This tutorial will show in a few easy steps how one can setup a secure ssh tunnel using Bitvise and TorGuard ssh tunnel service. To enable ssh tunnel service just enable it via your control panel located here
1.) Now, download and install Bitvise from this link:
https://www.bitvise.com/ssh-client-download
2.) Next, open bitvise and enter the following info under the “login” tab:
Host: Select the SSH Tunnel IP from your Activation Email (The location you choosen at checkout).
Port: 22 or another port from the ones listed on here
Username: TorGuard VPN/Proxy Username
Password: TorGuard VPN/Proxy Password
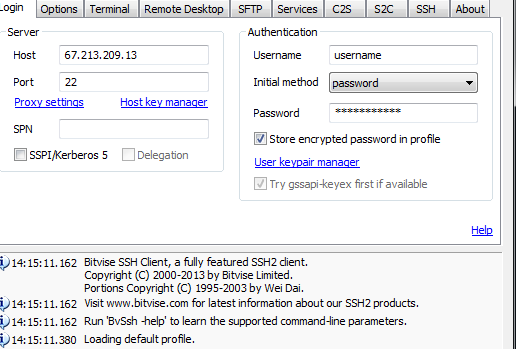
Obfuscation: Only enable if you want to use obfuscation, make sure to use the right port and key listed here
3.) Then click the "services" tab and enter the following info:
Socks/HTTP Proxy Forwarding: Check this box as "enabled"
Listen Interface: 127.0.0.1
Listen Port : 443
Server Bind Interface: 127.0.0.1
Server Public IP : 0.0.0.0

4.) Finally, open firefox web browser. Select options from the top menu, click "advanced" and under the "Network" tab click the settings button as seen below:
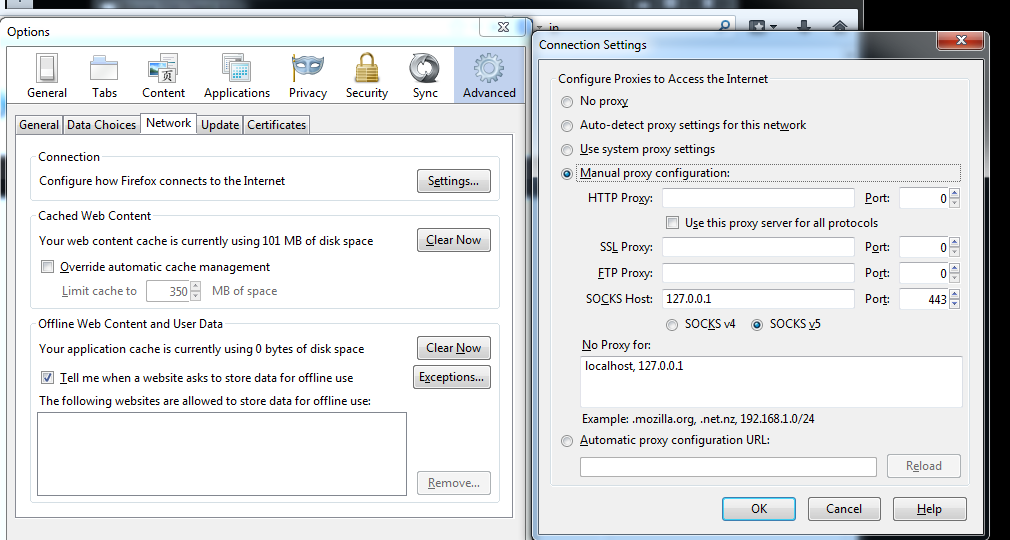
Then on the connection settings window select the following:
Select "Manual Proxy config..": Check this radio button
Socks Host: 127.0.0.1
Port : 443
Click OK. You have now setup firefox to run through a secure SSH tunnel:
