1. Login to your router using your web interface or Winbox. If using the web interface, make sure you’re in the WebFig interface.
2. Click “Interfaces” from the left menu.
3. On the “Interface” tab, click “Add New” then “PPTP Client”.
4. Do the following:
a. Make sure “Enabled” is ticked.
b. Under “General” insert a name in the “Name” field (e.g. ‘Torguard’).
c. Under “Dial Out” add your VPN’s IP address in the “Connect To” field, your Torguard username in “User”. Click the arrow next to “Password” to reveal a text field, then enter your Torguard password in that field.
d. If selected, uncheck “Dial on demand” and “Add default route”.

e. Click “OK”. Your PPTP client connection to Torguard should appear in your Interfaces list. After a short while, “R” should appear to the left of your PPTP connection’s name – this means your Mikrotik is connected successfully to a Torguard VPN server.
5. From the main menu on the left-hand side, click “IP” then “Firewall”.
6. On the “Filter Rules” tab, check for any rules with “fasttrack connection” in the “Action” column. If present, these may interfere with your VPN functionality. If adding VPN to a Mikrotik router with the default configuration, click on the rule labelled “fasttrack connection”, uncheck “Enabled”, then click “OK”.
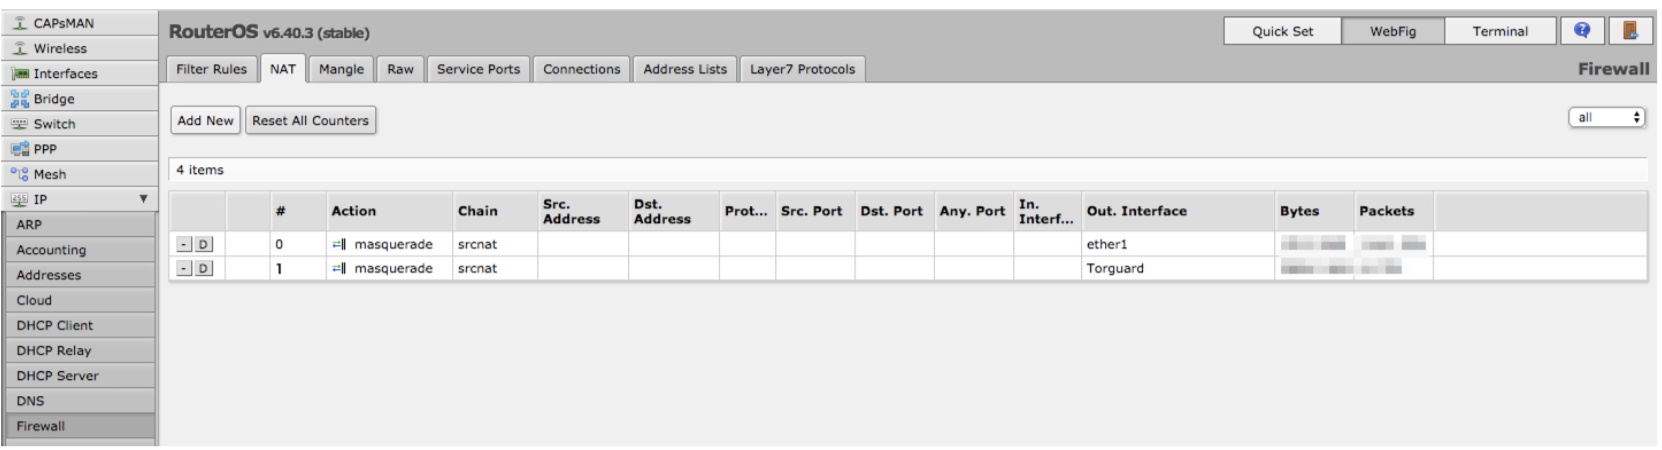
7. On the “NAT” tab, click “Add New” then do the following:
a. Under “General” select “srcnat” from “Chain” and select ‘Torguard’ (or whatever name you gave your VPN interface) from “Out Interface”.

b. Under “Action” select “masquerade”.

c. Click “OK”. Your new NAT rule should appear in the list.
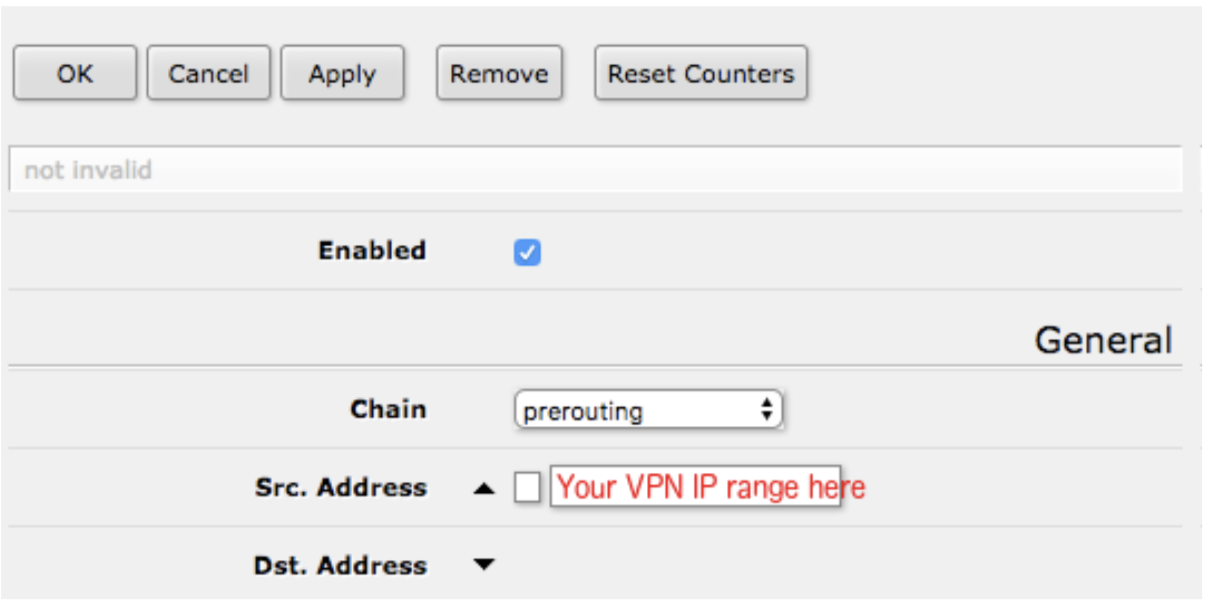
8. On the “Mangle” tab, click “Add New” then do the following:
a. Make sure “Enabled” is ticked.
b. Under “General” select “prerouting” from “Chain”, and enter the IP address or range of IP addresses you wish to pass through your VPN connection in “Src. Address”.
c. Under “Action” select “mark routing” from “Action”. Add a name (click the arrow then type in the text box) for your VPN routing mark (e.g. ‘VPN’) in “New Routing Mark”.

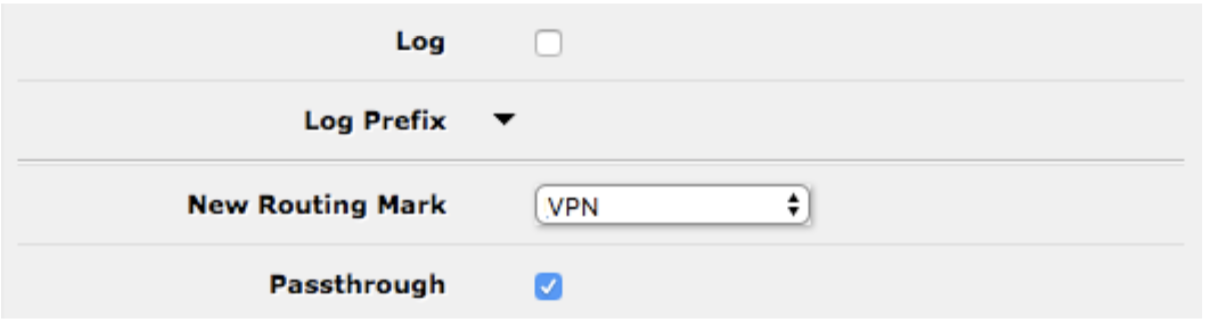
d. Make sure “Passthrough” is ticked.
e. Click “OK”. Your new mangle rule should appear the list.
f. You may repeat this step for as many IP addresses, ranges and rules as you need. If using multiple rules, remember that they are processed in the order in the Mangle table – if you need to, you can come back and reorder these by clicking and dragging.
9. From the main menu on the left-hand side, click “IP” then “Routes”, click “Add New” then do the following:
a. Under “General” enter “0.0.0.0/0” in “Dst. Address”, then select your previously created routing mark under “Routing Mark” (e.g. ‘VPN’).
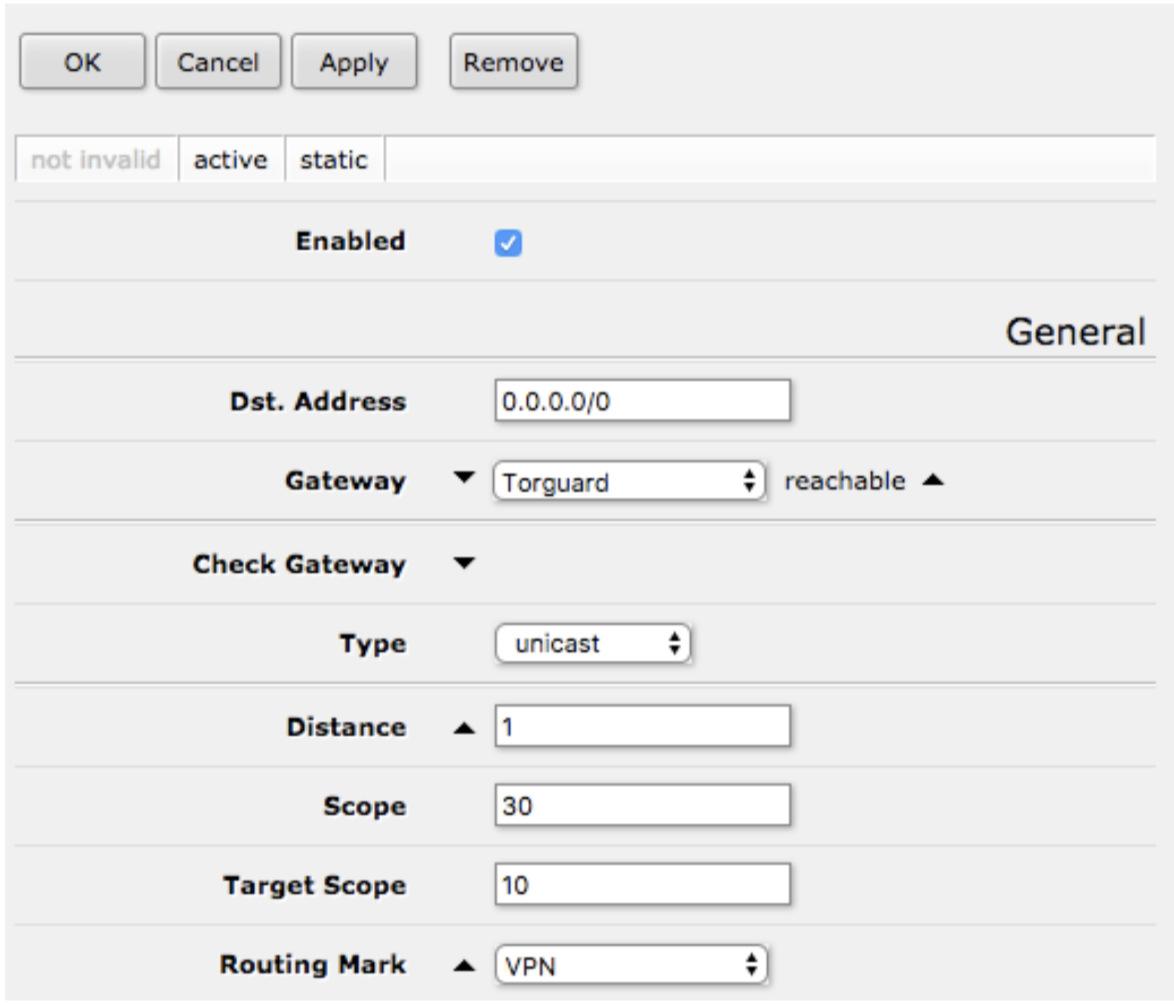
b. Click “OK”. A new route should appear the list.
10. At this point, your VPN connection should be working on the IP address(es) you’ve chosen. To use Torguard’s DNS servers, from the main menu on the left-hand side click “IP” then “DNS”, then do the following:
a. Make sure “Allow Remote Requests” is ticked. This allows your client devices to use your Mikrotik’s router as DNS server, which in turn will use Torguard’s DNS servers.
b. Add Torguard’s current DNS servers to “Servers”.
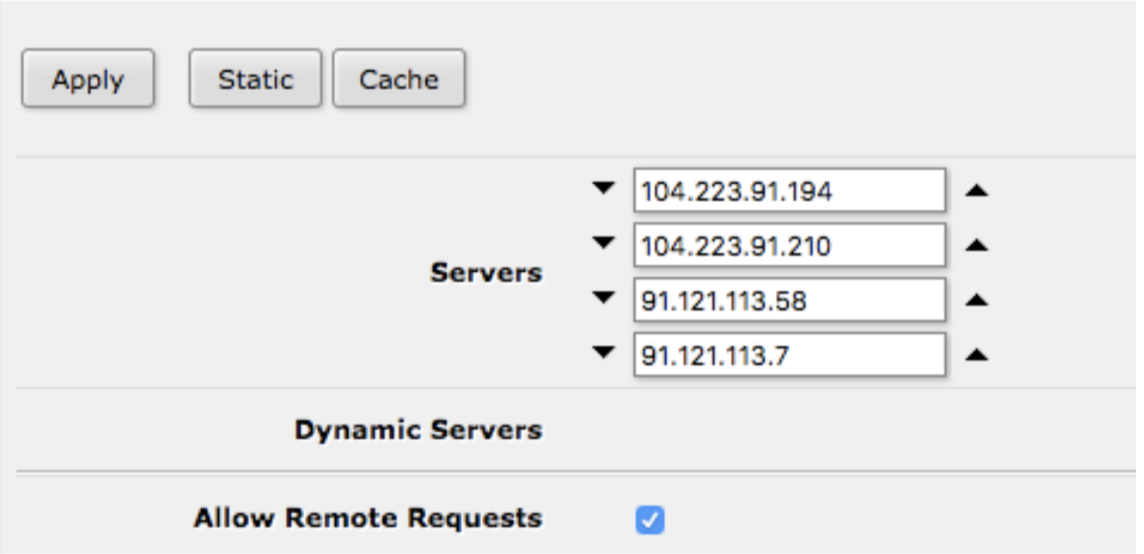
c. Click “Apply”.