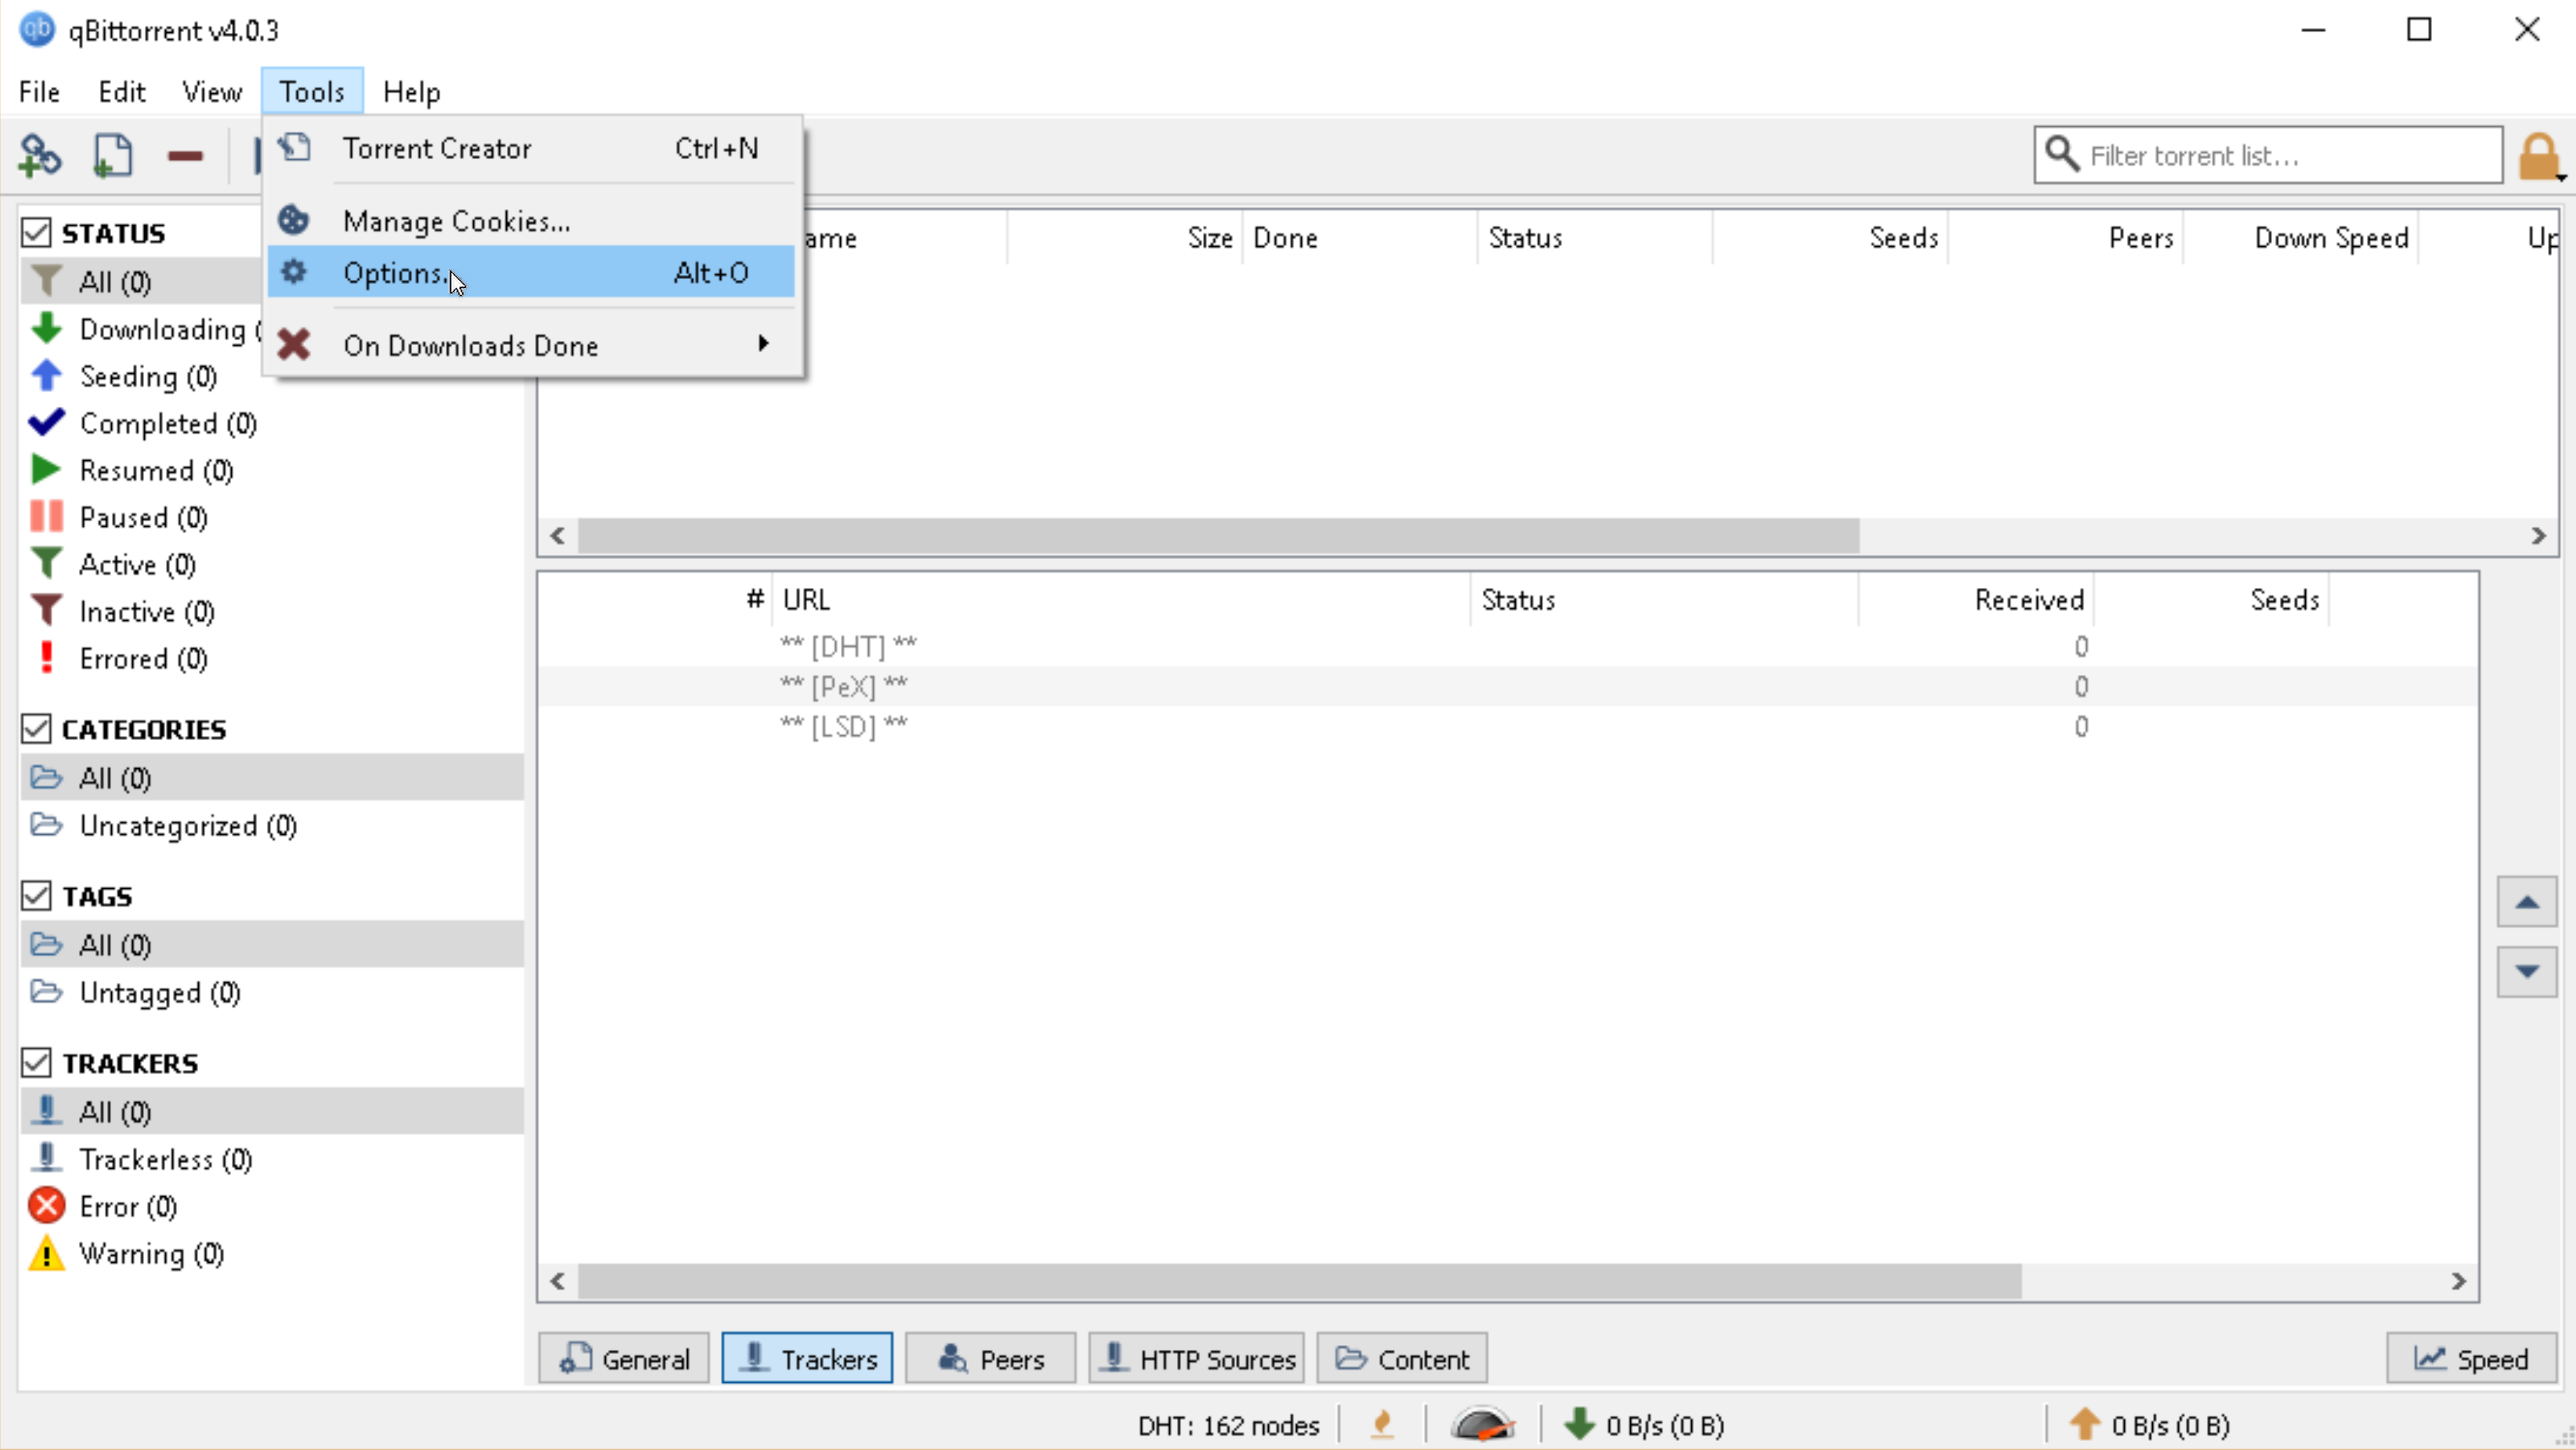
1.) Select Tools --> Options from the main interface as per the image below
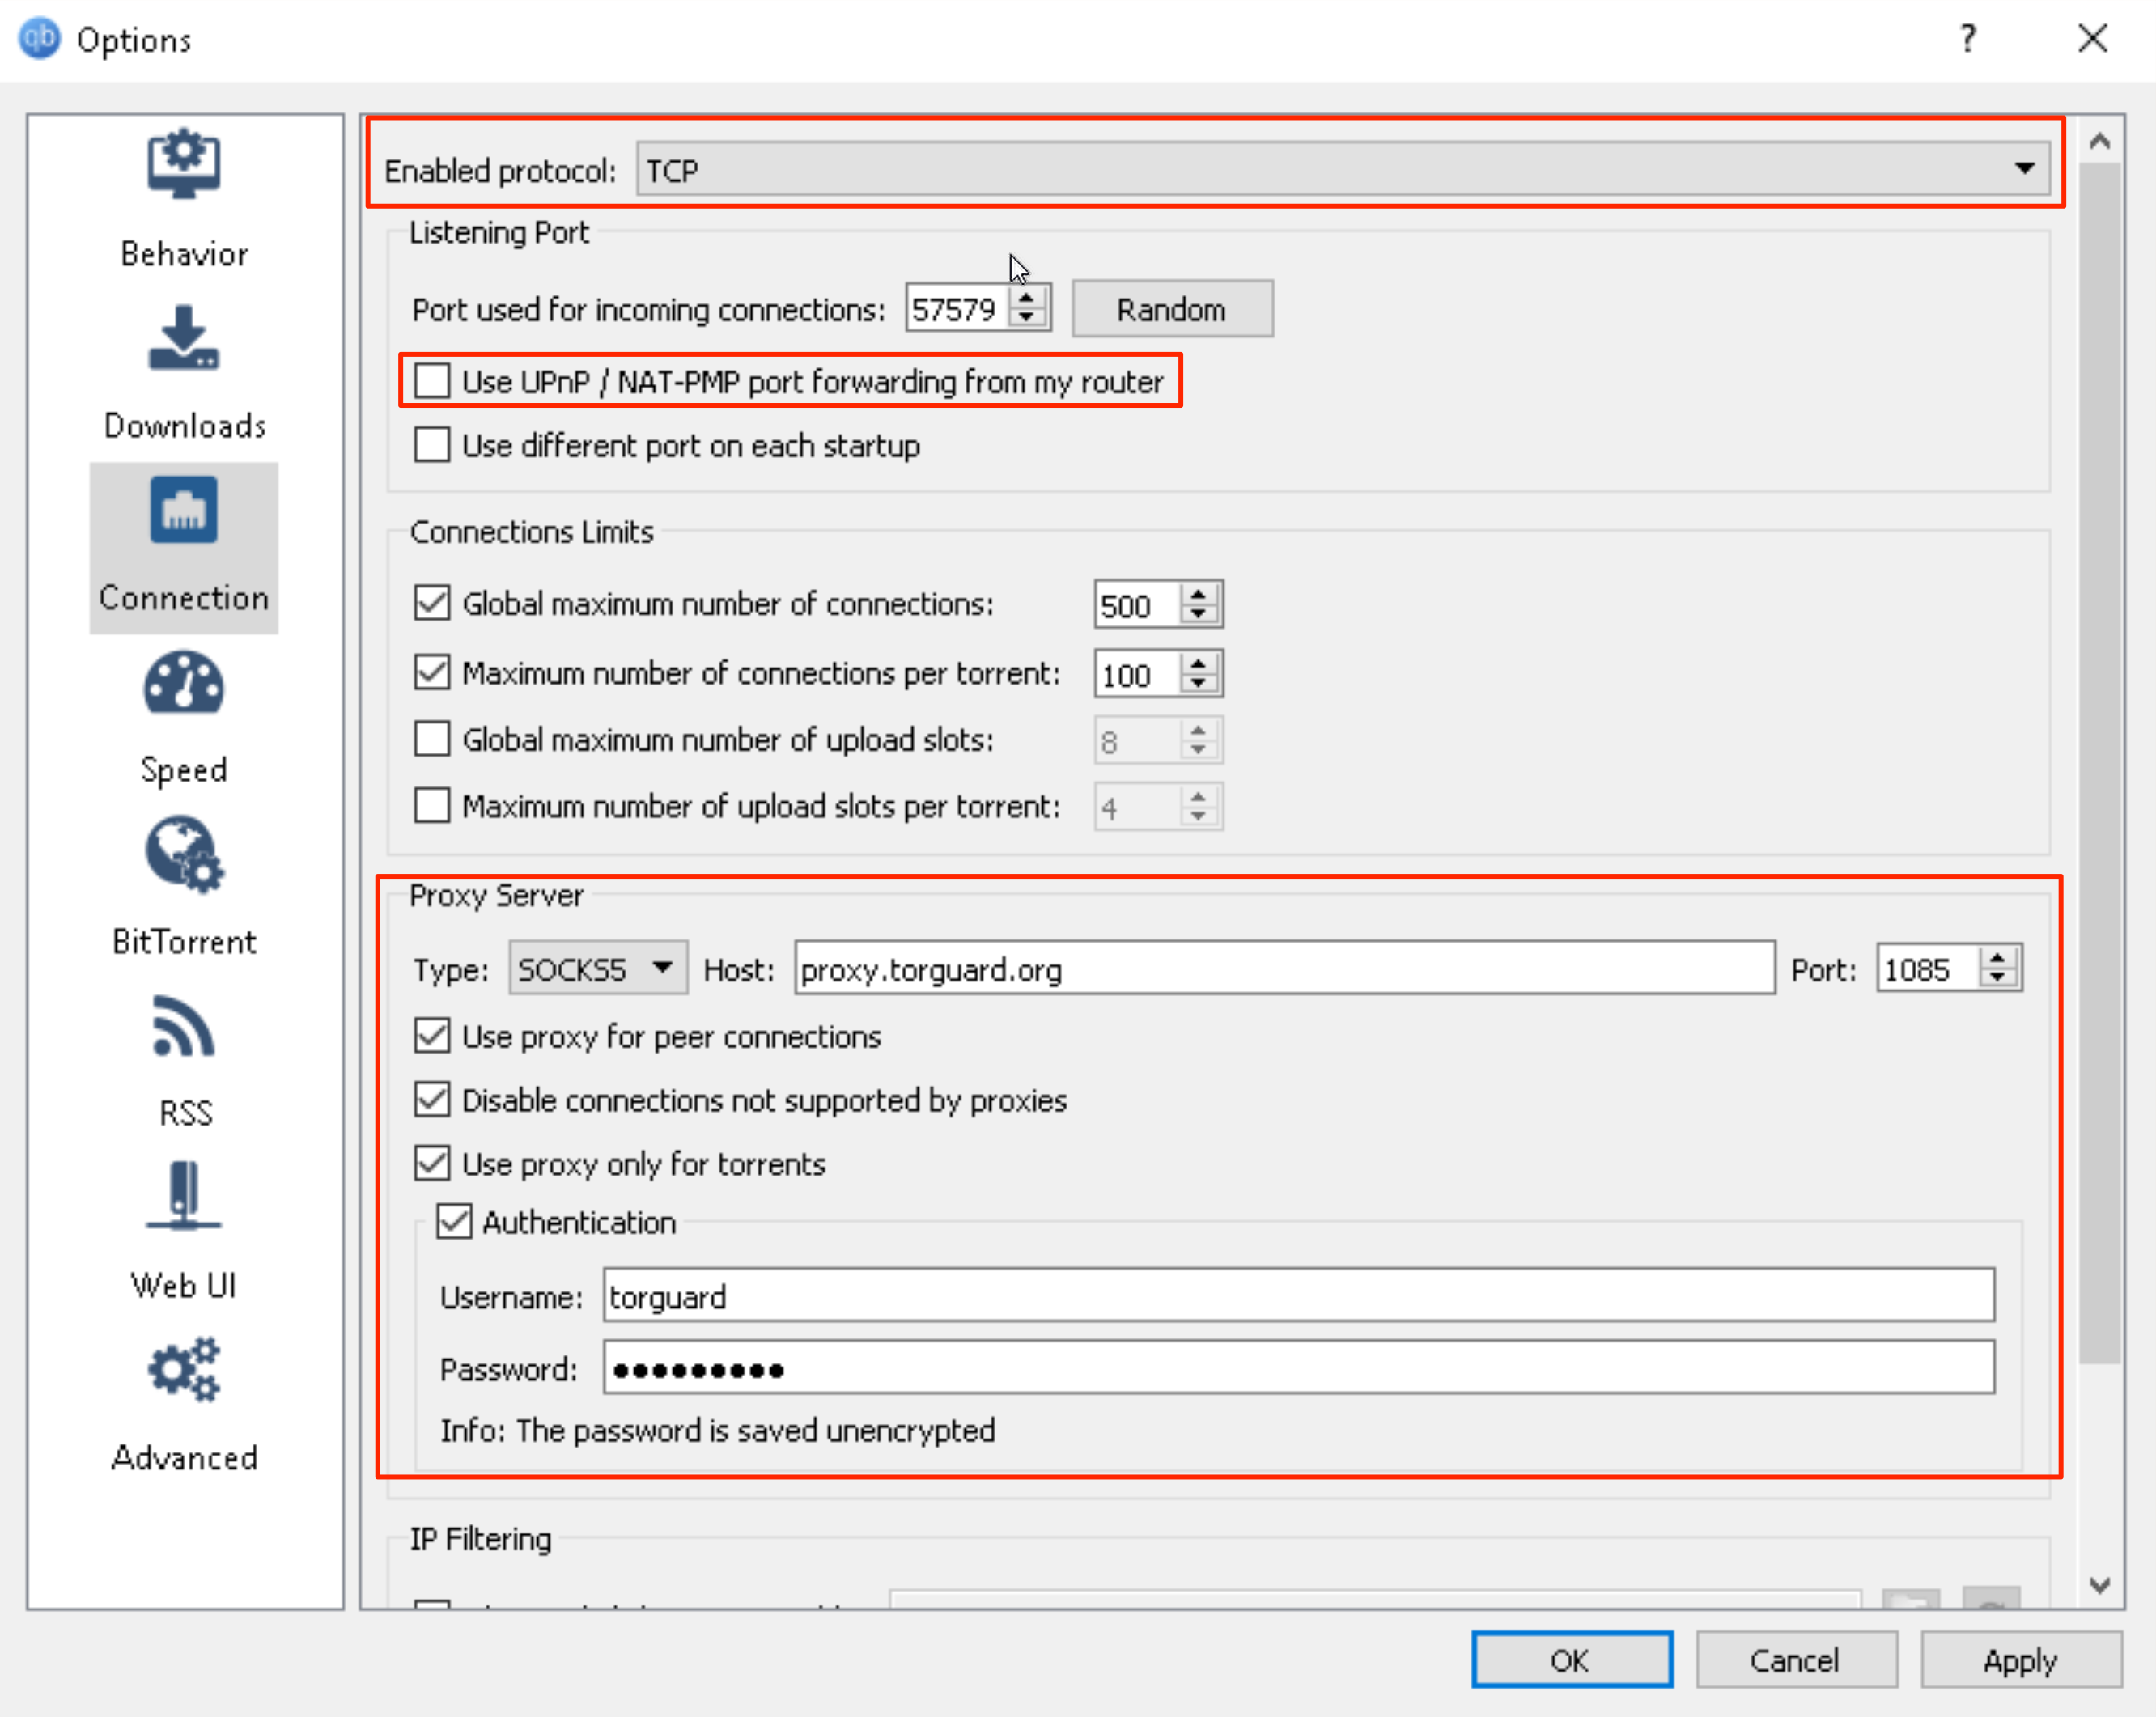
2.) Then select "Connection" on the left-hand side, the highlighted values in the image should match your setup, of course, entering your own user/pass for the proxy.
a) Change enabled Protocol to TCP
b) Uncheck "Use UPnP / NAT-PMP port forwarding from my router"
c) Under Proxy Server, set the proxy to proxy.torguard.org for vpn purchases, while for premium proxy set the proxy to random.stealthtunnel.net - check all boxes as per the image and enter your proxy username and password.
d) Click Apply and then OK
3) Now click "Speed" under the Connection icon on the left-hand side - here we advise that you disable the option "Apply rate limit to uTP protocol".
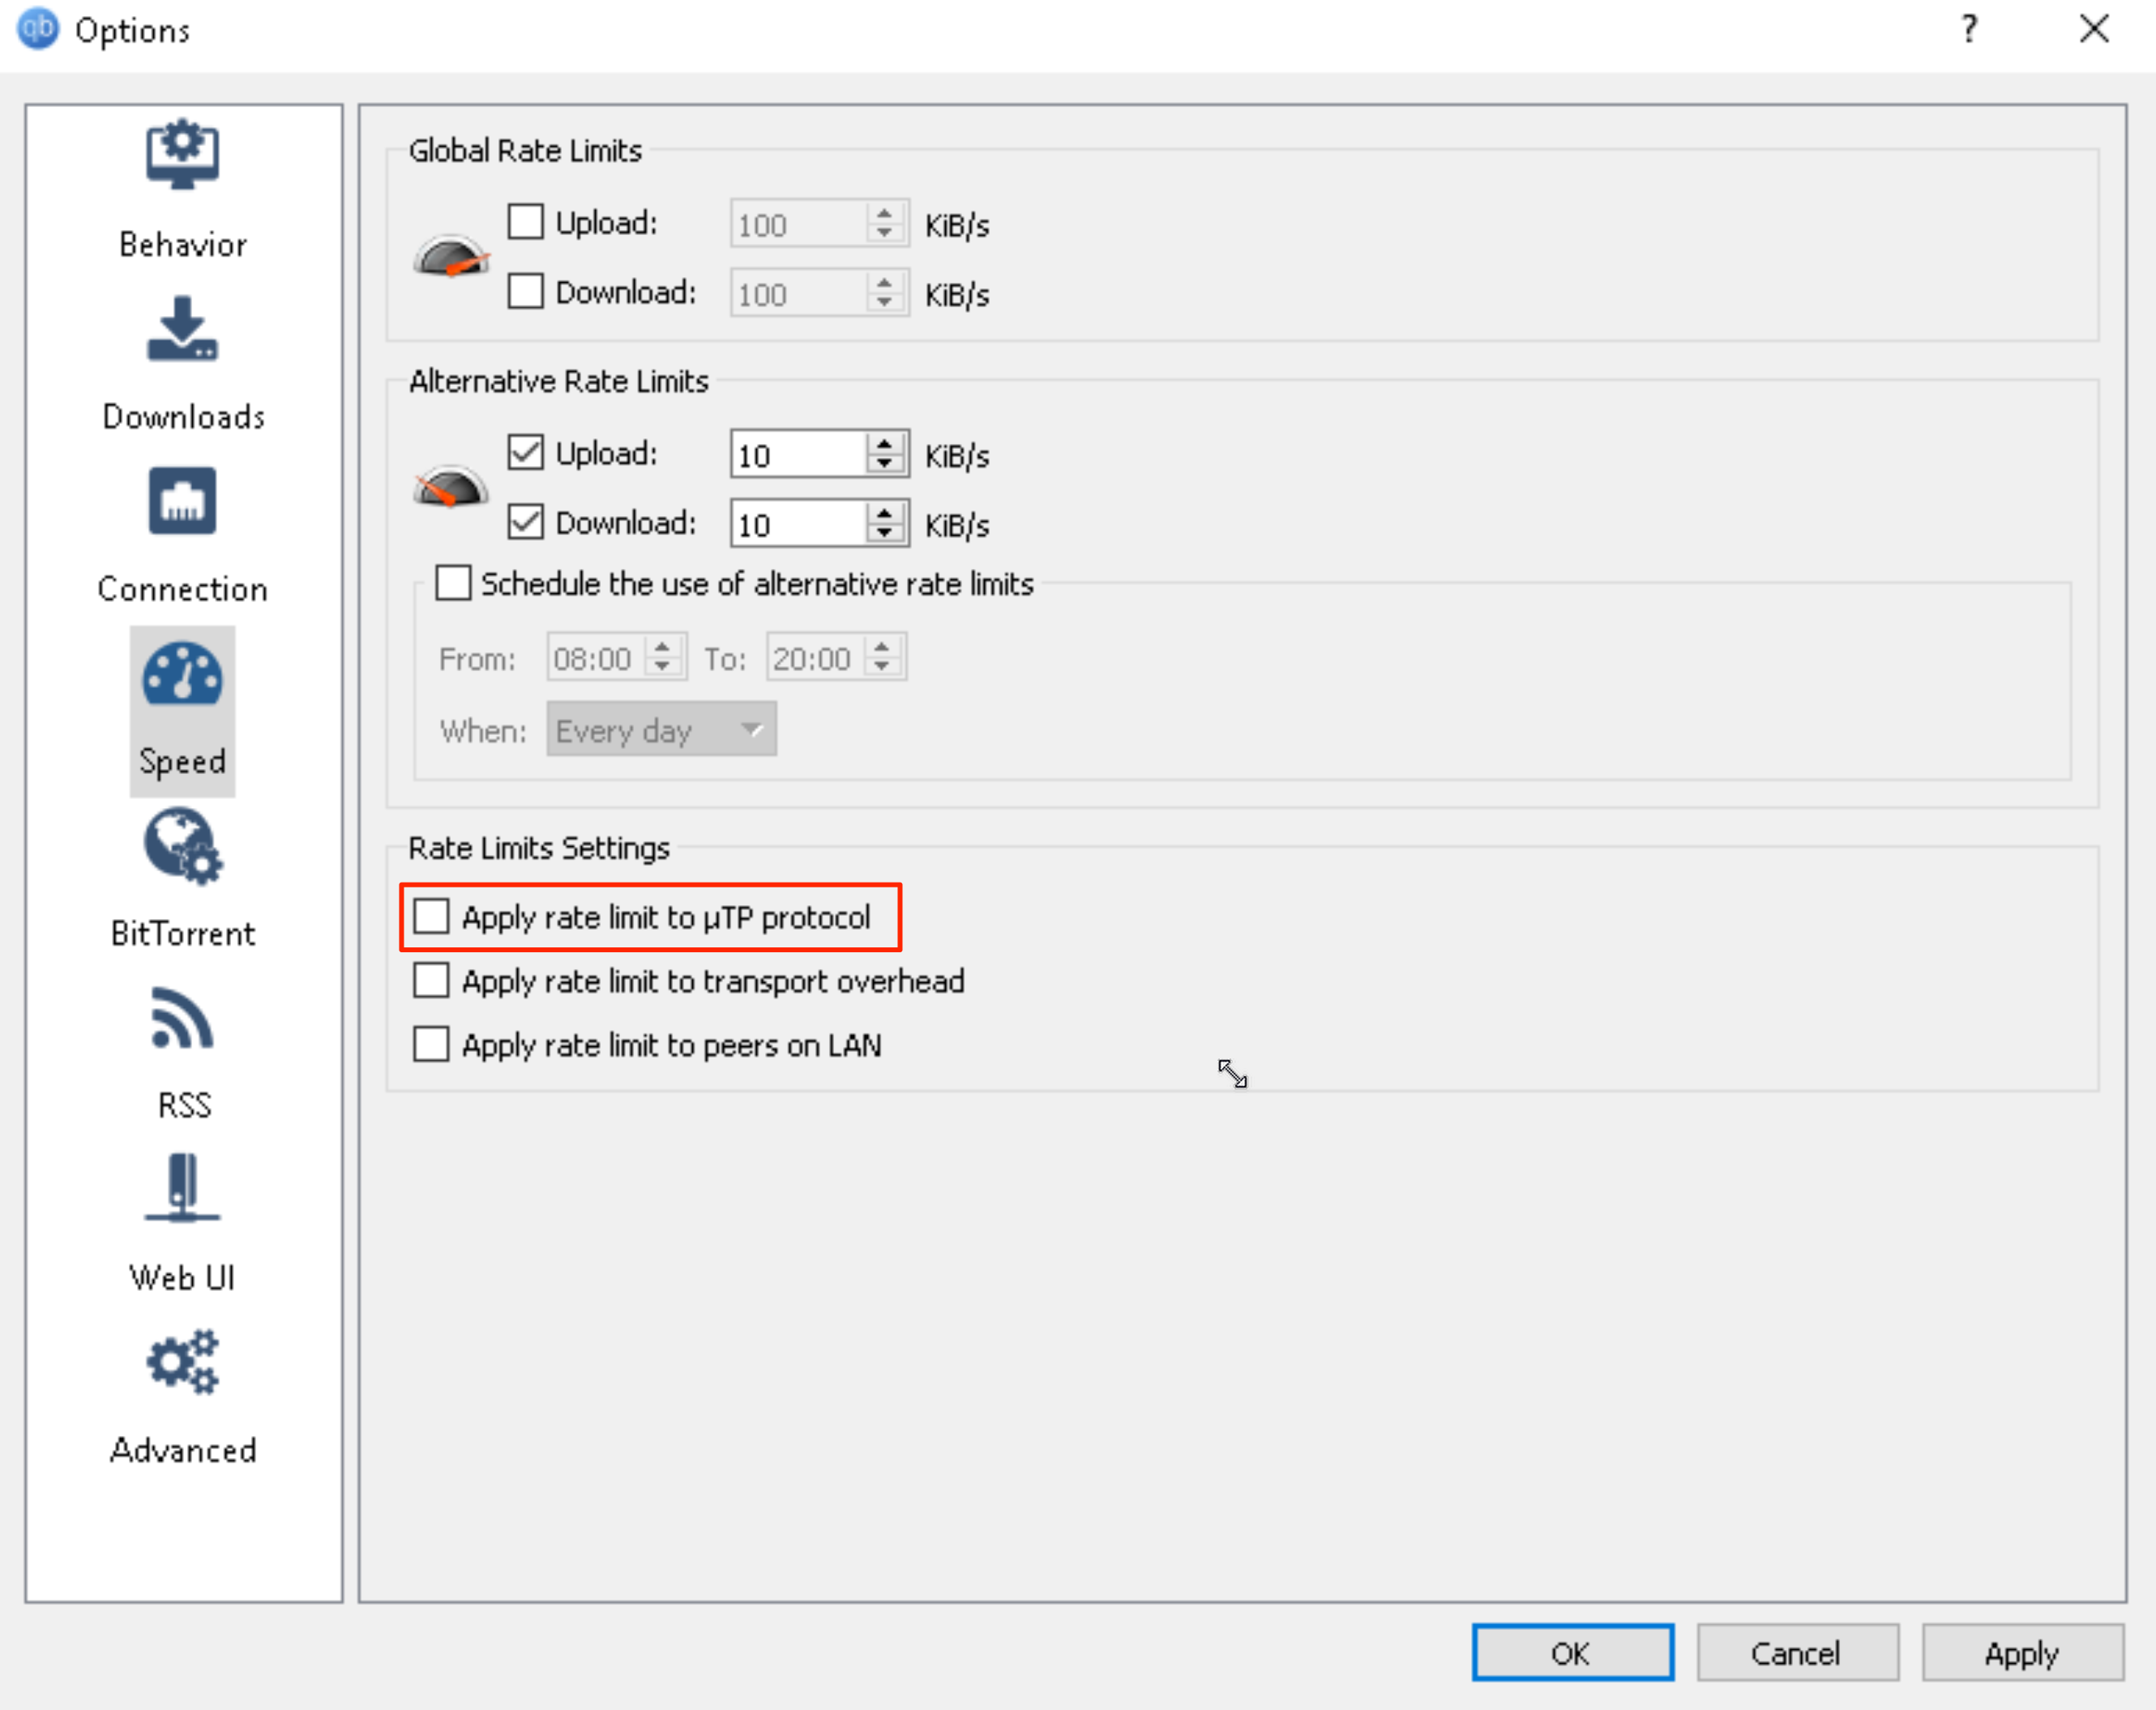
Click Apply and then OK - That's all you need to do to have the TorGuard socks5 proxy setup securely within your qBittorrent client.