The first thing you need to do is install the torguard software either through our downloads page or here - then download the Bitvise client from here or here and install both.
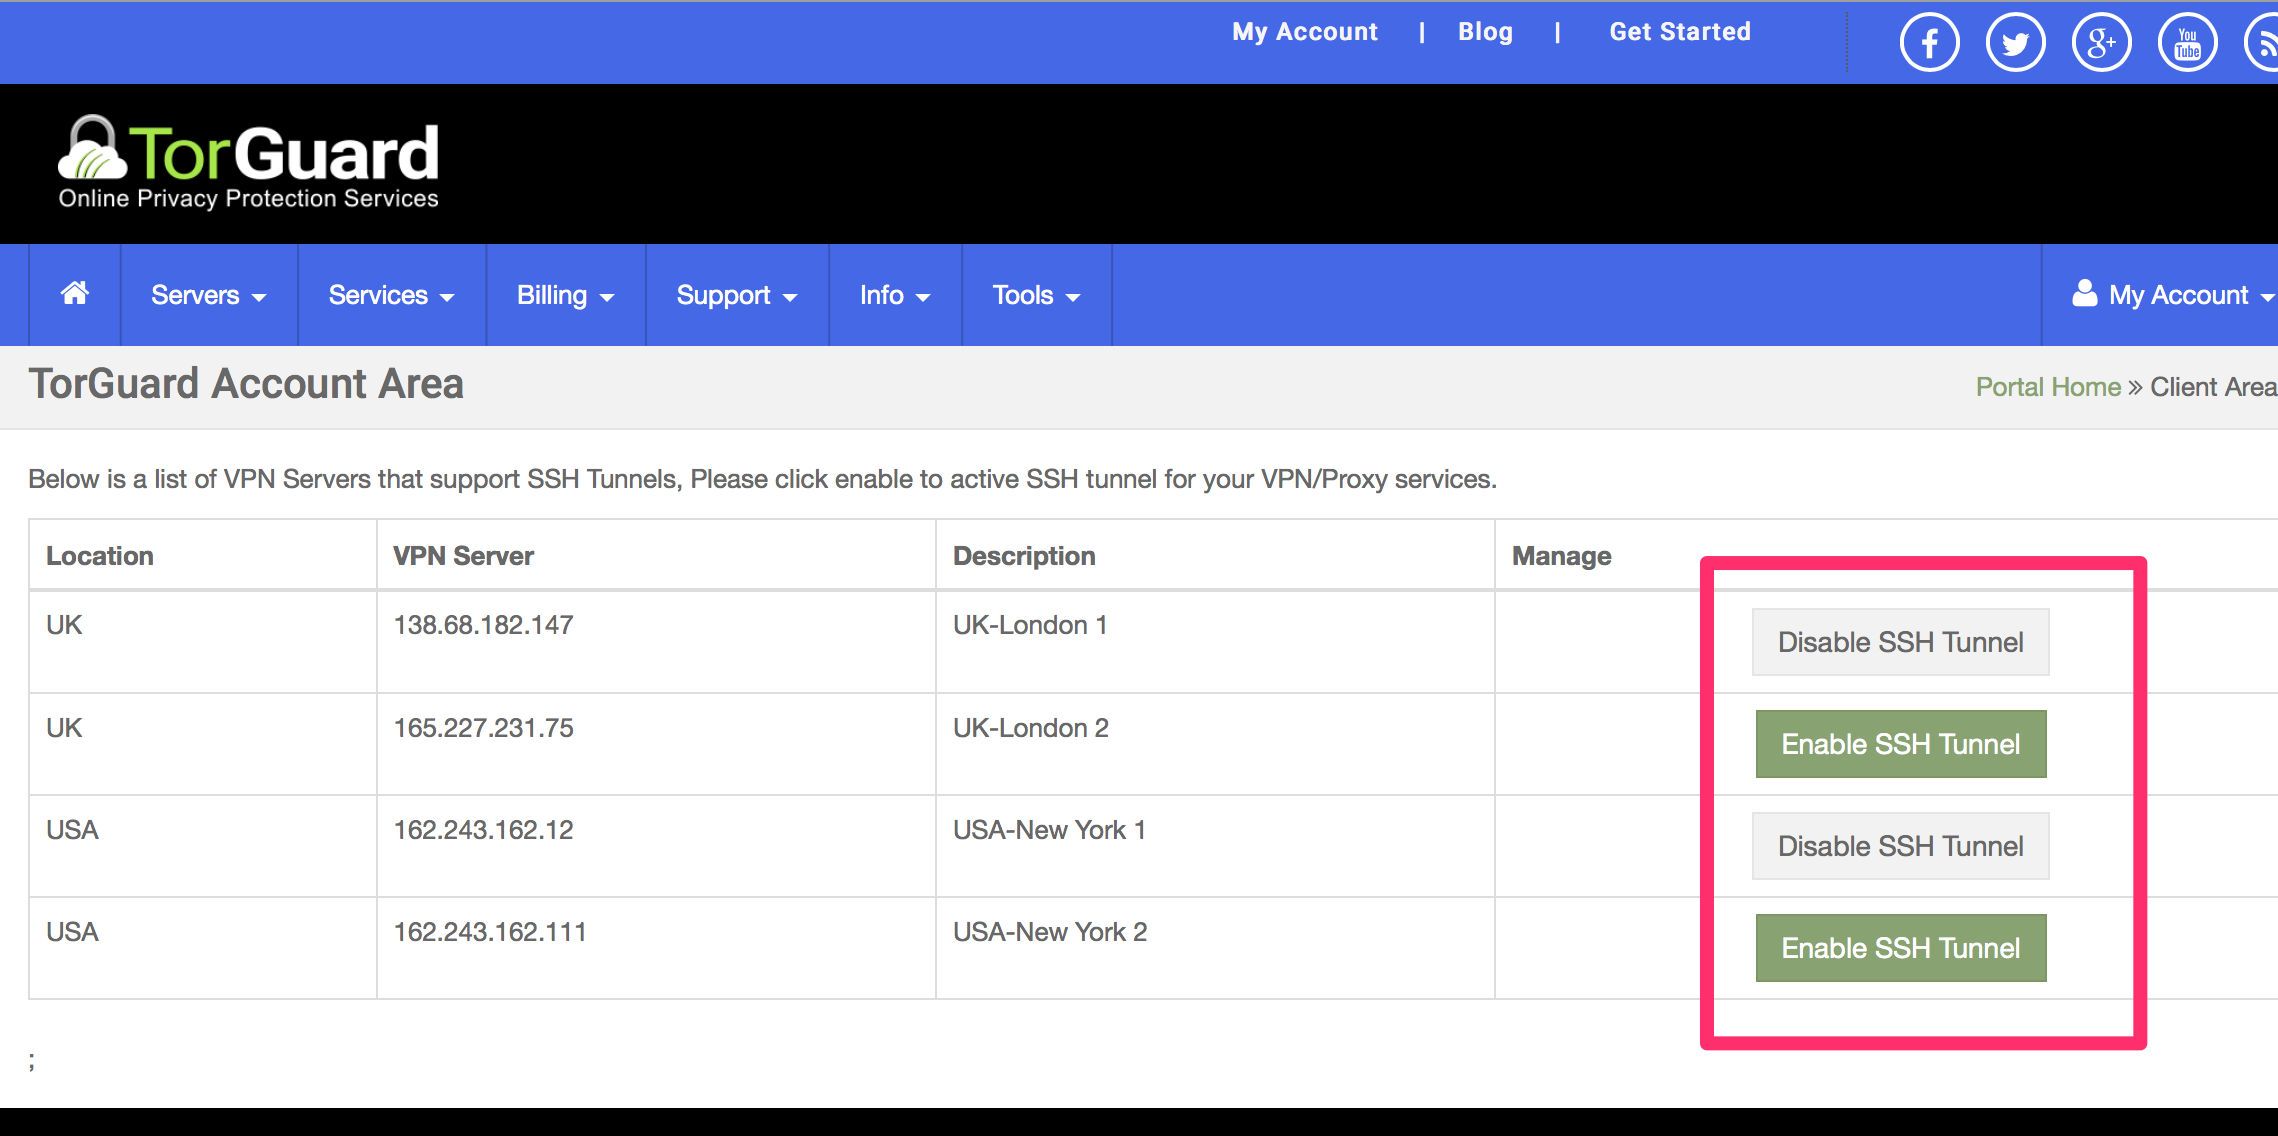
1) Now login to the torguard client area and browse to Tools --> Enable SSH Tunnelling and enable your account on any of the available servers, this will enable your VPN credentials to log in to the SSH Proxy.
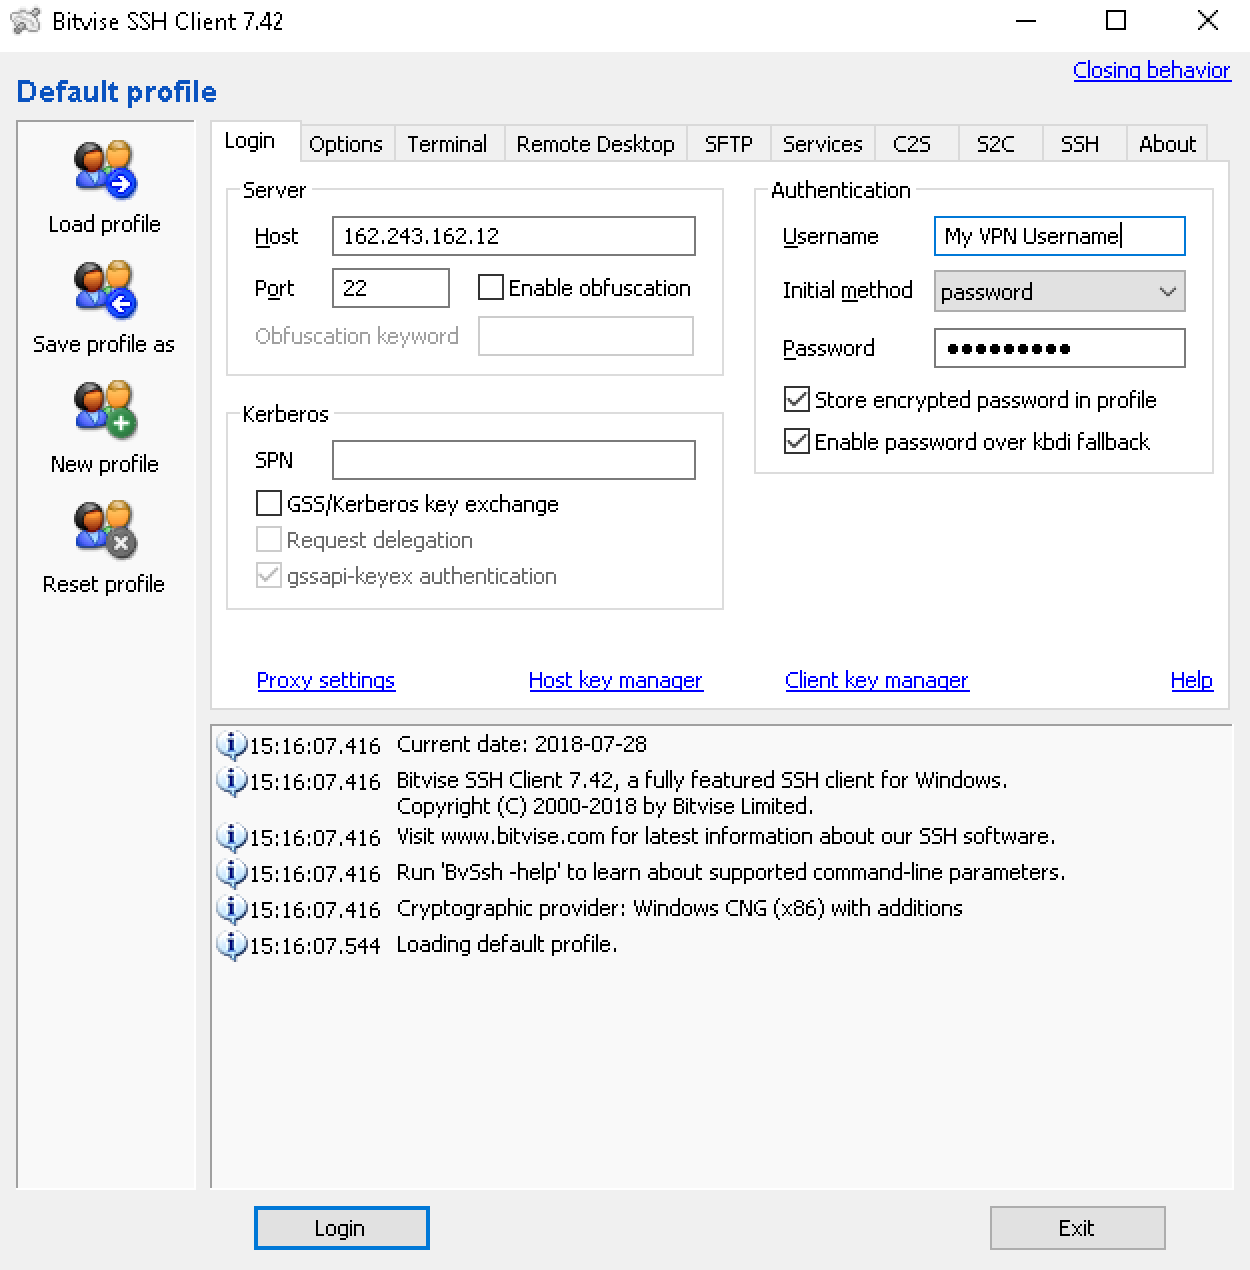
2) Load up Bitvise and enter the IP of the SSH Proxy you have enabled into the Host field under the Server section, leave port 22 as default - then under Authentication enter your VPN username, for initial method select password in the dropdown and then enter your VPN password, see the example of how it should be set up below:
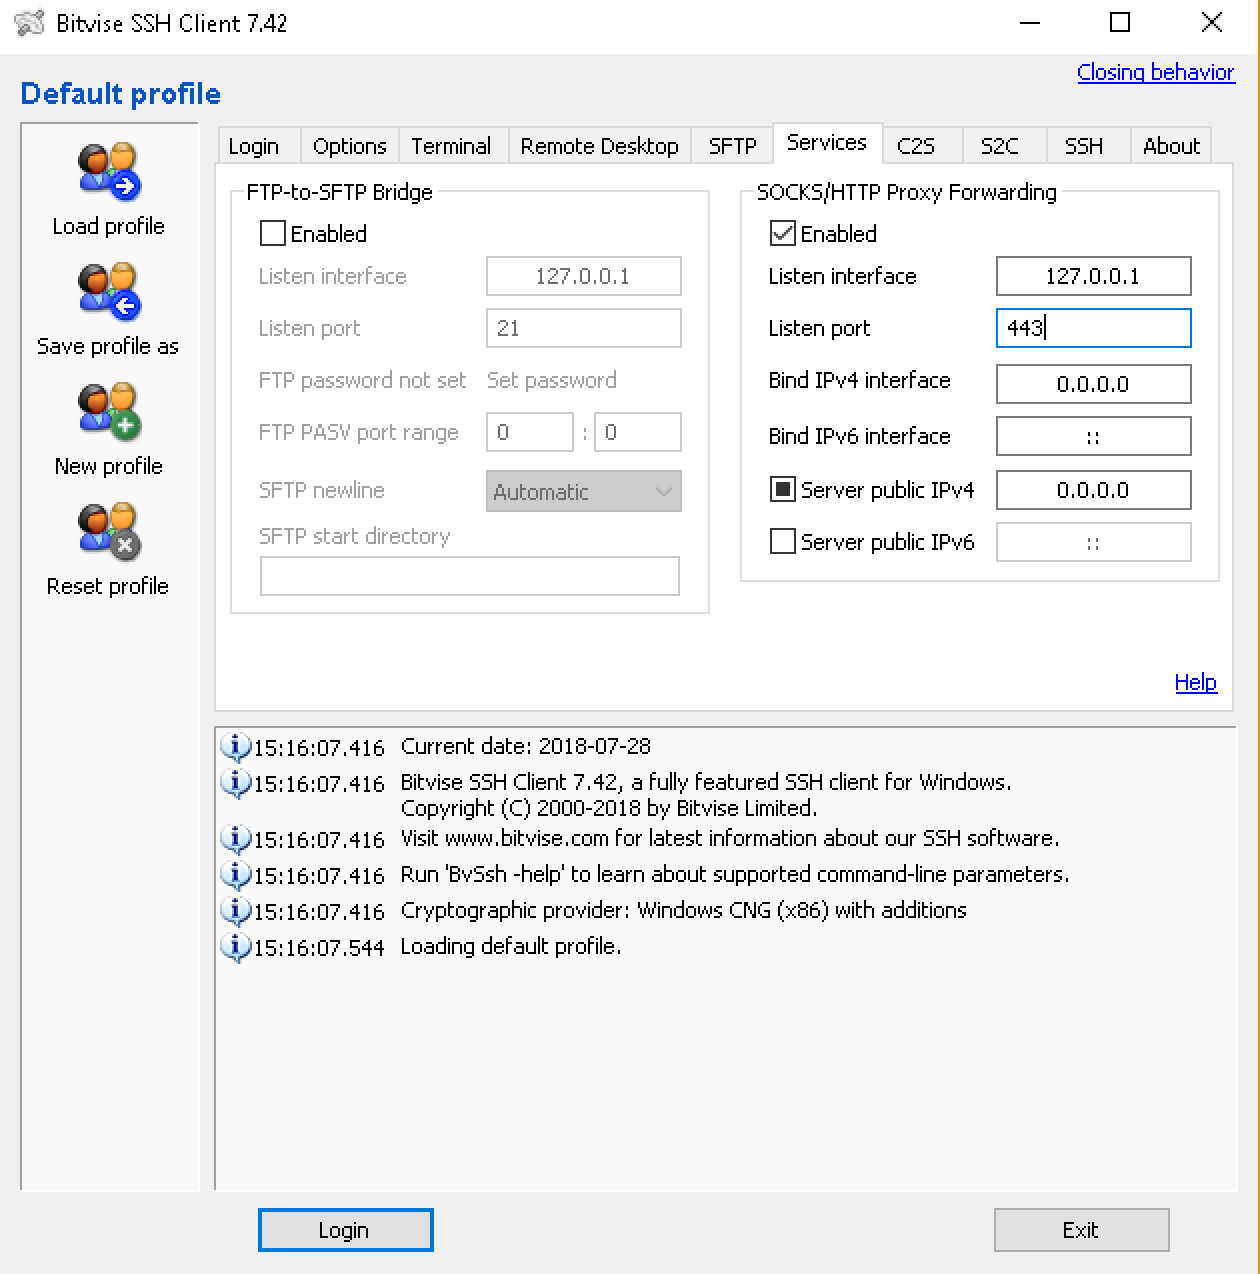
3) Click the services tab in Bitvise and check "Enabled" under SOCKS/HTTP Proxy Forwarding, the listen interface should be 127.0.0.1 and set the listen port to 443, see example setup below.
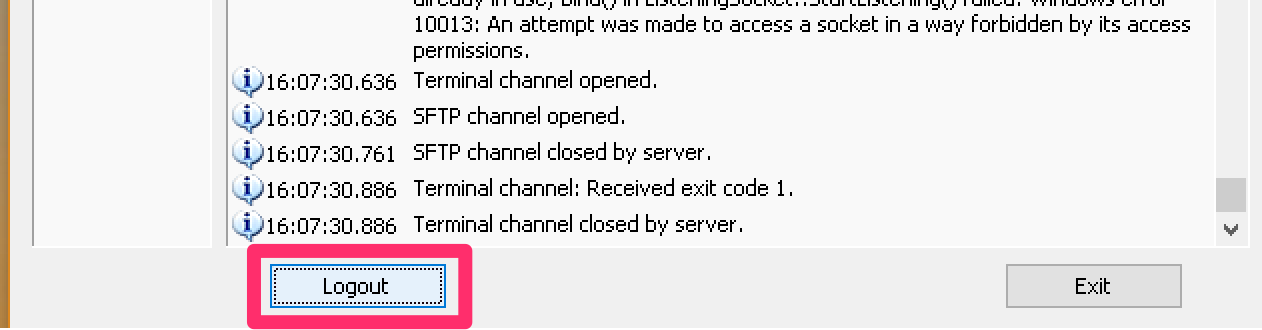
4) Click login - it should go through the login process and popup a black terminal window mentioning that there is no such directory, ignore and close this window - the login button should change to say "logout" this means you are logged into the SSH proxy.
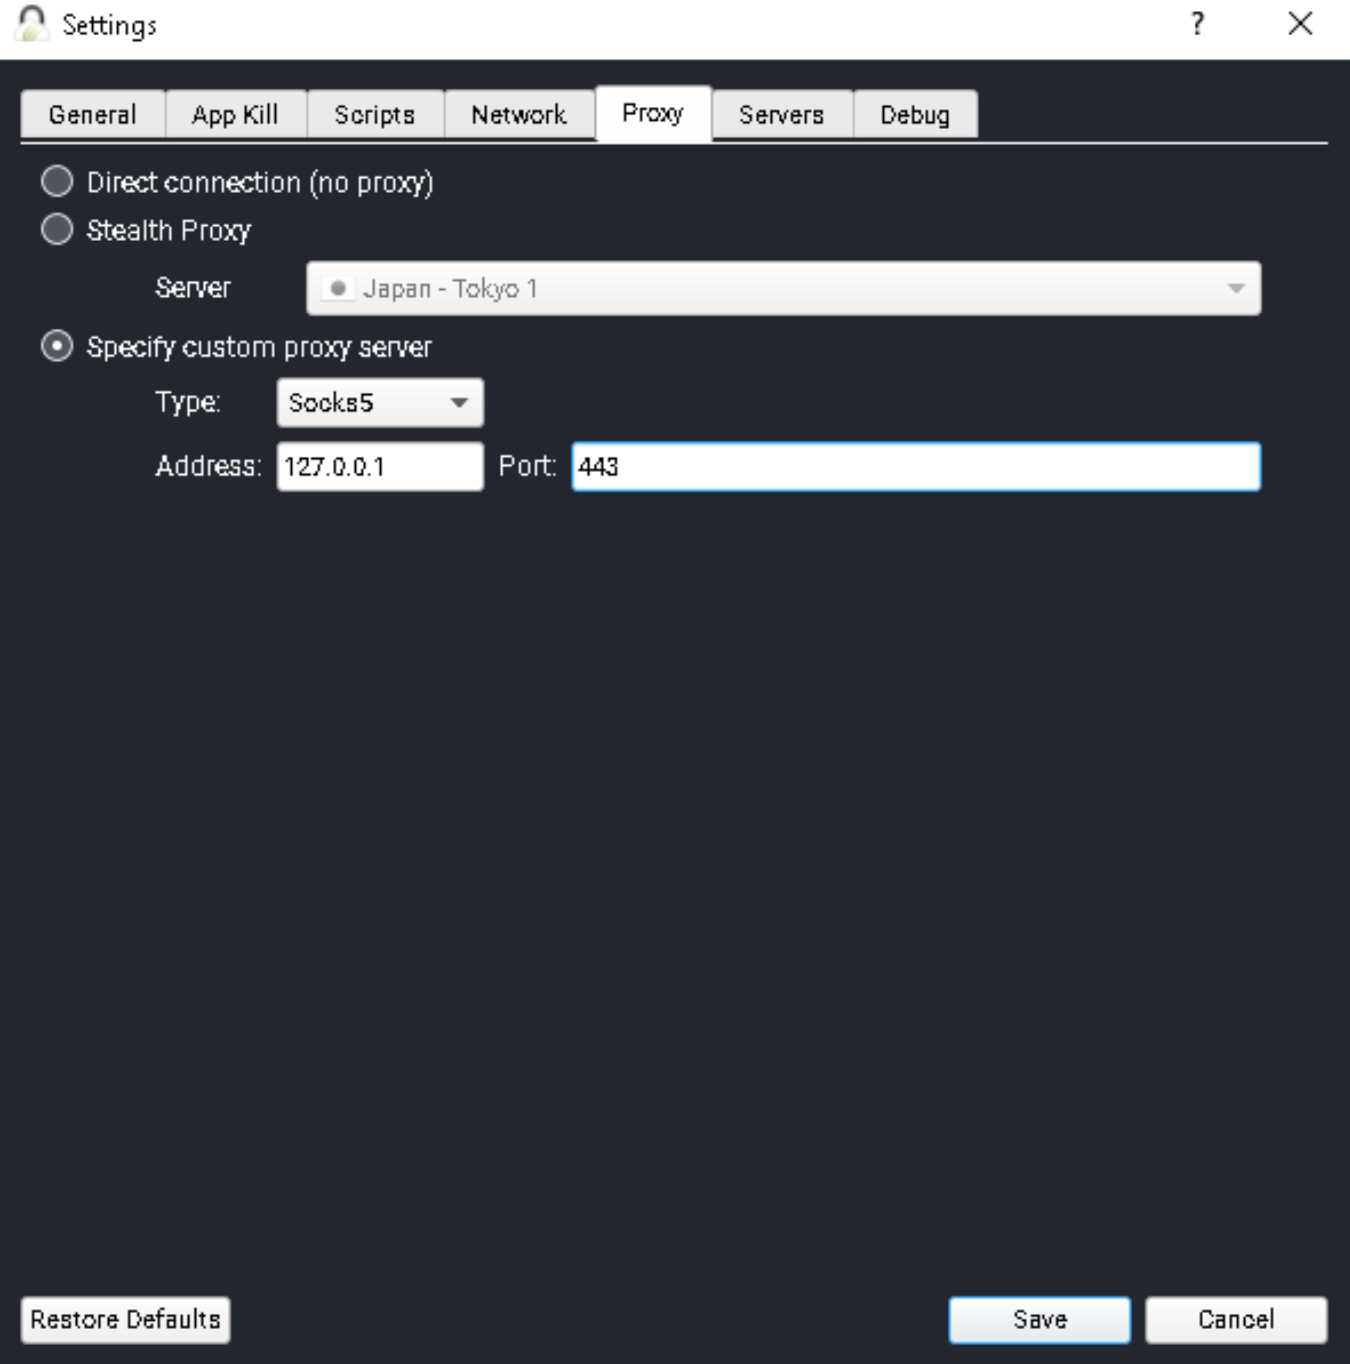
5) Now load up the TorGuard Client and go to more settings.. --> Proxy Tab --> Select "Specify Custom Proxy" and change type from HTTP to SOCKS5 in the dropdown menu, enter the address as 127.0.0.1 and the port as 443 or whatever port you choose to tunnel through in Bitvise, example below:
6) Hit save and got back to the connect screen, the Protocol section should now be greyed out with "Custom Proxy" - now you can connect to any location, once connected, remote IP should show 127.0.0.1 and where it normally says "Verified" will show the VPN IP.
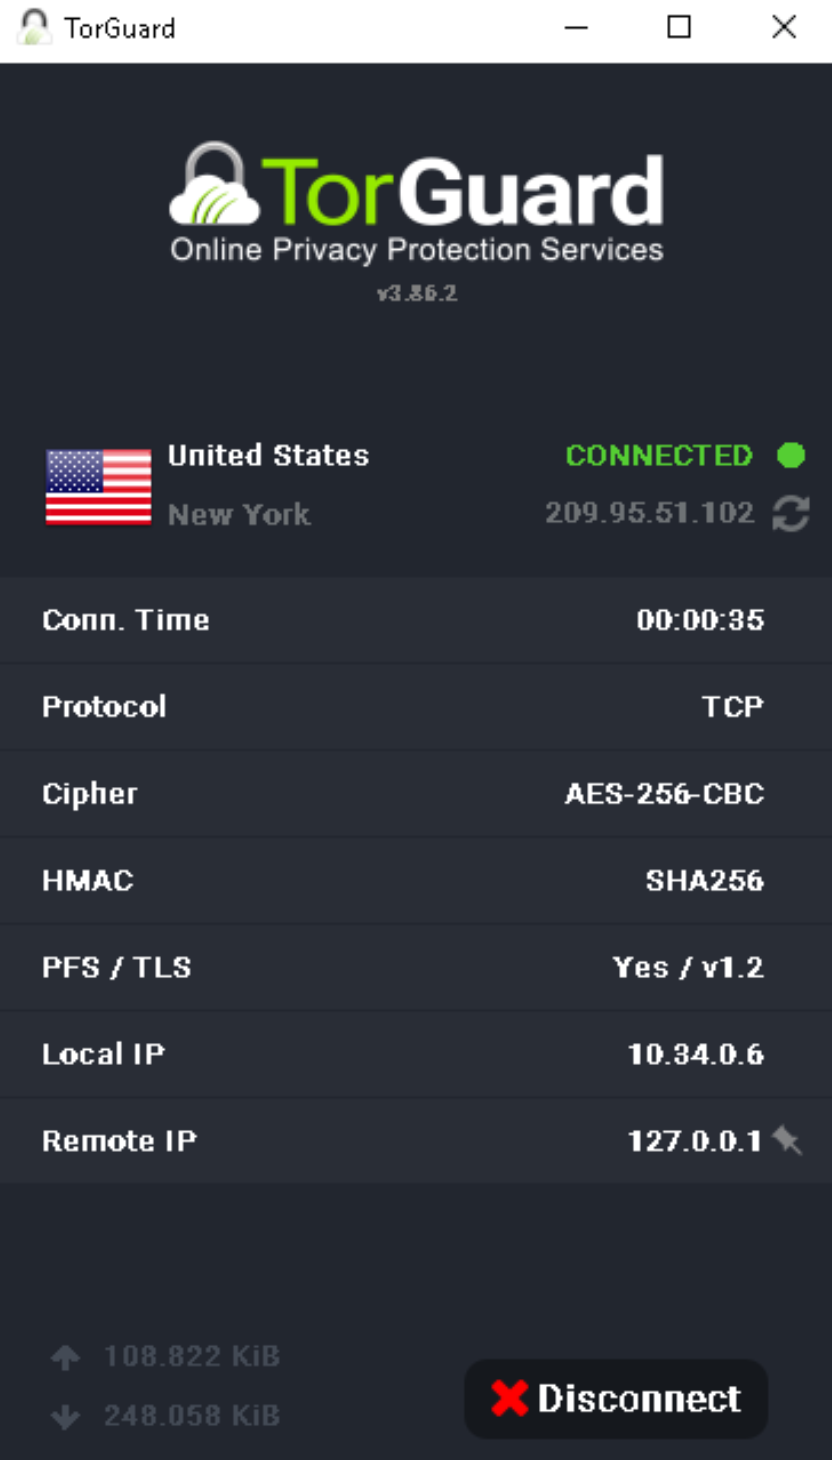
7) Check your IP it should show as the VPN IP:
