TorGuard Firefox Extension
Enhance Firefox's privacy features with TorGuard's premium proxy extension. Perfect for users who value both Firefox's privacy-first approach and the additional security of proxy connections.
Why Firefox + TorGuard?
Enhanced Privacy Combination
Firefox Privacy Features
- Enhanced Tracking Protection
- Container tabs isolation
- No data collection
- Open source transparency
TorGuard Protection
- IP address masking
- Encrypted proxy tunnels
- Geo-location spoofing
- ISP tracking prevention
Extension Features
Container Integration
Works seamlessly with Firefox Multi-Account Containers
Private Browsing
Full support in Firefox Private Windows
Proxy Management
Override Firefox's built-in proxy settings
Quick Toggle
Enable/disable with one click
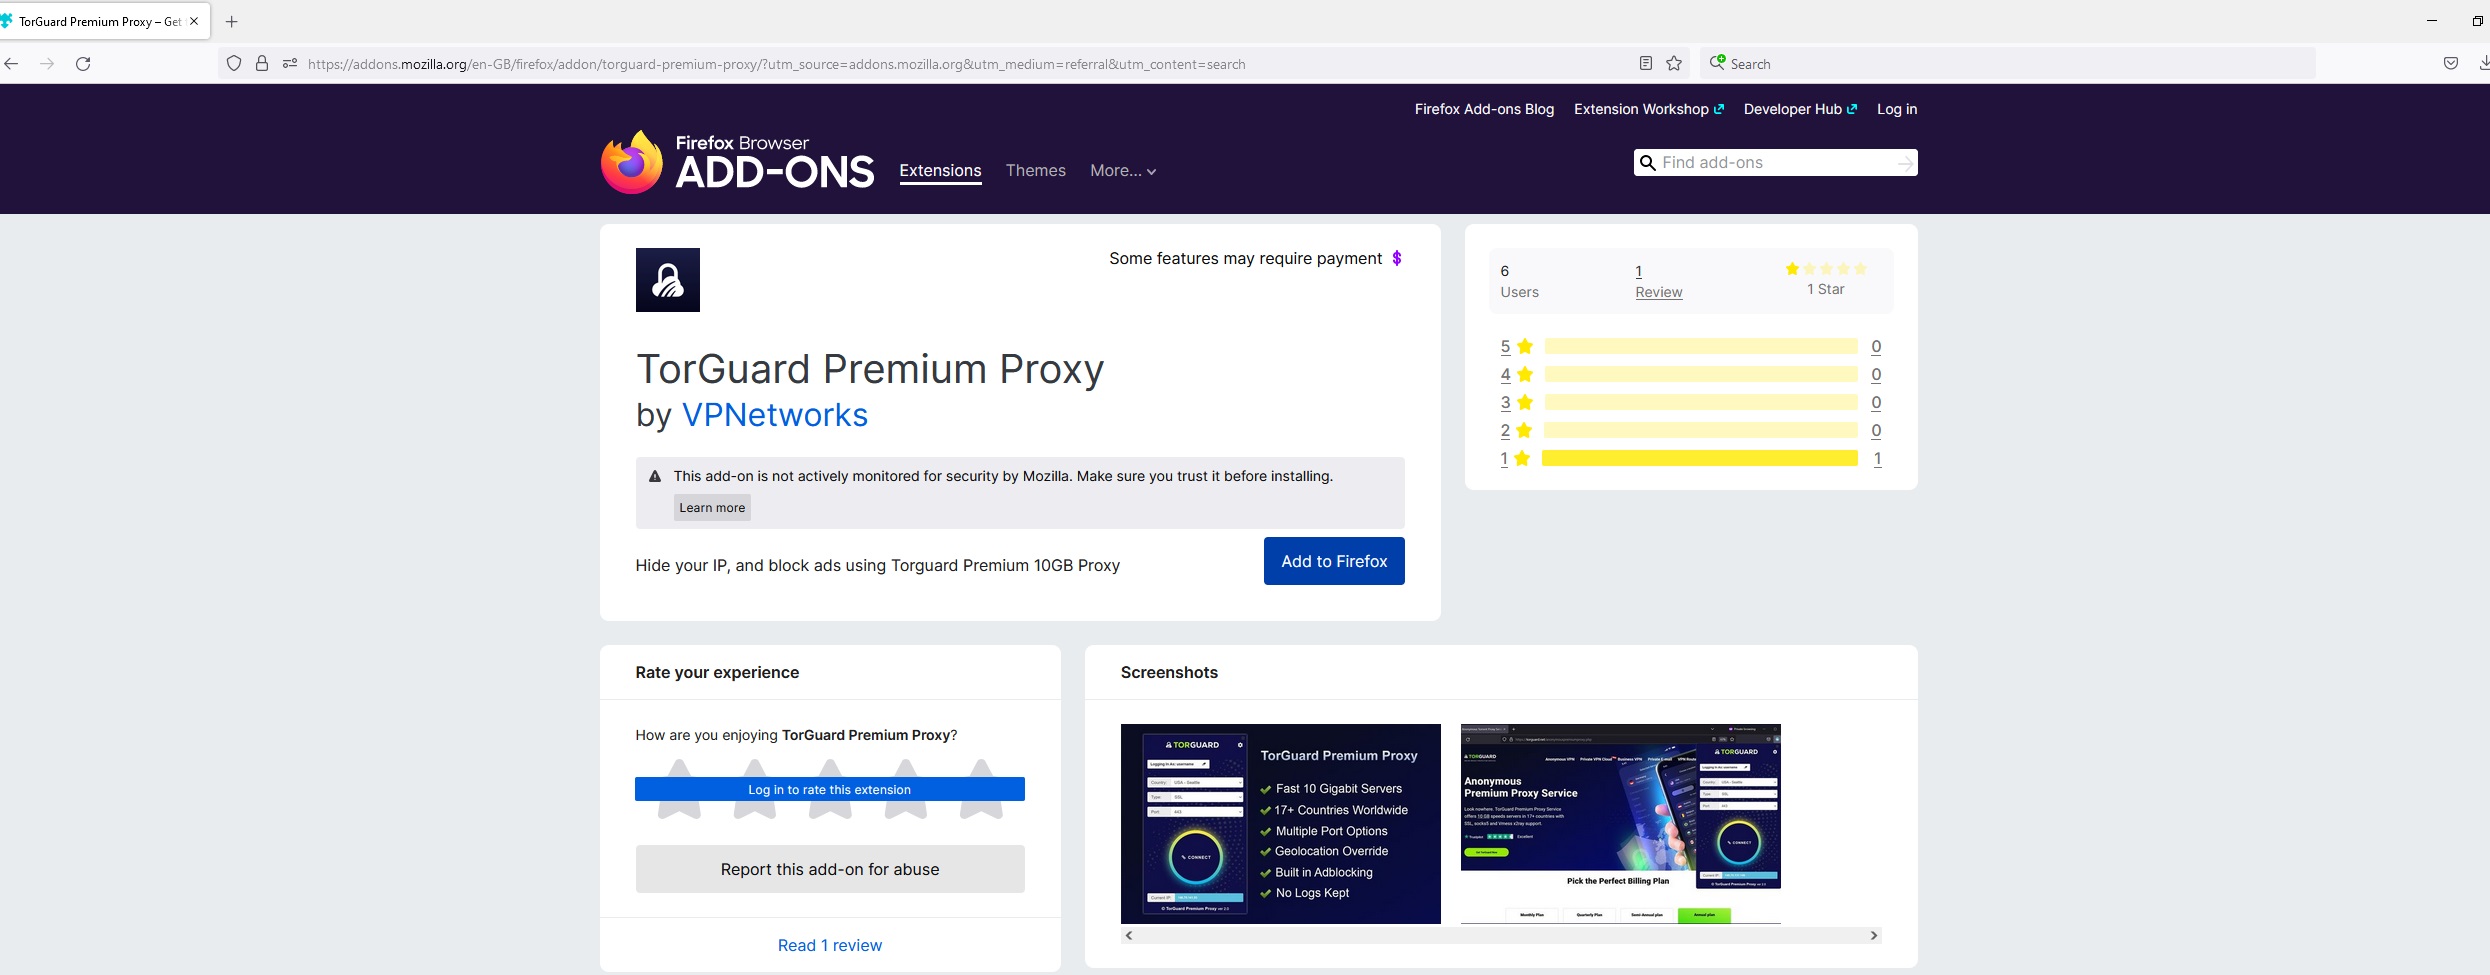
Step 1: Install from Firefox Add-ons
Find the Extension
- Open Firefox browser
- Visit the Firefox Add-ons page
- Search for "TorGuard Premium Proxy"
- Click on the TorGuard extension from results

Step 2: Add to Firefox
Install the Add-on
Click the "Add to Firefox" button on the extension page.
Firefox will verify the extension's signature and permissions before installation.
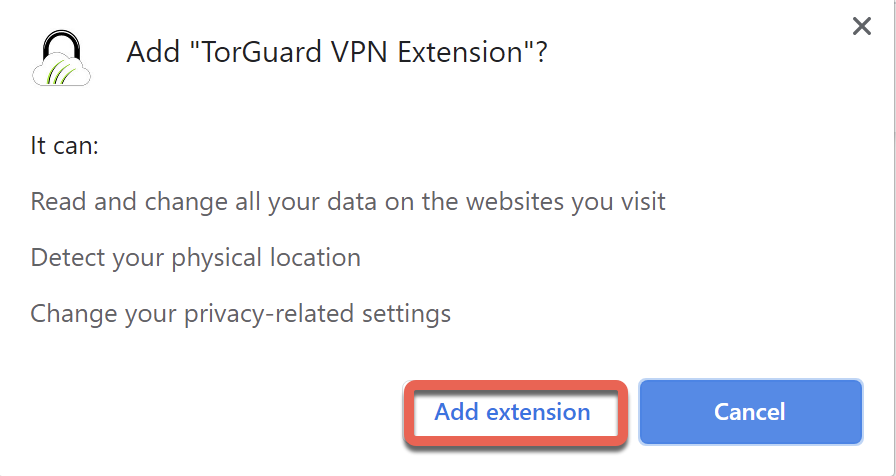
Step 3: Confirm Permissions
Grant Required Permissions
Firefox will display a permissions dialog. Click "Add" to confirm installation.
Permissions Explained:
- Proxy control: Manage Firefox's proxy settings
- Storage: Save your preferences
- Tabs: Apply proxy to all tabs
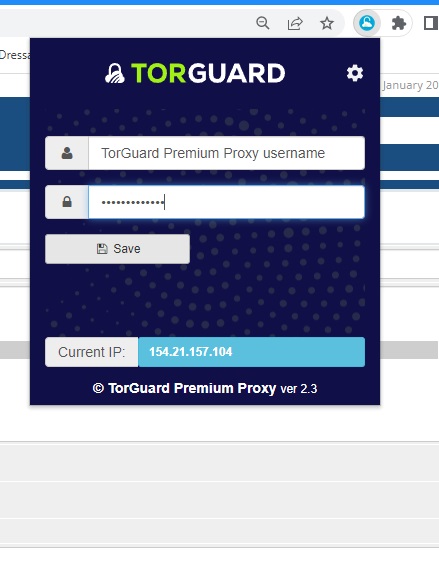
Step 4: Configure Credentials
Enter Login Details
- Click the TorGuard icon in your Firefox toolbar
- If not visible, click the puzzle piece icon and pin TorGuard
- Enter your TorGuard Premium Proxy username
- Enter your TorGuard Premium Proxy password
- Click Save
Use your Premium Proxy credentials, not your VPN login. Find these in your TorGuard account area.
Step 5: Select Server and Connect
Choose Connection Settings
- Location: Select your preferred server location
- Type: Choose proxy protocol:
- HTTP: Basic web browsing (port 8080)
- HTTPS: Encrypted browsing (port 443)
- SOCKS5: Most versatile, all traffic types (port 1080)
- Port: Select appropriate port for your protocol
- Click Connect
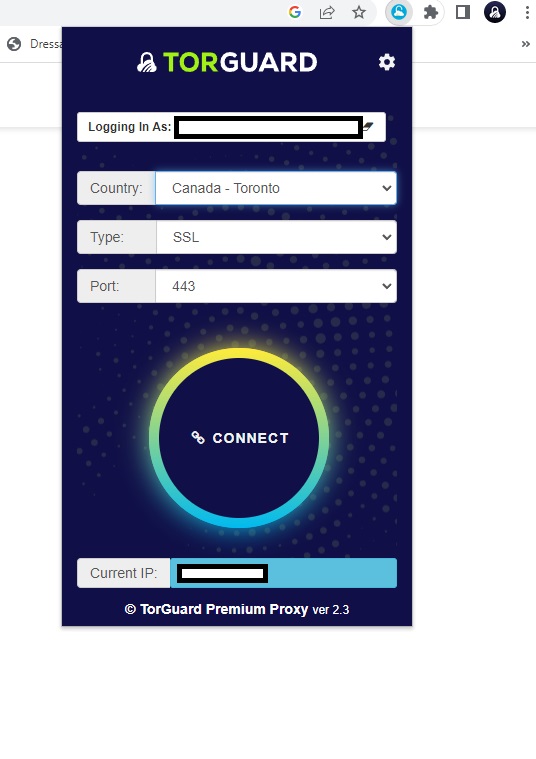
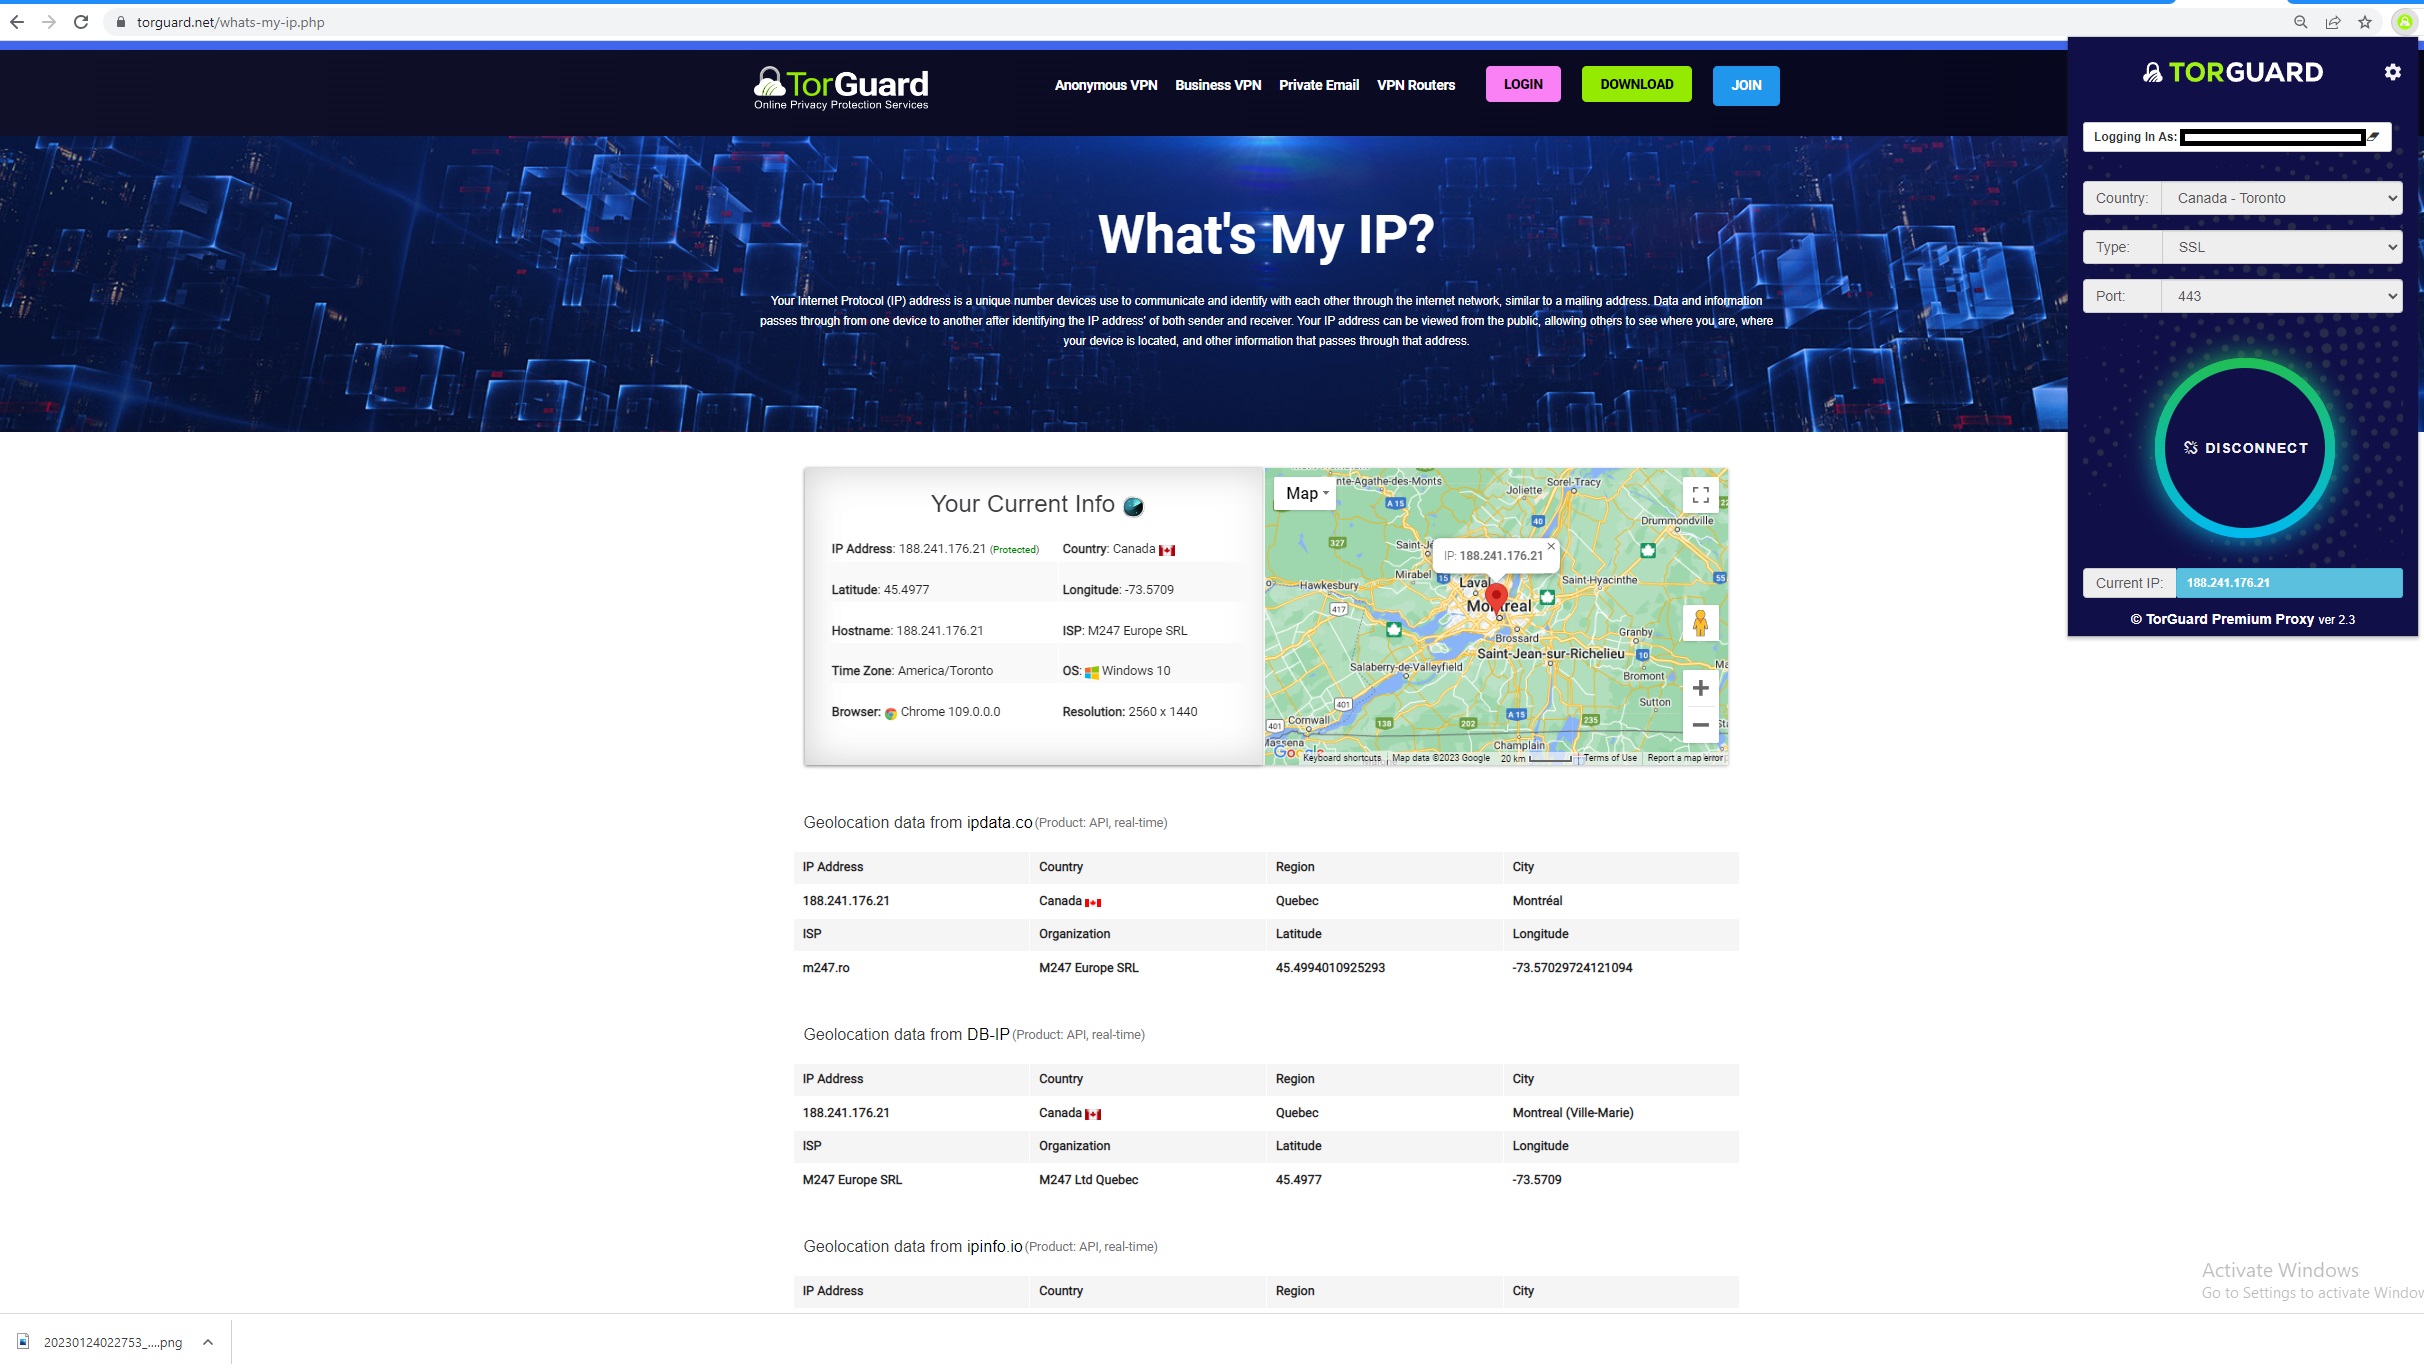
Step 6: Verify Connection
Confirm IP Change
- The Connect button changes to Disconnect when active
- Visit TorGuard's What's My IP tool
- Verify your IP address shows the proxy location
- Check for DNS and WebRTC leaks
Firefox-Specific Features
Leverage Firefox Capabilities
Container Tabs Integration
Use TorGuard proxy with Firefox Multi-Account Containers for enhanced isolation:
- Different proxy settings per container
- Isolate work, personal, and shopping activities
- Prevent cross-site tracking between containers
Private Browsing Mode
TorGuard extension works seamlessly in Private Windows:
- No proxy history saved
- Credentials remain secure
- Perfect for sensitive browsing
Firefox Proxy Settings
The extension overrides Firefox's network settings:
- No manual proxy configuration needed
- Automatic restoration when disconnected
- Works with Firefox's DNS over HTTPS
Advanced Configuration
Firefox-Specific Settings
WebRTC Leak Protection:
- Type
about:configin address bar - Search for
media.peerconnection.enabled - Set to false to disable WebRTC
DNS over HTTPS:
- Go to Settings → Network Settings
- Enable "DNS over HTTPS"
- Choose a secure DNS provider
Resist Fingerprinting:
- In
about:config, search forprivacy.resistFingerprinting - Set to true for additional privacy
Troubleshooting Firefox Issues
Extension Not Working
- Check Firefox is updated to latest version
- Verify extension is enabled in Add-ons Manager
- Try disabling other proxy/VPN extensions
- Clear Firefox cache and cookies
Proxy Authentication Issues
- Firefox may cache incorrect credentials
- Clear saved logins: Settings → Privacy → Saved Logins
- Restart Firefox after clearing credentials
- Re-enter proxy username and password
Avast/Antivirus Conflicts
- Avast Mail Shield blocks SSL proxy ports
- Add Firefox to antivirus exceptions
- Whitelist TorGuard proxy ports
- Try SOCKS5 if HTTPS is blocked
Add-on Conflicts
- Disable other proxy managers (FoxyProxy, etc.)
- Check uBlock Origin proxy settings
- Test in Firefox Safe Mode
- Create new Firefox profile for testing
Performance Optimization
Firefox + Proxy Performance
- Enable HTTP/3: Faster connections on supported sites
- Adjust cache: Increase browser cache for proxy use
- Disable telemetry: Reduce background connections
- Use SOCKS5: Generally faster than HTTP/HTTPS
- Select nearby servers: Lower latency connections
Firefox Pro Tips
- Bookmark proxy states: Save different configurations
- Use profiles: Create separate Firefox profiles for different proxy needs
- Keyboard shortcuts: Set custom shortcut for extension
- Container color coding: Match container colors to proxy locations
- Sync settings: Firefox Sync preserves extension settings