🚀 Quick Start for Windows
Get TorGuard VPN running on Windows 10 or Windows 11 with our simple installation guide. Protect your online privacy and secure your internet connection in under a minute.
⚡ 30-Second Quick Setup
- Download: TorGuard for Windows
- Install: Run installer, follow prompts
- Login: Enter VPN credentials
- Connect: Click the connect button
✅ You're now protected! Continue reading for detailed instructions and advanced features.
System Requirements
💻 Minimum Requirements
Operating System
- Windows 11 (all versions)
- Windows 10 (version 1607+)
- Windows 8.1
- Windows 7 SP1 (limited support)
Hardware
- 1 GHz processor
- 2 GB RAM (4 GB recommended)
- 200 MB free disk space
- Internet connection
Architecture
- 64-bit (x64) ✅
- 32-bit (x86) ✅
- ARM64 (Windows on ARM) ✅
Permissions
- Administrator rights for install
- Standard user for daily use
- Network adapter access
Download Options
Step-by-Step Installation
Download TorGuard
Download the TorGuard installer from our secure servers:
The file will be saved to your Downloads folder (usually C:\Users\YourName\Downloads)
Run the Installer
- Open your Downloads folder
- Double-click torguard-setup-latest.exe
- If Windows Defender SmartScreen appears, click "More info" then "Run anyway"
🛡️ Security Note
Windows may show a security prompt because the installer needs administrator rights to install the TAP network adapter. This is normal and required for VPN functionality.
Installation Process
Follow the installation wizard:
- Click Next on the welcome screen
- Accept the license agreement
- Choose installation location (default recommended)
- Select components (keep all checked)
- Click Install
- Allow TAP driver installation when prompted
- Click Finish to complete
✅ Installation Components
- TorGuard VPN Client
- TAP-Windows Adapter (for OpenVPN)
- WinTUN Driver (for WireGuard)
- Desktop & Start Menu shortcuts
Launch TorGuard
Start the TorGuard application:
- Desktop: Double-click the TorGuard icon
- Start Menu: Search for "TorGuard" and click
- System Tray: Look for the shield icon near the clock
Login to TorGuard
Enter your VPN credentials in the login window:
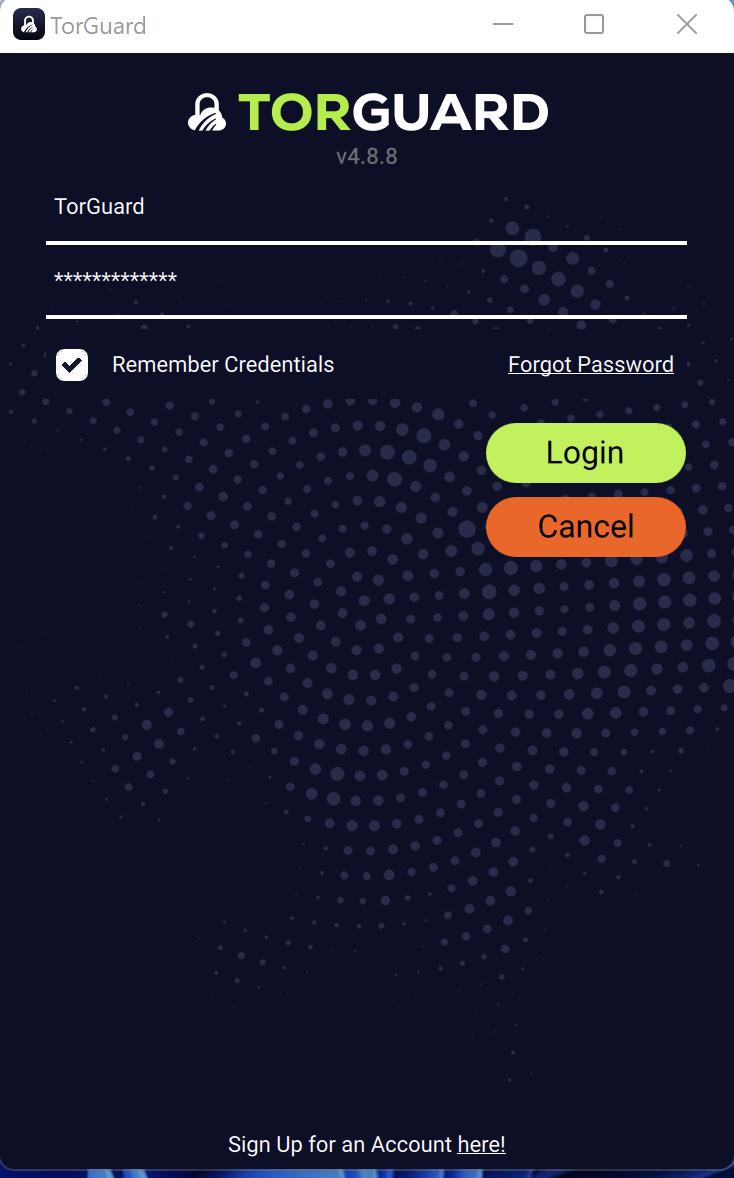
- Username: Your TorGuard VPN username
- Password: Your TorGuard VPN password
- ✅ Check "Remember credentials" for convenience
- Click Login
⚠️ Important
VPN credentials are different from your website login. Manage your VPN credentials here
First-Time Setup
On first launch, TorGuard will optimize settings for your system:
🎯 Initial Configuration
- Protocol: WireGuard selected (fastest)
- Server: Nearest location auto-selected
- Kill Switch: Disabled by default
- DNS: TorGuard secure DNS
- IPv6: Leak protection enabled
Connect to VPN
You're now ready to connect:
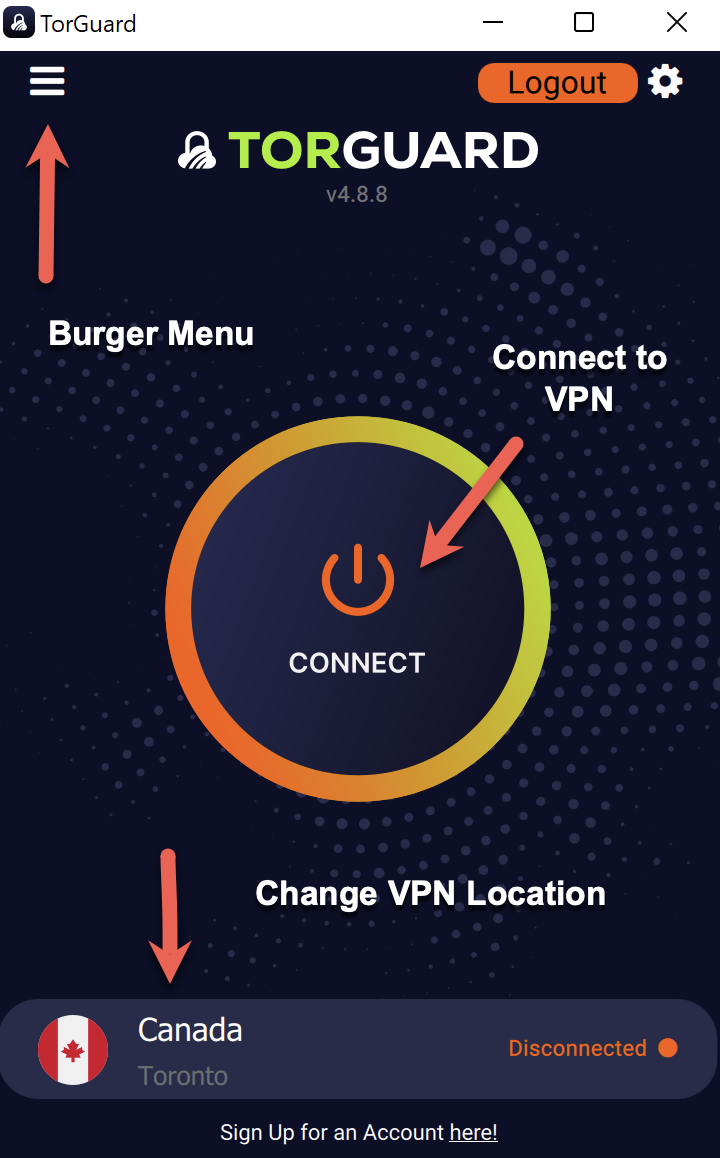
- Review selected location (click to change)
- Click the large Connect button
- Wait for connection (3-5 seconds)
Quick Actions:
Verify Connection
Confirm you're protected:
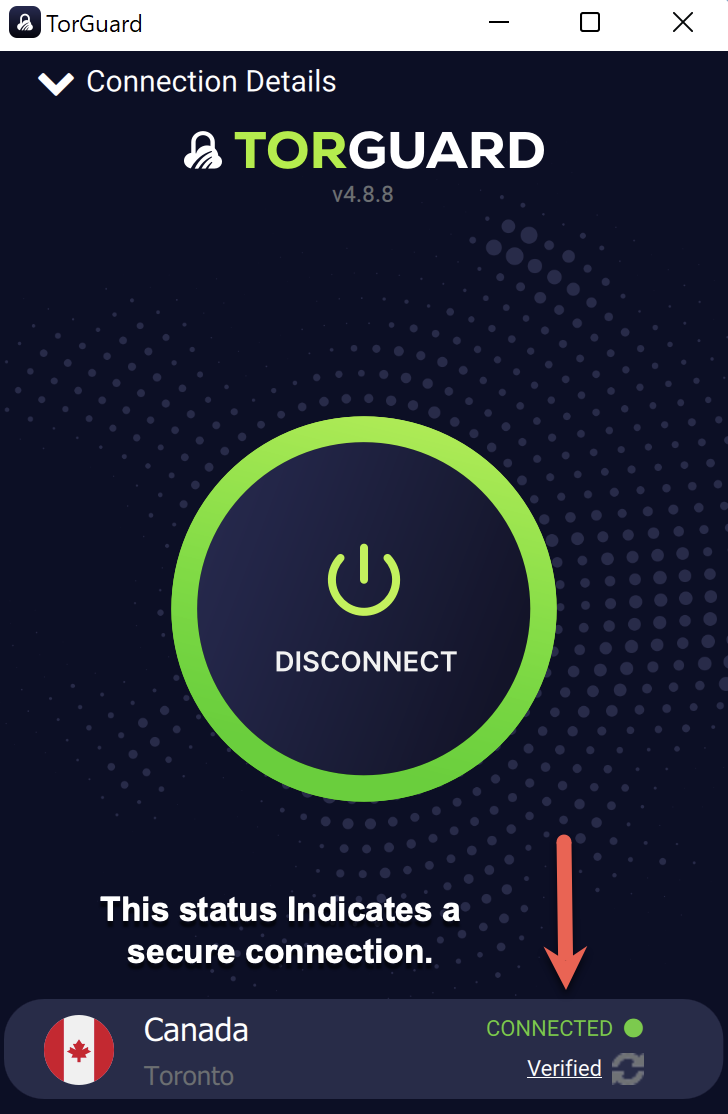
- Status shows "CONNECTED"
- Below that shows "Verified"
- Your new IP address is displayed
- Green shield icon in system tray
✅ You're Protected!
Your internet traffic is now encrypted and routed through TorGuard's secure servers.
Protocol Selection Guide
🔧 Choose Your Protocol
Access via: Menu (☰) → Connection → Protocol
⚡ WireGuard
Fastest
Best for most users
🛡️ OpenVPN
Most Compatible
Works everywhere
🌐 OpenConnect
Firewall Bypass
For restrictive networks
🚀 Shadowsocks
Stealth Mode
Bypasses DPI
Key Features
Kill Switch
Blocks internet if VPN drops
Settings → General → Kill Switch
Ad Blocker
Block ads at DNS level
Settings → Network → Ad Block DNS
Auto Connect
Connect on Windows startup
Settings → General → Auto Connect
Split Tunneling
Exclude apps from VPN
Settings → Network → App Kill
Dedicated IP
Your own static IP address
Add via server browser
Port Forwarding
Open ports for services
Request in client area
Windows-Specific Tips
💡 Pro Tips for Windows Users
- Windows 11 Widgets: Add TorGuard status widget to taskbar
- Startup: Enable "Launch on Windows startup" for always-on protection
- Notifications: Customize connection alerts in Windows Settings
- Gaming Mode: Use WireGuard + nearest server for lowest latency
- Multiple Monitors: App remembers position on last used screen
- Keyboard Shortcuts:
Ctrl+Shift+C- Quick connect/disconnectCtrl+Shift+S- Open server browserCtrl+Q- Quit application
Troubleshooting
🔍 Common Issues & Solutions
TAP Adapter Error
- Run as Administrator once
- Reinstall TAP driver
- Disable Windows Firewall temporarily
- Check Device Manager
Slow Connection
- Switch to WireGuard protocol
- Try different server
- Disable Windows Defender scan
- Check background downloads
Can't Login
- Use VPN credentials, not website
- Check CAPS LOCK
- Reset password if needed
- Verify account is active
DNS Leaks
- Enable DNS leak protection
- Use TorGuard DNS
- Disable IPv6 in Windows
- Flush DNS cache
Firewall Blocking
- Add TorGuard to exceptions
- Allow ports 443, 1194, 1443
- Disable Windows Firewall test
- Check antivirus settings
Auto-Update Issues
- Check for updates manually
- Run installer as admin
- Download latest version
- Clear app cache
Next Steps
🎉 You're All Set!
Now that TorGuard is running, explore these features:
- Server Browser: Find the fastest server for your needs
- Kill Switch: Enable for maximum security
- Streaming Bundle: Access geo-restricted content
- Port Forwarding: Set up for torrenting or hosting
Need Help?
If you encounter any issues during setup:
Available 24/7 via live chat and ticket system