Legacy DSM Version Warning
DSM 5 and below are no longer supported by Synology and do not receive security updates. We strongly recommend:
- Upgrading to DSM 7.x for security patches and modern features
- Backing up your data before any DSM upgrade
- Checking hardware compatibility at Synology's DSM page
For DSM 6 and above, see our updated guide.
This guide covers OpenVPN configuration on Synology NAS devices running DSM 5.x and below. While these older systems lack some modern features, they can still establish secure VPN connections to protect your network traffic.
Part 1: Prerequisites
Before configuring VPN on your DiskStation, ensure:
- Your internet connection is stable and working
- The DiskStation volume status is healthy (check in Storage Manager)
- DSM is updated to the latest version available for your model
- You have your TorGuard VPN credentials ready
- Port 443 (TCP/UDP) is not blocked by your firewall
Part 2: OpenVPN Configuration
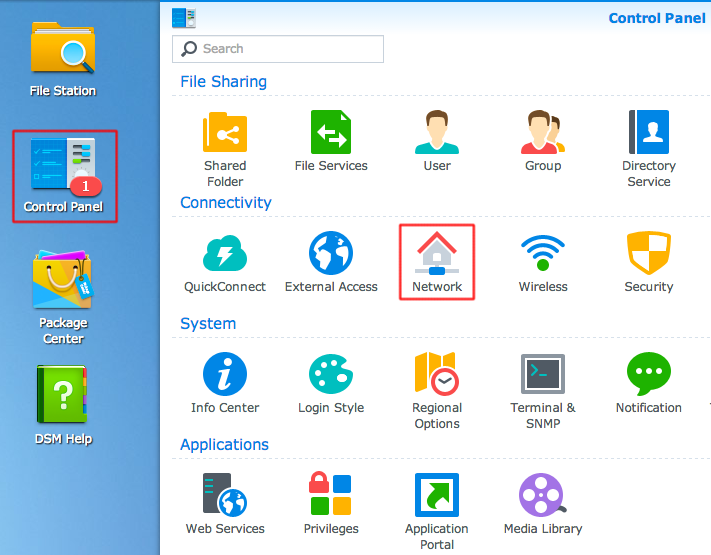
Step 1: Access Network Settings
From your DSM dashboard, click on Control Panel, then navigate to Network.
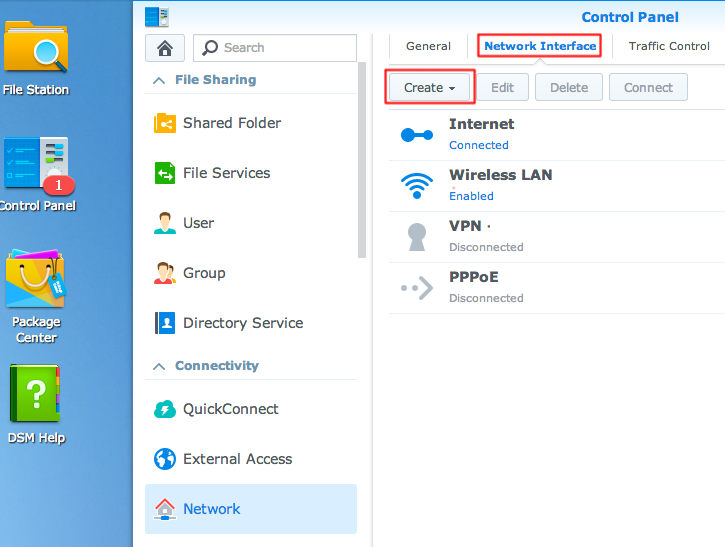
Step 2: Create Network Interface
Click on Network Interface tab, then click the Create button.
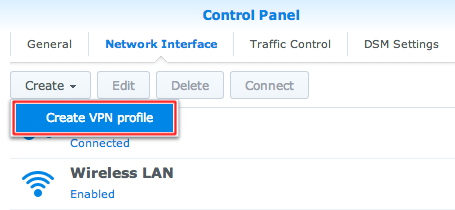
Select Create VPN profile from the options.
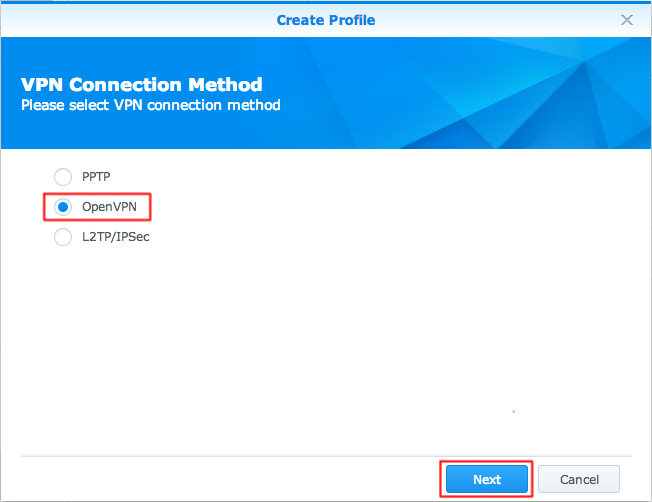
Choose OpenVPN (via importing a .ovpn file) and click Next.
Step 3: Configure VPN Details
Enter the following connection details:
- Profile name: TorGuard VPN (or any name you prefer)
- Server address: Choose a server from your TorGuard server list
- Username: Your TorGuard VPN username
- Password: Your TorGuard VPN password
- Port: 443 (available in DSM 5.1+ only)
- Protocol: TCP or UDP based on your preference (DSM 5.1+ only)
- Certificate: Download from your TorGuard client area
Getting Your Certificate
- Log in to your TorGuard client area
- Navigate to "My Servers" or "Tools" → "Enable VPN"
- Download the CA certificate (ca.crt or ca.pem)
- Save it to your computer for upload to Synology

Step 4: Advanced Settings
Click Next to access Advanced Settings. Configure the following options:
- ✓ Enable compression on the VPN link
- ✓ Use default gateway on remote network
- ✓ Reconnect when the VPN connection is lost
- ✓ Enable NAT Traversal (if behind router)
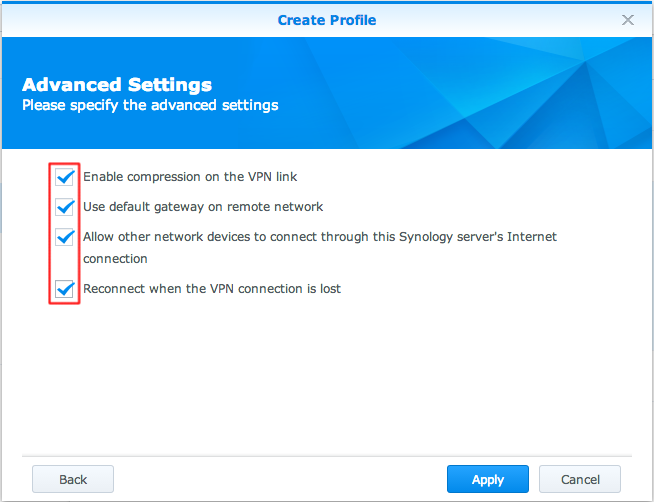
Click Apply to save your configuration.
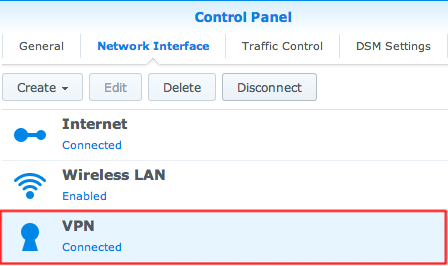
Step 5: Connect to VPN
Navigate back to Network Interface in your DSM. Select your newly created VPN - TorGuard profile and click Connect.
The status should change to Connected once the VPN tunnel is established.
Step 6: Verify Connection
To verify your VPN connection is working:
Option 1: Web Browser Check
From any device connected to your NAS (via Ethernet or Wi-Fi), visit TorGuard's IP check to confirm your IP has changed.
Option 2: SSH Command
If you have SSH access to your NAS, run:
curl https://torguard.net/whats-my-ip.phpThis will display the IP address your NAS is currently using.
Troubleshooting Common Issues
| Issue | Solution |
|---|---|
| Certificate upload fails | Ensure certificate is in .crt or .pem format, not .ovpn |
| Connection times out | Try different server or switch between TCP/UDP |
| DNS not working | Manually set DNS servers to 8.8.8.8 and 8.8.4.4 |
| Slow speeds | Disable compression; try servers closer to your location |
| Can't access local network | Uncheck "Use default gateway on remote network" |
DSM Version-Specific Notes
DSM 4.x Limitations
- No port/protocol selection (defaults to 1194/UDP)
- Limited cipher support (AES-128-CBC only)
- No compression options
- Manual certificate installation required
DSM 5.0 vs 5.1+ Differences
- DSM 5.0: Fixed port 1194, no protocol selection
- DSM 5.1+: Custom port support, TCP/UDP selection
- DSM 5.1+: Better certificate handling
- DSM 5.1+: Improved reconnection reliability
Security Recommendations
Critical Security Notice
Running outdated DSM versions exposes your NAS to significant security risks:
- Unpatched vulnerabilities can compromise stored data
- Outdated SSL/TLS libraries may not support modern encryption
- No protection against recent ransomware targeting NAS devices
- Limited protocol support reduces connection security
Immediate action recommended: Check if your hardware supports DSM 6.x or 7.x upgrade.
Alternative Solutions
If your Synology hardware cannot be upgraded to a newer DSM version, consider:
- Router-based VPN: Configure VPN on your router to protect all devices
- Docker on compatible models: Run OpenVPN in a container if Docker is supported
- Dedicated VPN device: Use a Raspberry Pi or similar as a VPN gateway
- Hardware upgrade: Invest in a newer Synology model with DSM 7 support
For assistance with VPN setup or DSM upgrade questions, please contact our support team.