Legacy Firmware Notice
This guide is for older Tomato firmware builds. Modern versions have different interfaces and improved security features. Consider:
- Upgrading to FreshTomato (actively maintained)
- Using AdvancedTomato for modern UI
- Checking our updated Tomato guide
This tutorial guides you through setting up TorGuard VPN on a Tomato router running legacy firmware. We assume your router has already been flashed with Tomato firmware. For pre-configured routers, visit the TorGuard store.
Prerequisites
- Router flashed with Tomato firmware (older build)
- Active TorGuard VPN subscription
- Your TorGuard VPN username and password
- Access to router admin interface
- Basic understanding of router configuration
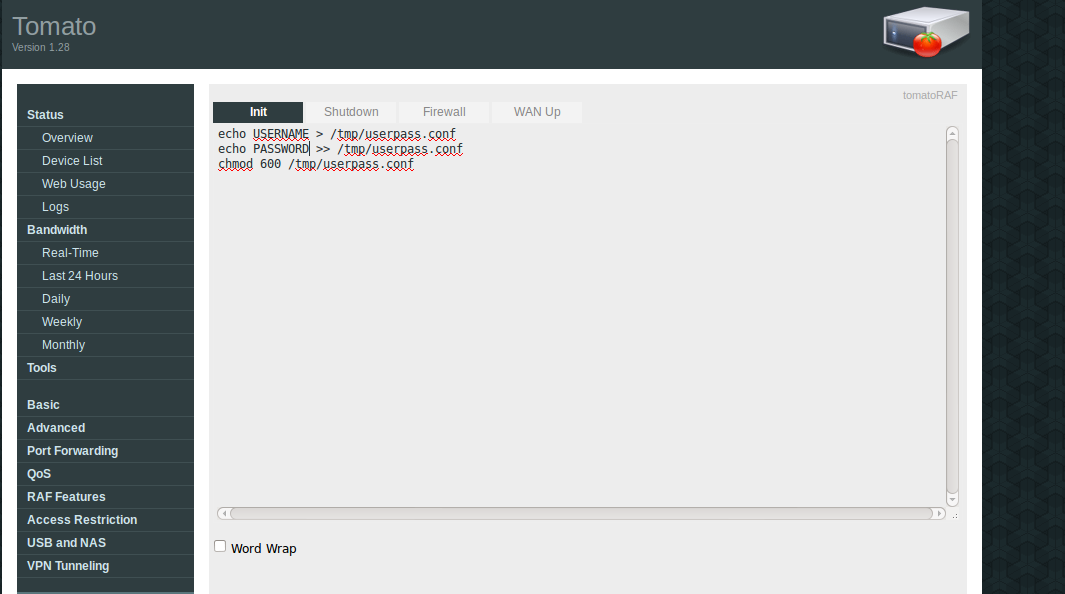
Step 1: Configure Authentication Script
Access your Tomato router's admin interface at http://192.168.1.1/ (default IP).
Navigate to Administration → Scripts and add the following startup script:
echo USERNAME > /tmp/userpass.conf
echo PASSWORD >> /tmp/userpass.conf
chmod 600 /tmp/userpass.conf
Important: Replace USERNAME with your TorGuard VPN username and PASSWORD with your TorGuard VPN password.
Click Save to store the script.
Step 2: Basic VPN Configuration
Login to your TorGuard client area and check "My Servers" to select a server hostname.
Navigate to VPN Tunneling → Client → Basic and configure:
- Start with WAN: Checked ✓
- Interface Type: TUN
- Protocol: UDP (recommended) or TCP
- Server Address: Your chosen TorGuard server hostname
- Port: 443 (for both UDP and TCP)
- Firewall: Automatic
- Authorization Mode: TLS
- Extra HMAC Authorization: Disabled
- Create NAT on tunnel: Checked ✓
Click Save to apply settings.

Step 3: Advanced Settings
Navigate to VPN Tunneling → Client → Advanced and configure:
- Poll Interval: 0
- Redirect Internet Traffic: Unchecked (unless you want all traffic through VPN)
- Accept DNS Configuration: Strict
- Encryption Cipher: Use Default
- Compression: Adaptive
- TLS Renegotiation Time: -1
- Connection Retry: 30 (or -1 for infinite)
In the Custom Configuration box, add:
persist-key
persist-tun
tls-client
comp-lzo
verb 1
ns-cert-type server
auth-user-pass /tmp/userpass.conf
Click Save to apply settings.

Step 4: Install Certificate
Navigate to VPN Tunneling → Client → Keys.
In the Certificate Authority field, paste the TorGuard CA certificate. You can obtain this from:
- Your client area configuration files
- The CA certificate download
Note: Paste the ENTIRE certificate contents, including the BEGIN and END certificate lines.
Click Save to store the certificate.

Step 5: Connect to VPN
Your Tomato router is now configured for OpenVPN. Navigate to VPN Tunneling → Client → Status.
- Click Start Now to establish the VPN connection
- Click Stop Now to disconnect
- Check the status log for connection details

Troubleshooting
| Issue | Solution |
|---|---|
| Connection fails immediately | Check username/password in startup script |
| TLS handshake failed | Verify certificate is complete and correctly pasted |
| No internet after connecting | Enable "Redirect Internet Traffic" if needed |
| DNS not working | Check DNS configuration settings |
| Slow speeds | Try different server or switch to UDP protocol |
Security Considerations
Important Security Notes
- Credentials stored in
/tmp/are cleared on reboot - Consider the security implications of plain-text password storage
- Older Tomato builds may have unpatched vulnerabilities
- Update to the latest firmware version when possible
- Use strong, unique passwords for both router and VPN
Modern Alternatives
Updated Firmware Options
| Firmware | Features |
|---|---|
| FreshTomato | Active development, modern UI, better VPN support |
| AdvancedTomato | Modern web interface, based on Tomato |
| DD-WRT | Alternative firmware with extensive features |
| OpenWRT | Highly customizable, package management |
Additional Resources
For assistance with router configuration or VPN setup issues, please contact our support team.