Native Cisco IPSec VPN for macOS
Set up VPN access using macOS's built-in Cisco IPSec client. No additional software required - works with all modern macOS versions including Monterey, Ventura, and Sonoma.
Why Use Cisco IPSec?
Advantages of Cisco IPSec:
- Native Support: Built into macOS - no third-party apps needed
- Stable Connection: Mature protocol with excellent reliability
- System Integration: Works seamlessly with macOS network features
- Menu Bar Access: Quick connect/disconnect from status bar
- Battery Efficient: Optimized for Mac hardware
Note: Some networks may block IPSec. If you experience connection issues, try OpenVPN or WireGuard instead.
Prerequisites
What You'll Need:
- macOS 10.12 (Sierra) or later
- TorGuard VPN account with active subscription
- VPN credentials (different from website login)
- Server address from TorGuard network page
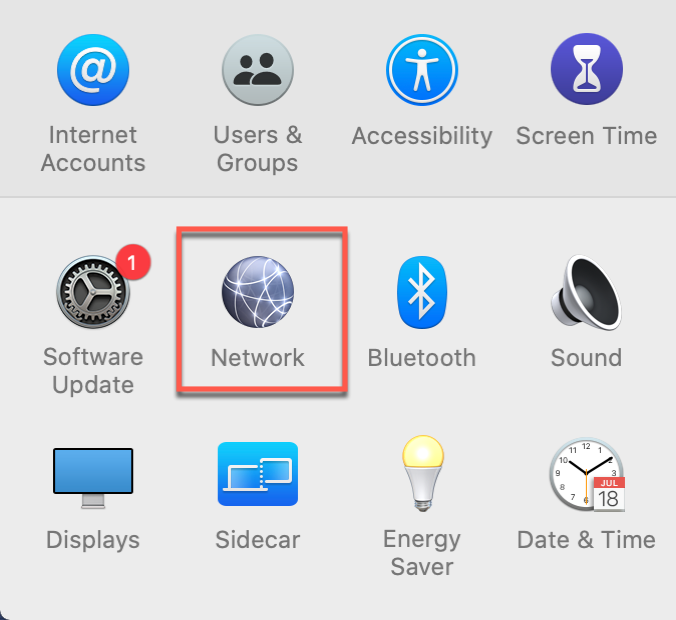
Step 1: Open Network Preferences
Access System Settings
macOS Ventura/Sonoma:
- Click Apple menu → System Settings
- Click Network in the sidebar
macOS Monterey and earlier:
- Click Apple menu → System Preferences
- Click Network icon
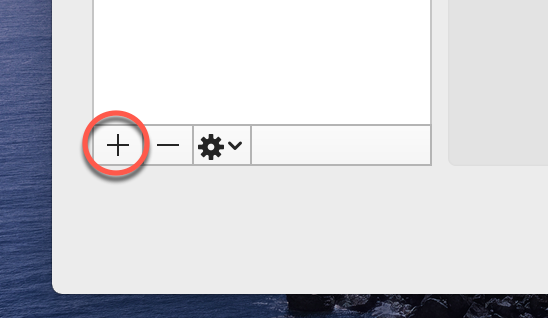
Step 2: Add New VPN Connection
Create VPN Profile
Click the + button at the bottom of the network connections list to add a new connection.
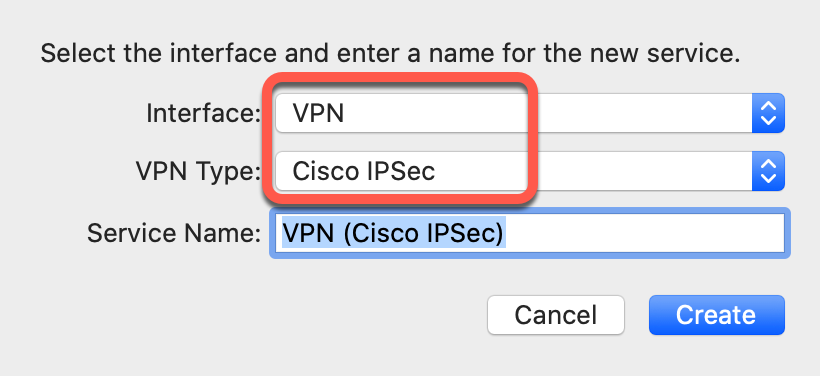
Step 3: Configure VPN Type
Select Connection Type
- Interface: Select "VPN"
- VPN Type: Select "Cisco IPSec"
- Service Name: Enter "TorGuard VPN" (or any name you prefer)
- Click Create
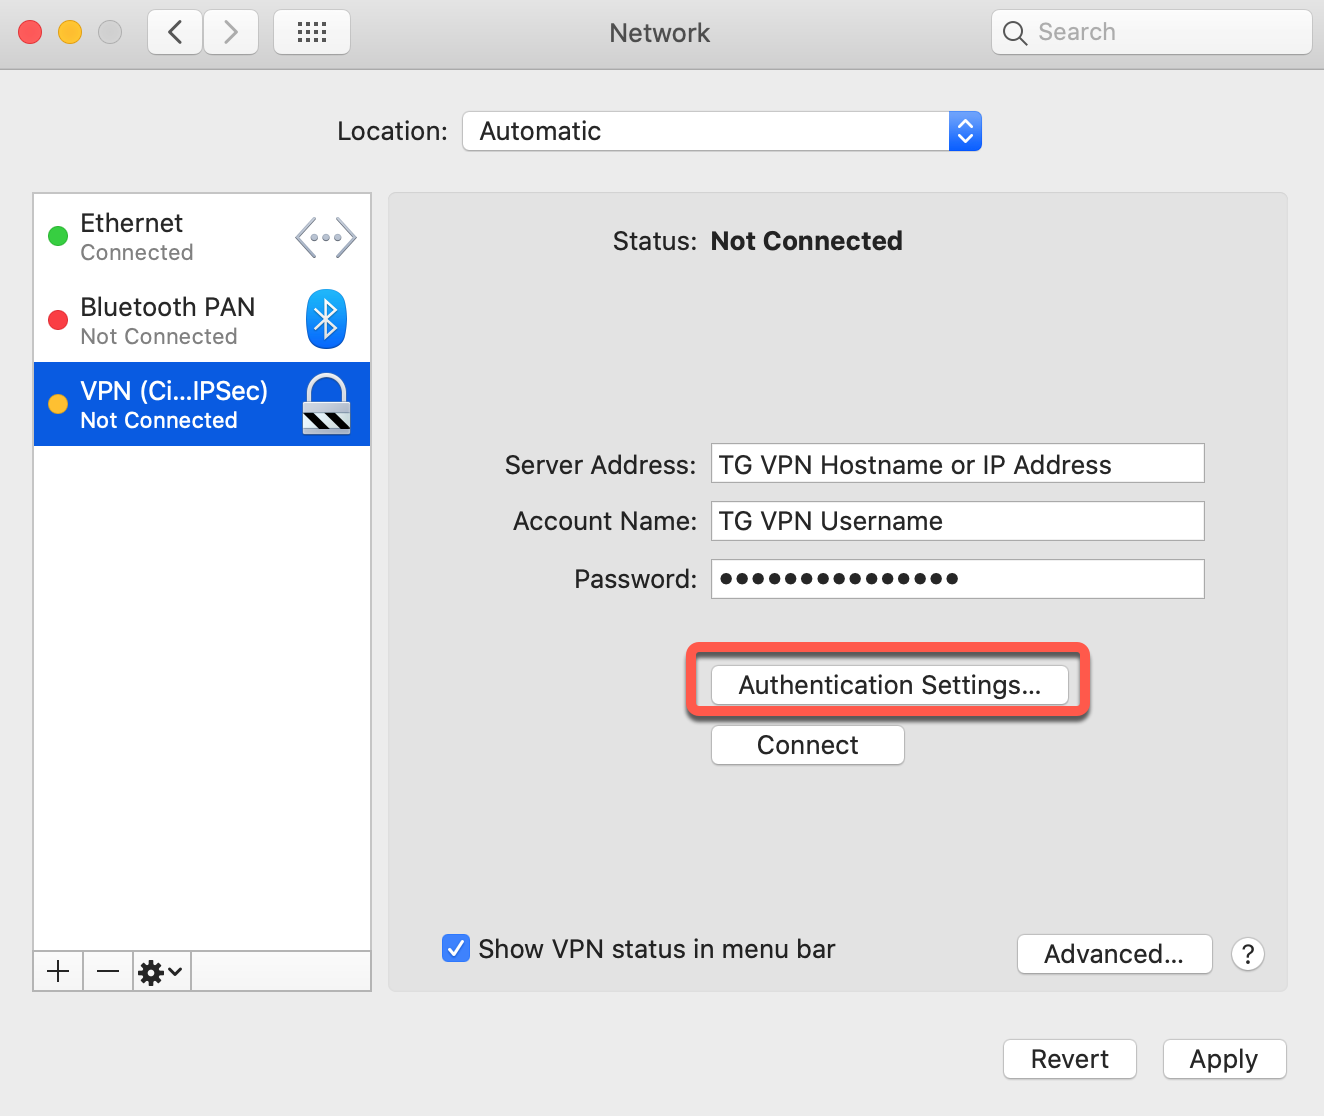
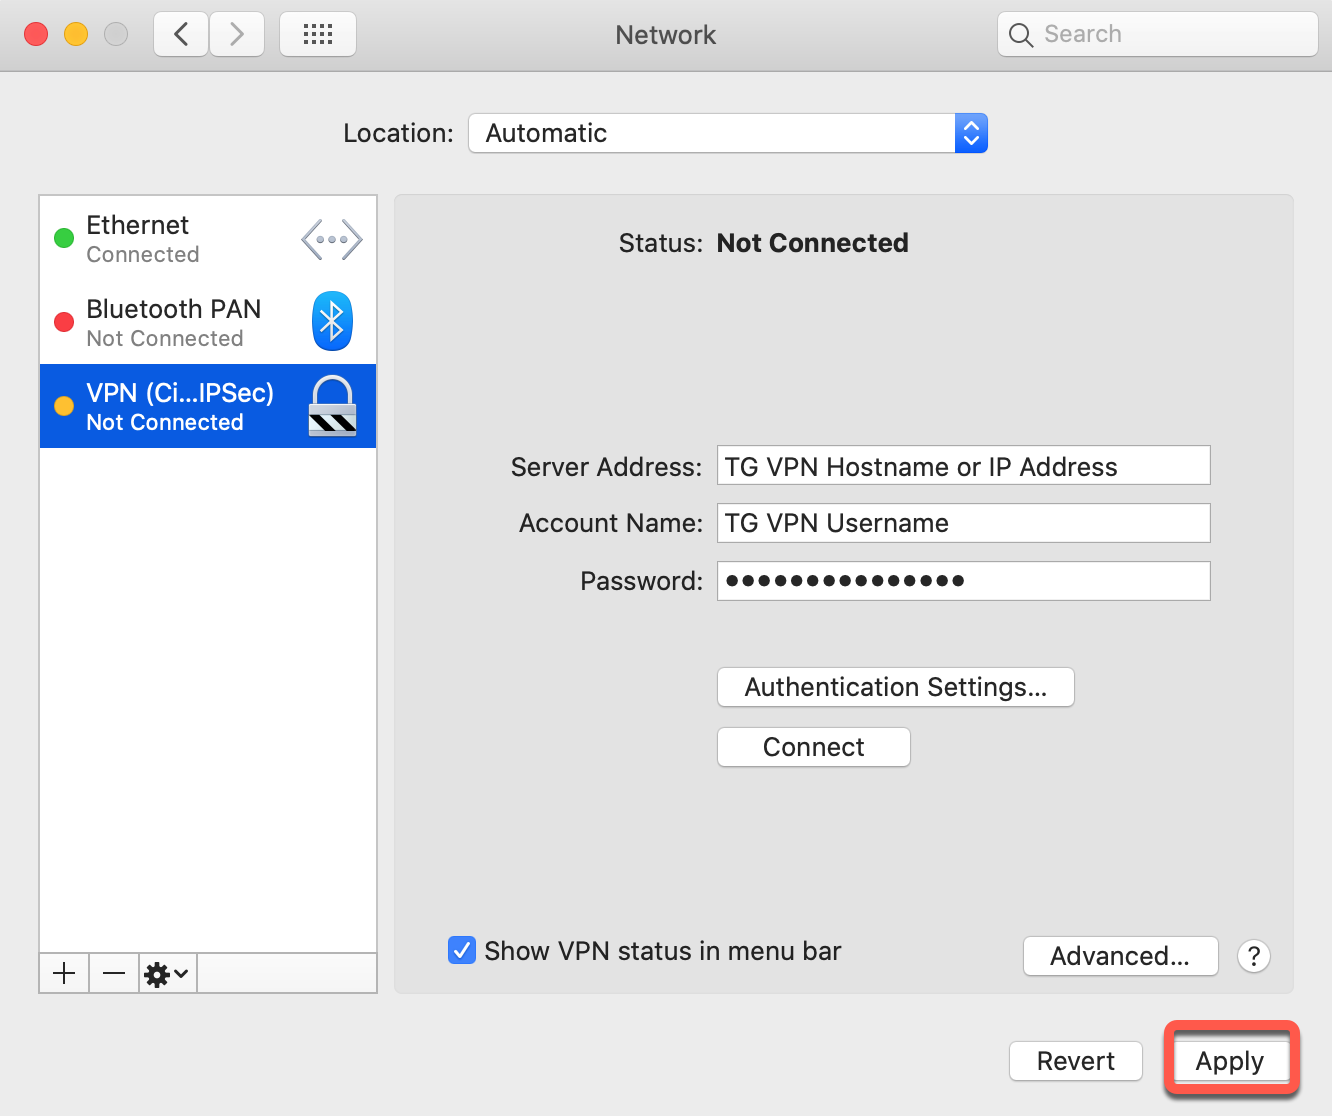
Step 4: Enter Connection Details
Configure Server Settings
Fill in the following fields:
| Server Address: | Enter a TorGuard server IP or hostname from network page |
| Account Name: | Your VPN username (not email) |
| Password: | Your VPN password |
After entering these details, click Authentication Settings...
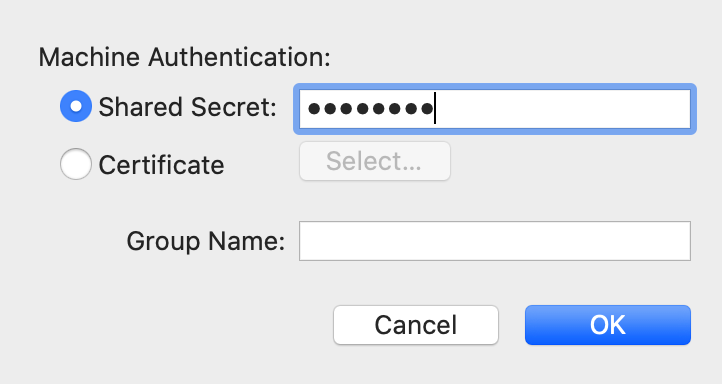
Step 5: Configure Authentication
Set Shared Secret
- In the authentication window, enter the shared secret:
torguard - Leave "Group Name" empty
- Click OK
The shared secret is always "torguard" (lowercase) for all TorGuard servers.
Step 6: Apply Settings
Save Configuration
Click Apply to save your VPN configuration.
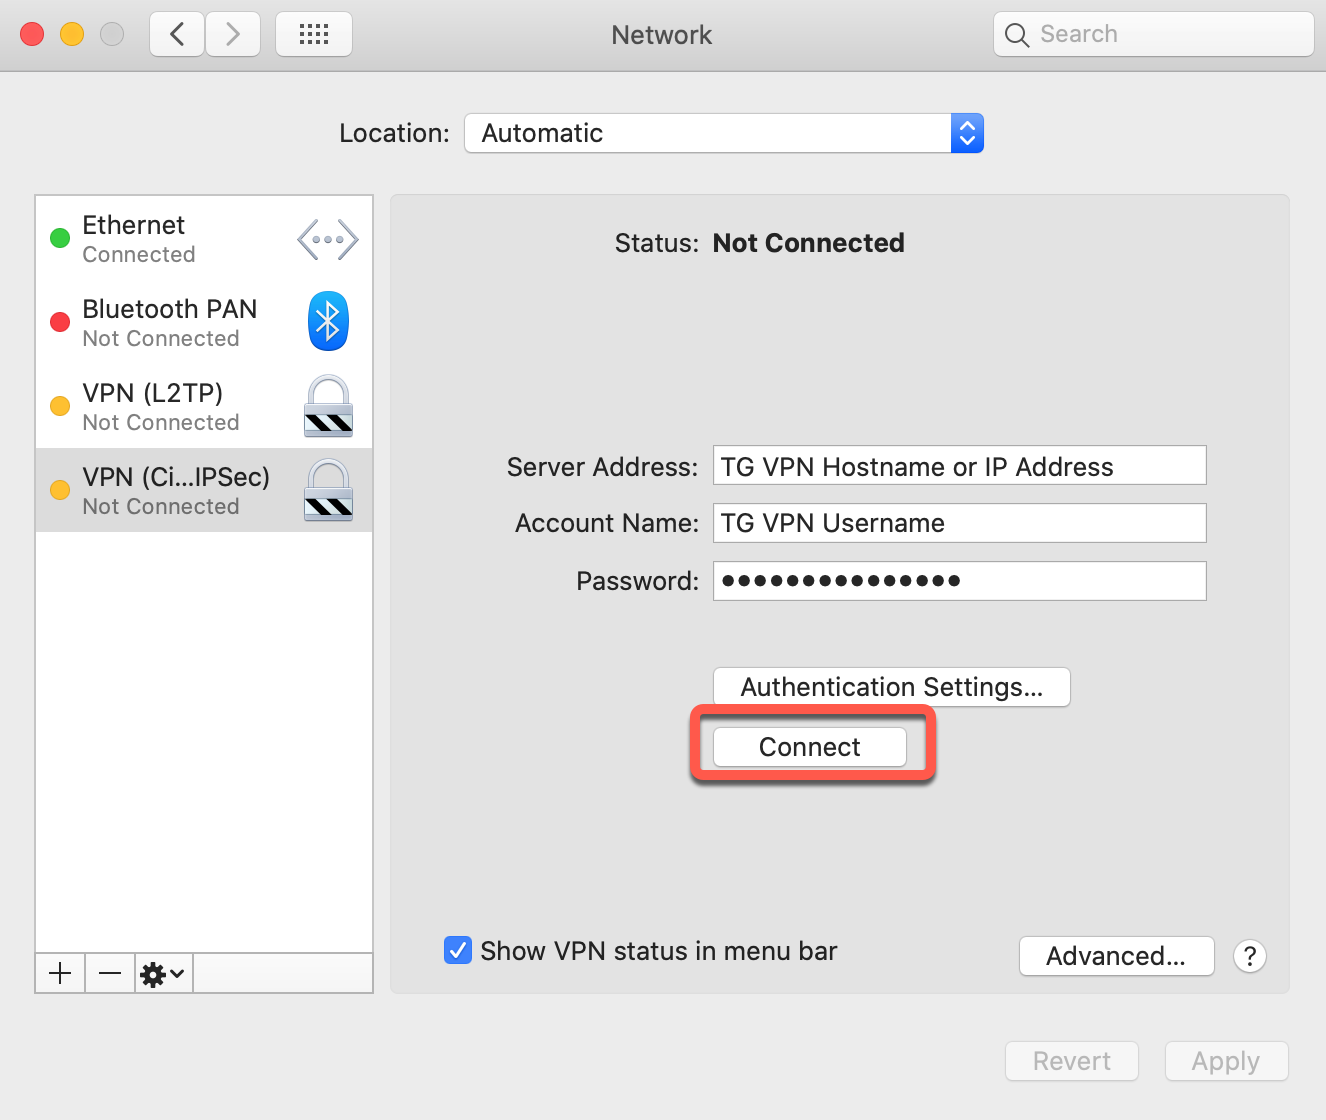
Step 7: Connect to VPN
Establish Connection
- Ensure "Show VPN status in menu bar" is checked for quick access
- Click Connect to establish VPN connection
- Wait for connection status to show "Connected"
Step 8: Manage Connection
Connection Management
Success! You can now manage your VPN connection from the menu bar:
- Click the VPN icon in menu bar to connect/disconnect
- View connection status and duration
- Access VPN preferences quickly
When connected, all your internet traffic is encrypted and routed through TorGuard's servers.
Advanced Configuration
Optional Settings
1. Connect on Demand
Configure automatic VPN connection:
- Click Advanced... in VPN settings
- Enable "Connect on demand"
- Configure rules for automatic connection
2. Split Tunneling
Route only specific traffic through VPN:
- Click Advanced...
- Configure routing options
- Add specific networks or domains
3. DNS Settings
Use TorGuard DNS servers:
- Primary DNS:
8.8.8.8 - Secondary DNS:
8.8.4.4
Troubleshooting
Connection Failed
- Verify server address is correct and active
- Check username/password (use VPN credentials, not website login)
- Ensure shared secret is "torguard" (lowercase)
- Try a different server location
- Check if IPSec is blocked on your network
Slow Connection
- Try a server closer to your location
- Switch between different server locations
- Check for background apps using bandwidth
- Consider using OpenVPN or WireGuard for better speeds
DNS Leaks
- Manually configure DNS servers in Network settings
- Use TorGuard's DNS servers
- Test for leaks at TorGuard IP check
Alternative Protocols
Other VPN Options for macOS
If Cisco IPSec doesn't work well on your network, try these alternatives:
- OpenVPN: Most versatile, works on restricted networks
- WireGuard: Fastest speeds, modern protocol
- IKEv2: Good for mobile devices, fast reconnection
- L2TP/IPSec: Alternative native option
Support
Need Help?
If you encounter any issues setting up Cisco IPSec:
- Check our server status page
- Visit our support desk
- Try our other setup guides