Native L2TP/IPSec VPN on macOS
This guide covers L2TP/IPSec VPN setup using macOS's built-in VPN client. Compatible with all modern macOS versions including Big Sur, Monterey, Ventura, and Sonoma.
About L2TP/IPSec on macOS
Protocol Characteristics:
- Native Support: Built into macOS - no additional software needed
- Good Security: Uses IPSec encryption for data protection
- Stable Connection: Generally reliable on macOS
- Behind NAT: Works well behind routers/firewalls
- Battery Efficient: Low overhead compared to OpenVPN
Note: While L2TP/IPSec is secure, consider using IKEv2 or WireGuard for better performance and security on macOS.
Prerequisites
Requirements:
- macOS 10.12 (Sierra) or newer
- TorGuard VPN account with active subscription
- VPN credentials (different from website login)
- Shared secret:
torguard
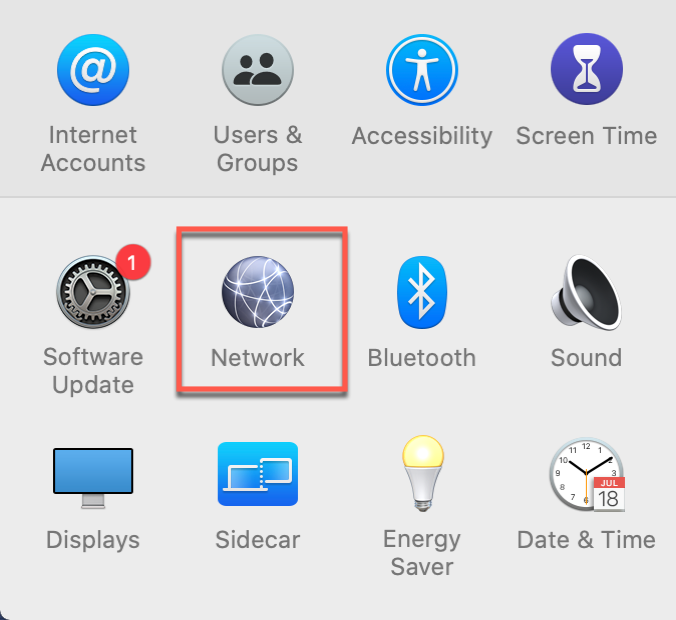
Step 1: Open Network Preferences
Access System Settings
macOS Ventura/Sonoma (13.0+):
- Click Apple menu → System Settings
- Click Network in the sidebar
macOS Big Sur/Monterey (11.0-12.x):
- Click Apple menu → System Preferences
- Click Network icon
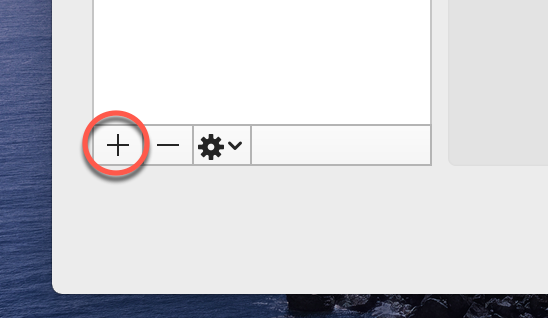
Step 2: Add VPN Connection
Create New VPN
Click the + button at the bottom of the network connections list to add a new connection.
If the + button is grayed out, click the lock icon and enter your Mac password to make changes.
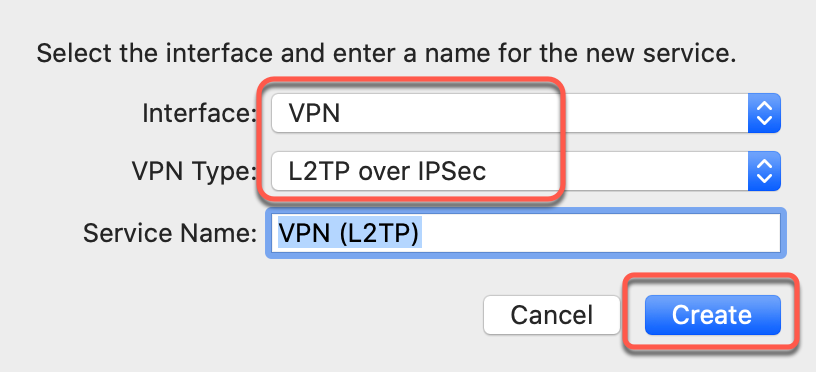
Step 3: Configure VPN Type
Select Connection Type
- Interface: Select "VPN"
- VPN Type: Select "L2TP over IPSec"
- Service Name: Enter "TorGuard L2TP" (or any name)
- Click Create
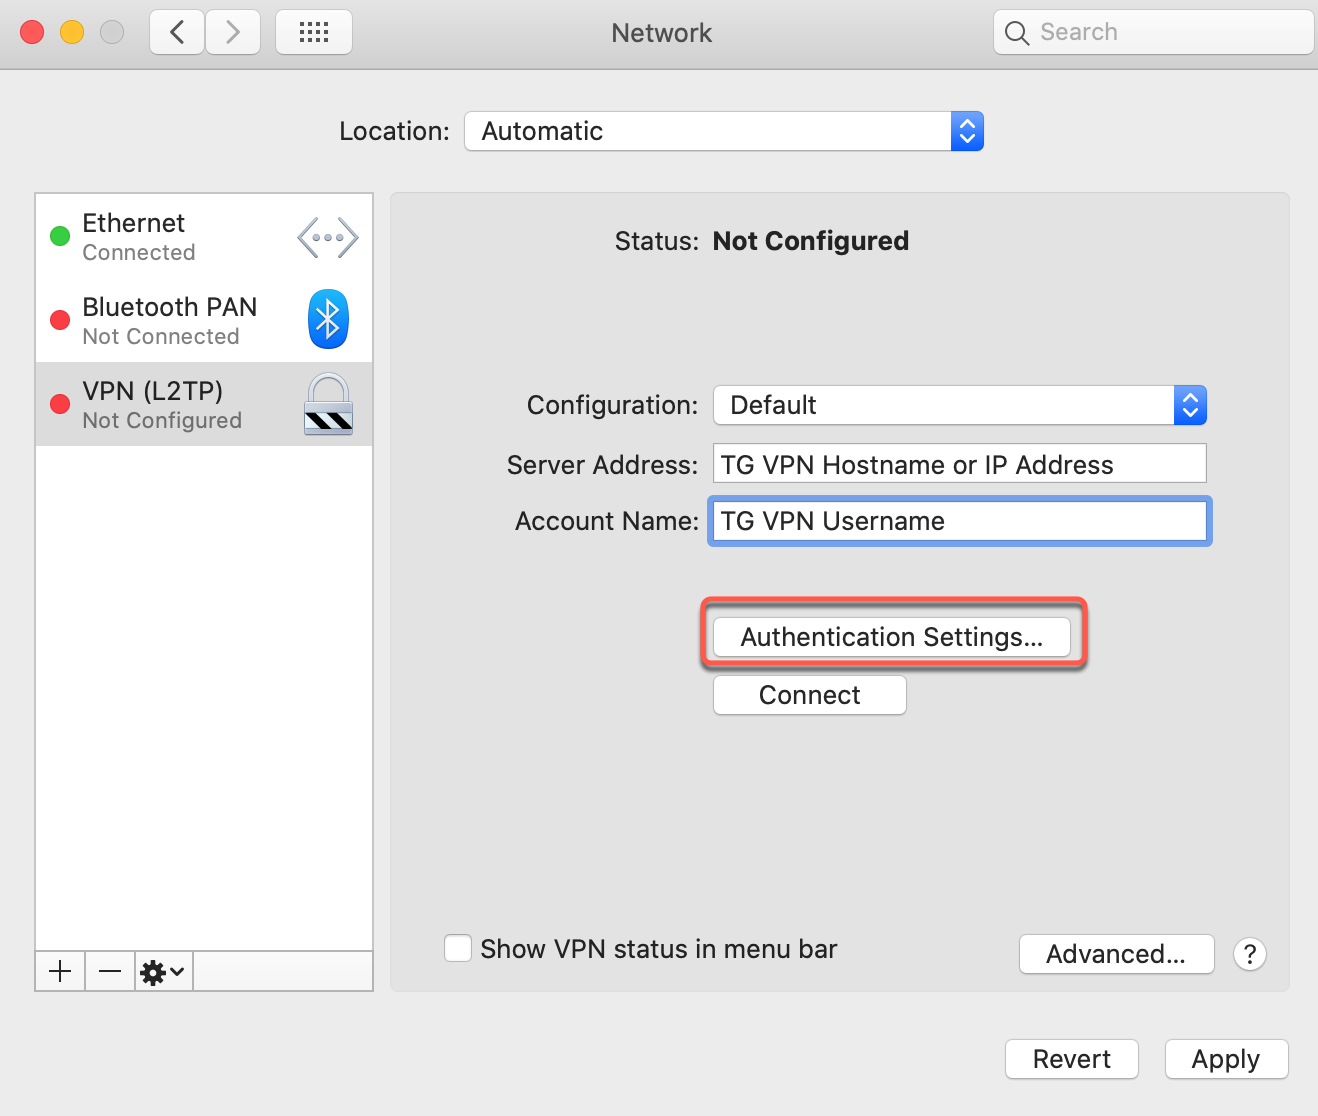
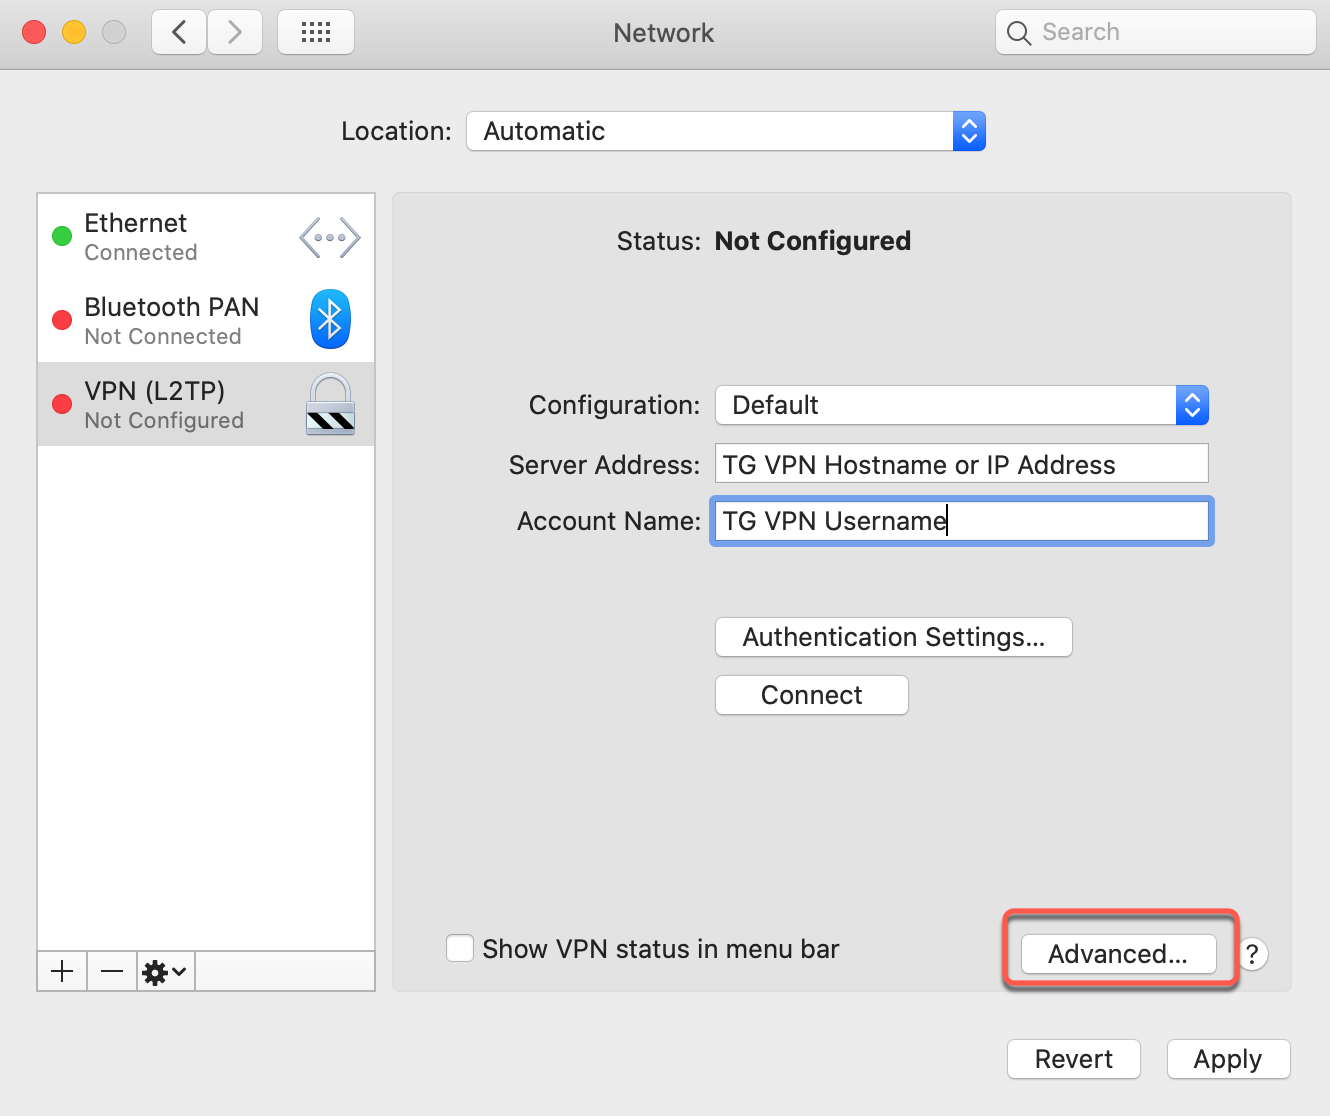
Step 4: Enter Server Details
Configure Connection
| Server Address: | Enter TorGuard server (e.g., uk.torguard.com) See full server list |
| Account Name: | Your VPN username |
After entering details, click Authentication Settings...
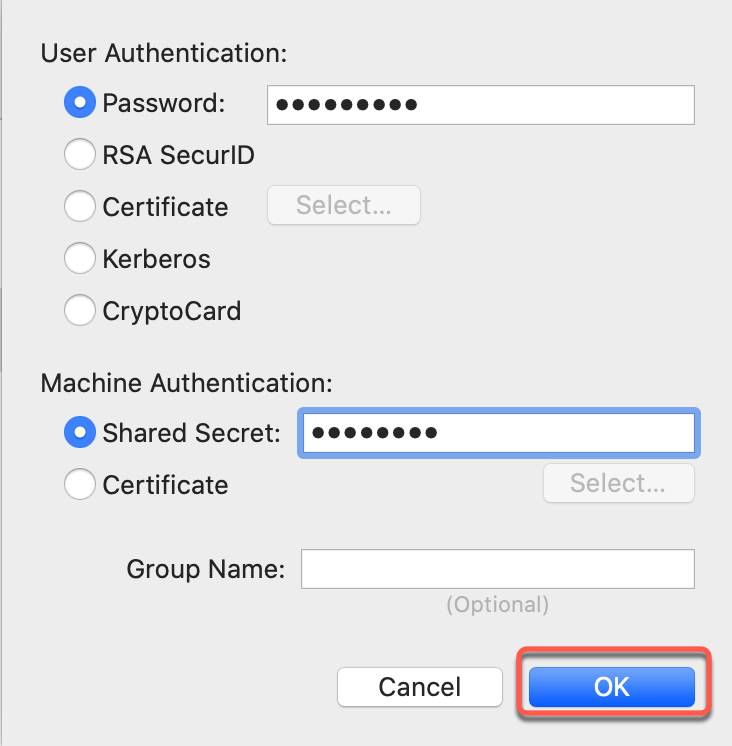
Step 5: Configure Authentication
Set Password and Shared Secret
User Authentication:
- Password: Enter your VPN password
Machine Authentication:
- Shared Secret: Enter
torguard
Click OK to save authentication settings.
The shared secret is always "torguard" (lowercase) for all TorGuard servers.
Step 6: Apply Settings
Save Configuration
Click Apply to save your VPN configuration.

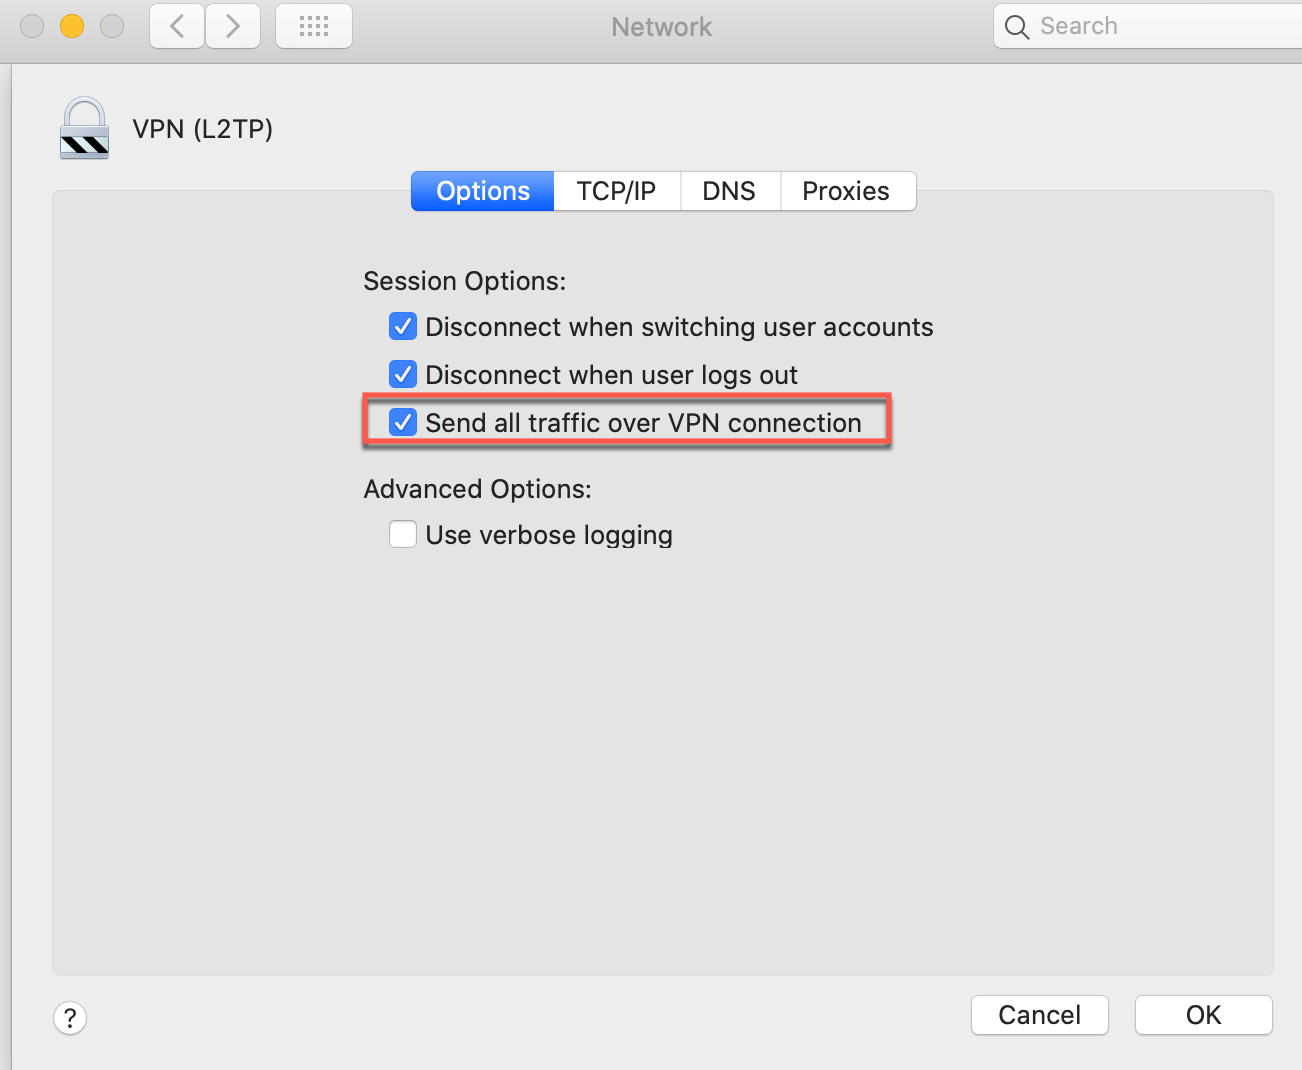
Step 7: Configure Advanced Settings
Route All Traffic
- Click Advanced... button
- In the Options tab, check "Send all traffic over VPN connection"
- Click OK
This ensures all internet traffic goes through the VPN, preventing leaks.
Step 8: Final Configuration
Complete Setup
Click Apply again to save the advanced settings.

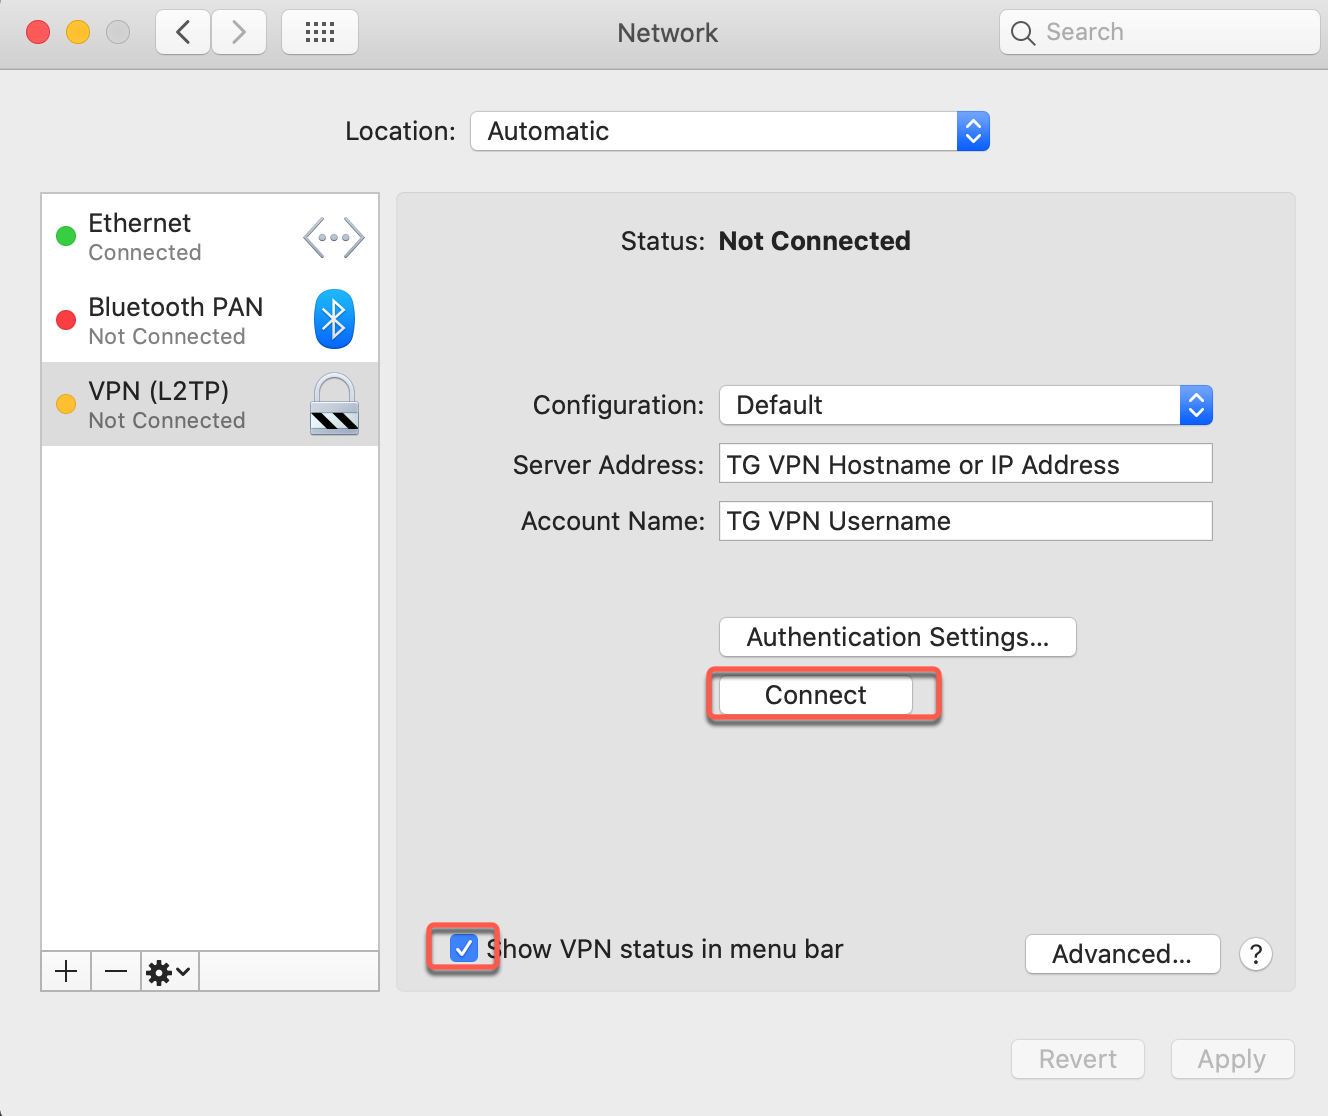
Step 9: Connect to VPN
Establish Connection
- Ensure "Show VPN status in menu bar" is checked
- Click Connect button
- Wait for connection to establish
You can also connect/disconnect using the VPN icon in the menu bar.
Verify Your Connection
Connection Status
When connected successfully:
- VPN icon appears in menu bar with timer
- Status shows "Connected" in Network preferences
- Your IP address changes to VPN server location
Verify your new IP at TorGuard IP Check
Troubleshooting
Connection Failed
- Verify server address is correct and active
- Check username/password (use VPN credentials)
- Ensure shared secret is exactly "torguard"
- Try a different server location
- Check if L2TP is blocked on your network
No Internet After Connecting
- Verify "Send all traffic over VPN" is enabled
- Try disconnecting and reconnecting
- Check DNS settings in Network preferences
- Flush DNS cache:
sudo dscacheutil -flushcache
Frequent Disconnections
- Check your internet connection stability
- Try TCP-based protocols (OpenVPN TCP)
- Disable sleep mode when on VPN
- Check Energy Saver settings
L2TP Blocked
Some networks block L2TP. Try these alternatives:
- Use IKEv2 (built-in, similar setup)
- Switch to OpenVPN on port 443
- Use WireGuard for better performance
- Try TorGuard's stealth VPN options
Advanced Configuration
Optional Settings
1. On-Demand Connection
Configure VPN to connect automatically:
- In Advanced settings, click "Options" tab
- Configure on-demand rules
- Set trusted networks where VPN isn't needed
2. DNS Configuration
Use custom DNS servers:
- Click Advanced → DNS tab
- Add DNS servers: 8.8.8.8, 8.8.4.4
- Or use Cloudflare: 1.1.1.1, 1.0.0.1
3. Split Tunneling
Route specific traffic outside VPN:
- Uncheck "Send all traffic over VPN"
- Add specific routes in Advanced settings