OpenVPN CLI Setup for Debian-based Linux
This guide covers OpenVPN setup via command line for Debian, Ubuntu, Linux Mint, and other Debian-based distributions. Perfect for servers, headless systems, or users who prefer terminal-based configuration.
Prerequisites
System Requirements:
- Debian-based Linux distribution (Debian, Ubuntu, Mint, Pop!_OS, etc.)
- Root or sudo access to install packages and modify system files
- TorGuard VPN account with active subscription
- Terminal access (local or SSH)
Step 1: Install OpenVPN Package
Install Required Software
Open your terminal and install the OpenVPN package using apt:
sudo apt install openvpn
This command works on all Debian-based distributions including Ubuntu 20.04/22.04, Debian 11/12, and Linux Mint.
Step 2: Download Configuration Files
Get TorGuard Config Files
Navigate to the OpenVPN directory and download the configuration files:
cd /etc/openvpn
sudo wget https://torguard.net/downloads/OpenVPN-TCP-Linux.zip
Step 3: Extract Configuration Files
Unzip Downloaded Files
Extract the configuration archive:
sudo unzip OpenVPN-TCP-Linux.zip
If you get "command not found", install unzip first:
sudo apt install unzip
Step 4: Move Files to OpenVPN Directory
Organize Configuration Files
Copy all configuration files to the main OpenVPN directory:
sudo cp /etc/openvpn/OpenVPN-TCP/* /etc/openvpn/
Step 5: Rename Configuration Files
Convert .ovpn to .conf
OpenVPN on Linux expects .conf extensions. Rename all .ovpn files:
sudo rename -v 's/\.ovpn/\.conf/' *.ovpn
If the rename command is not available, install it:
sudo apt install rename
Alternative Method (without rename command):
You can also rename files using a bash loop:
for file in *.ovpn; do sudo mv "$file" "${file%.ovpn}.conf"; done
Step 6: Connect to VPN
Establish VPN Connection
Connect to your chosen server by running:
sudo openvpn USA-MIAMI.conf
Replace USA-MIAMI.conf with your preferred server location.
Available Server Locations:
To list all available configurations:
ls /etc/openvpn/*.conf
Authentication: You'll be prompted for your TorGuard VPN username and password. These are different from your website login credentials.
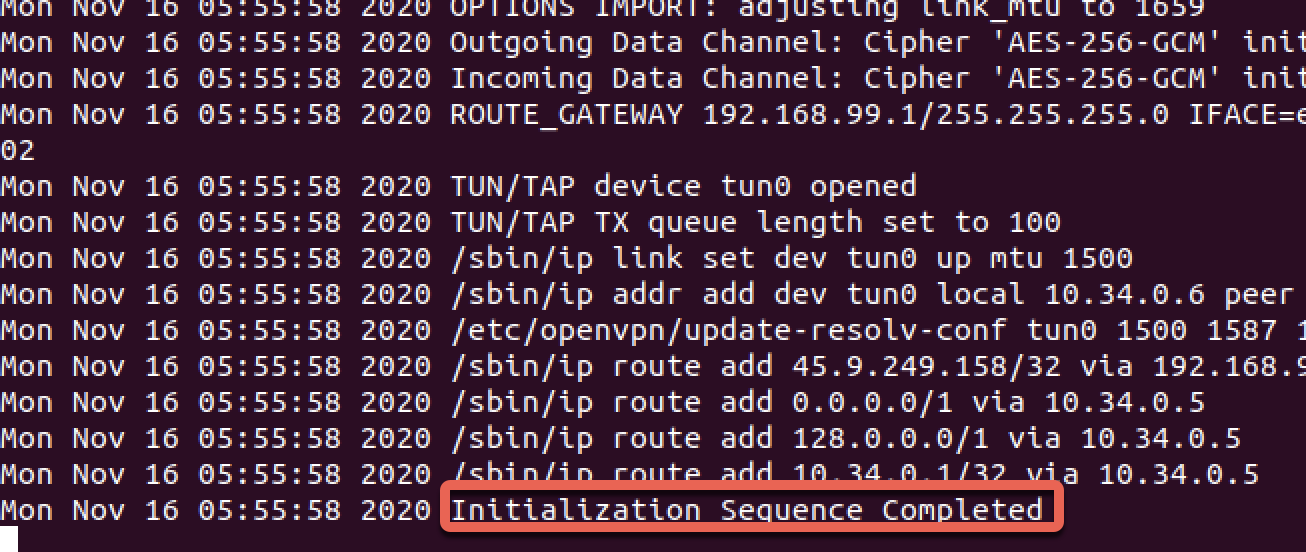
Successful Connection
Verify Your Connection
A successful connection will display:
- "Initialization Sequence Completed"
- Your new VPN IP address
- No error messages
Advanced Configuration
Optional Enhancements
1. Save Credentials (Auto-login)
To avoid entering credentials each time:
- Create a credentials file:
sudo nano /etc/openvpn/auth.txt - Add your credentials (username on first line, password on second)
- Secure the file:
sudo chmod 600 /etc/openvpn/auth.txt - Edit your .conf file and add:
auth-user-pass /etc/openvpn/auth.txt
2. Run as Background Service
To run OpenVPN in the background:
sudo openvpn --daemon --config /etc/openvpn/USA-MIAMI.conf
3. Enable Auto-start on Boot
To start VPN automatically on system boot:
sudo systemctl enable openvpn@USA-MIAMI
Troubleshooting
Connection Timeout
- Try TCP configs instead of UDP
- Check firewall settings:
sudo ufw status - Verify internet connectivity
- Try a different server location
Authentication Failed
- Use VPN credentials, not website login
- Check credentials at TorGuard client area
- Ensure no extra spaces in username/password
- Reset VPN password if needed
DNS Issues
- Add DNS configuration to .conf file:
dhcp-option DNS 8.8.8.8 - Install resolvconf:
sudo apt install resolvconf
Useful Commands
Quick Reference
| Check VPN status: | ip addr show tun0 |
| Check public IP: | curl ifconfig.me |
| Stop OpenVPN: | sudo killall openvpn |
| View logs: | sudo journalctl -u openvpn |