Native macOS SSH Tunneling
Use macOS's built-in SSH client and networksetup command to create a secure SOCKS5 proxy tunnel without installing any third-party software. This method provides system-wide proxy coverage for all applications.
Understanding SSH Tunneling
What is SSH Tunneling?
SSH tunneling creates an encrypted connection between your Mac and TorGuard's servers, functioning as a SOCKS5 proxy that routes all your internet traffic through a secure channel.
Key Benefits:
- Encryption: All traffic is encrypted using SSH protocol
- Firewall bypass: Works on restricted networks
- No software needed: Uses macOS built-in tools
- System-wide coverage: Protects all applications
Prerequisites
Before You Begin
- Active TorGuard Premium Proxy account
- macOS with Terminal access
- Your TorGuard proxy username and password
- SSH access enabled on your desired server
Step 1: Enable SSH Access on TorGuard Server
Activate SSH Service
- Login to your TorGuard account
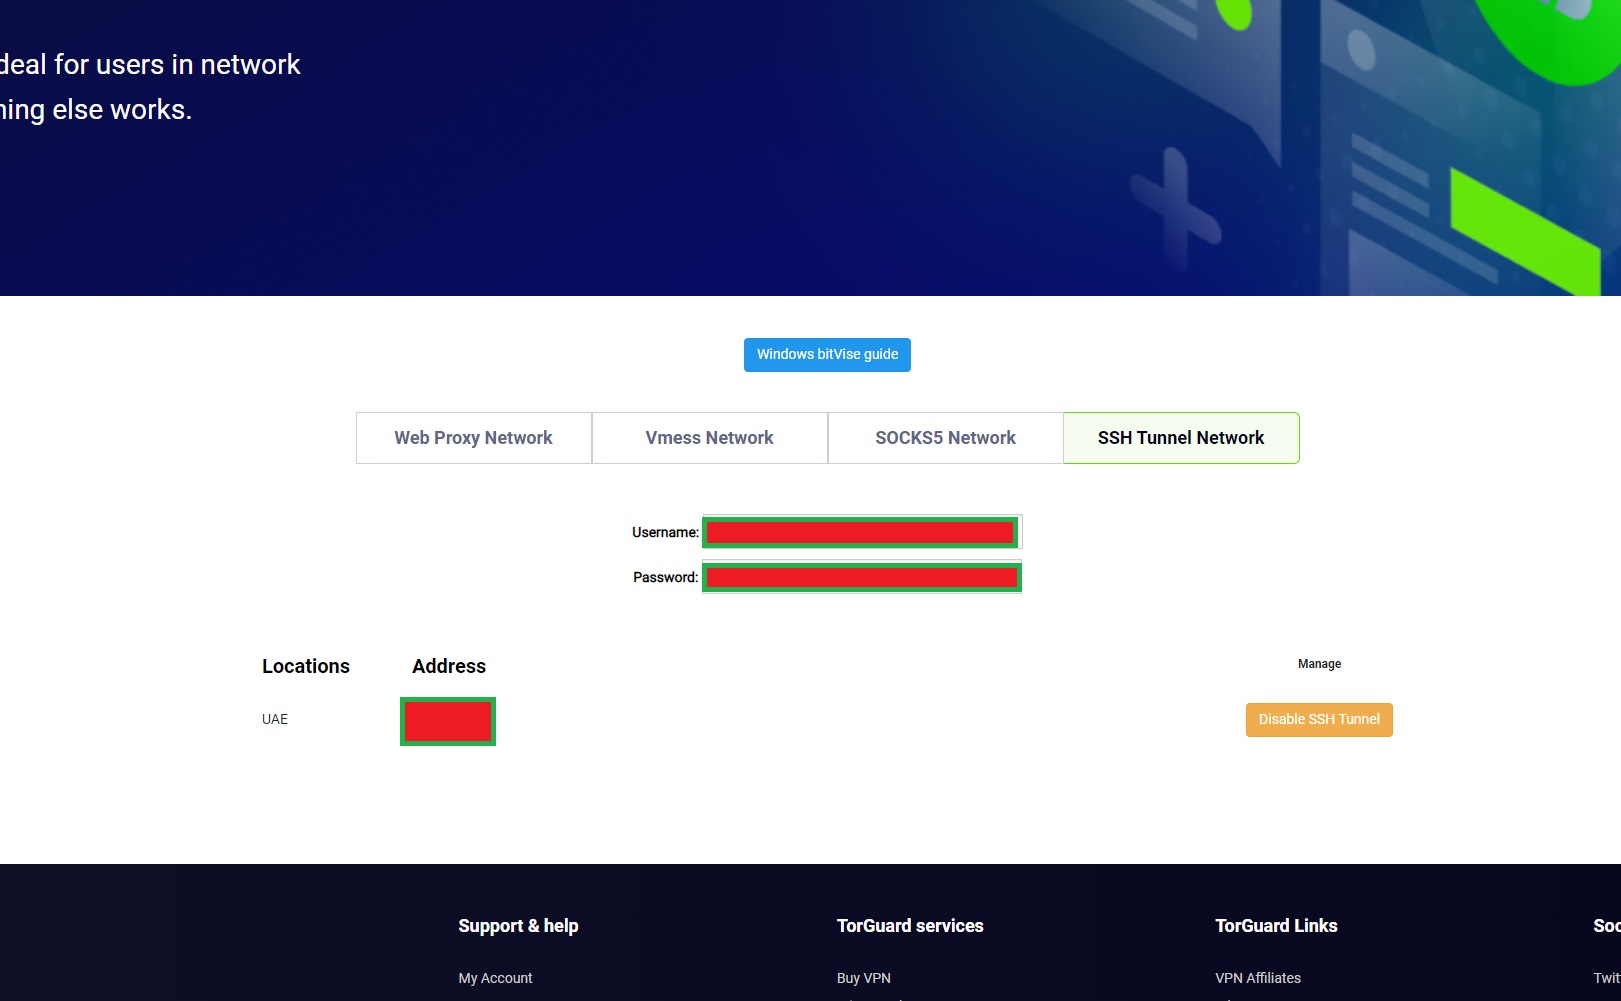
- Navigate to the SSH Tunnel Network page
- Enable SSH access on your desired server location
- Note down:
- Your proxy username
- Your proxy password
- The server IP address or hostname
Step 2: Configure Browser Settings
Browser Proxy Configuration
Safari
Uses system proxy automatically - no configuration needed!
Chrome
Uses system proxy automatically - no configuration needed!
Firefox
Requires manual configuration: Settings → Network Settings → Use system proxy settings. Detailed guide
Step 3: Create SSH Tunnel Connection
Open Terminal and Connect
- Open Terminal: Applications → Utilities → Terminal
- Run the following command (replace with your details):
ssh -N -D9443 username@ssh-server-ip
Command Breakdown:
ssh- The SSH client command-N- Don't execute remote commands (forwarding only)-D9443- Create SOCKS5 proxy on local port 9443username- Your TorGuard proxy usernamessh-server-ip- TorGuard server IP or hostname
Example:
ssh -N -D9443 [email protected]
- Enter your proxy password when prompted
- Keep this Terminal window open! The connection remains active only while Terminal is running
Step 4: Enable System-Wide Proxy
Configure macOS Network Settings
- Open a new Terminal window (keep the SSH connection running in the first one)
- Run this command to enable the SOCKS proxy:
networksetup -setsocksfirewallproxy wi-fi 127.0.0.1 9443
Network Interface Names
The command above uses wi-fi for wireless connections. For different interfaces, use:
ethernet- For wired connectionsthunderbolt ethernet- For Thunderbolt adapters- Run
networksetup -listallnetworkservicesto see all available interfaces
Step 5: Verify Your Connection
Check Your IP Address
Visit TorGuard's IP Check Tool to verify:
- Your IP has changed to the proxy server location
- Your real IP and location are hidden

Step 6: Disconnect and Disable
How to Disconnect
1. Disable System Proxy
Run this command in Terminal:
networksetup -setsocksfirewallproxystate wi-fi off
2. Close SSH Connection
In the Terminal window running the SSH connection:
- Press Ctrl + C to terminate the connection
- Or simply close the Terminal window
Advanced Configuration
Additional SSH Options
Compression for Better Performance:
ssh -N -C -D9443 username@ssh-server-ip
-C enables compression, useful for slower connections
Keep Connection Alive:
ssh -N -D9443 -o ServerAliveInterval=60 username@ssh-server-ip
Sends keepalive packets every 60 seconds to prevent disconnection
Use Different Port:
ssh -N -D8080 username@ssh-server-ip
Change 9443 to any available port (remember to update networksetup command too)
Automation Scripts
Create Connection Scripts
Connect Script (connect-ssh.sh):
#!/bin/bash
# TorGuard SSH Tunnel Connect Script

# Configuration
USERNAME="your_username"
SERVER="server-ip"
LOCAL_PORT="9443"

# Create SSH tunnel
echo "Creating SSH tunnel..."
ssh -N -D$LOCAL_PORT $USERNAME@$SERVER &
SSH_PID=$!

# Wait for connection
sleep 3

# Enable system proxy
echo "Enabling system proxy..."
networksetup -setsocksfirewallproxy wi-fi 127.0.0.1 $LOCAL_PORT

echo "Connected! SSH PID: $SSH_PID"
echo "To disconnect, run: ./disconnect-ssh.sh"
Disconnect Script (disconnect-ssh.sh):
#!/bin/bash
# TorGuard SSH Tunnel Disconnect Script

# Disable proxy
echo "Disabling system proxy..."
networksetup -setsocksfirewallproxystate wi-fi off

# Kill SSH processes
echo "Closing SSH connections..."
pkill -f "ssh -N -D"

echo "Disconnected!"
Make scripts executable: chmod +x connect-ssh.sh disconnect-ssh.sh
Troubleshooting Common Issues
Connection Refused
- Verify SSH is enabled on the TorGuard server
- Check username and password are correct
- Try a different server location
- Ensure port 22 (SSH) isn't blocked by your firewall
Proxy Not Working
- Confirm the SSH tunnel is still running (check Terminal)
- Verify networksetup command used correct interface name
- Check Firefox is set to use system proxy
- Try disabling and re-enabling the proxy
Connection Drops
- Use ServerAliveInterval option to maintain connection
- Check your internet connection stability
- Try compression option (-C) for unstable connections
- Consider using autossh for automatic reconnection
Security Best Practices
Stay Secure
- Use strong passwords: Ensure your TorGuard proxy password is complex
- Verify server fingerprint: Accept SSH fingerprint only on first connection
- Close unused connections: Always disconnect when not in use
- Monitor active connections: Use
netstat -an | grep 9443to check - Use kill switch: Create scripts to ensure proxy is disabled if SSH drops
Pro Tips
- Multiple tunnels: Create tunnels to different servers on different ports
- Background process: Use
screenortmuxto keep SSH running - Keychain integration: Store passwords securely in macOS Keychain
- Launch agent: Create a launchd service for automatic connection on startup
- Network locations: Use macOS Network Locations to quickly switch proxy settings