This tutorial will show in a few easy steps how to set up a secure SSH tunnel using NetMod and TorGuard SSH tunnel for Premium Proxy service owners. SSH tunneling creates an encrypted connection that can bypass network restrictions and provide secure access.
What is SSH Tunneling?
SSH (Secure Shell) tunneling creates an encrypted tunnel between your device and a remote server. All traffic passing through this tunnel is encrypted and appears as SSH traffic, making it excellent for bypassing firewalls and securing connections.
Strong Encryption
Military-grade encryption for all tunneled traffic
Firewall Bypass
SSH is rarely blocked, even in restrictive networks
Traffic Obfuscation
All traffic appears as standard SSH
Low Latency
Minimal overhead for fast connections
🚀 Why Use SSH Tunneling?
- Bypass strict firewalls and content filters
- Secure connections on public WiFi
- Access blocked websites and services
- Protect against network sniffing
- Works where VPNs are blocked
- Creates SOCKS5 proxy for any application
Prerequisites
Before you begin, ensure you have:
- Windows 7 or later
- Active TorGuard Premium Proxy subscription
- TorGuard Premium Proxy username and password
- Internet connection
- Administrator access (for installation)
⚠️ Important: SSH tunnel access is only available with TorGuard Premium Proxy service, not standard VPN subscriptions.
SSH Tunnel vs Other Methods
| Feature | SSH Tunnel | VPN | HTTPS Proxy | VMess |
|---|---|---|---|---|
| Firewall Bypass | ✅ Excellent | ⚠️ Often blocked | ✅ Good | ✅ Excellent |
| Speed | ✅ Fast | ✅ Good | ✅ Fast | ✅ Very Fast |
| Encryption | ✅ Strong | ✅ Strong | ⚠️ HTTPS only | ✅ Strong |
| Port | 22 (rarely blocked) | Various | 443 | Various |
| Setup Complexity | ✅ Simple | ✅ Simple | ✅ Very Simple | ⚠️ Moderate |
Installation and Configuration
Step 1a: Enable SSH Access
First, enable SSH access on your desired server by visiting your control panel here.
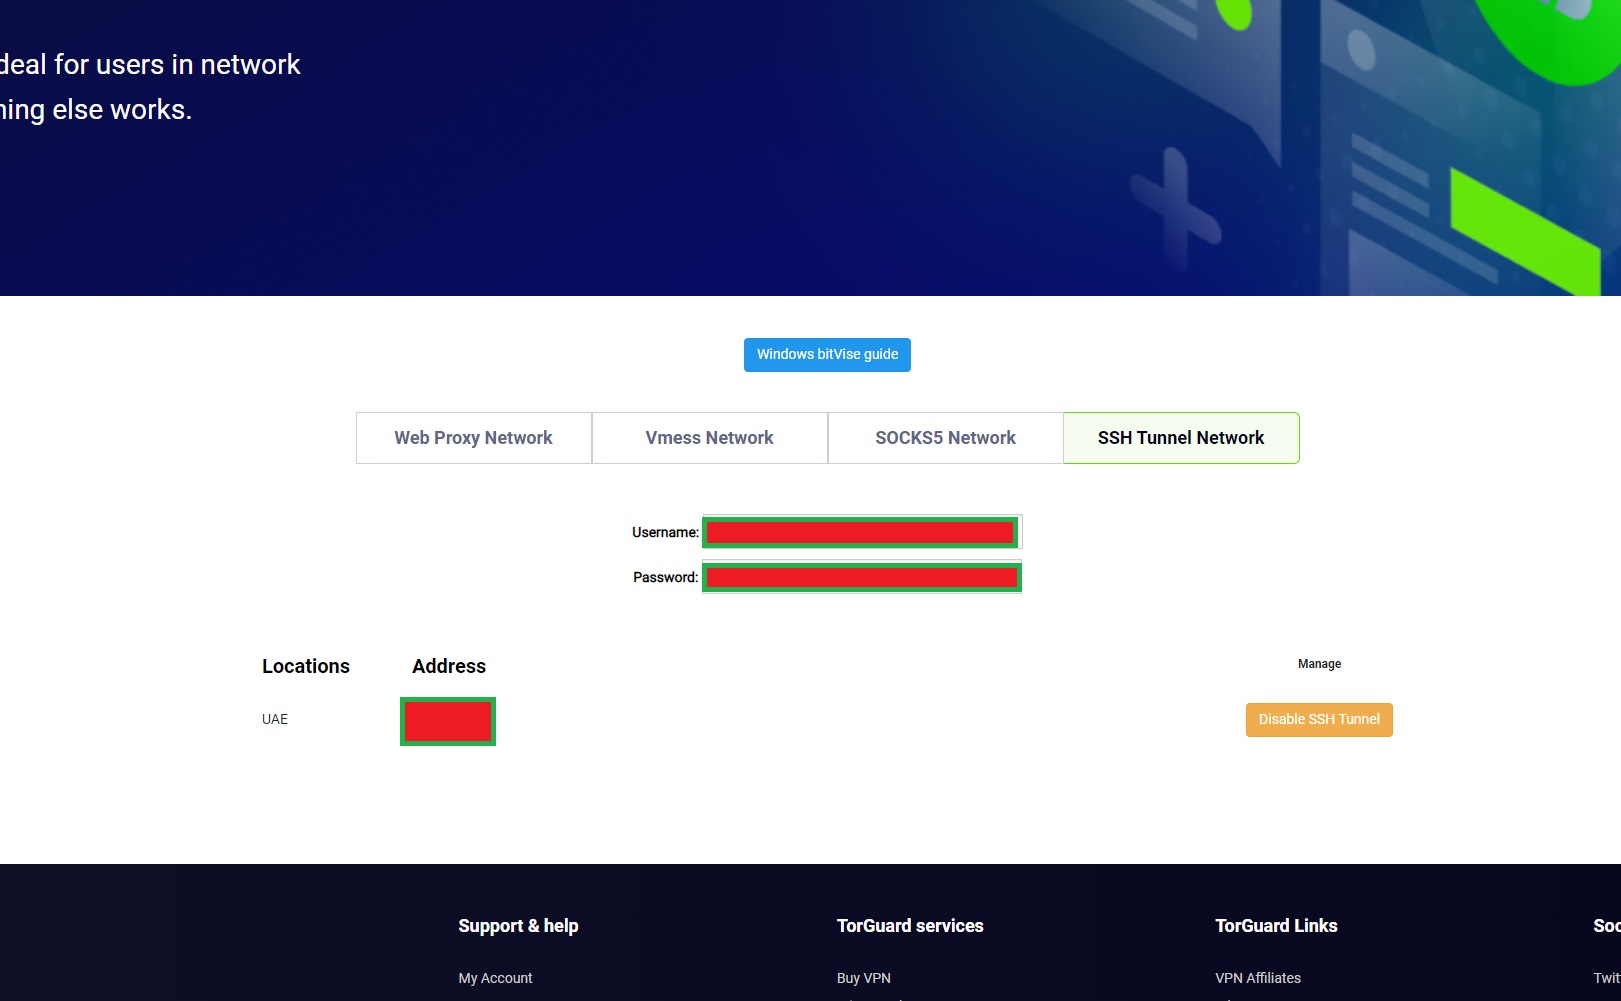
📝 SSH Activation: After enabling SSH, it may take a few minutes for the service to become active on your selected server.
Step 1b: Download NetMod
Download and install NetMod from this link:
https://sourceforge.net/projects/netmodhttp/
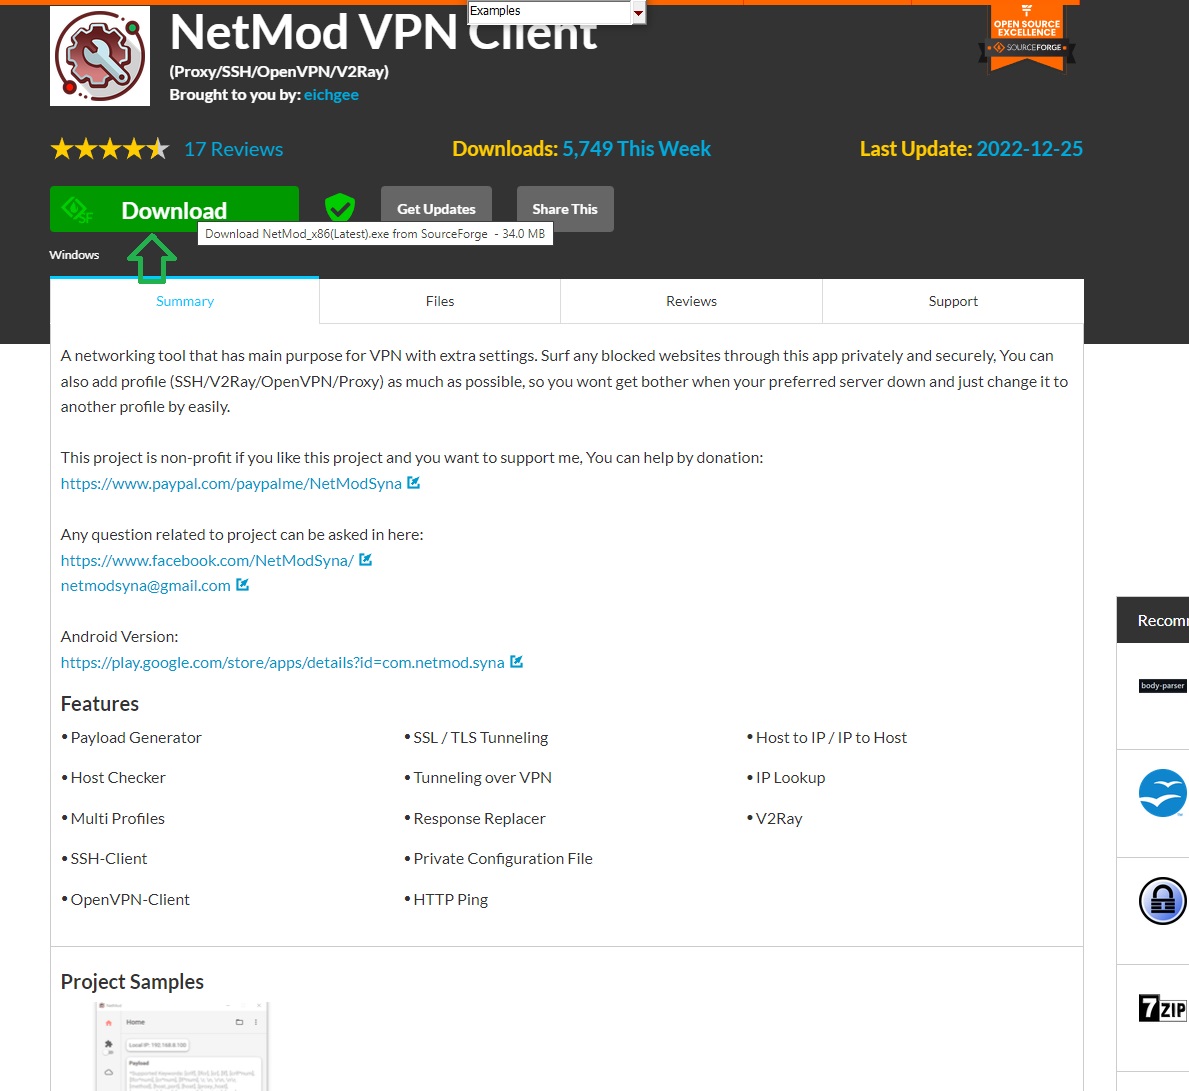
💡 About NetMod: NetMod is a lightweight SSH client that creates a SOCKS5 proxy on your local machine, allowing any application to use the SSH tunnel.
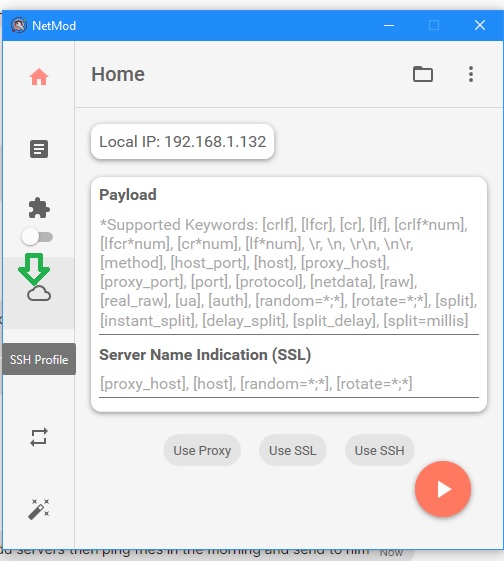
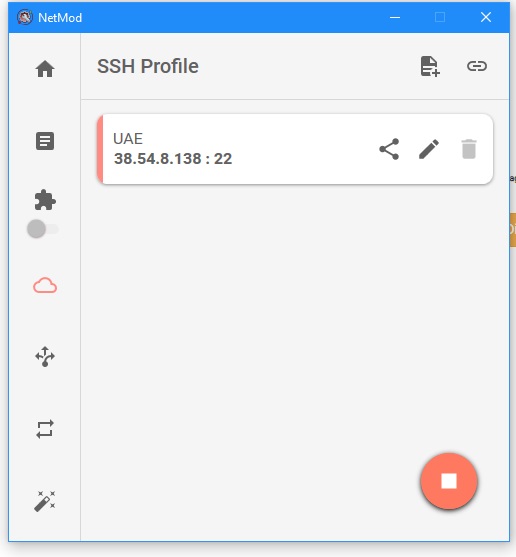
Step 2: Open NetMod
After installation, open NetMod. Click the cloud icon and then click the + add icon in the top right as shown below.

Step 3: Configure SSH Connection
Fill in the fields:
- Host: Select the SSH Tunnel IP from the SSH page
- Port: 22
- Username: Your TorGuard Premium Proxy Username
- Password: Your TorGuard Premium Proxy Password
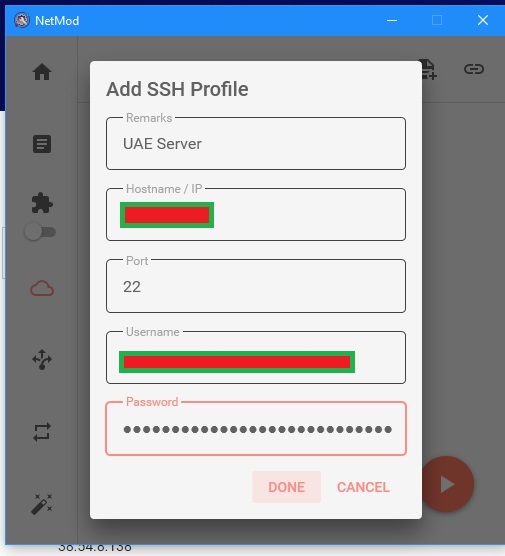
🔑 Credentials: Use your Premium Proxy credentials, not your main TorGuard account login. These can be managed at managecredentials.php
Step 4: Save Configuration
Click "Done" to save your SSH tunnel configuration.
Step 5: Connect to SSH Tunnel
Finally, click the "Play" button to connect to the SSH tunnel.
✅ Connected! NetMod will create a local SOCKS5 proxy on port 1080 that routes through the SSH tunnel.
Step 6: Verify Connection
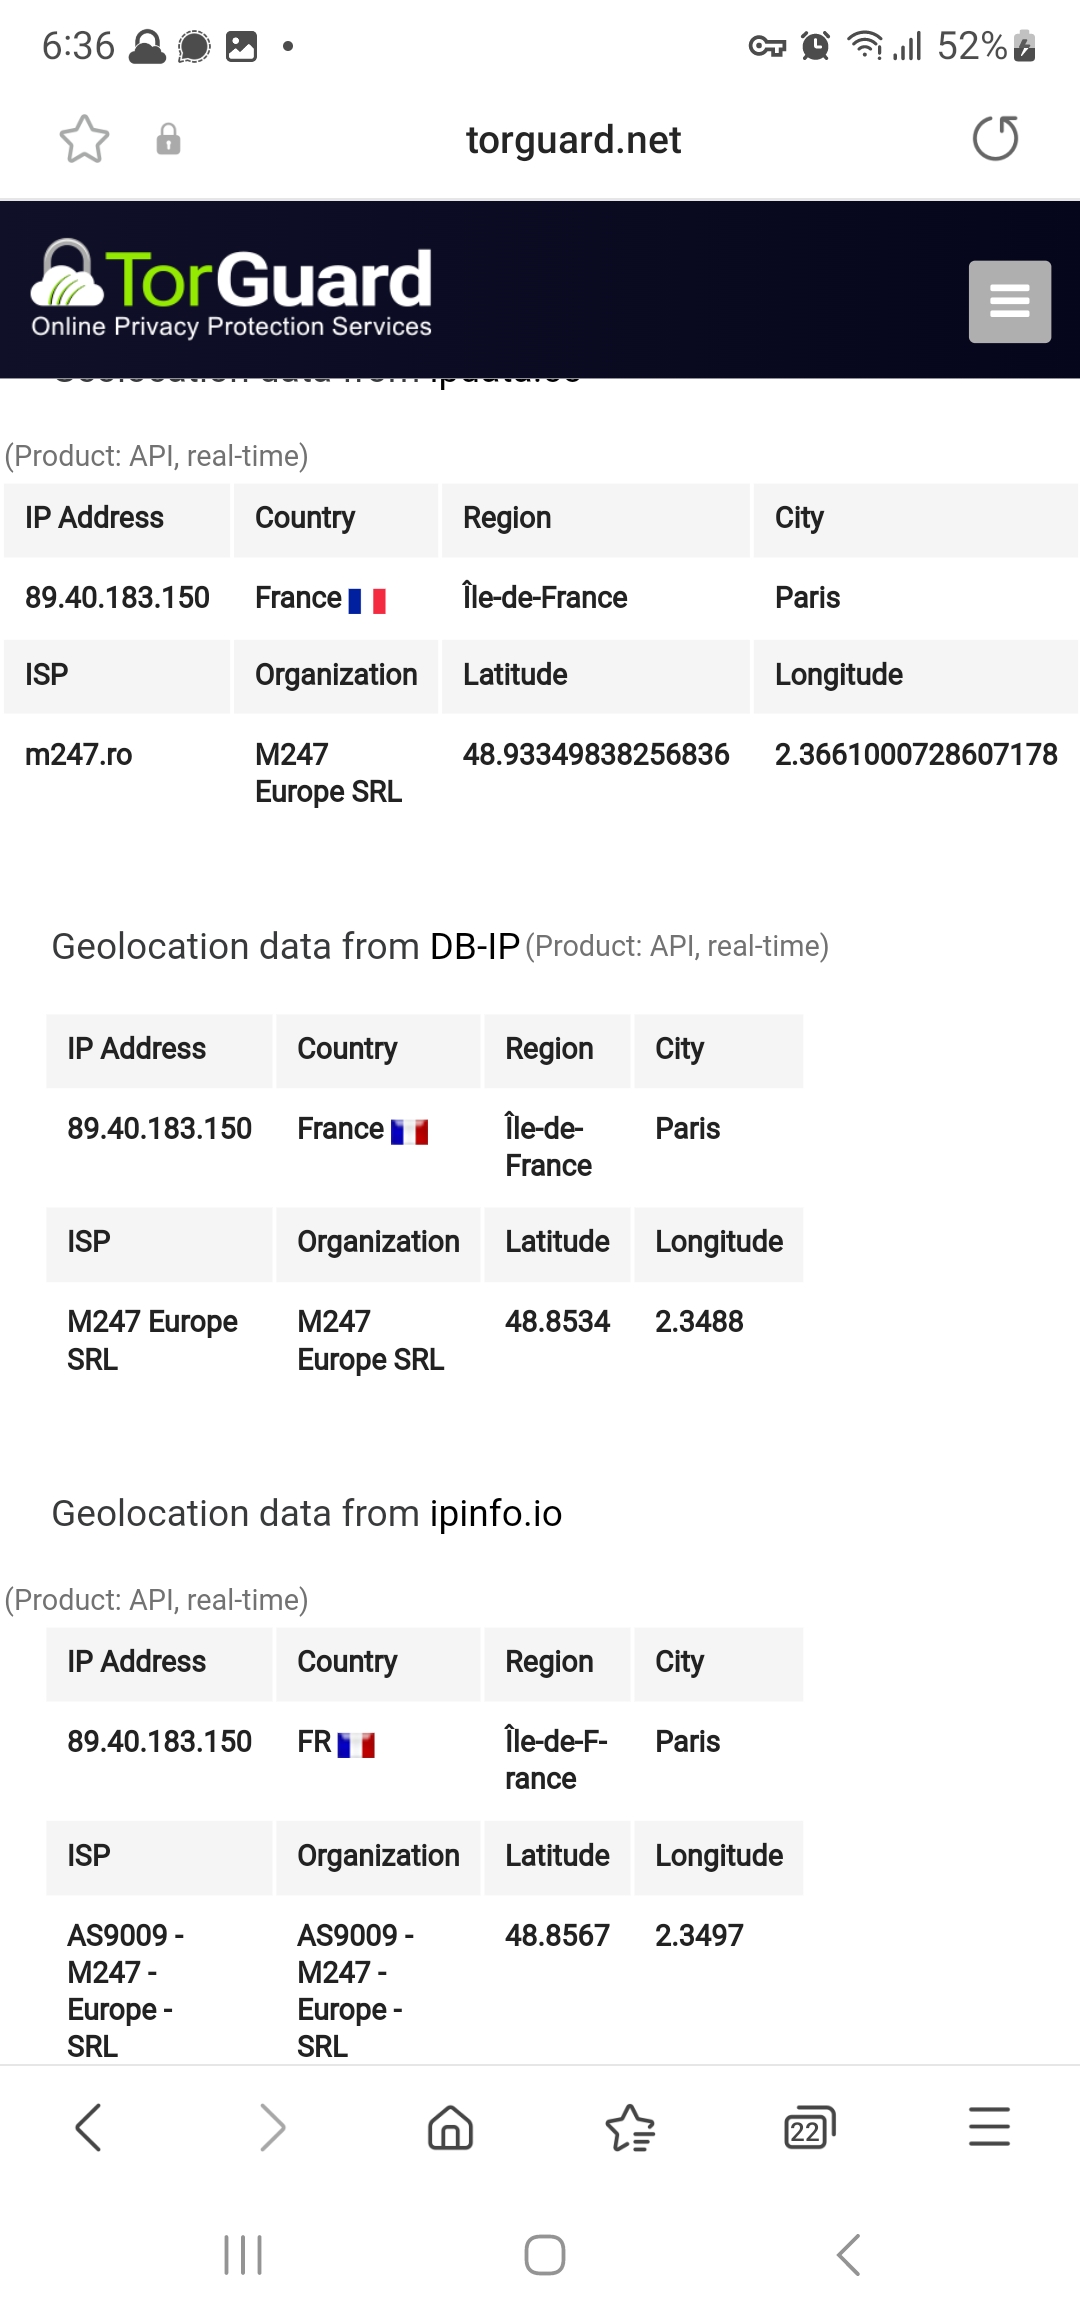
Check your IP in a browser by visiting https://torguard.net/whats-my-ip.php
💡 Browser Configuration: You'll need to configure your browser to use the SOCKS5 proxy at 127.0.0.1:1080 to route traffic through the SSH tunnel.
NetMod Features
🌐 Local SOCKS5 Proxy
NetMod creates a SOCKS5 proxy on your local machine:
- Default address: 127.0.0.1
- Default port: 1080
- Supports SOCKS5 authentication
- Works with any SOCKS5-compatible app
🔧 Connection Management
- Save multiple server profiles
- Quick connect/disconnect
- Auto-reconnect on failure
- Connection status indicators
⚡ Performance Options
- Compression support
- Keep-alive settings
- Custom SSH options
- Port forwarding capabilities
🛡️ Security Features
- Strong SSH encryption
- Public key authentication support
- No traffic logs
- Secure credential storage
Configure Your Browser
To use the SSH tunnel, configure your browser to use the SOCKS5 proxy:
🦊 Firefox Configuration
- Go to Settings → General → Network Settings
- Click "Settings" button
- Select "Manual proxy configuration"
- SOCKS Host: 127.0.0.1
- Port: 1080
- Select SOCKS v5
- Check "Proxy DNS when using SOCKS v5"
🌐 Chrome Configuration
Chrome uses system proxy by default. Either:
- Use a proxy extension like FoxyProxy
- Launch Chrome with command line:
chrome.exe --proxy-server="socks5://127.0.0.1:1080" - Configure Windows system proxy
Advanced SSH Tunnel Usage
🎯 Application-Specific Proxy
Configure individual applications to use the tunnel:
- Torrent clients: Set SOCKS5 proxy to 127.0.0.1:1080
- Telegram: Settings → Advanced → Connection type → SOCKS5
- Games: Check for proxy settings in network options
- Command line tools: Use proxychains or similar
🔀 Port Forwarding
SSH tunnels support various forwarding types:
- Local port forwarding (-L)
- Remote port forwarding (-R)
- Dynamic port forwarding (-D)
- X11 forwarding for GUI apps
⚙️ Custom SSH Options
- Compression:
-Cfor slow connections - Keep-alive:
ServerAliveInterval=60 - Specific cipher:
-c aes256-gcm - Verbose logging:
-vfor troubleshooting
Troubleshooting Common Issues
Connection Failed
Solution:
- Verify SSH is enabled for your server
- Check Premium Proxy credentials are correct
- Ensure port 22 isn't blocked by firewall
- Try different server location
- Check Windows Firewall settings
Browser Not Using Proxy
Solution:
- Verify NetMod shows connected status
- Check browser proxy settings
- Test with Firefox (easiest to configure)
- Disable other VPN/proxy software
- Clear browser cache and cookies
Slow Connection Speed
Solution:
- Try server closer to your location
- Enable compression in SSH settings
- Check base internet speed
- Close bandwidth-heavy applications
- Try different SSH cipher algorithms
Connection Drops Frequently
Solution:
- Enable keep-alive in NetMod settings
- Check for network stability issues
- Disable power saving for network adapter
- Try TCP over HTTP if available
- Update NetMod to latest version
Security Best Practices
🔐 SSH Security
- Use strong passwords
- Consider key-based authentication
- Keep NetMod updated
- Monitor active connections
💻 System Security
- Use Windows Firewall
- Keep Windows updated
- Scan downloads with antivirus
- Use secure DNS servers
🌐 Browsing Security
- Check for DNS leaks
- Use HTTPS websites
- Enable browser security features
- Clear cookies regularly
🔑 Account Security
- Protect SSH credentials
- Use unique passwords
- Enable 2FA on TorGuard
- Monitor account activity
Benefits of SSH Tunneling
🚀 Performance
- Low latency connections
- Minimal protocol overhead
- Compression support
- Efficient bandwidth usage
🛡️ Reliability
- SSH rarely blocked
- Stable connections
- Auto-reconnect capability
- Works in restrictive networks
Summary
You've successfully configured NetMod to create an SSH tunnel with TorGuard! This setup provides:
- ✅ Secure encrypted tunnel using SSH protocol
- ✅ Local SOCKS5 proxy for any application
- ✅ Excellent firewall bypass capabilities
- ✅ Simple setup and management
- ✅ Fast and reliable connections
- ✅ Works where VPNs are blocked