DD-WRT OpenVPN Setup
This guide shows you how to configure OpenVPN on DD-WRT routers using TorGuard's automated startup script generator. This protects all devices on your network with VPN encryption.
Prerequisites
Before You Begin:
- DD-WRT compatible router with recent firmware (build 25000 or higher recommended)
- Sufficient flash memory (8MB+ recommended for OpenVPN)
- TorGuard VPN account with active subscription
- VPN credentials (different from website login)
- Router admin access (username and password)
Important: Make sure your DD-WRT build supports OpenVPN. Check the DD-WRT database for your router model.
Step 1: Access DD-WRT Web Interface
Login to Router
- Open your web browser
- Enter your router's IP address (typically
192.168.1.1) - Login with your router admin credentials
Tip: If running multiple routers, change DD-WRT to a different IP (e.g., 192.168.2.1) to avoid conflicts.

Step 2: Navigate to Services Tab
Access VPN Settings
After logging in, click on the Services tab in the main navigation menu.
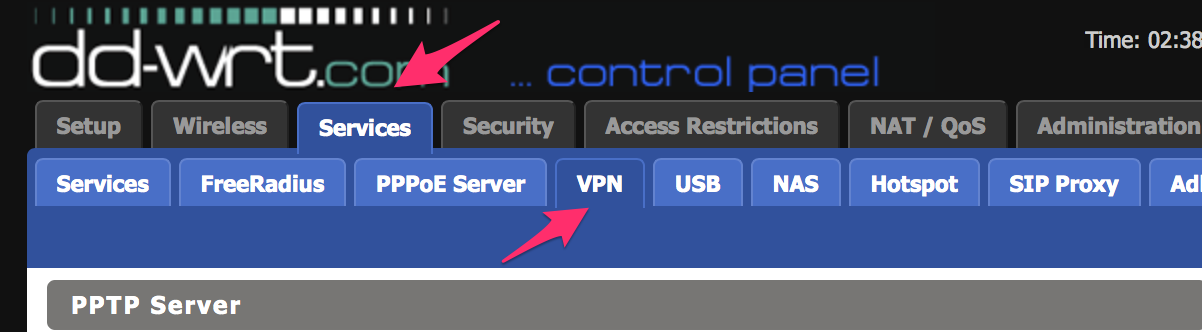
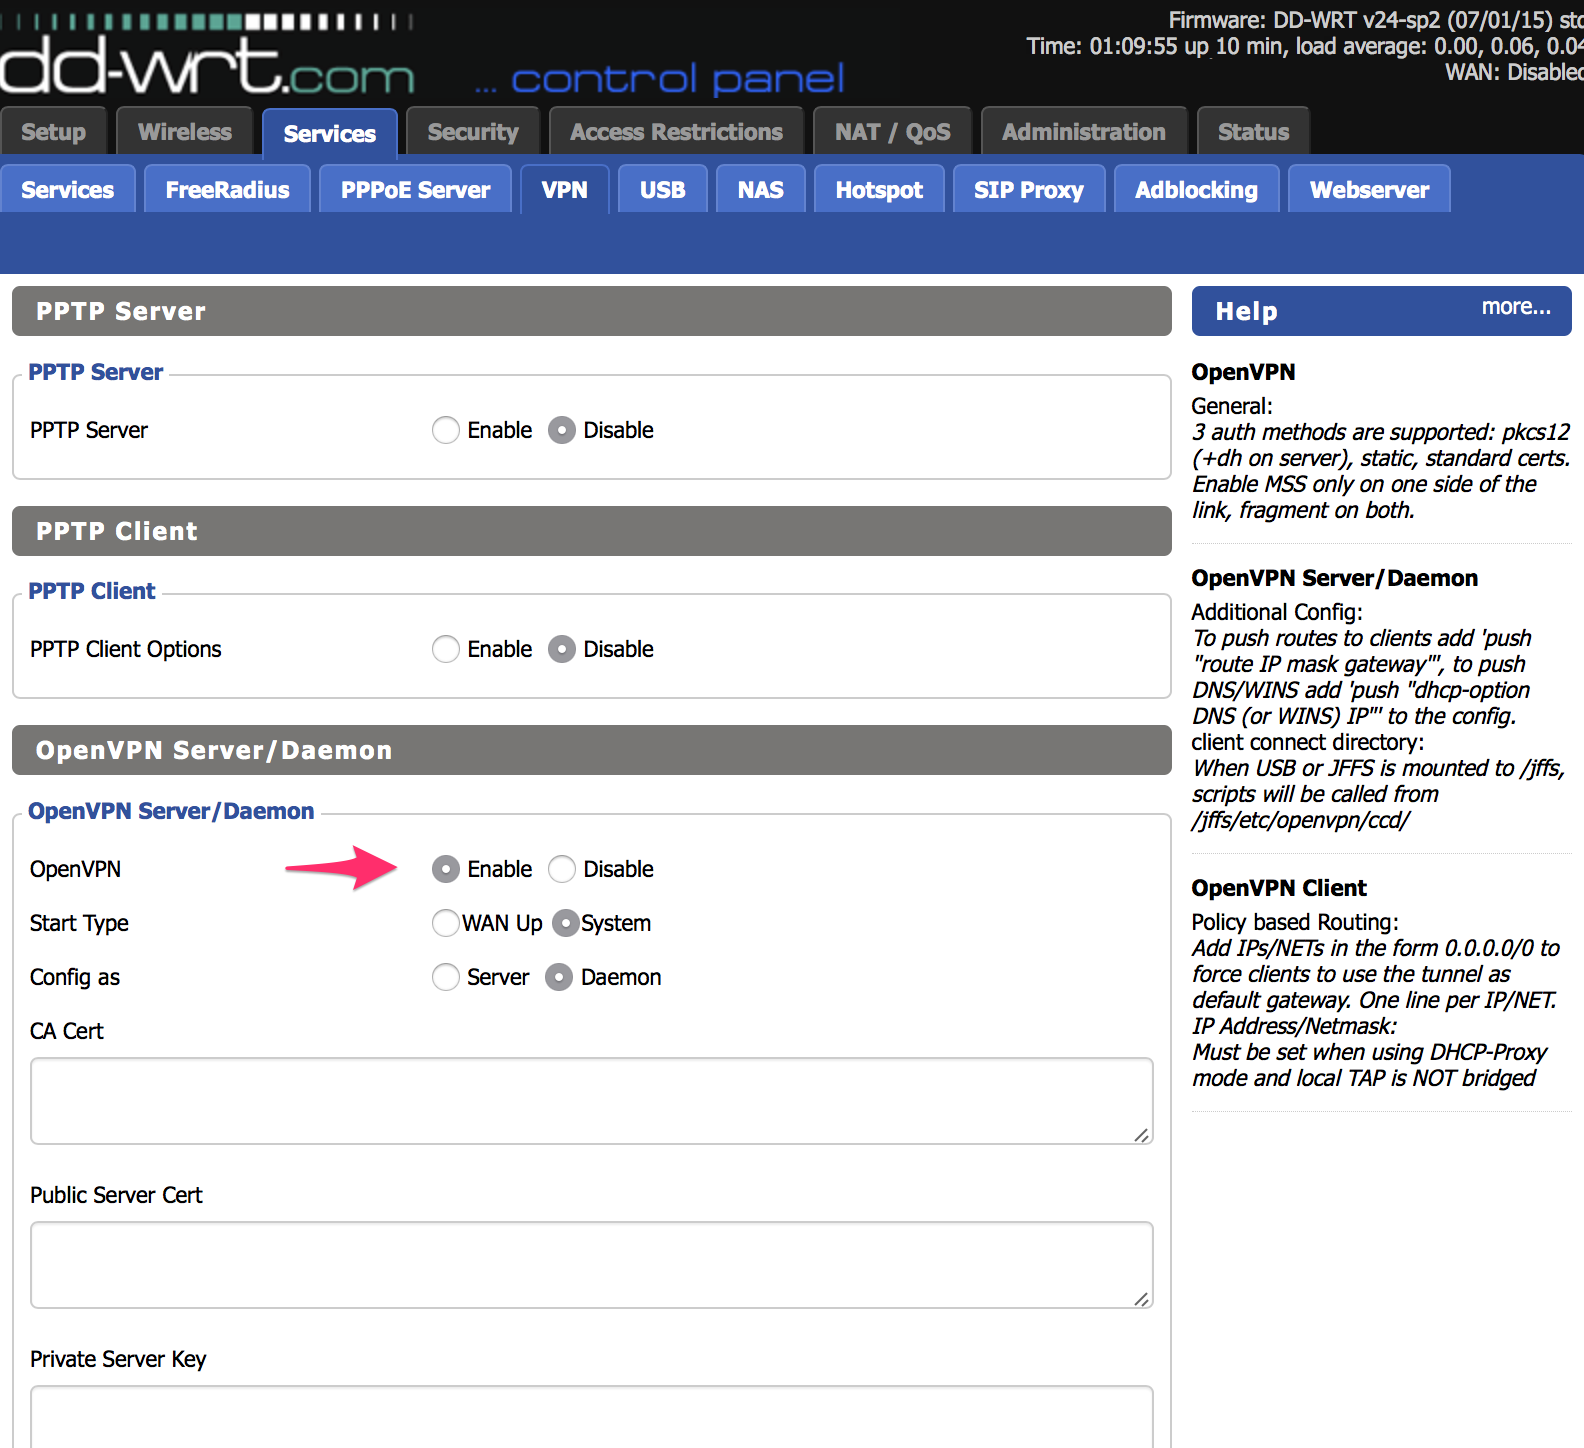
Step 3: Enable OpenVPN
Activate OpenVPN Service
- Click the VPN tab within Services
- Under OpenVPN Server/Daemon, click Enable
- Click Apply Settings
This enables the OpenVPN status page for monitoring your connection.
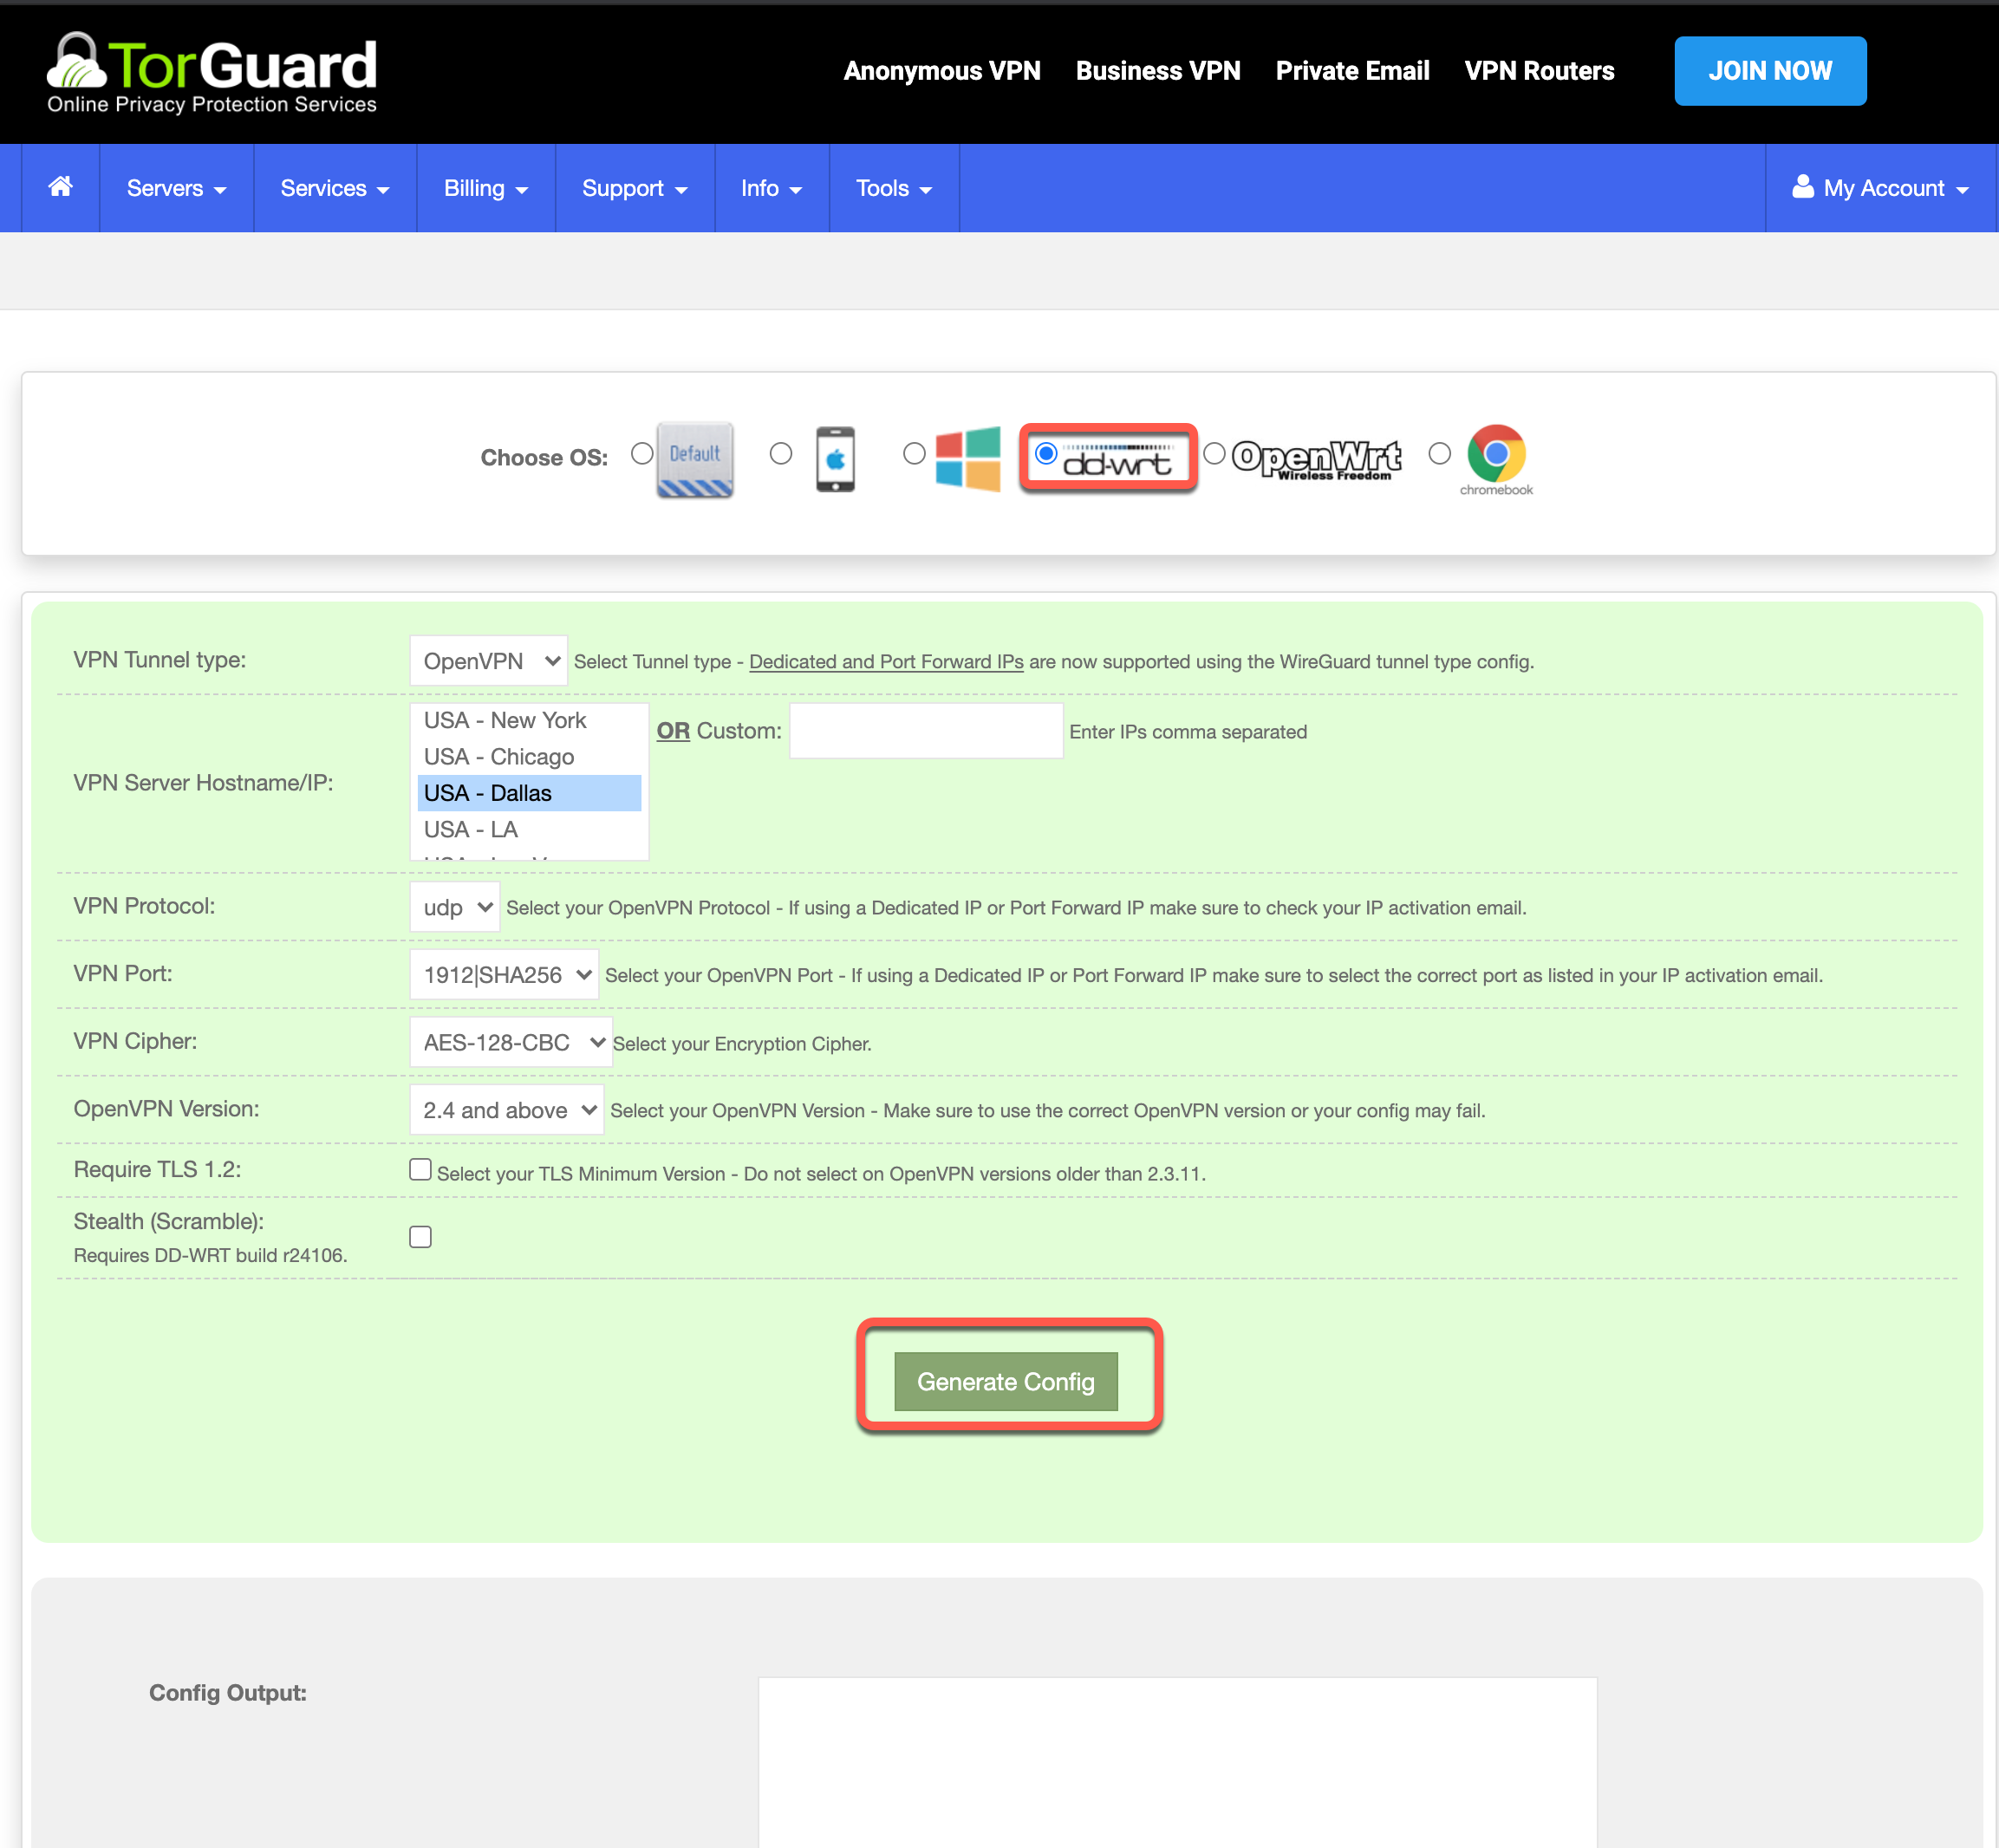
Step 4: Generate Startup Script
Create Configuration
- Go to Administration tab → Commands
- Visit TorGuard's Config Generator
- Configure the following options:
- Type: DD-WRT
- Server: Choose your preferred location
- Port: 443 (recommended) or 1194
- Protocol: TCP (more reliable) or UDP (faster)
- OpenVPN Version: 2.4 or higher
- Click Generate Config
Step 5: Apply Startup Script
Install Configuration
- Copy the entire generated script from the Config Output box
- Paste it into the Commands window in DD-WRT
- Replace
USERNAME-HEREwith your VPN username - Replace
PASSWORD-HEREwith your VPN password
Security Note: Use VPN credentials, not website login details!
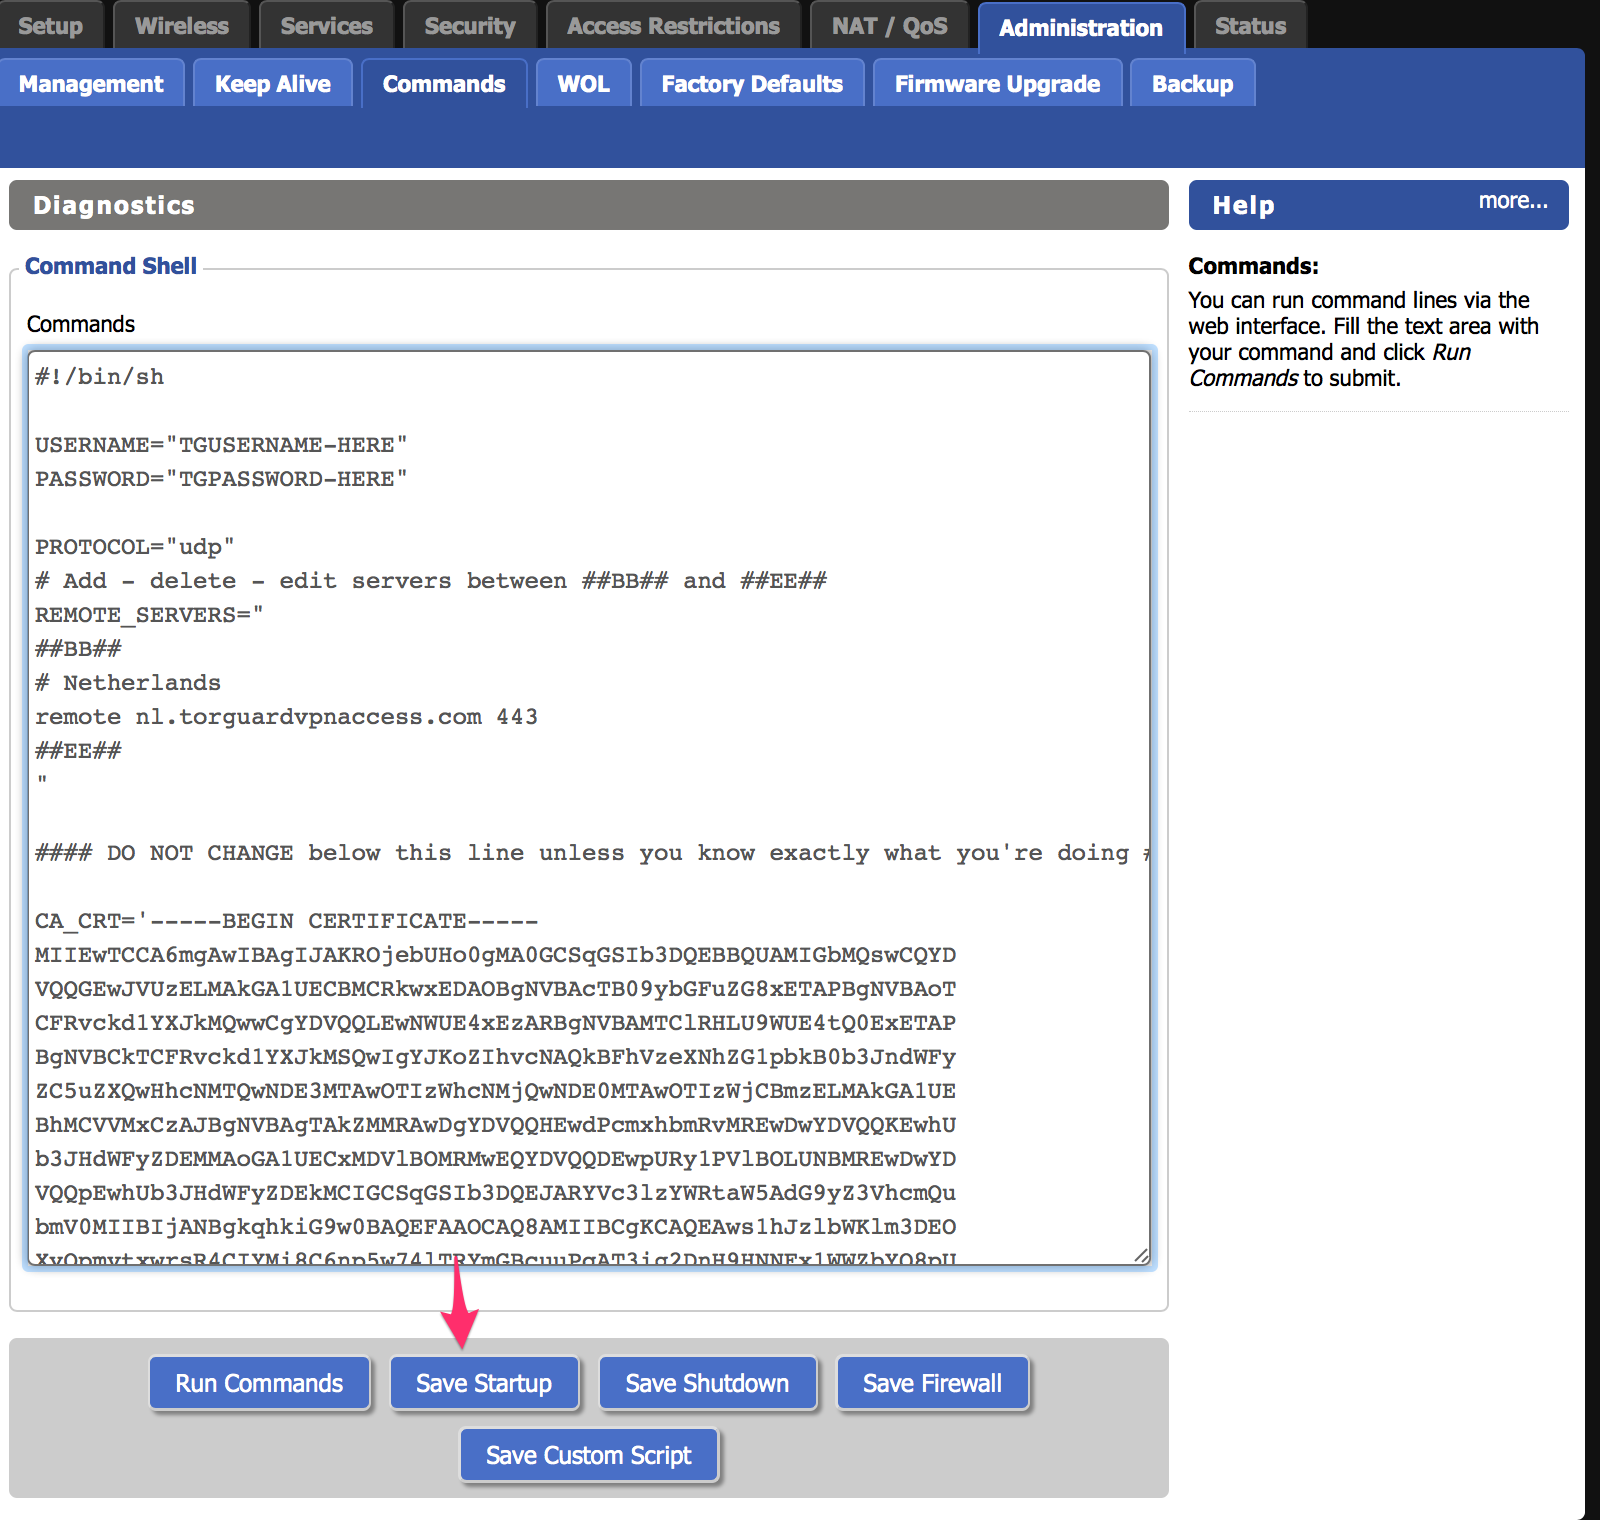
Step 6: Save and Reboot
Finalize Setup
- Click Save Startup
- Reboot your router (Administration → Management → Reboot Router)
- Wait 2-3 minutes for router to fully restart
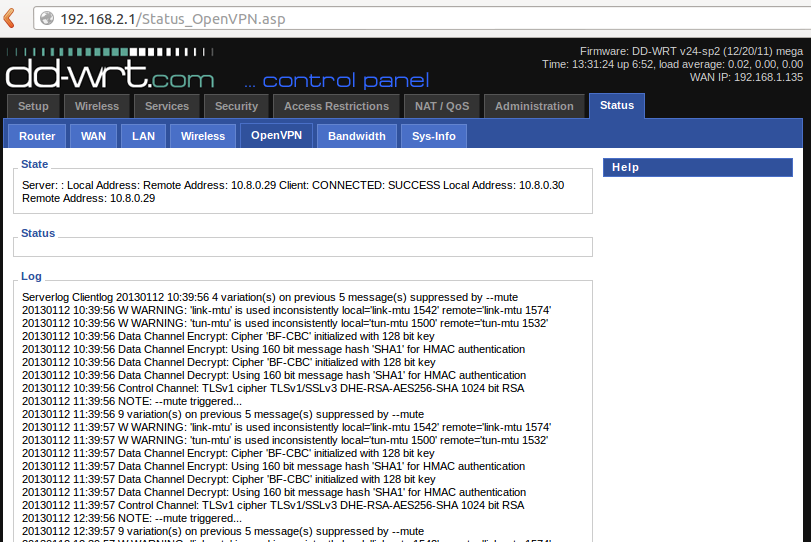
Step 7: Verify Connection
Check VPN Status
- Go to Status → OpenVPN
- Look for "CONNECTED: SUCCESS" under State
- Verify your public IP at TorGuard IP Check
If status page is empty, reboot router again and wait a few minutes.
Troubleshooting Guide
Common Issues and Solutions
1. DNS Configuration
Try toggling these settings under Setup → Basic Setup:
- Use DNSMasq for DHCP
- Use DNSMasq for DNS
- DHCP-Authoritative
2. IP Conflicts
- Ensure DD-WRT IP doesn't conflict with main router
- Example: Main router: 192.168.1.1, DD-WRT: 192.168.1.51
- Both must be in same subnet
3. Connection Method
- Connect DD-WRT to main router via WAN port
- Try setting DD-WRT to Static connection in Basic Setup
4. Client Configuration
- Manually set client IP to point to DD-WRT router
- Use Cloudflare DNS: 1.1.1.1 and 1.0.0.1
5. Firewall Issues
- Temporarily disable firewalls for testing
- Re-enable after confirming connection works
6. MTU Settings
Add this to your startup script after verb 3:
tun-mtu 1100
7. Time and Date
- Ensure router has correct time/date
- Enable NTP client in Administration → Management
Enable OpenVPN Logging
Debug Connection Issues
1. Enable Logging
Add this line after verb 3 in your startup script:
log /tmp/openvpn.log
2. Create Log Link
After rebooting, run this command in Administration → Commands:
ln -s /tmp/openvpn.log /tmp/www/openvpnlog.html
3. View Logs
Access logs at: http://192.168.x.x/user/openvpnlog.html
Include these logs when contacting support for faster resolution.
Performance Optimization
Maximize VPN Speed
- Use UDP protocol for better performance
- Select nearby servers to reduce latency
- Enable hardware acceleration if supported
- Adjust MTU for your network (typically 1400-1500)
- Disable unnecessary services on router
Additional Resources
Helpful Links
- TorGuard Server Network
- Support Ticket System
- IP Address Checker
- DD-WRT Forums and Documentation