OpenWRT + Private VPN Cloud Integration
Connect your OpenWRT-based router to TorGuard's Private VPN Cloud using WireGuard for secure, high-performance networking. This guide covers standard OpenWRT and PrivateRouter firmware with three flexible connection options.
Understanding Your Connection Options
Prerequisites
Before You Begin
- OpenWRT router (or PrivateRouter firmware)
- Active TorGuard Private VPN Cloud subscription
- Admin access to router web interface
- Basic understanding of networking concepts
Step 1: Login to Your Router
Access your OpenWRT router's web interface (typically http://192.168.1.1 or your custom IP).
Step 2: Create WireGuard Interface
PrivateRouter Users
If using PrivateRouter firmware, please refer to this guide for WireGuard setup.
For Standard OpenWRT:
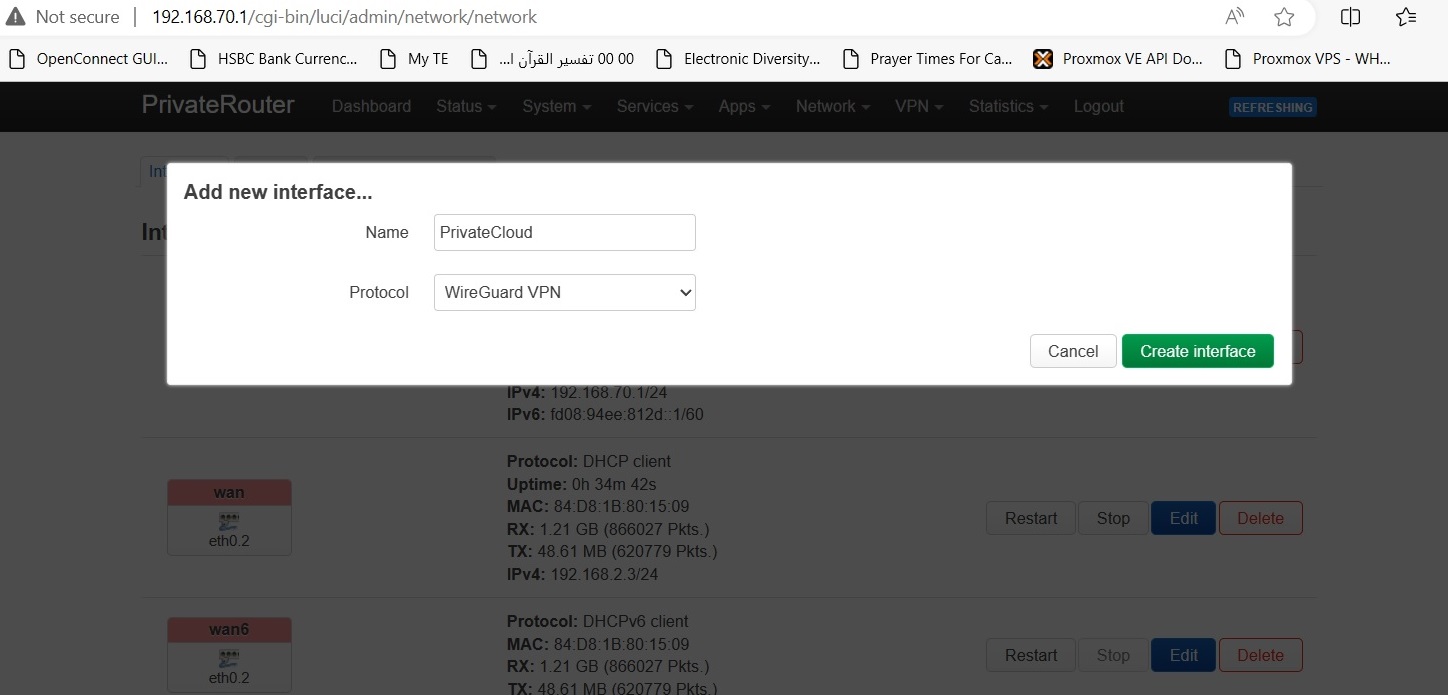
- Navigate to Network → Interfaces
- Click Add new interface...
- Configure:
- Name: PrivateCloud (or your preference)
- Protocol: WireGuard VPN
- Click Create interface
Step 3: Generate Keys and Configure Cloud
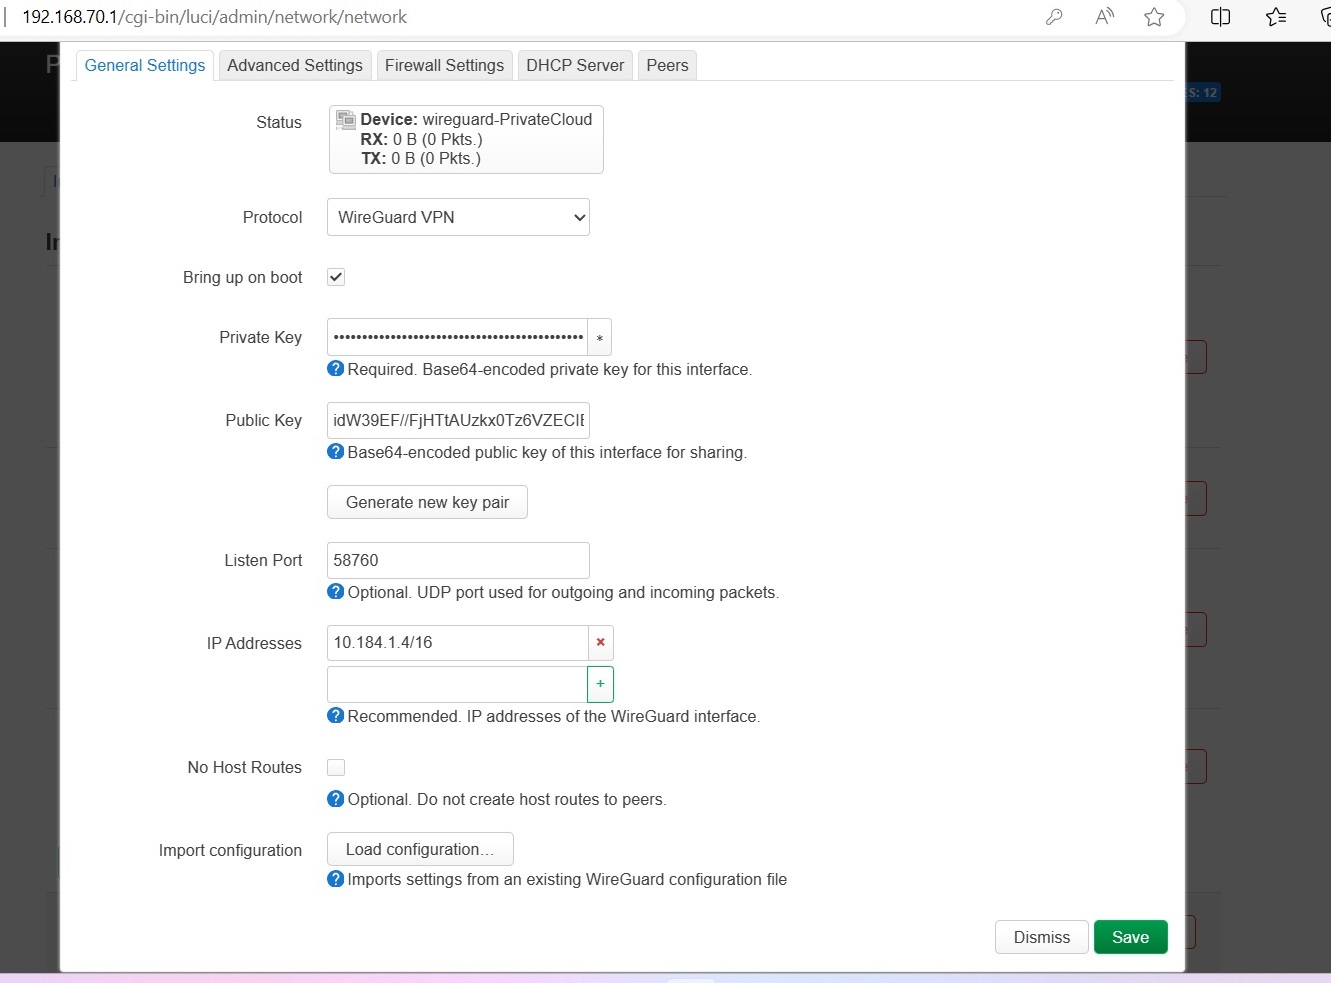
Step 3-1: Generate Key Pair
On the WireGuard interface configuration page, click "Generate new key pair"
Save these keys! You'll need them for the VPN Cloud configuration.
Step 3-2: Configure Private VPN Cloud
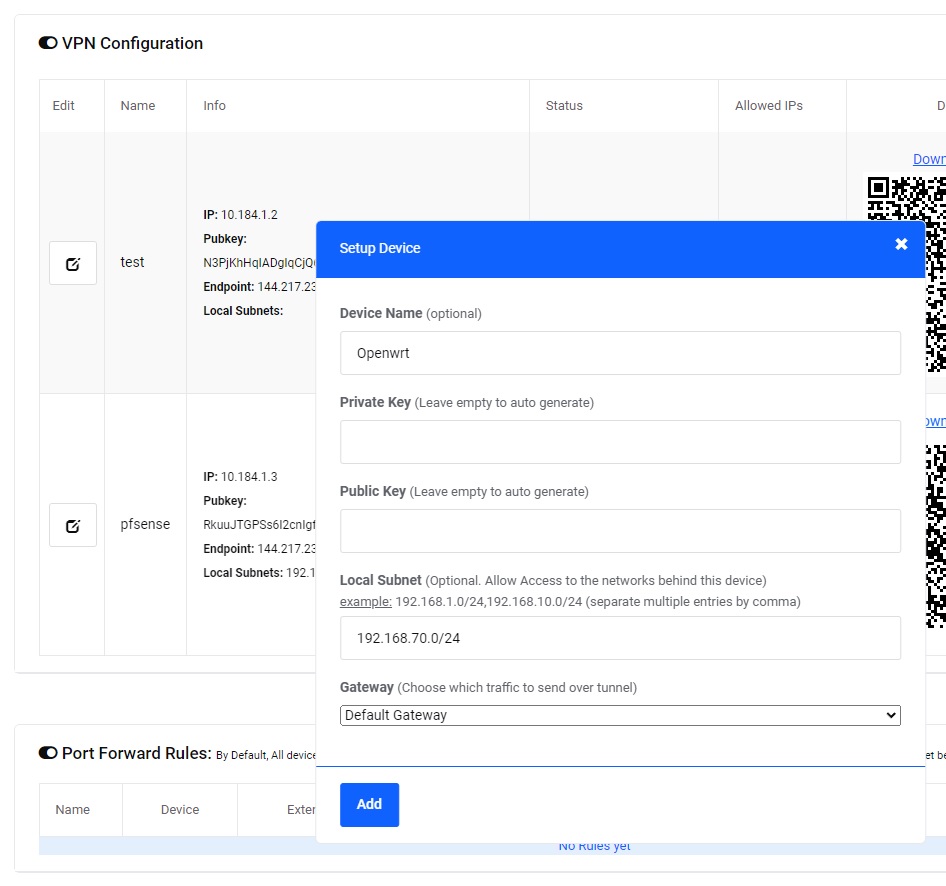
- Login to TorGuard account
- Go to Services → My Services
- Click Manage VPN cloud beside your service
- Click Add device button
- Configure the device:
- Device Name: openwrt (or descriptive name)
- Private Key: Paste from Step 3-1
- Public Key: Paste from Step 3-1
- LAN Subnet:
- To expose LAN: Enter your subnet (e.g., "192.168.70.0/24")
- Otherwise: Leave empty
- Gateway:
Based on your Setup Option:
- Options 1 or 3: "Internal communication only"
- Option 2: "Default Gateway"
- Click Add
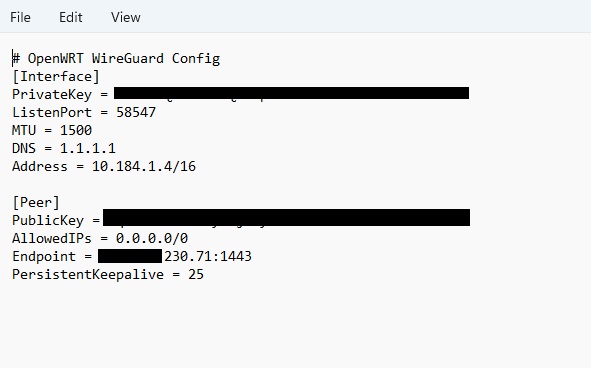
Step 3-3: Download Configuration
- Click Download config link beside your device
- Save the WireGuard configuration file
- Open it in a text editor (you'll need values from it)
Step 4: Configure WireGuard Interface
Step 4-1: General Settings
Return to OpenWRT WireGuard interface configuration.
Some OpenWRT builds support "Load Configuration" button to auto-fill fields. Otherwise, enter manually.
Configure using [Interface] section from downloaded config:
- Protocol: WireGuard VPN
- Bring up on boot: ✓ Check
- Listen Port: Leave empty (dynamic)
- IP Addresses: Copy Address value from config
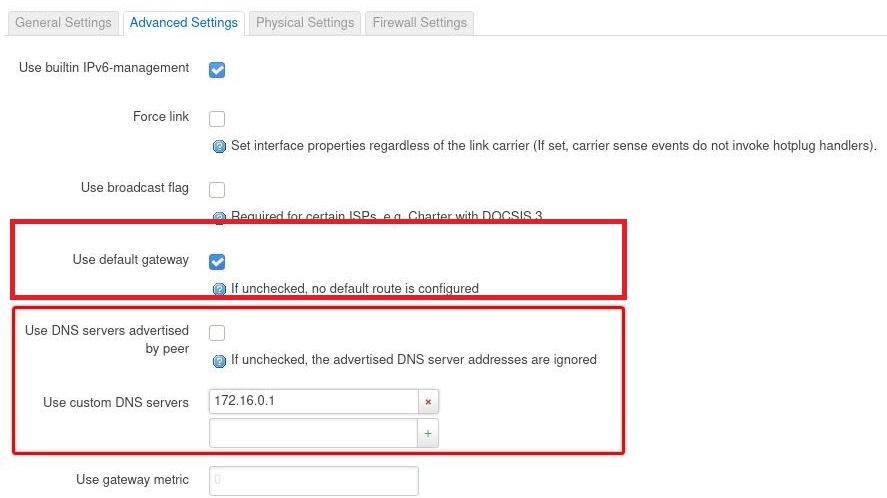
Step 4-2: Advanced Settings
Click Advanced Settings tab:
- Use DNS servers advertised by peer: ☐ Uncheck
- Custom DNS servers: Enter DNS from config (e.g., 1.1.1.1)
Click + icon to add DNS if available in your OpenWRT version
- Use default gateway:
- Option 2: ✓ Check (routes all traffic through VPN)
- Options 1 & 3: ☐ Uncheck
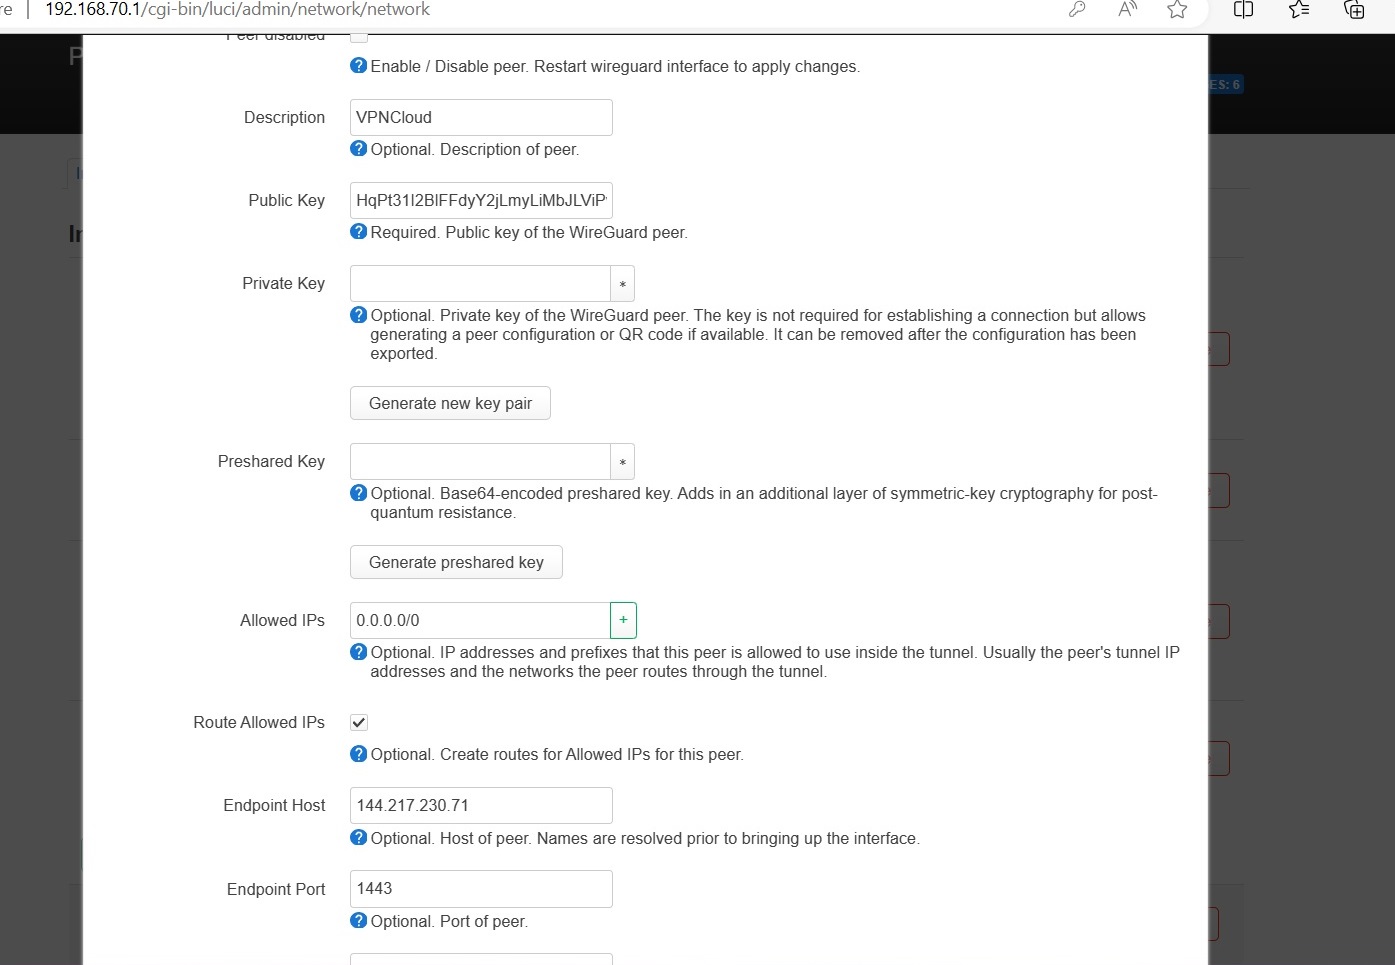
Step 4-3: Peers Configuration
Click Peers tab and configure using [Peer] section from config:
- Enabled: ✓ Check
- Description: VPNCloud
- Public key: Copy PublicKey from config
- Allowed IPs: Copy AllowedIPs from config
- Endpoint host: Extract from Endpoint (e.g., 60.60.60.60)
- Endpoint port: Extract from Endpoint (e.g., 1443)
- Route Allowed IPs: ✓ Check
- Persistent Keep Alive: 25
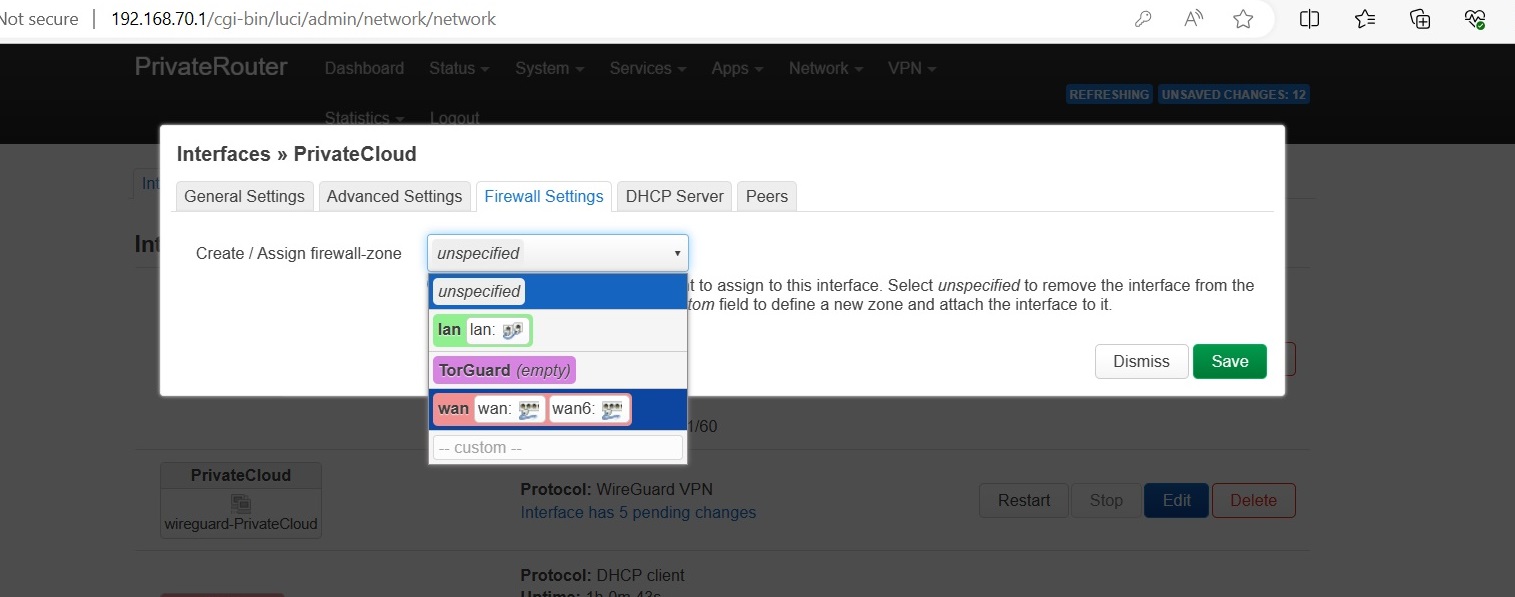
Step 4-4: Firewall Settings
Click Firewall Settings tab and select zone based on your Setup Option:
Click Save and Save & Apply
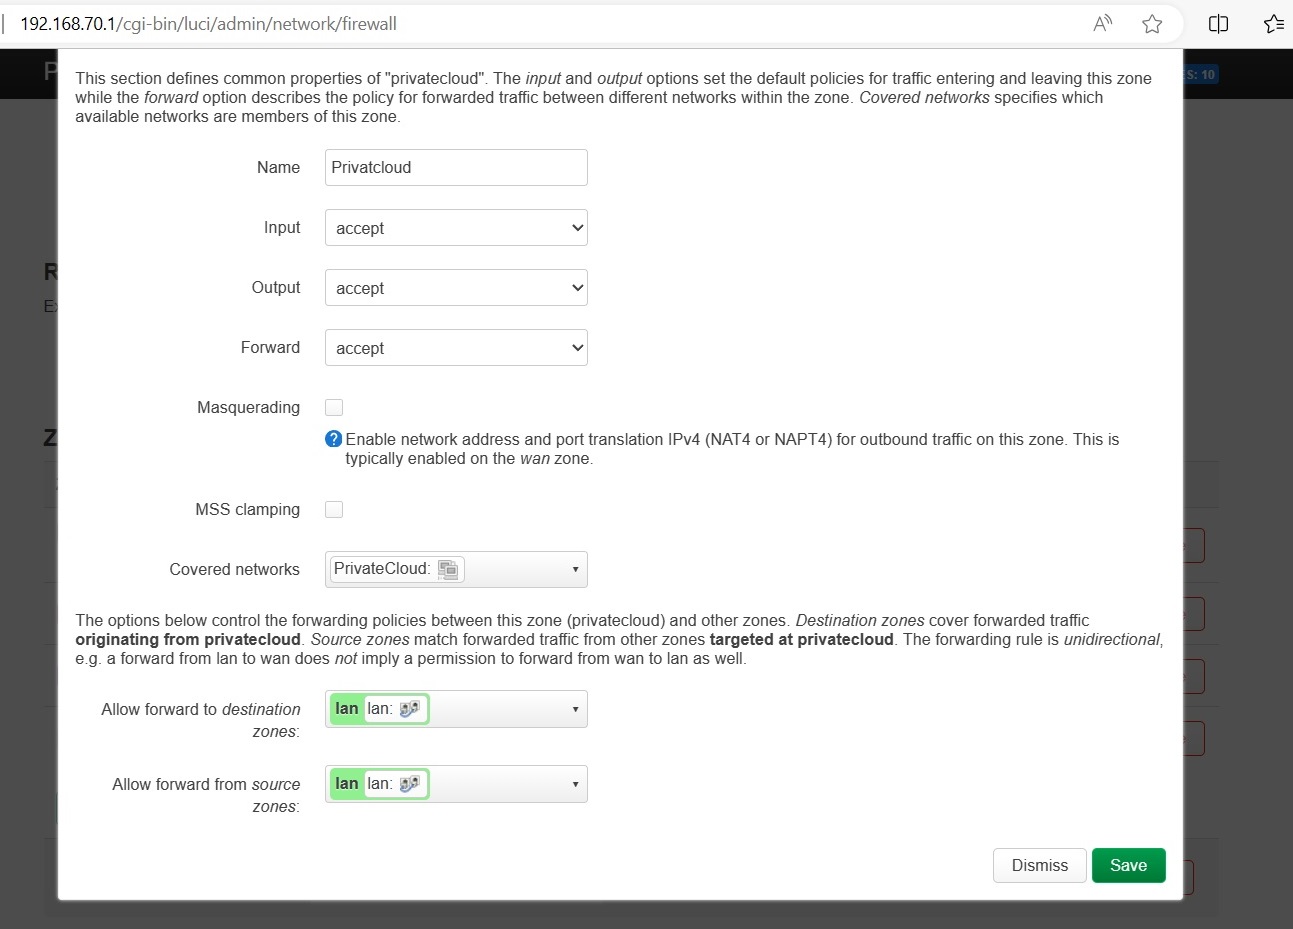
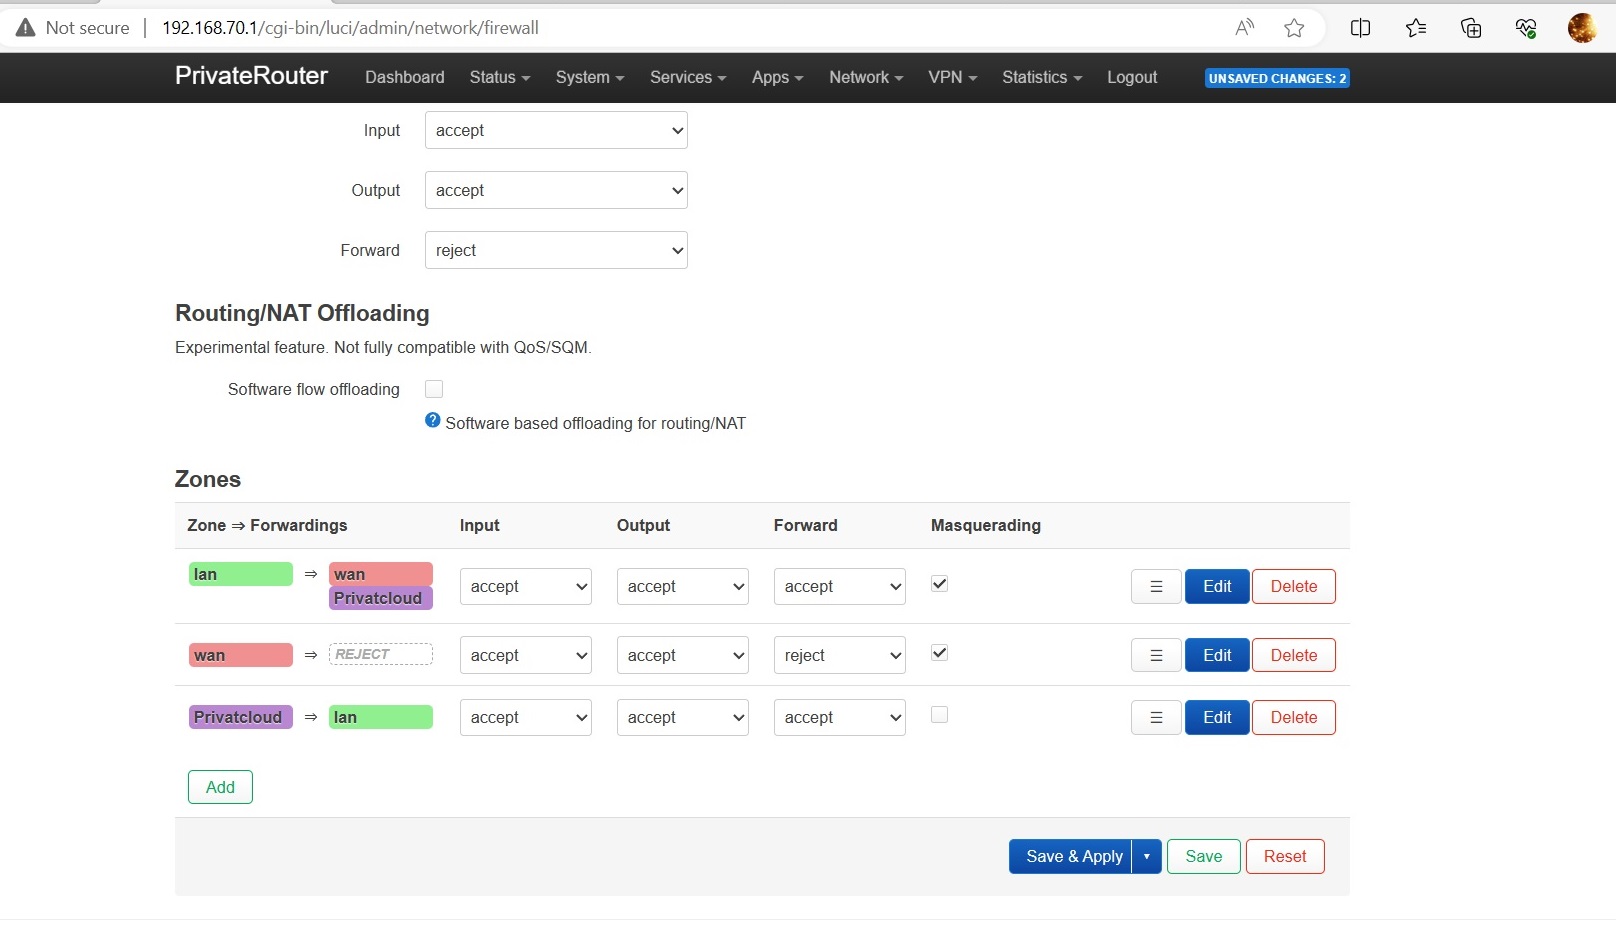
Step 5: Configure Firewall Zone (For LAN Exposure)
Only for Options 1 or 2 with LAN Exposure
- Navigate to Network → Firewall
- Edit the newly created PrivateCloud zone
- Configure:
- Input: accept
- Output: accept
- Forward: accept
- Masquerading: ☐ Usually unchecked (check only to hide source IPs)
- Allow forward to destination zones: LAN (and others to expose)
- Allow forward from source zones: LAN (and others to expose)
- Click Save
Verify Your Connection
Test Your Setup
For VPN as Default Gateway (Option 2):
- Visit https://torguard.net/whats-my-ip.php
- Verify IP shows VPN cloud location
For LAN Exposure:
- Test accessing LAN devices from cloud
- Check firewall logs for blocked connections
- Temporarily disable security software on target devices if needed
Security Note: Firewalls on LAN devices may block incoming VPN traffic. Add rules to allow traffic from your Private VPN Cloud subnet.
Configuration Summary Table
| Setting | Option 1 | Option 2 | Option 3 |
|---|---|---|---|
| Gateway Type | Internal Only | Default Gateway | Internal Only |
| Use Default Gateway | No | Yes | No |
| Firewall Zone | WAN or Custom | WAN or Custom | LAN |
| Internet via VPN | No | Yes | No |
| LAN Access | Optional | Optional | Yes |
Troubleshooting
WireGuard Won't Start
- Verify keys were generated and saved correctly
- Check interface IP doesn't conflict with existing networks
- Ensure WireGuard package is installed
- Review system logs for errors
No Connection to Cloud
- Verify endpoint IP and port are correct
- Check firewall isn't blocking UDP traffic
- Confirm peer public key matches
- Test with different MTU settings
LAN Not Accessible
- Ensure LAN subnet was entered in VPN Cloud config
- Verify firewall zones allow forwarding
- Check masquerading settings
- Test with firewall temporarily disabled