pfSense + Private VPN Cloud Integration
Connect your pfSense firewall to TorGuard's Private VPN Cloud using WireGuard for secure, high-performance networking. Choose from three flexible setup options based on your specific needs: cloud resource access, internet gateway routing, or internet connection sharing.
Understanding Your Connection Options
Prerequisites
Before You Begin
- pfSense firewall (version 2.5.0 or higher recommended)
- Active TorGuard Private VPN Cloud subscription
- Admin access to pfSense web interface
- Basic understanding of firewall and routing concepts
Step 1: Login to pfSense
Access Your Firewall
Open your web browser and navigate to your pfSense admin interface (typically https://192.168.1.1 or your custom IP).
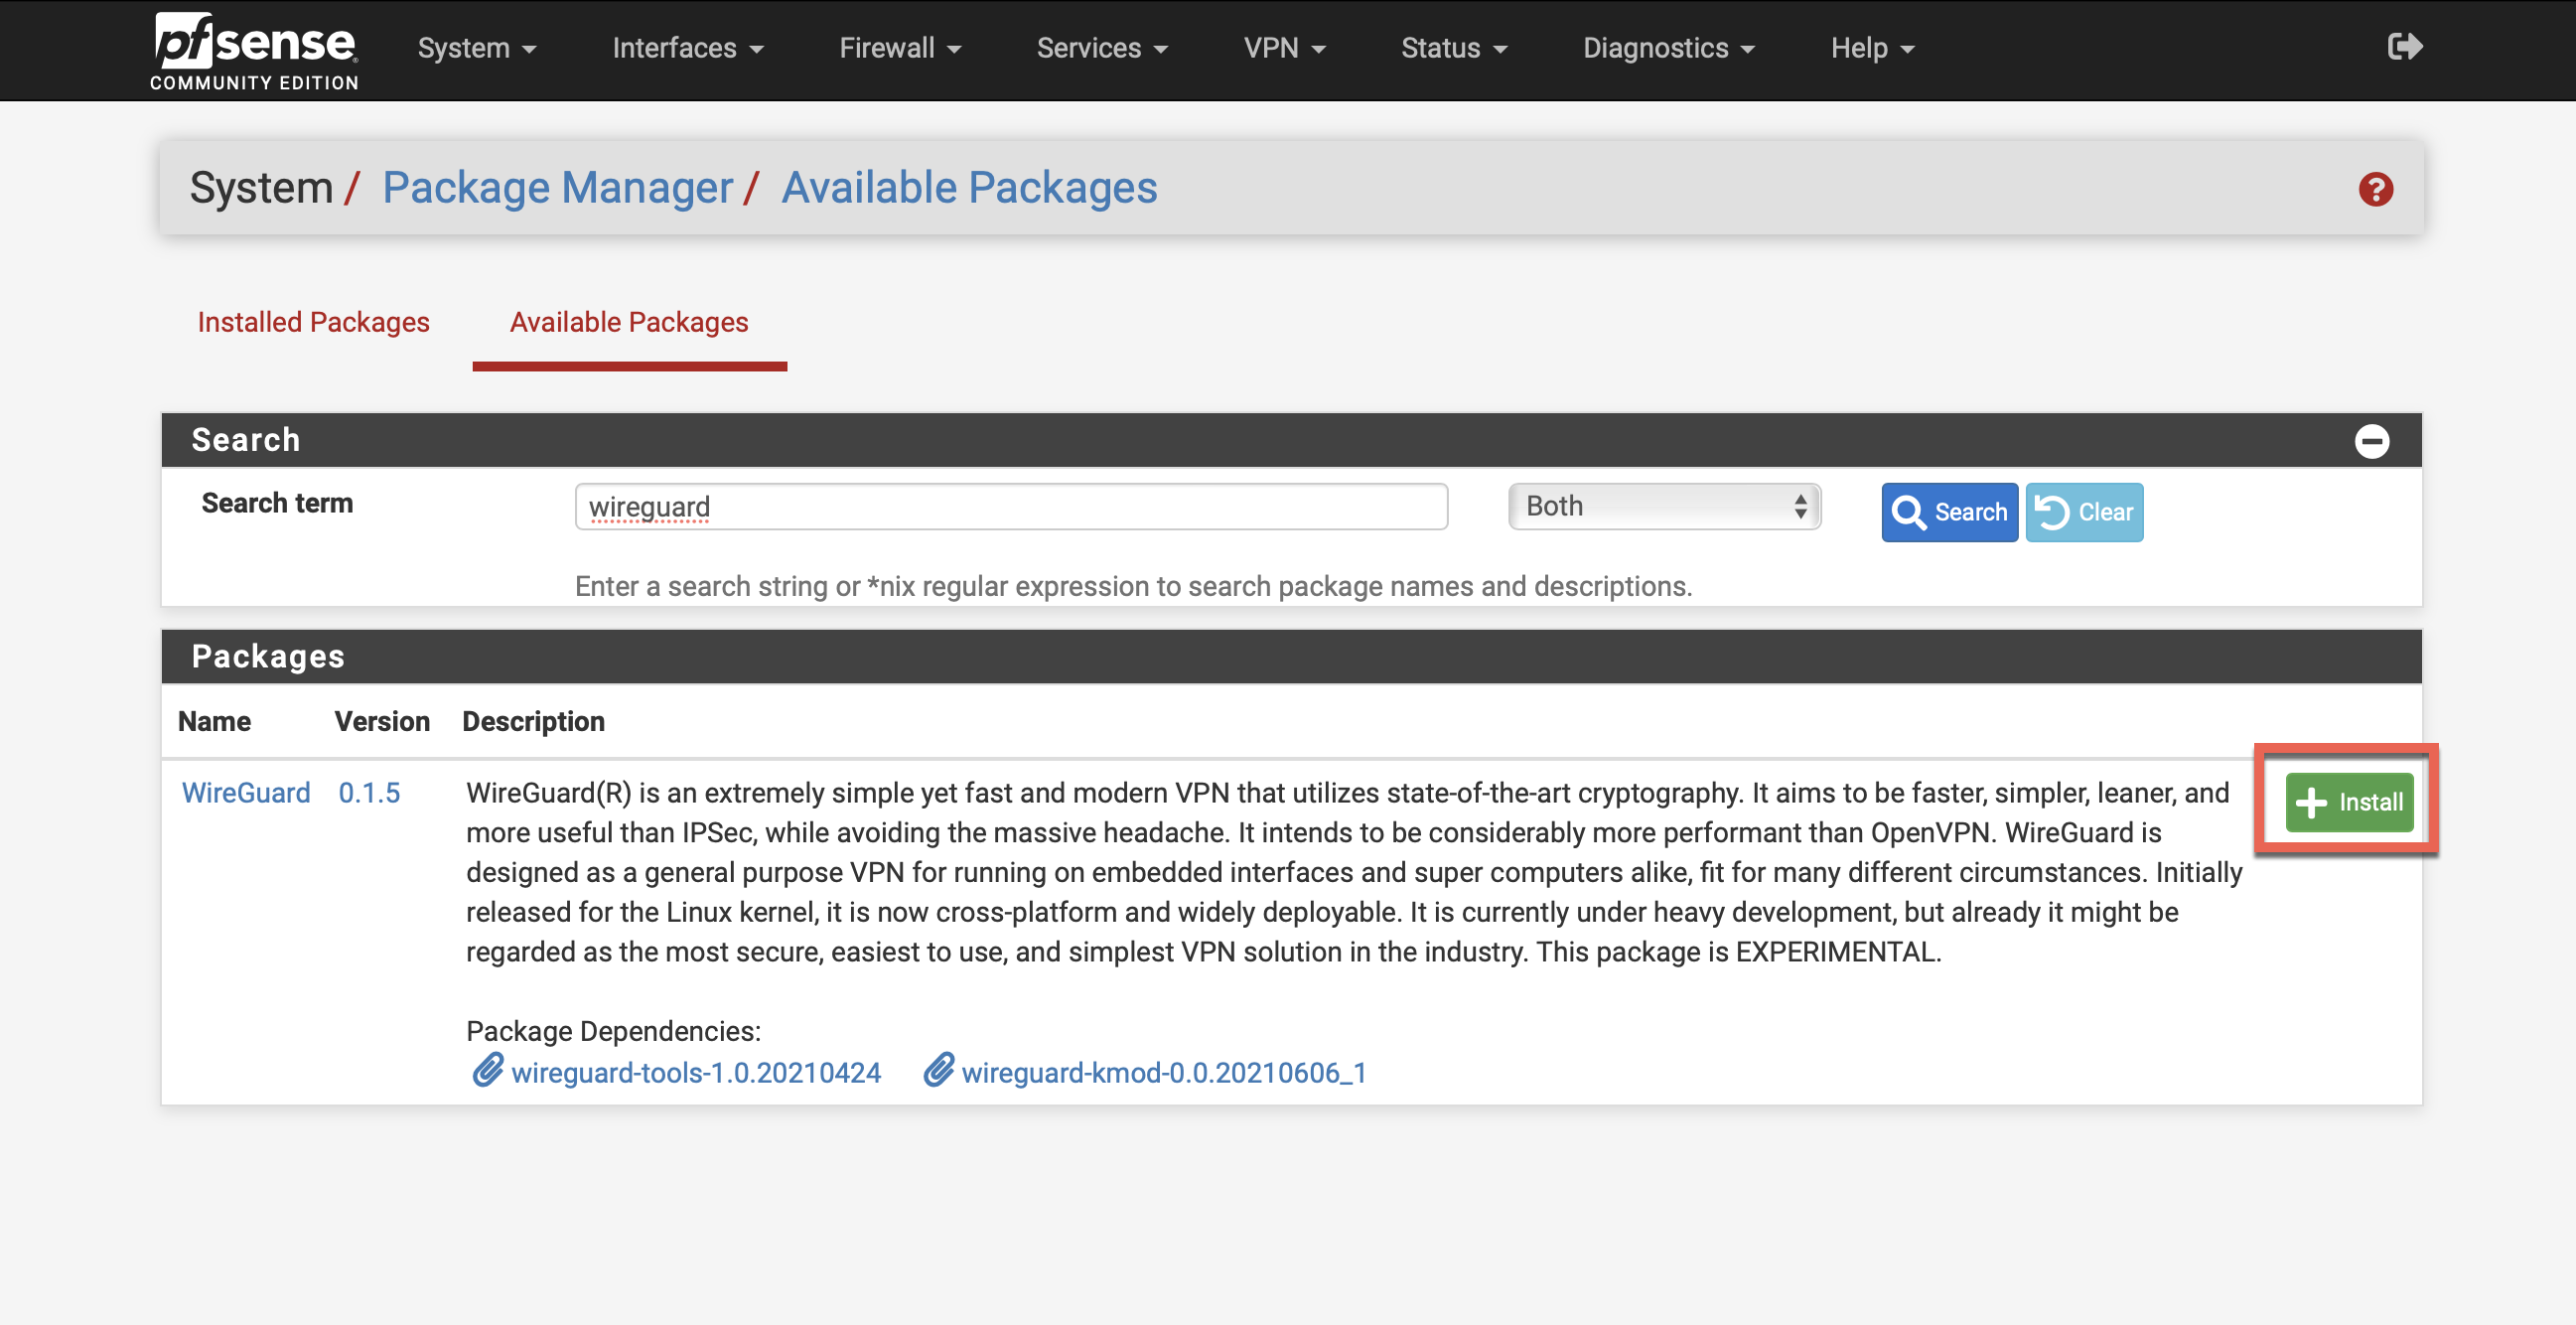
Step 2: Install WireGuard Package
Add WireGuard Support
- Check if WireGuard is already installed under VPN tab
- If not present, navigate to System → Package Manager → Available Packages
- Search for "wireguard"
- Click Install to add WireGuard package
- Wait for installation to complete
Step 3: Configure Private VPN Cloud
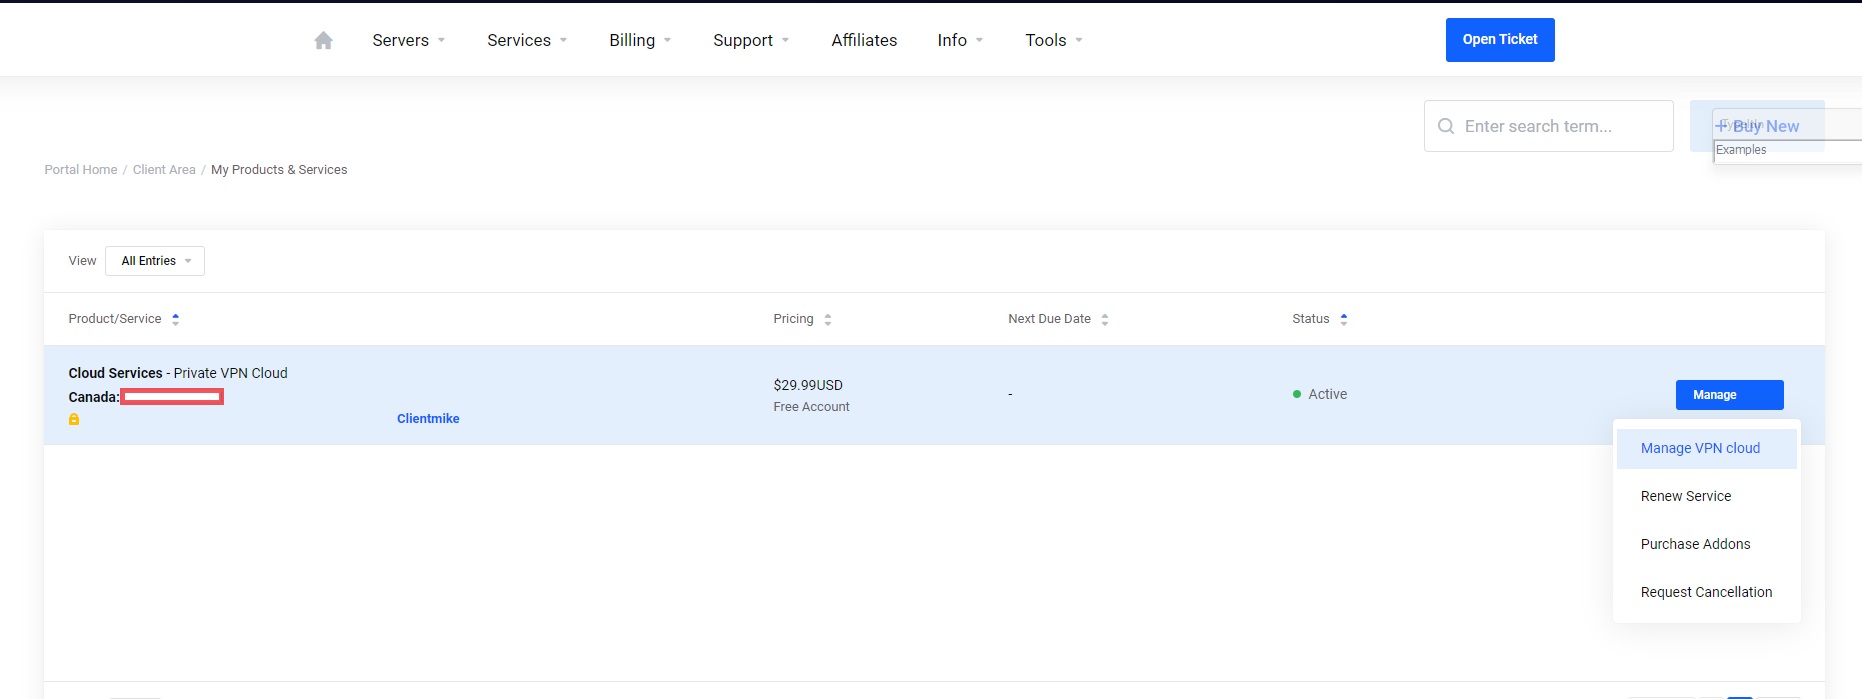
Step 3-1: Access Your VPN Cloud
- Login to your TorGuard account
- Go to Services → My Services
- Click Manage VPN cloud beside your Private VPN Cloud service
Step 3-2: Create pfSense Device
Add New Device
- Device Name: Enter "pfsense" or descriptive name
- LAN Subnet:
- If exposing pfSense LAN to cloud: Enter your subnet (e.g., "192.168.2.0/24")
- Otherwise: Leave empty
- Gateway Selection:
- Click Add to generate configuration
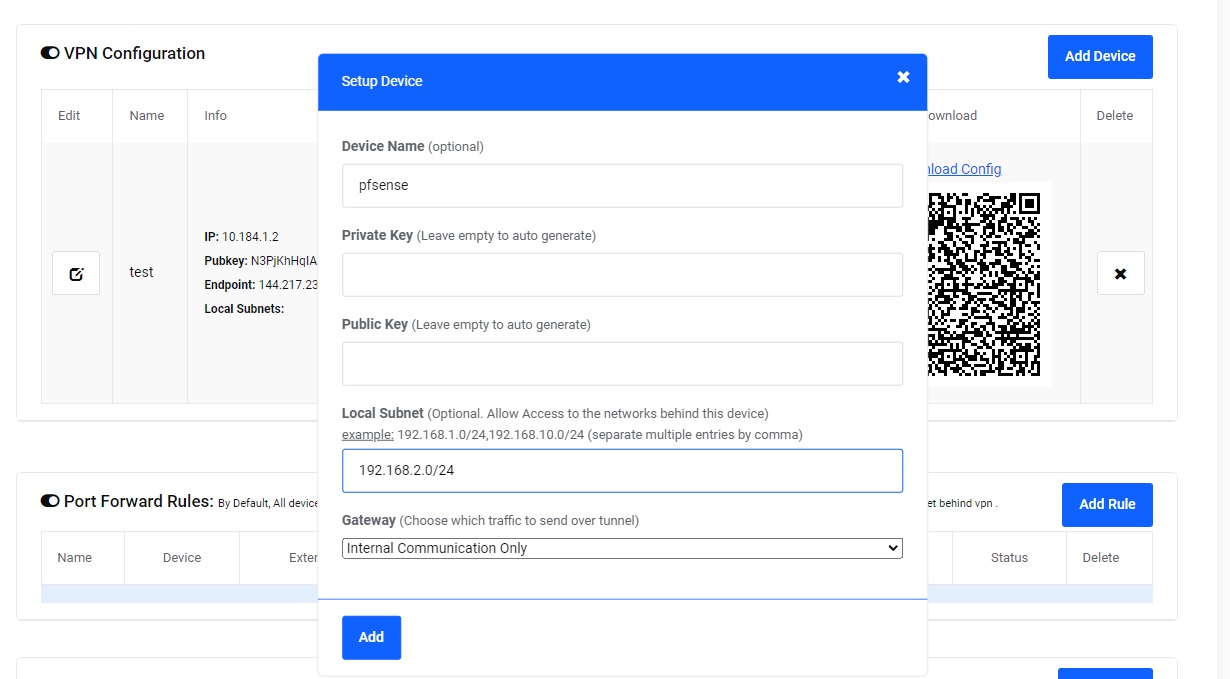
Step 3-3: Download Configuration
- Click Download config link beside your new device
- Save the WireGuard configuration file
- Open it with a text editor (Notepad, TextEdit, etc.)
- Keep this file open - you'll need values from it

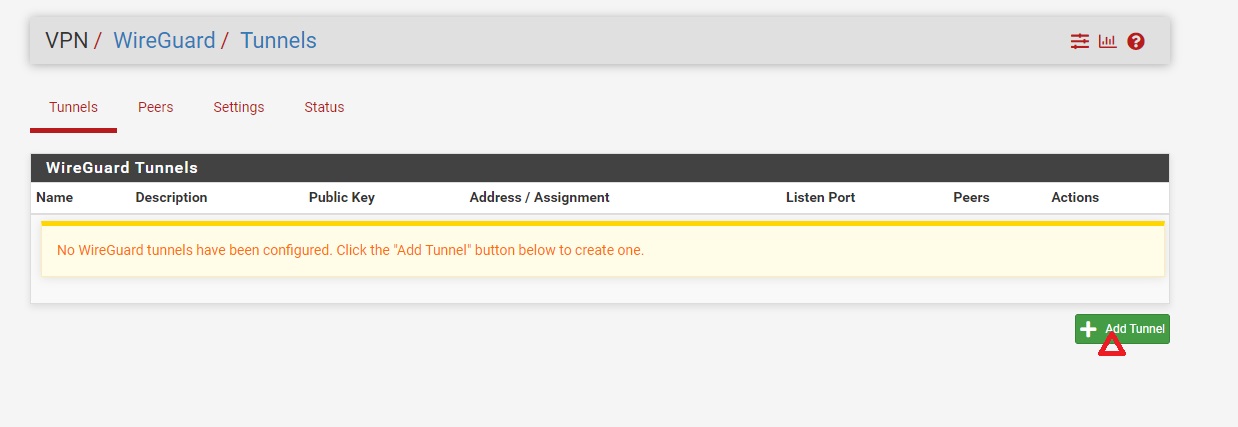
Step 4: Configure WireGuard Tunnel
Step 4-1: Create Tunnel
- In pfSense, navigate to VPN → WireGuard
- Click + Add Tunnel
Step 4-2: Configure Tunnel Settings
Tunnel Configuration
- Enable: ✓ Checked
- Description: My Private Cloud
- Listen Port: Leave blank
- Private Key: Copy PrivateKey value from config file
- Interface Address: Copy Address value from config file
Click Save Tunnel

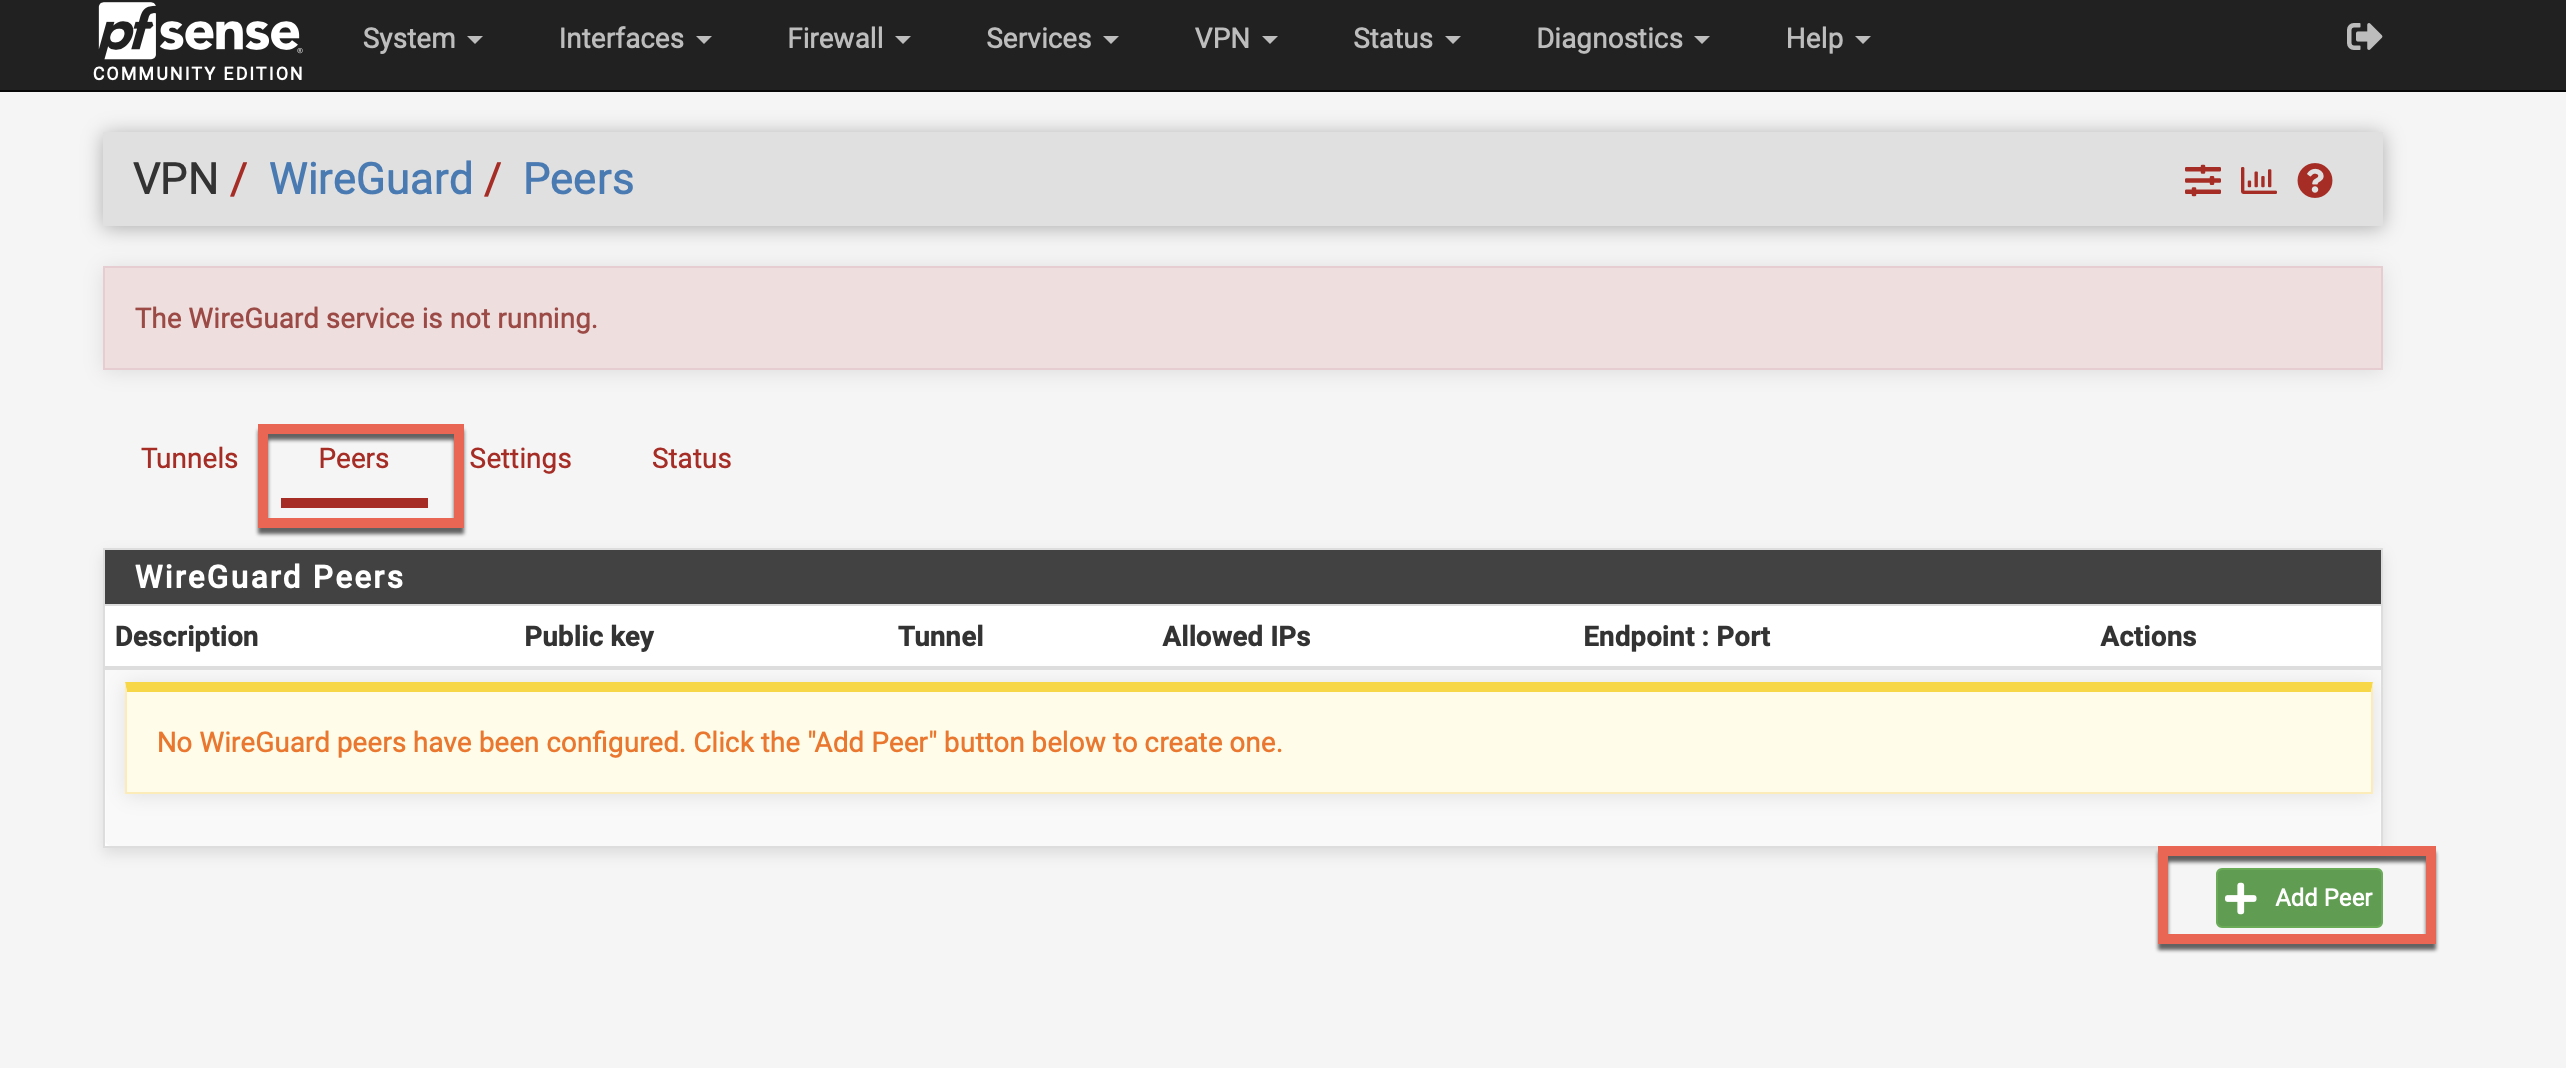
Step 5: Configure Peer
Step 5-1: Add Peer
- Click Peers tab
- Click + Add Peer
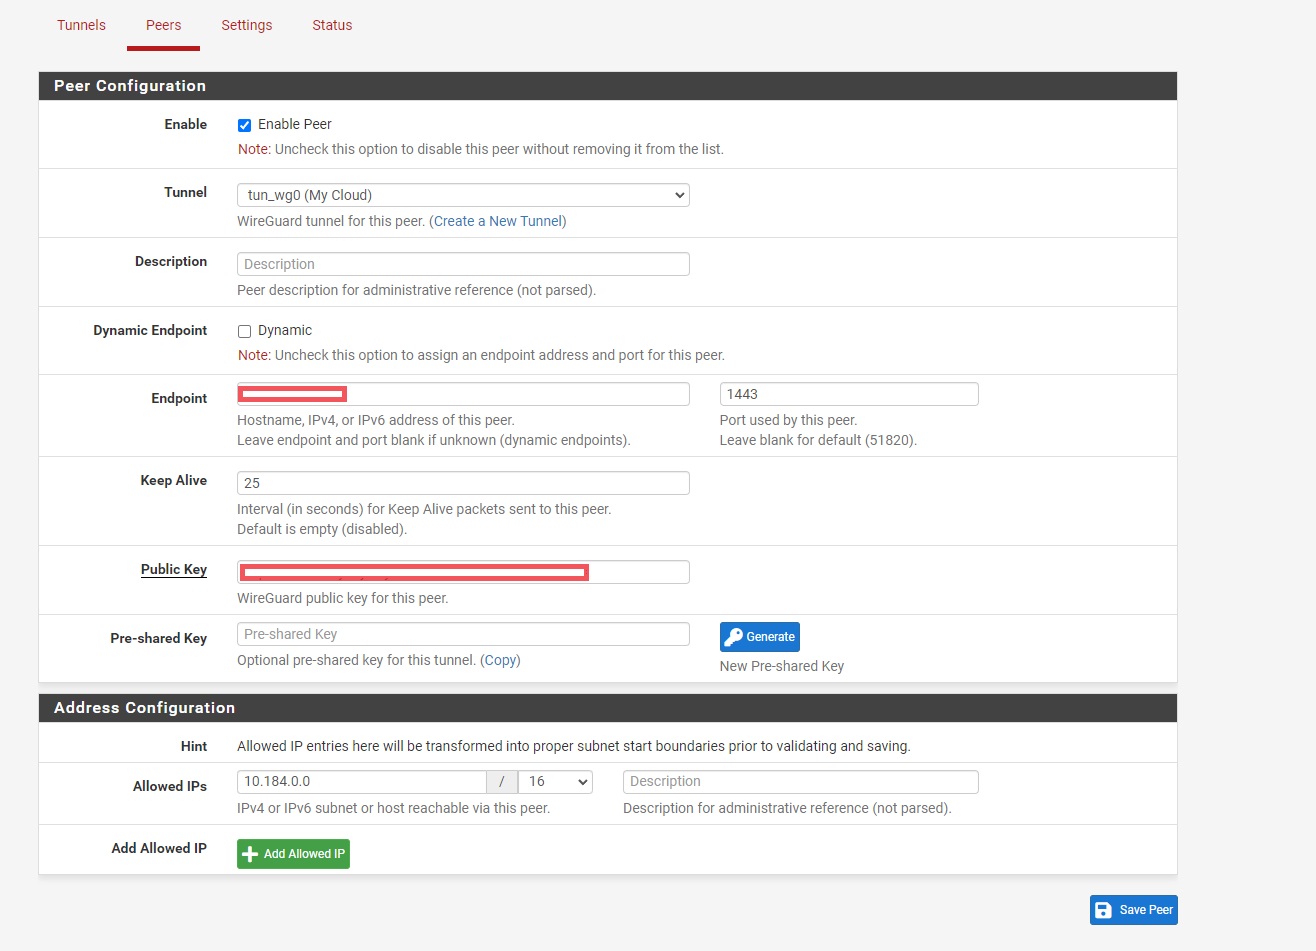
Step 5-2: Configure Peer Settings
Peer Configuration
- Enabled: ✓ Check
- Dynamic: ☐ Uncheck
- Endpoint:
- From config: "Endpoint = 60.60.60.60:1443"
- IP: 60.60.60.60
- Port: 1443
- Keepalive: 25
- Public Key: Copy from config file
- Allowed IPs: Copy AllowedIPs value from config
Click Save Peer
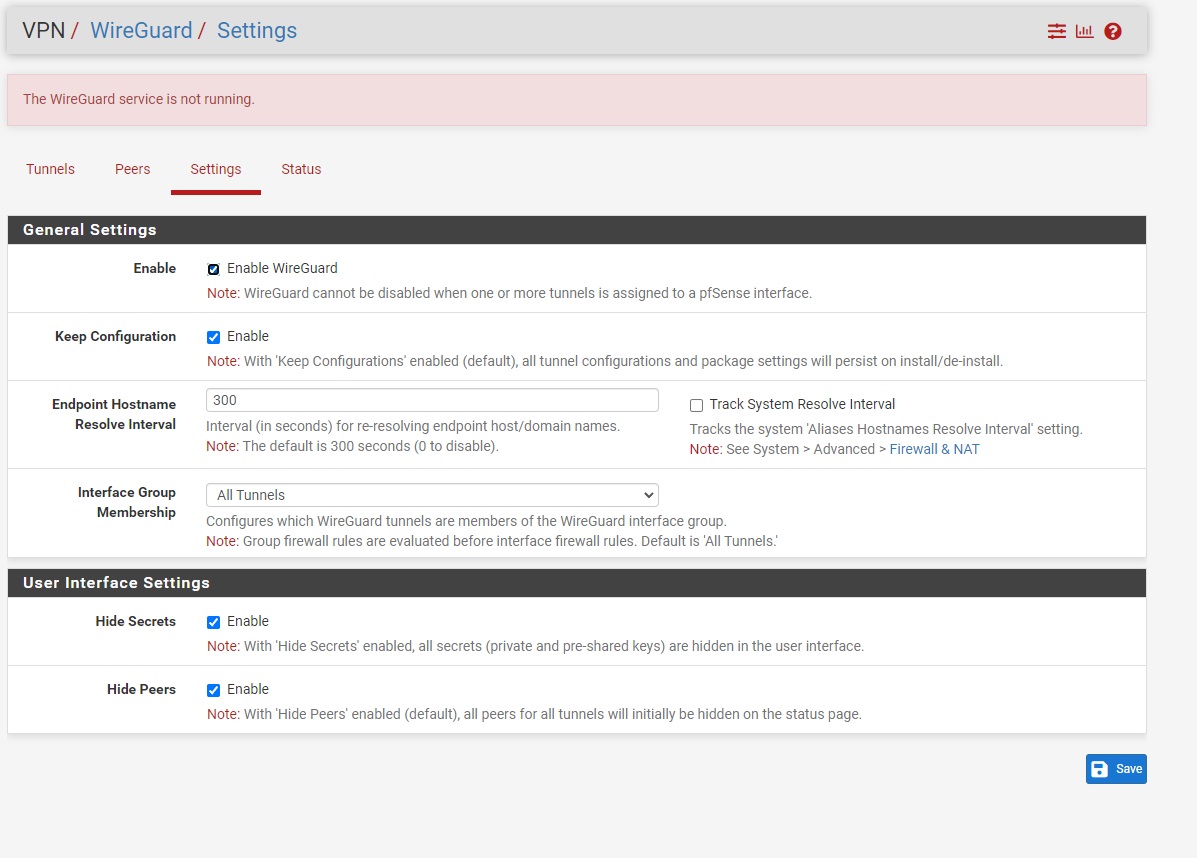
Step 6: Enable WireGuard
- Navigate to VPN → WireGuard → Settings
- Enable WireGuard
- Click Save
- Click Apply Configuration
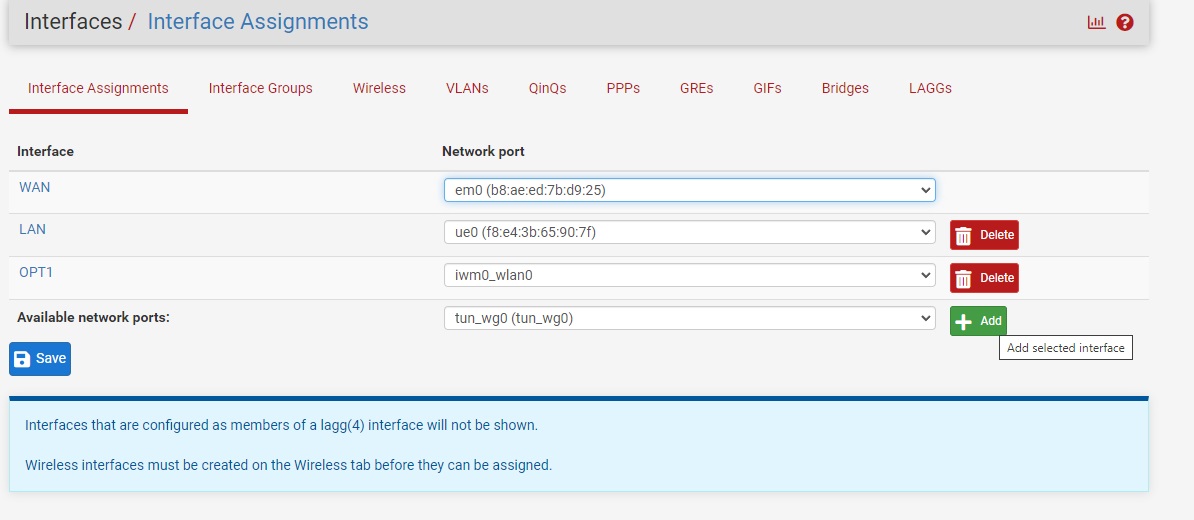
Step 7: Configure Interface
Step 7-1: Assign Interface
- Go to Interfaces → Assignments
- Find the WireGuard interface (tun_wg0)
- Click Add to assign it
Step 7-2: Configure Interface
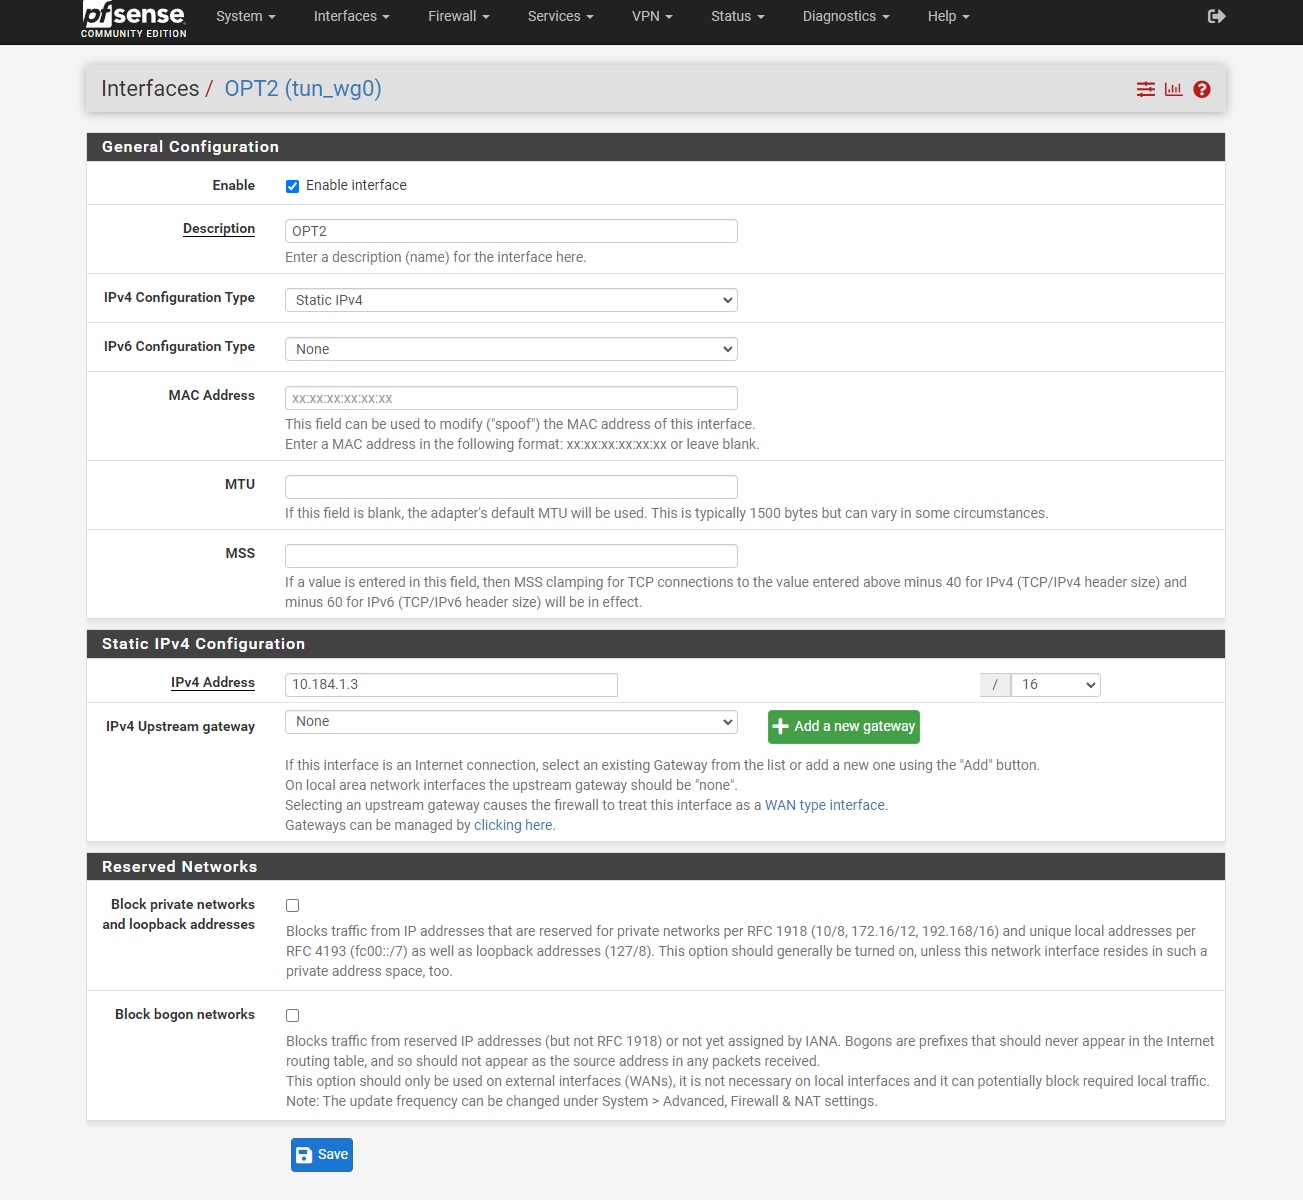
- Click on the new interface (likely OPT1, OPT2, etc.)
- Enable: ✓ Check
- Description: Change to "WG_TG"
- IPv4 Configuration Type: Static IPv4
- IPv4 Address: Same as Interface Address from config (e.g., 10.184.1.3/16)
For Setup Option 2 Only (Internet Access)
- Click + Add next to IPv4 Upstream Gateway
- Gateway name: WG_TG_GWV4
- Gateway IPv4: Same IP as Interface Address but with /32 (e.g., 10.184.1.3)
- Click Add
Click Save and Apply Changes
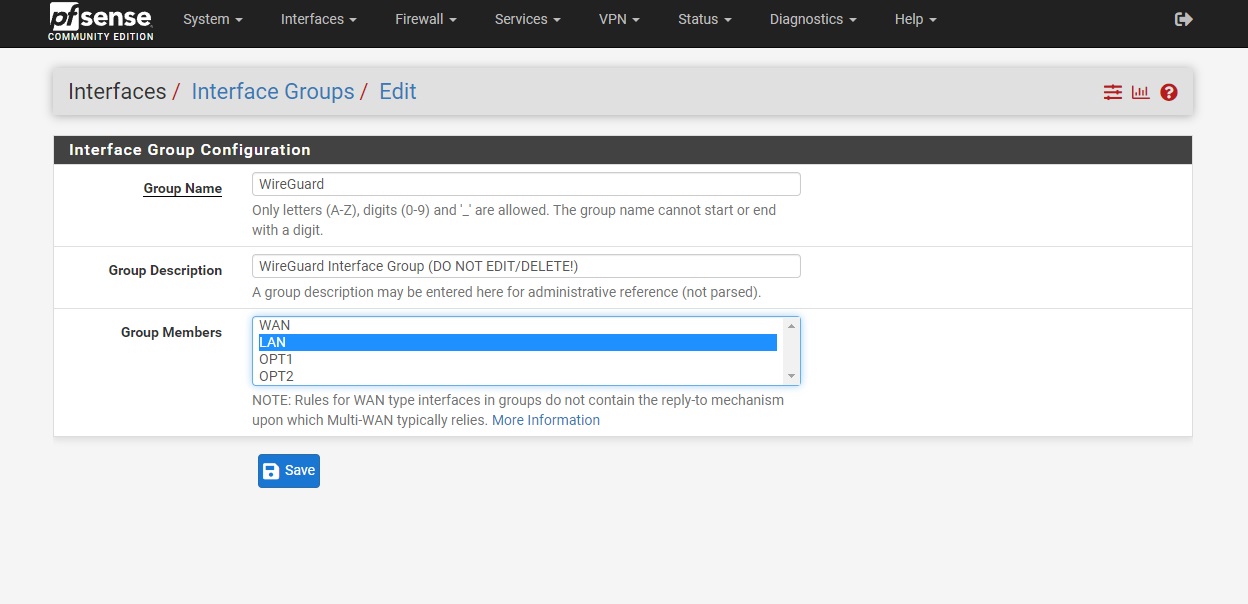
Step 7-3: Configure Interface Group
- Navigate to Interfaces → Interface Groups
- Edit your WireGuard Interface group
- Select group based on Setup Option:
- Option 2: Choose WAN
- Options 1/3: Choose LAN
- Click Save and Apply Configuration
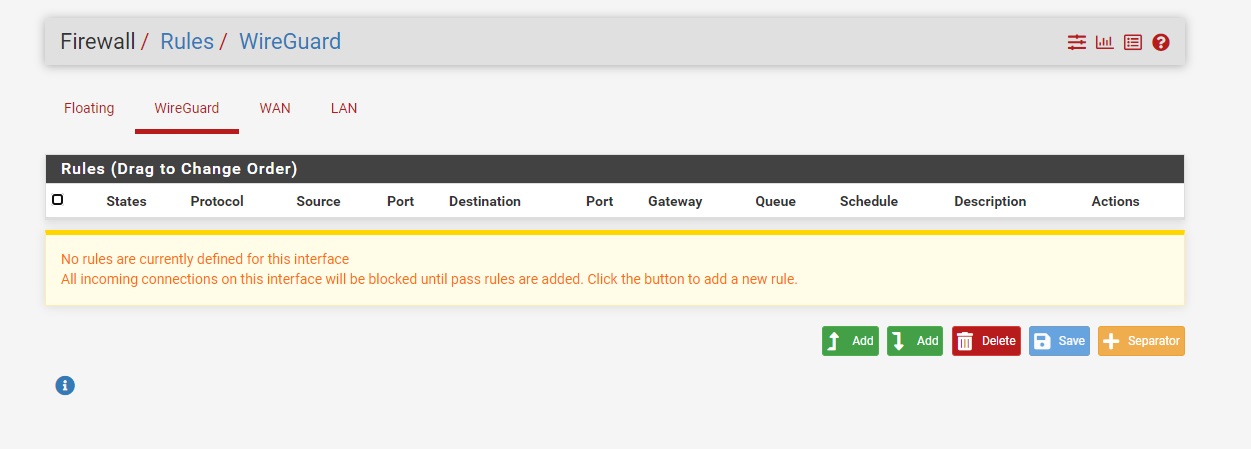
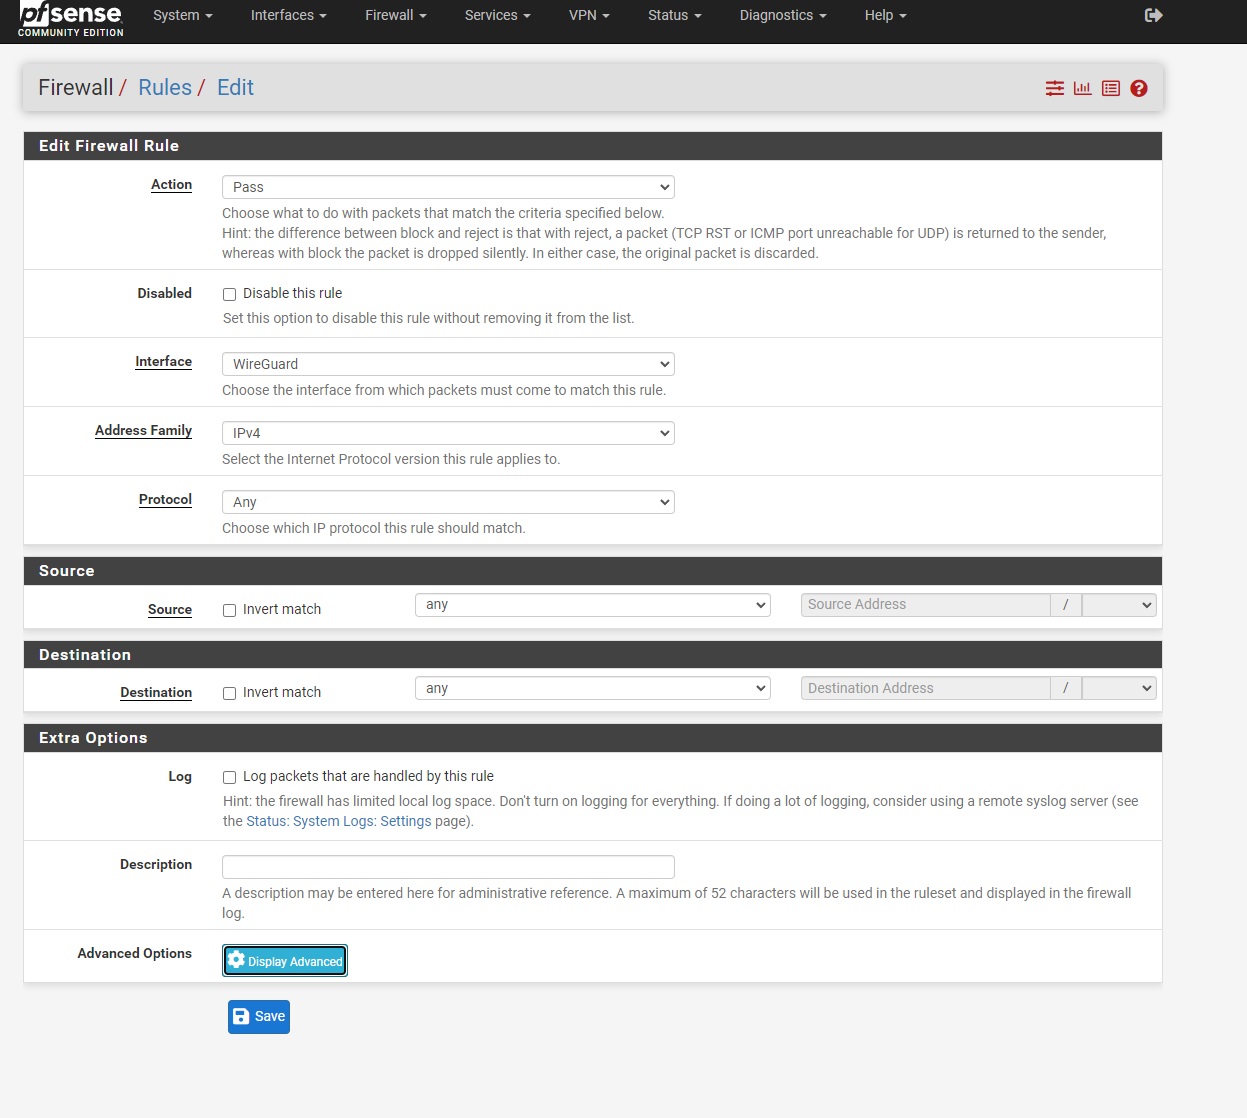
Step 8: Configure Firewall Rules
Required for Options 1 & 3, Optional for Option 2
- Navigate to Firewall → Rules → WireGuard
- Click Add to create new rule
- Configure to allow incoming traffic on WireGuard interface
- Click Save and Apply Configuration
Setup Complete for Options 1 & 3!
If you're using Option 1 (Cloud Access) or Option 3 (Share Internet), your setup is now complete. The following steps are only needed for Option 2 (Internet Access).
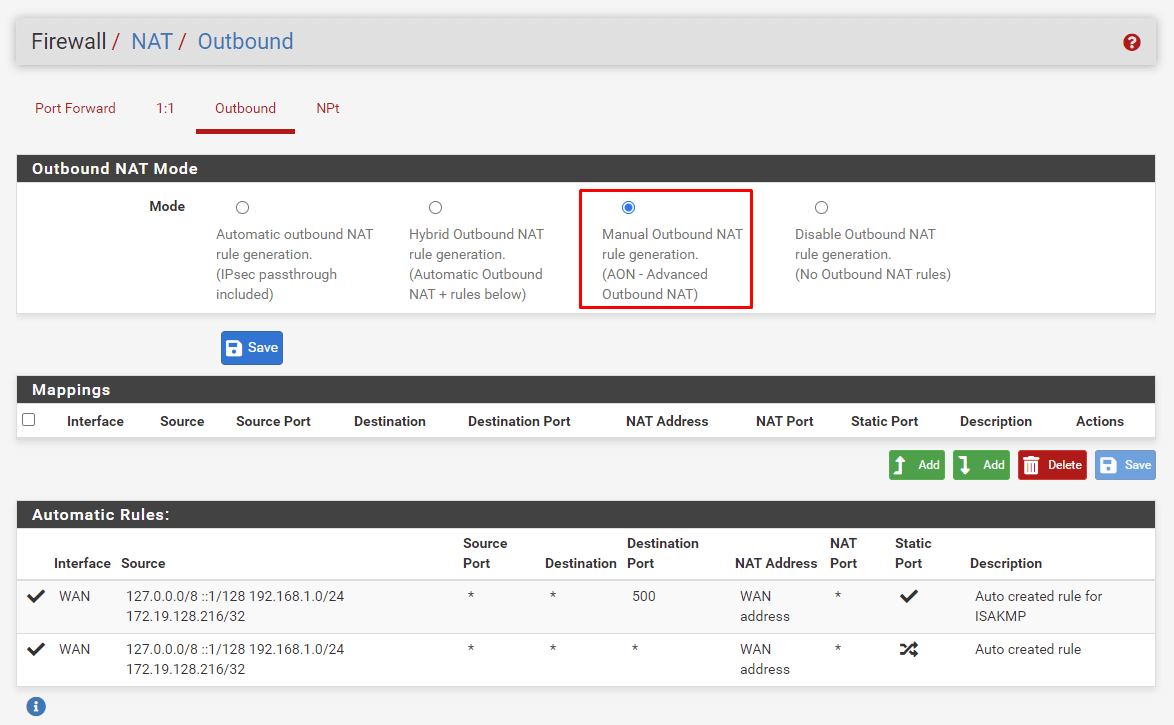
Step 9: Configure NAT (Option 2 Only)
Outbound NAT Configuration
- Navigate to Firewall → NAT → Outbound
- Select Manual Outbound NAT rule generation
- Click Save and Apply changes
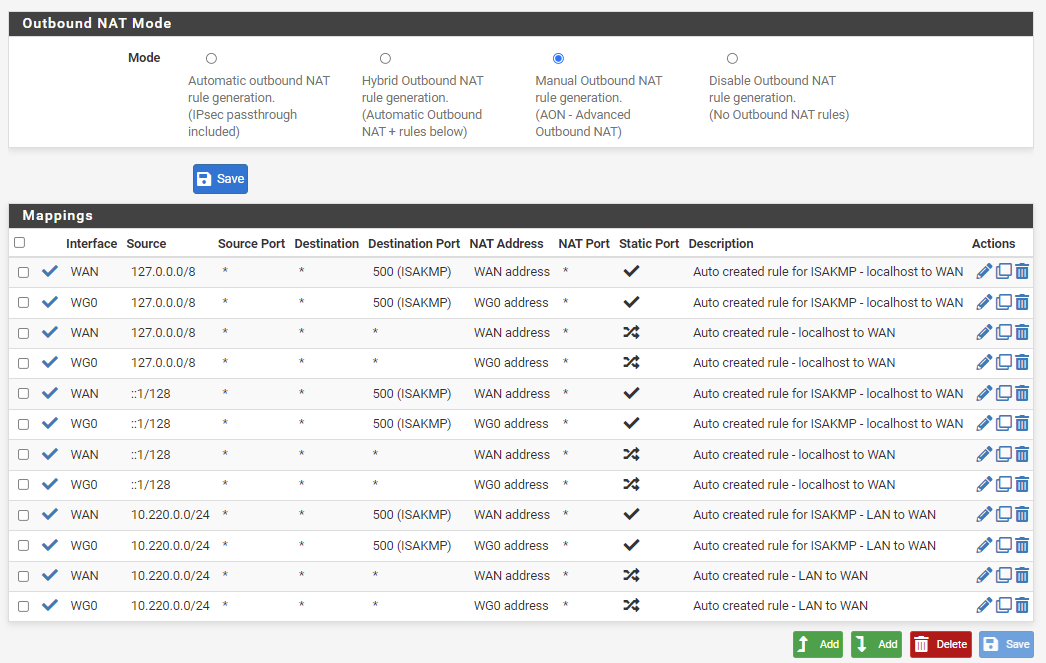
Configure NAT Rules
- For each existing rule under Mappings:
- Click Copy button
- Change Interface to tun_wg0
- Save each copied rule
- Click Apply changes
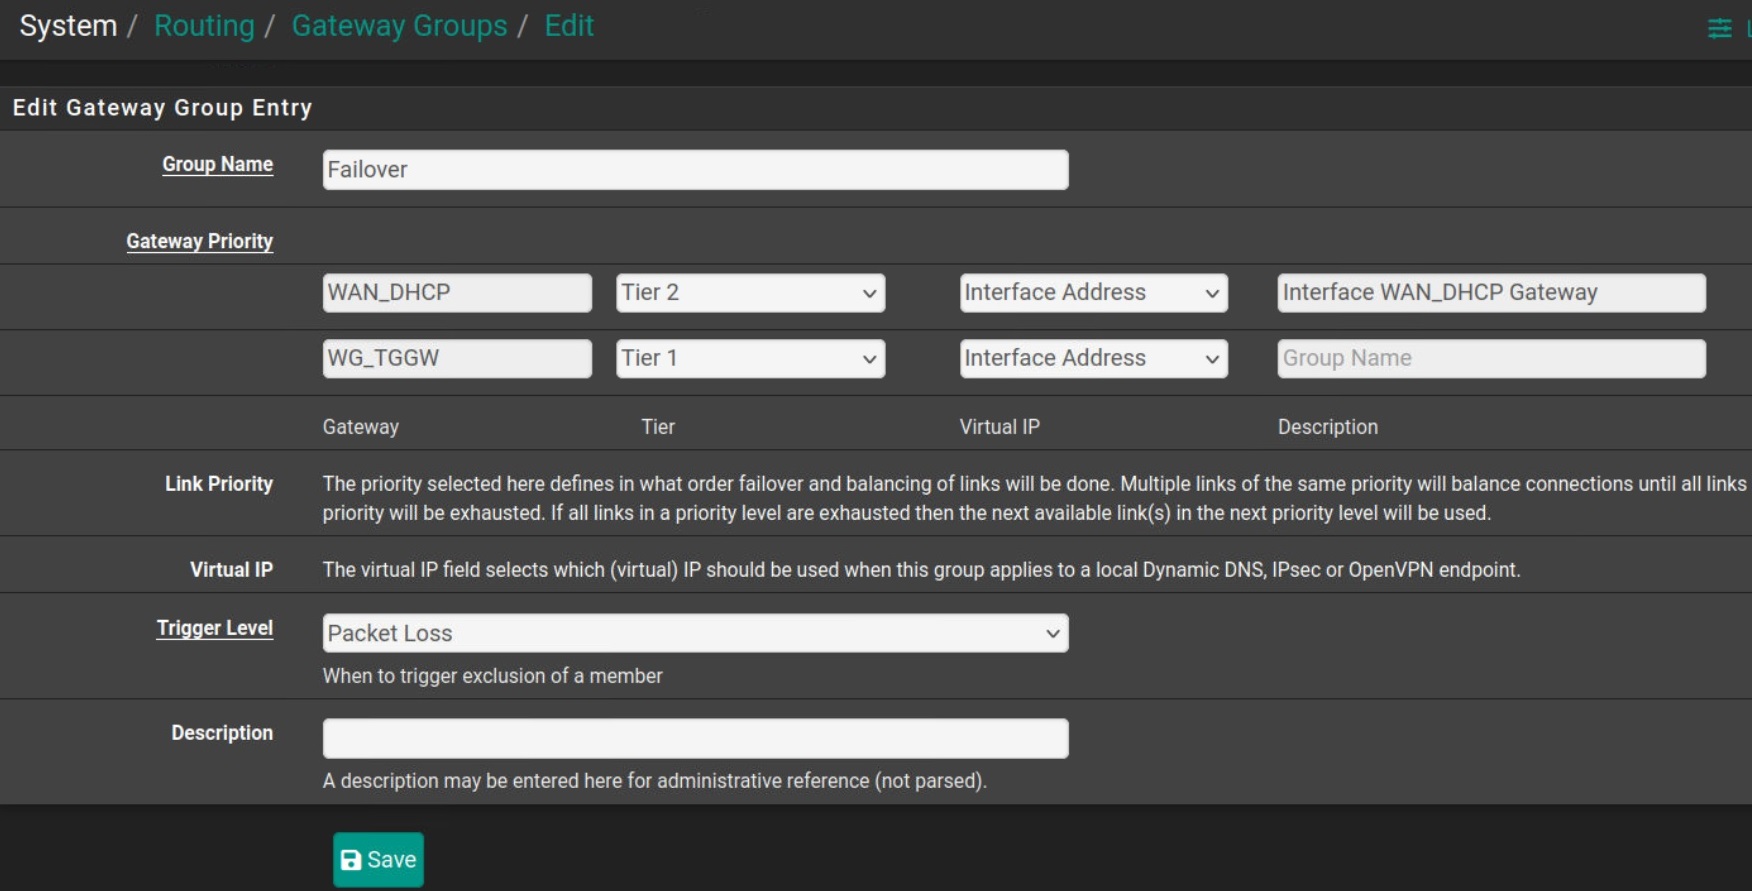
Step 10: Routing Fix (If Needed)
Routing Table Update
If tunnel shows active but traffic isn't routing through it:
- Go to System → Routing → Groups
- Add new group with:
- VPN interface: Tier 1 priority
- WAN interface: Tier 2 priority
- Trigger: Packet Loss
- Apply configuration
- Go to System → Routing
- Select new group from Default gateway dropdown
- Apply changes
Verify Your Connection
Test Your Setup
- Browse to https://torguard.net/whats-my-ip.php
- Verify based on your setup option:
- Option 1: IP should remain your regular ISP IP
- Option 2: IP should show VPN cloud location
- Option 3: Test from cloud device to see pfSense IP
Troubleshooting
No Handshake
- Verify endpoint IP and port are correct
- Check firewall isn't blocking UDP traffic
- Confirm keys were copied correctly
- Try regenerating configuration in VPN Cloud
Connected but No Traffic
- Check interface assignment and configuration
- Verify firewall rules allow traffic
- For Option 2, confirm NAT rules are correct
- Try the routing fix in Step 10
LAN Access Issues
- Ensure LAN subnet was specified correctly in VPN Cloud
- Check firewall rules on WireGuard interface
- Verify routing between interfaces
- Test with ping from both directions