🚀 About WireGuard on pfSense
WireGuard is the latest VPN protocol offering superior performance, security, and simplicity. This guide will help you configure WireGuard on your pfSense router to protect your entire network with TorGuard VPN.
Why WireGuard on pfSense?
✨ Benefits of Router-Level VPN
Whole Network
Protect all devices automatically
Best Performance
WireGuard is 3-4x faster
Always Protected
No need to connect each device
All Devices
Smart TVs, IoT, game consoles
Low Latency
Minimal impact on gaming
Set & Forget
Configure once for all
Prerequisites
📋 Before You Begin
pfSense Version
- pfSense 2.5.0 or newer
- pfSense Plus 21.02 or newer
- Community Edition supported
TorGuard Account
- Active VPN subscription
- VPN username & password
- Access to config generator
Network Access
- Admin access to pfSense
- Ability to modify firewall
- Router reboot permission
Version Compatibility
🔧 Supported pfSense Versions
✅ Full Support
✅ Full Support
✅ Full Support
✅ Full Support
✅ Full Support
⚠️ Manual Install
Network Overview
🌐 How It Works
Internet → pfSense (WireGuard) → TorGuard VPN → Protected Traffic
All devices on your network automatically use the VPN connection
Step-by-Step Configuration
Log into pfSense
Access your pfSense web interface using your router's IP address (typically 192.168.1.1)
Install WireGuard Package
Navigate to System → Package Manager → Available Packages
Search for "wireguard" and click Install:
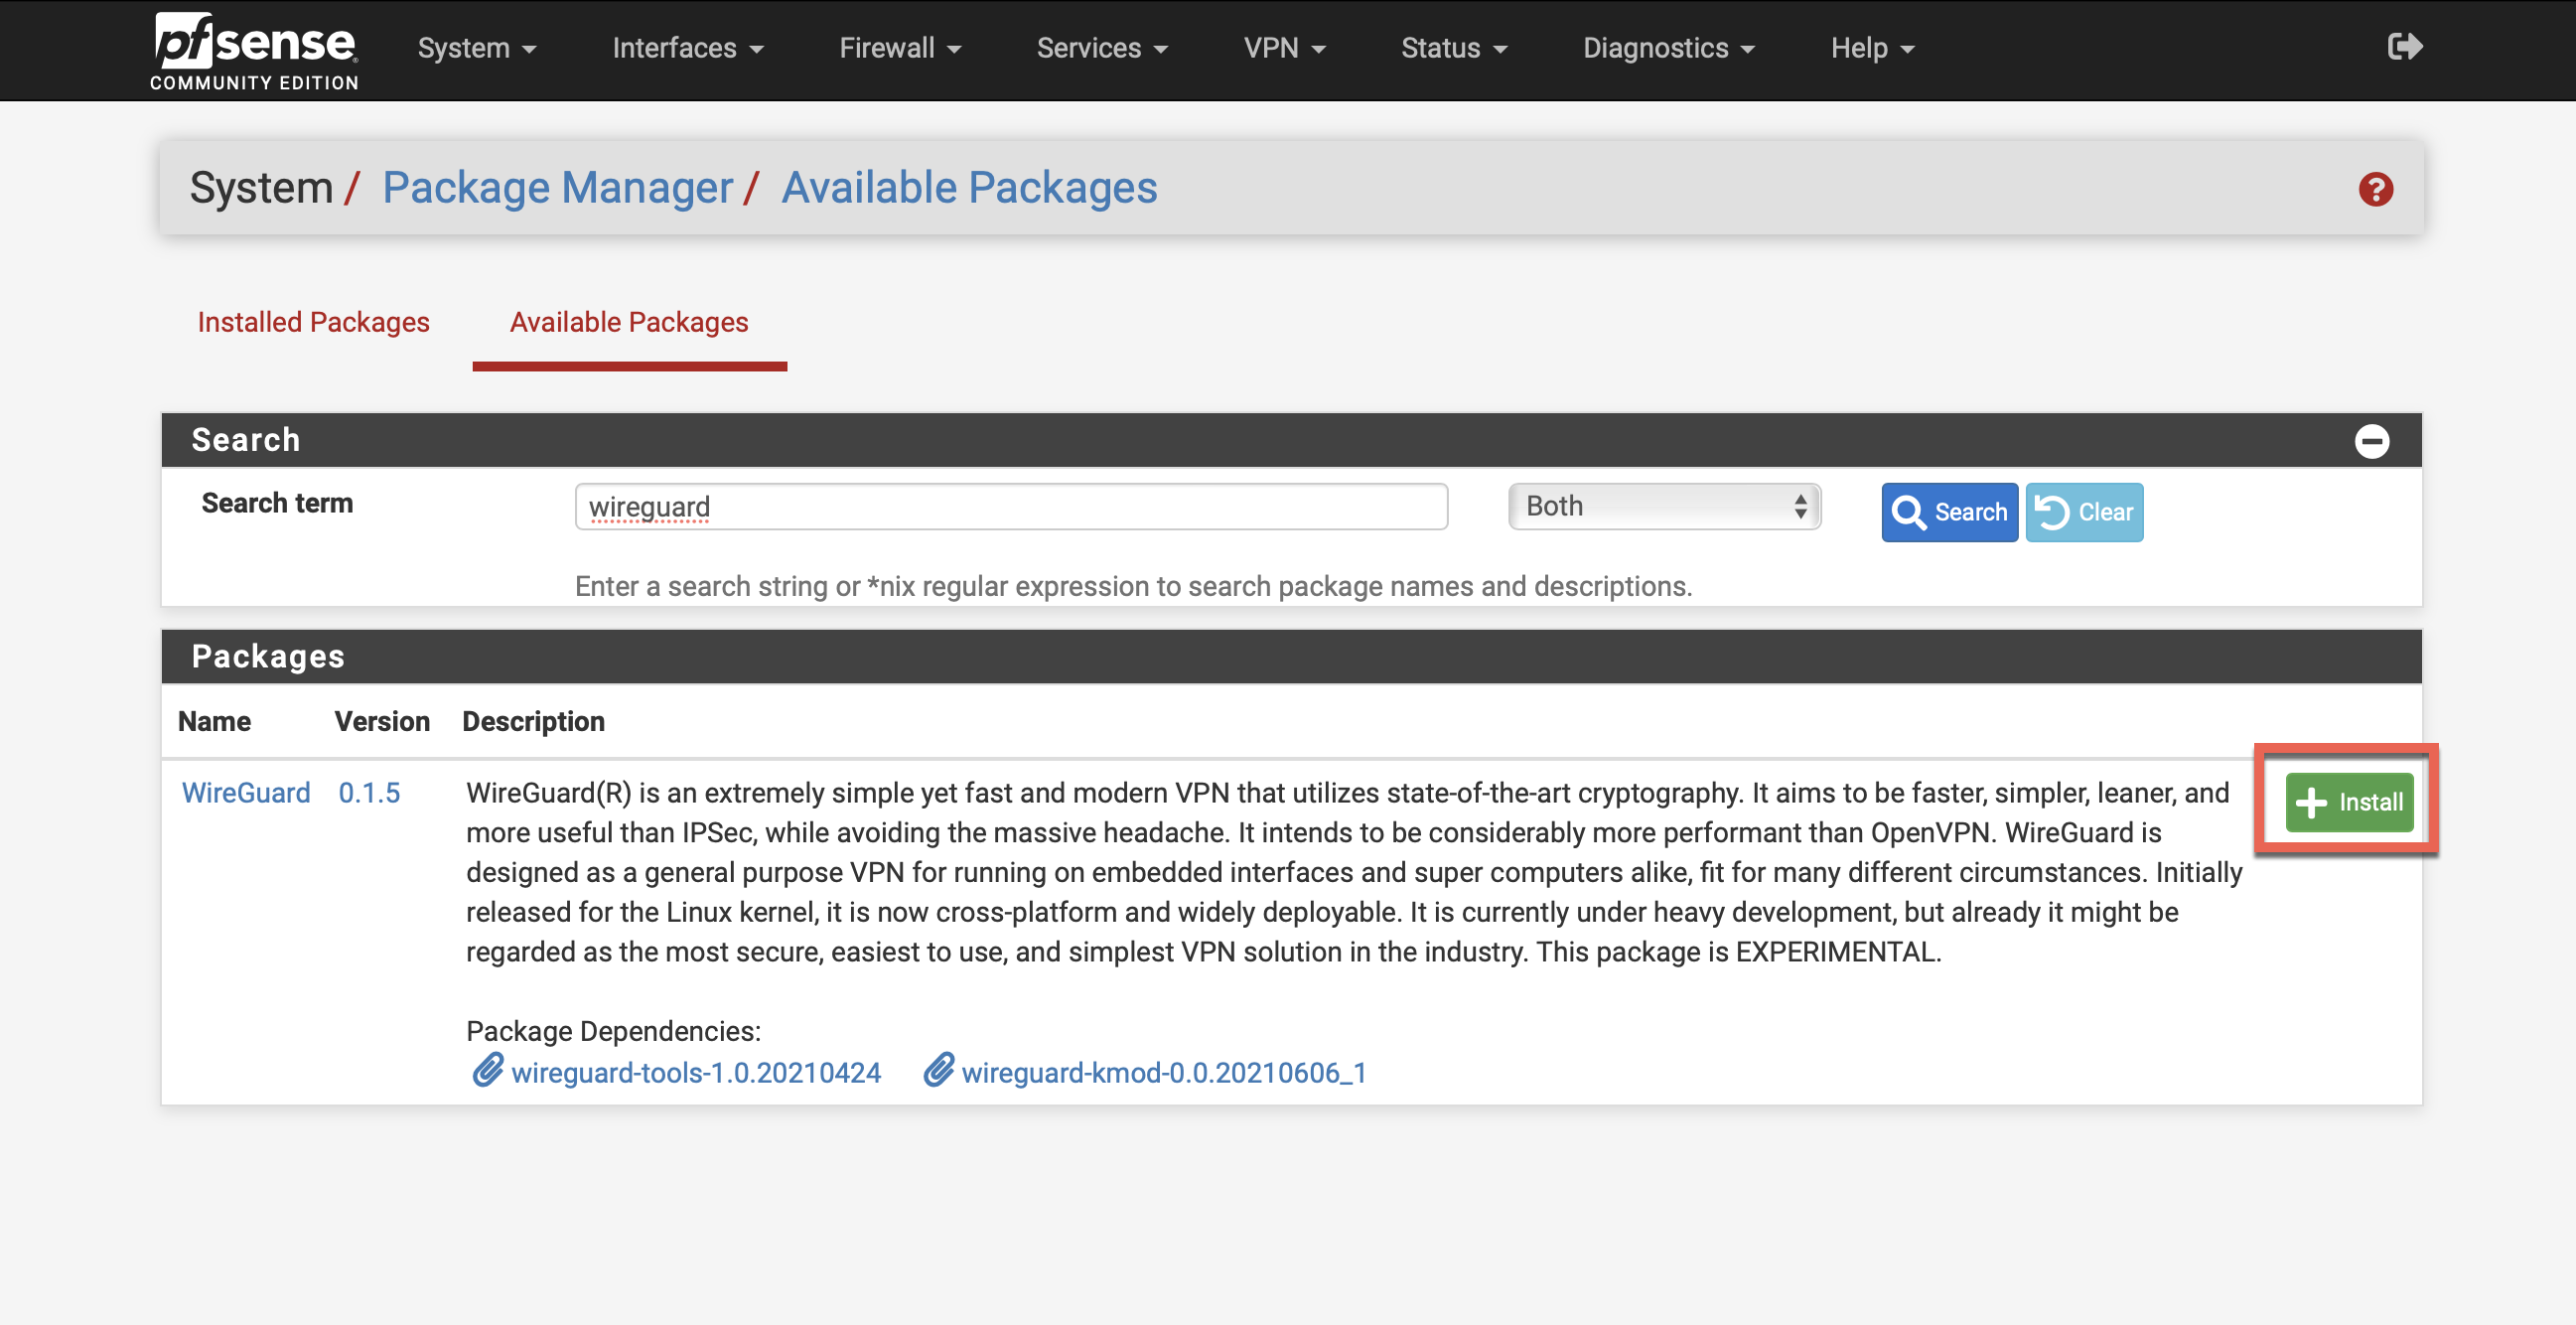
💡 Installation Tip
The installation may take 1-2 minutes. Wait for the success message before proceeding.
Create WireGuard Tunnel
Navigate to VPN → WireGuard and click +Add Tunnel
| Enable | ✓ Checked |
| Description | TorGuard VPN |
| Listen Port | Leave blank (auto-assign) |
| Interface Keys | Click Generate to create new keys |
Click Save Tunnel after generating keys
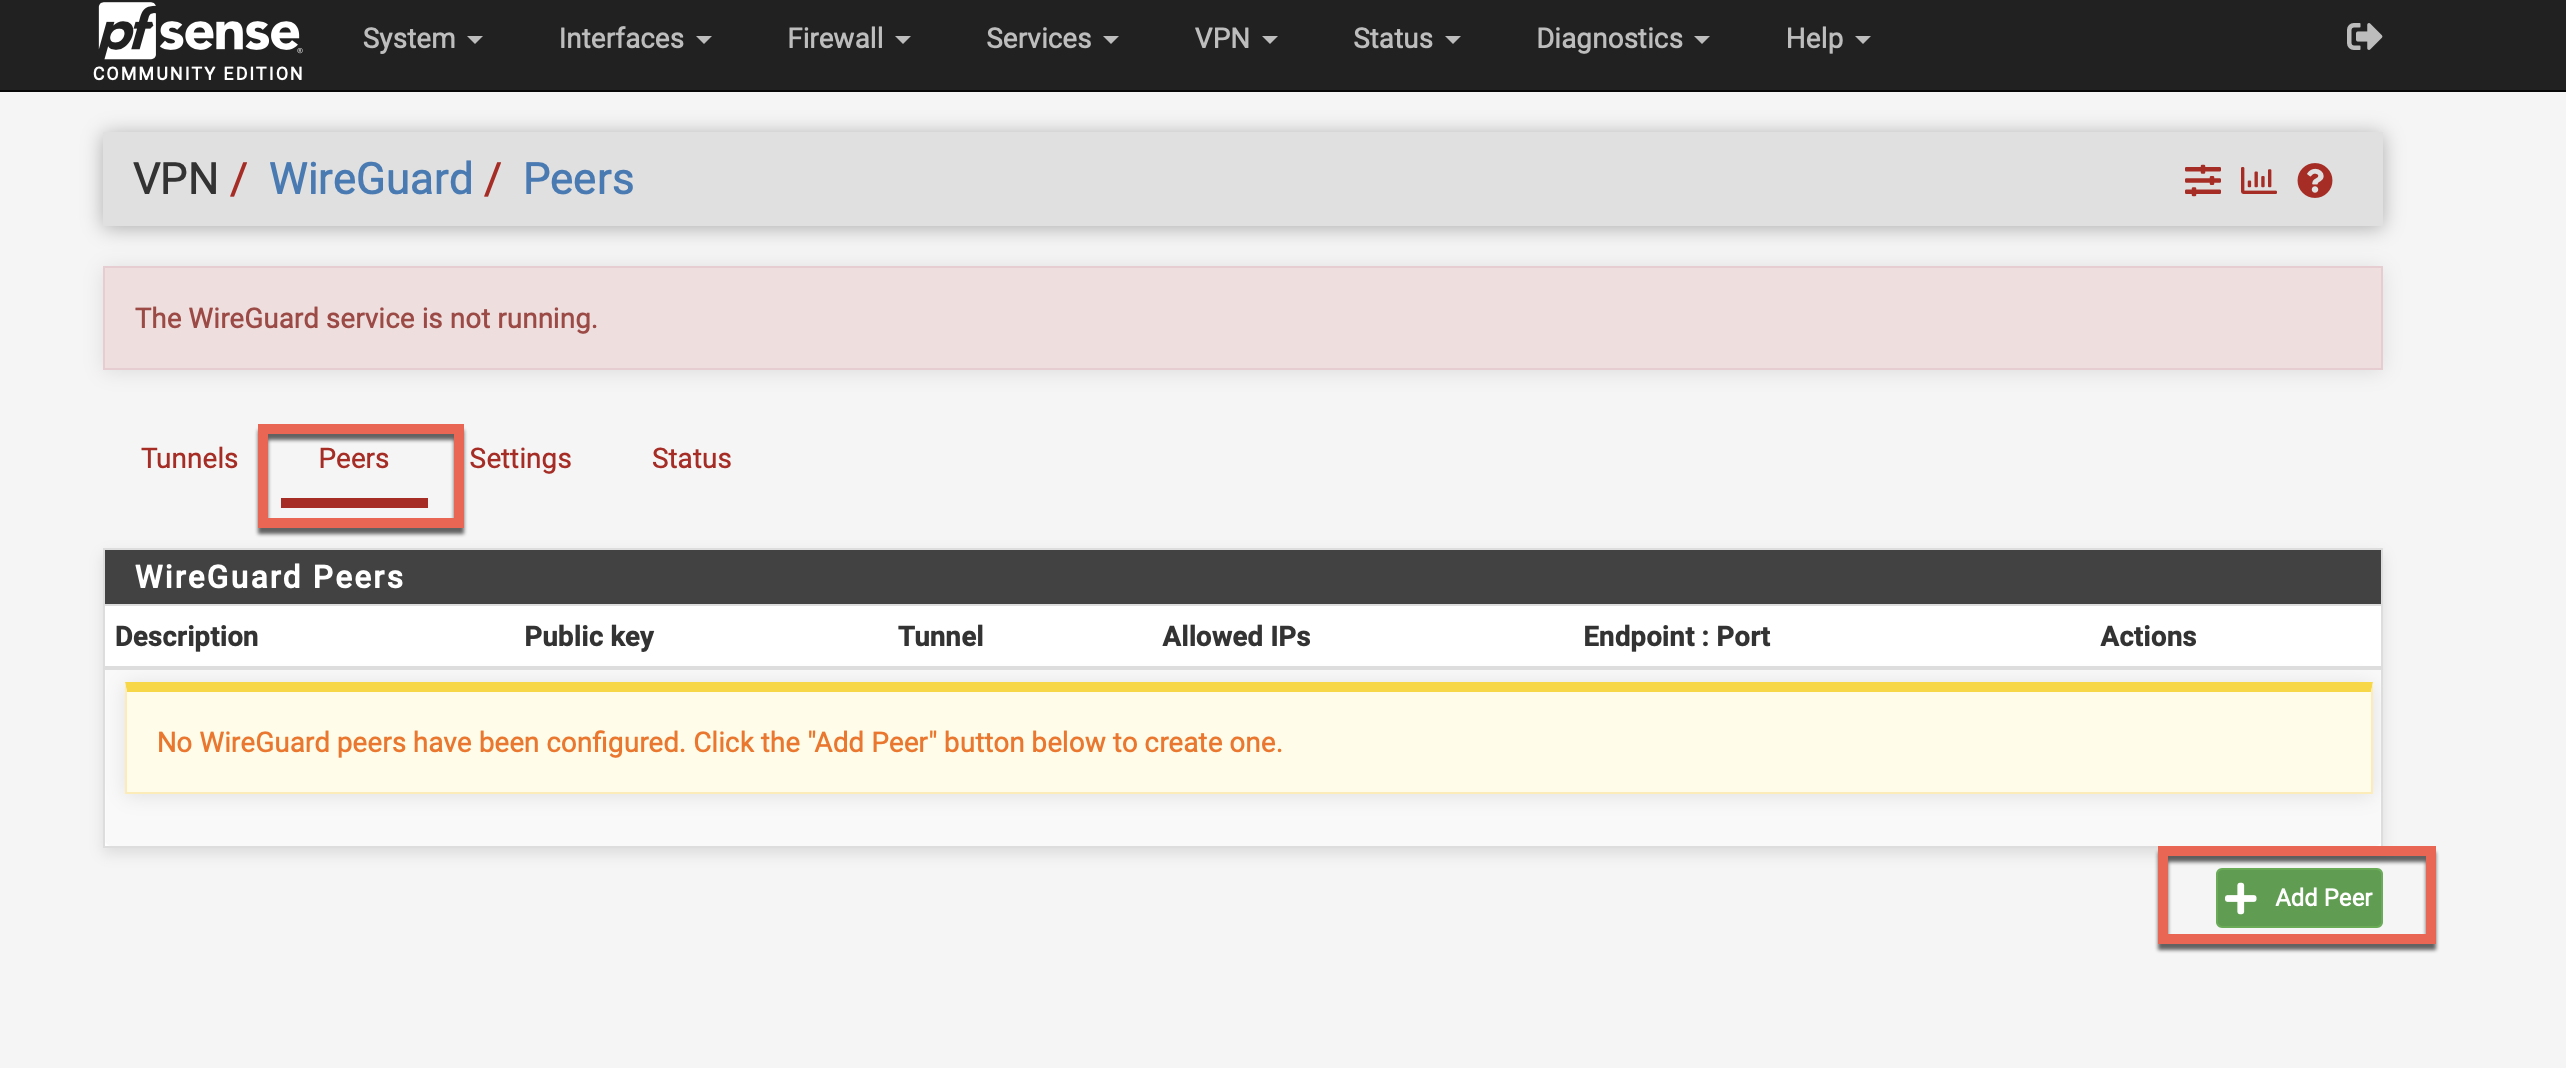
Add VPN Peer
Click Peers tab, then +Add Peer:
Generate TorGuard Config
Visit the TorGuard Config Generator:
- Select WireGuard as tunnel type
- Choose your server location or enter Dedicated IP
- Enter your TorGuard VPN credentials
- Click Generate Config
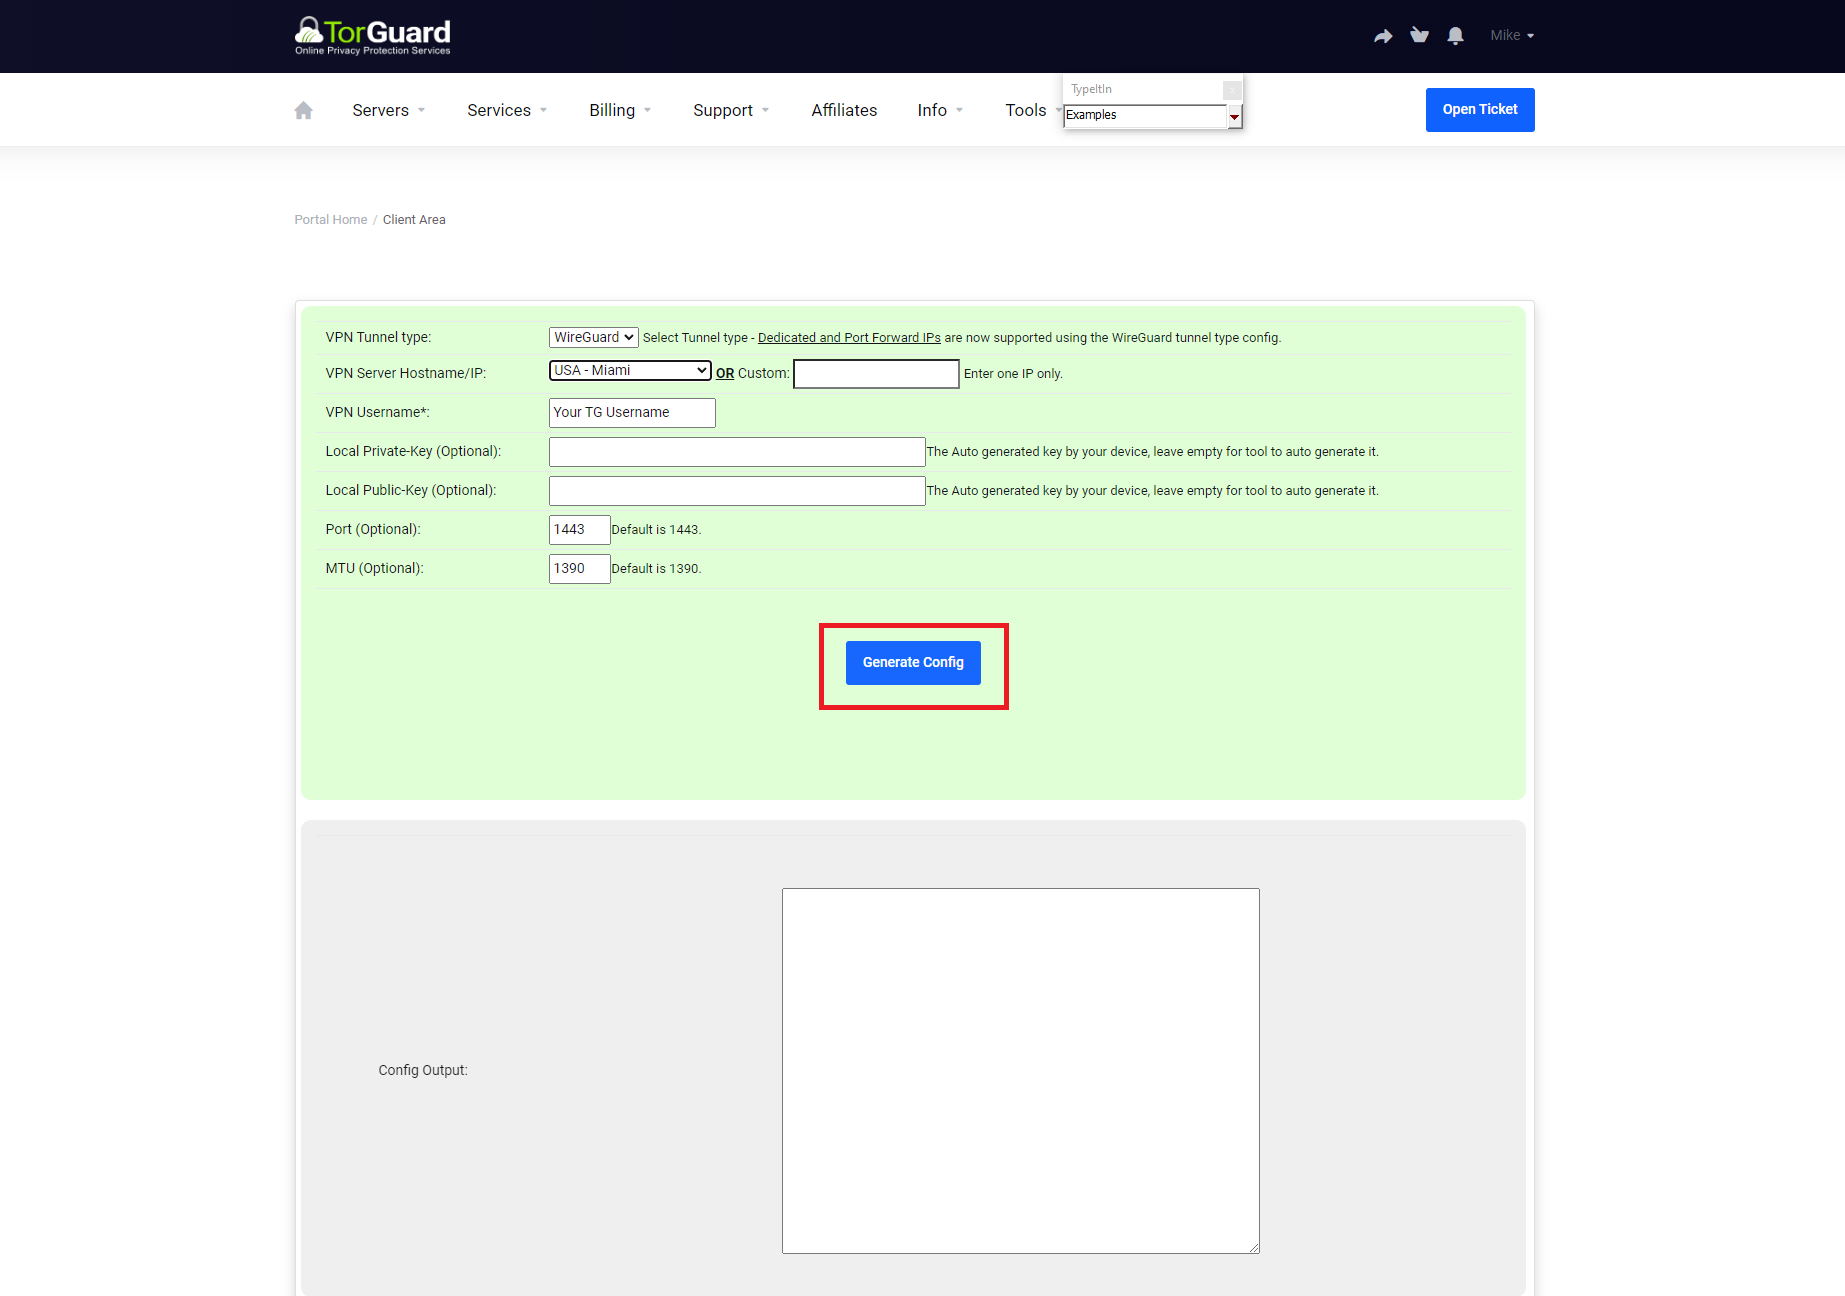
⚠️ Important
Keep this config file handy - you'll need values from it in the next step
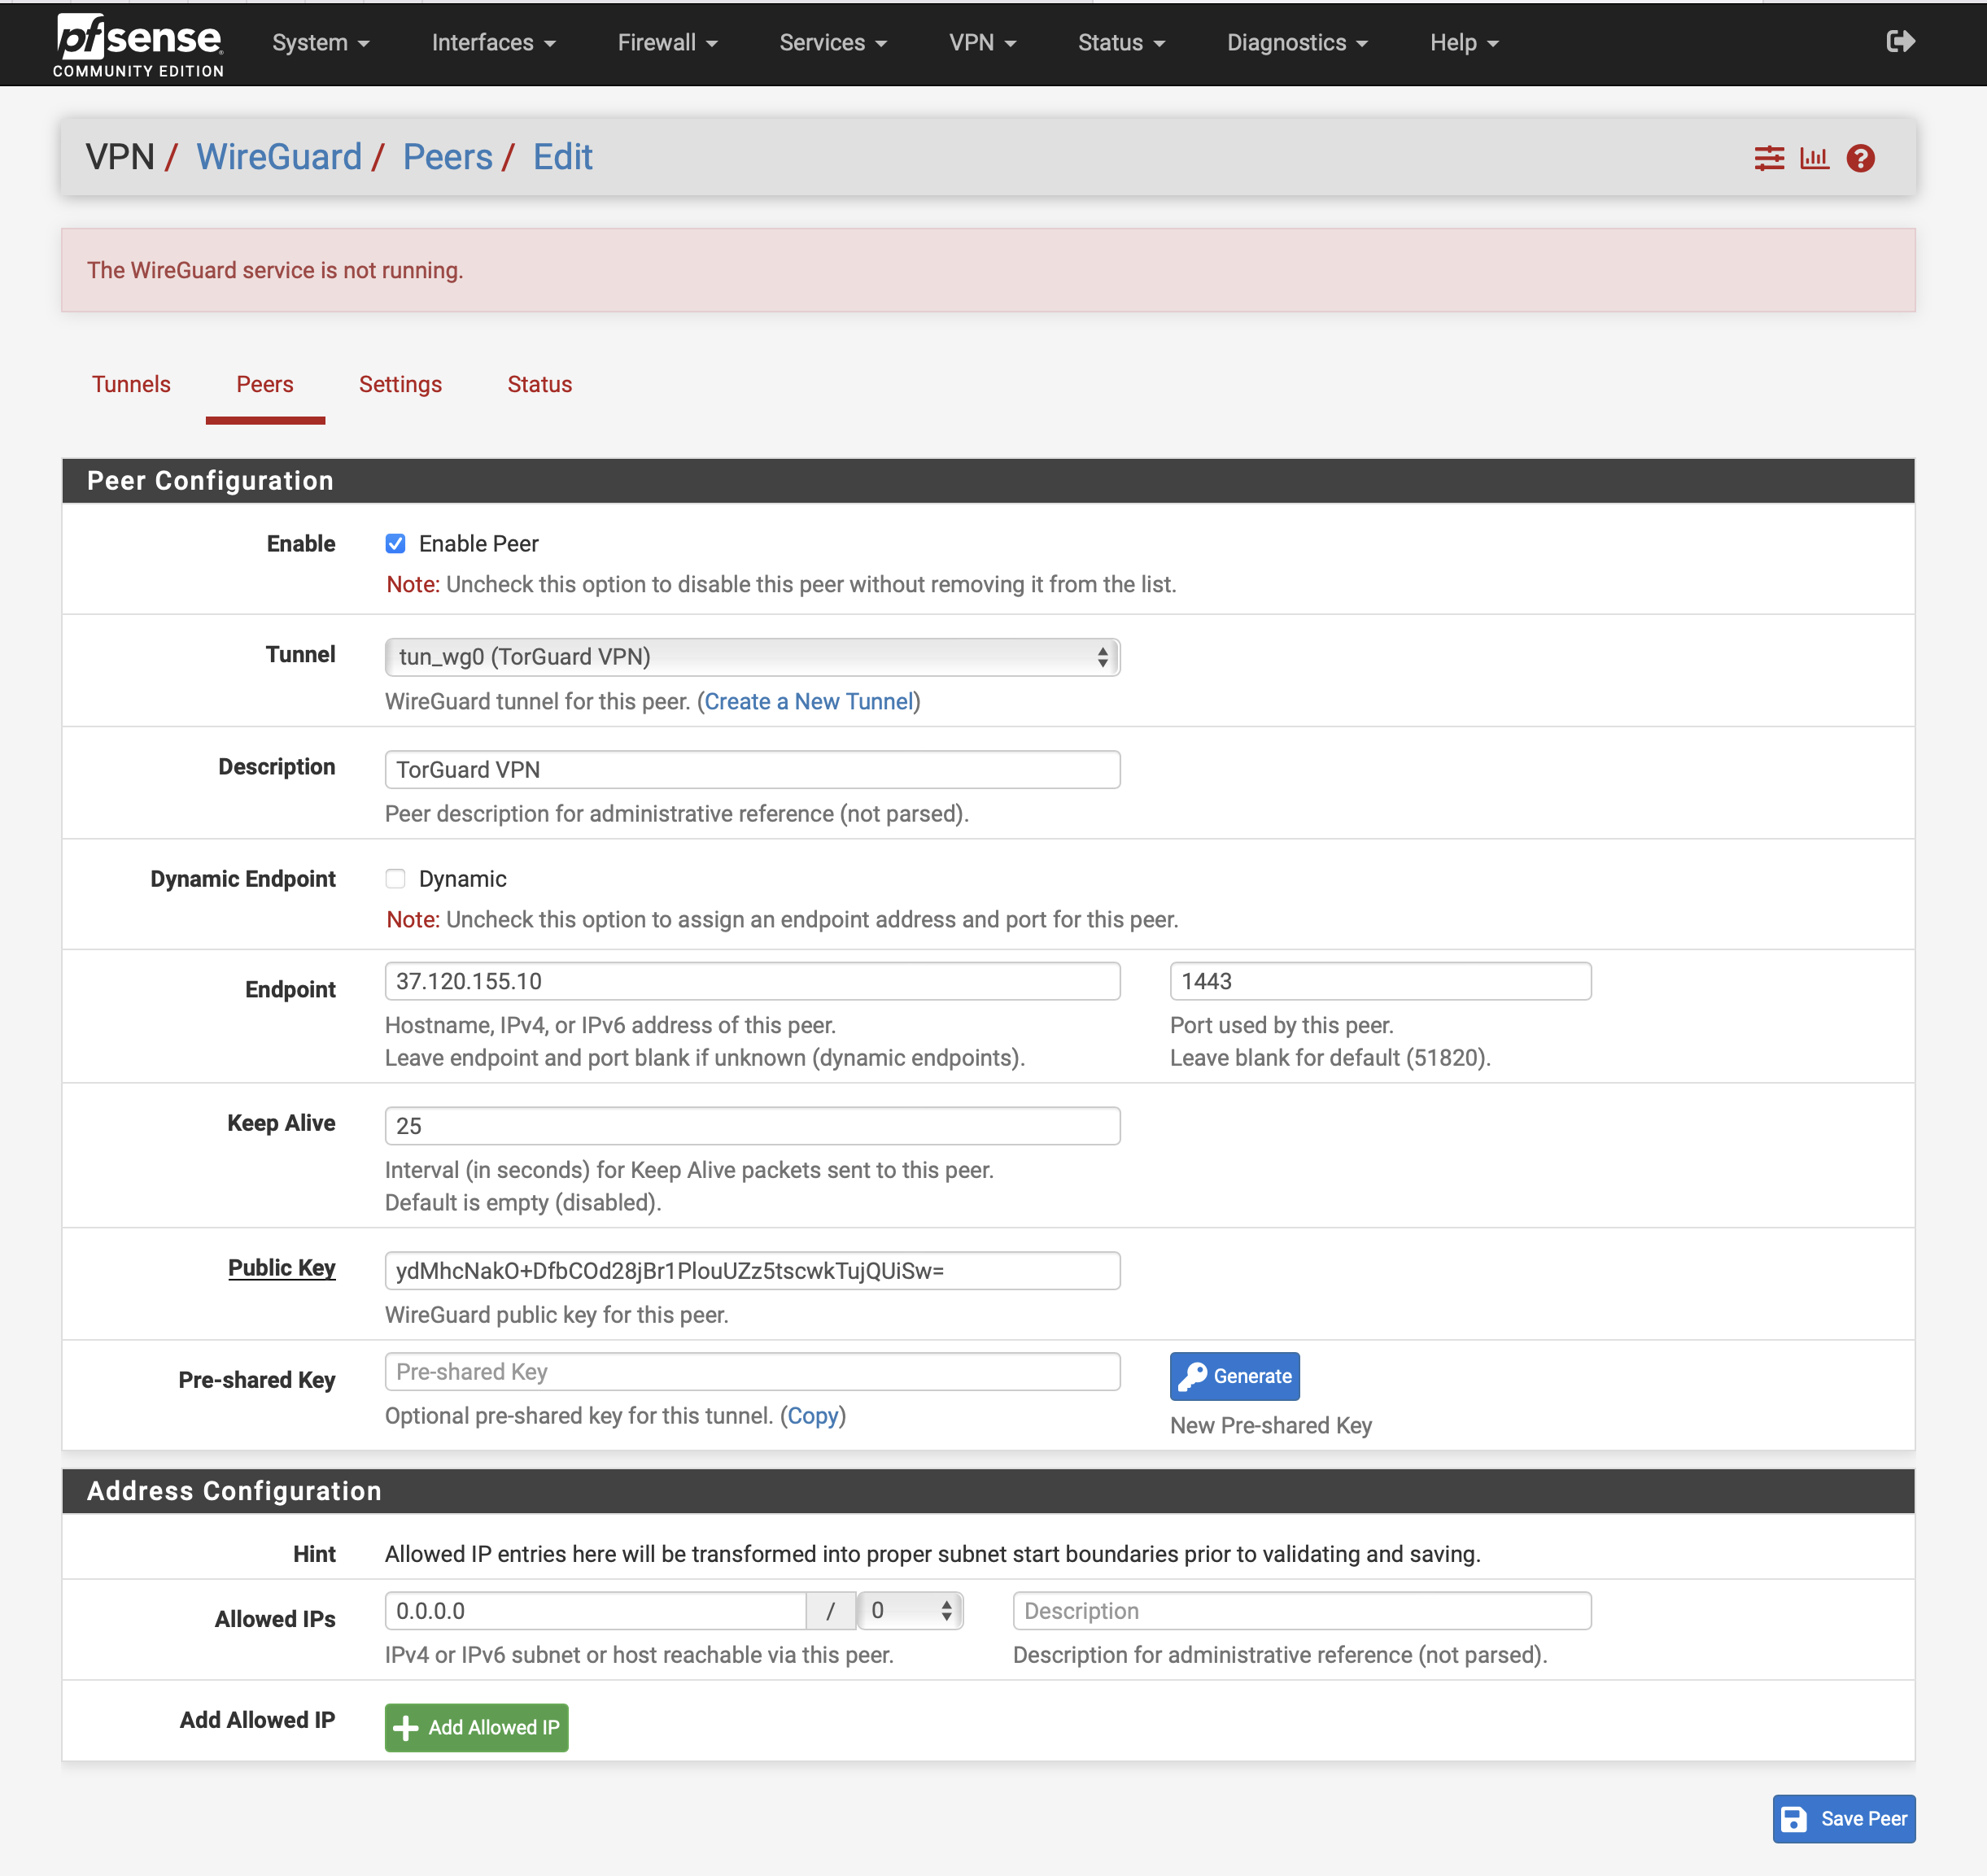
Configure Peer Settings
Enter the following settings from your generated config:
| Enable | ✓ Checked |
| Tunnel | Select tun_wg0 (TorGuard VPN) |
| Description | TorGuard VPN |
| Dynamic Endpoint | ☐ Unchecked |
| Endpoint | IP from your config file |
| Endpoint Port | 1443 |
| Keep Alive | 25 |
| Public Key | From [Peer] section of config |
| Allowed IPs | 0.0.0.0/0 |
Click Save Peer:
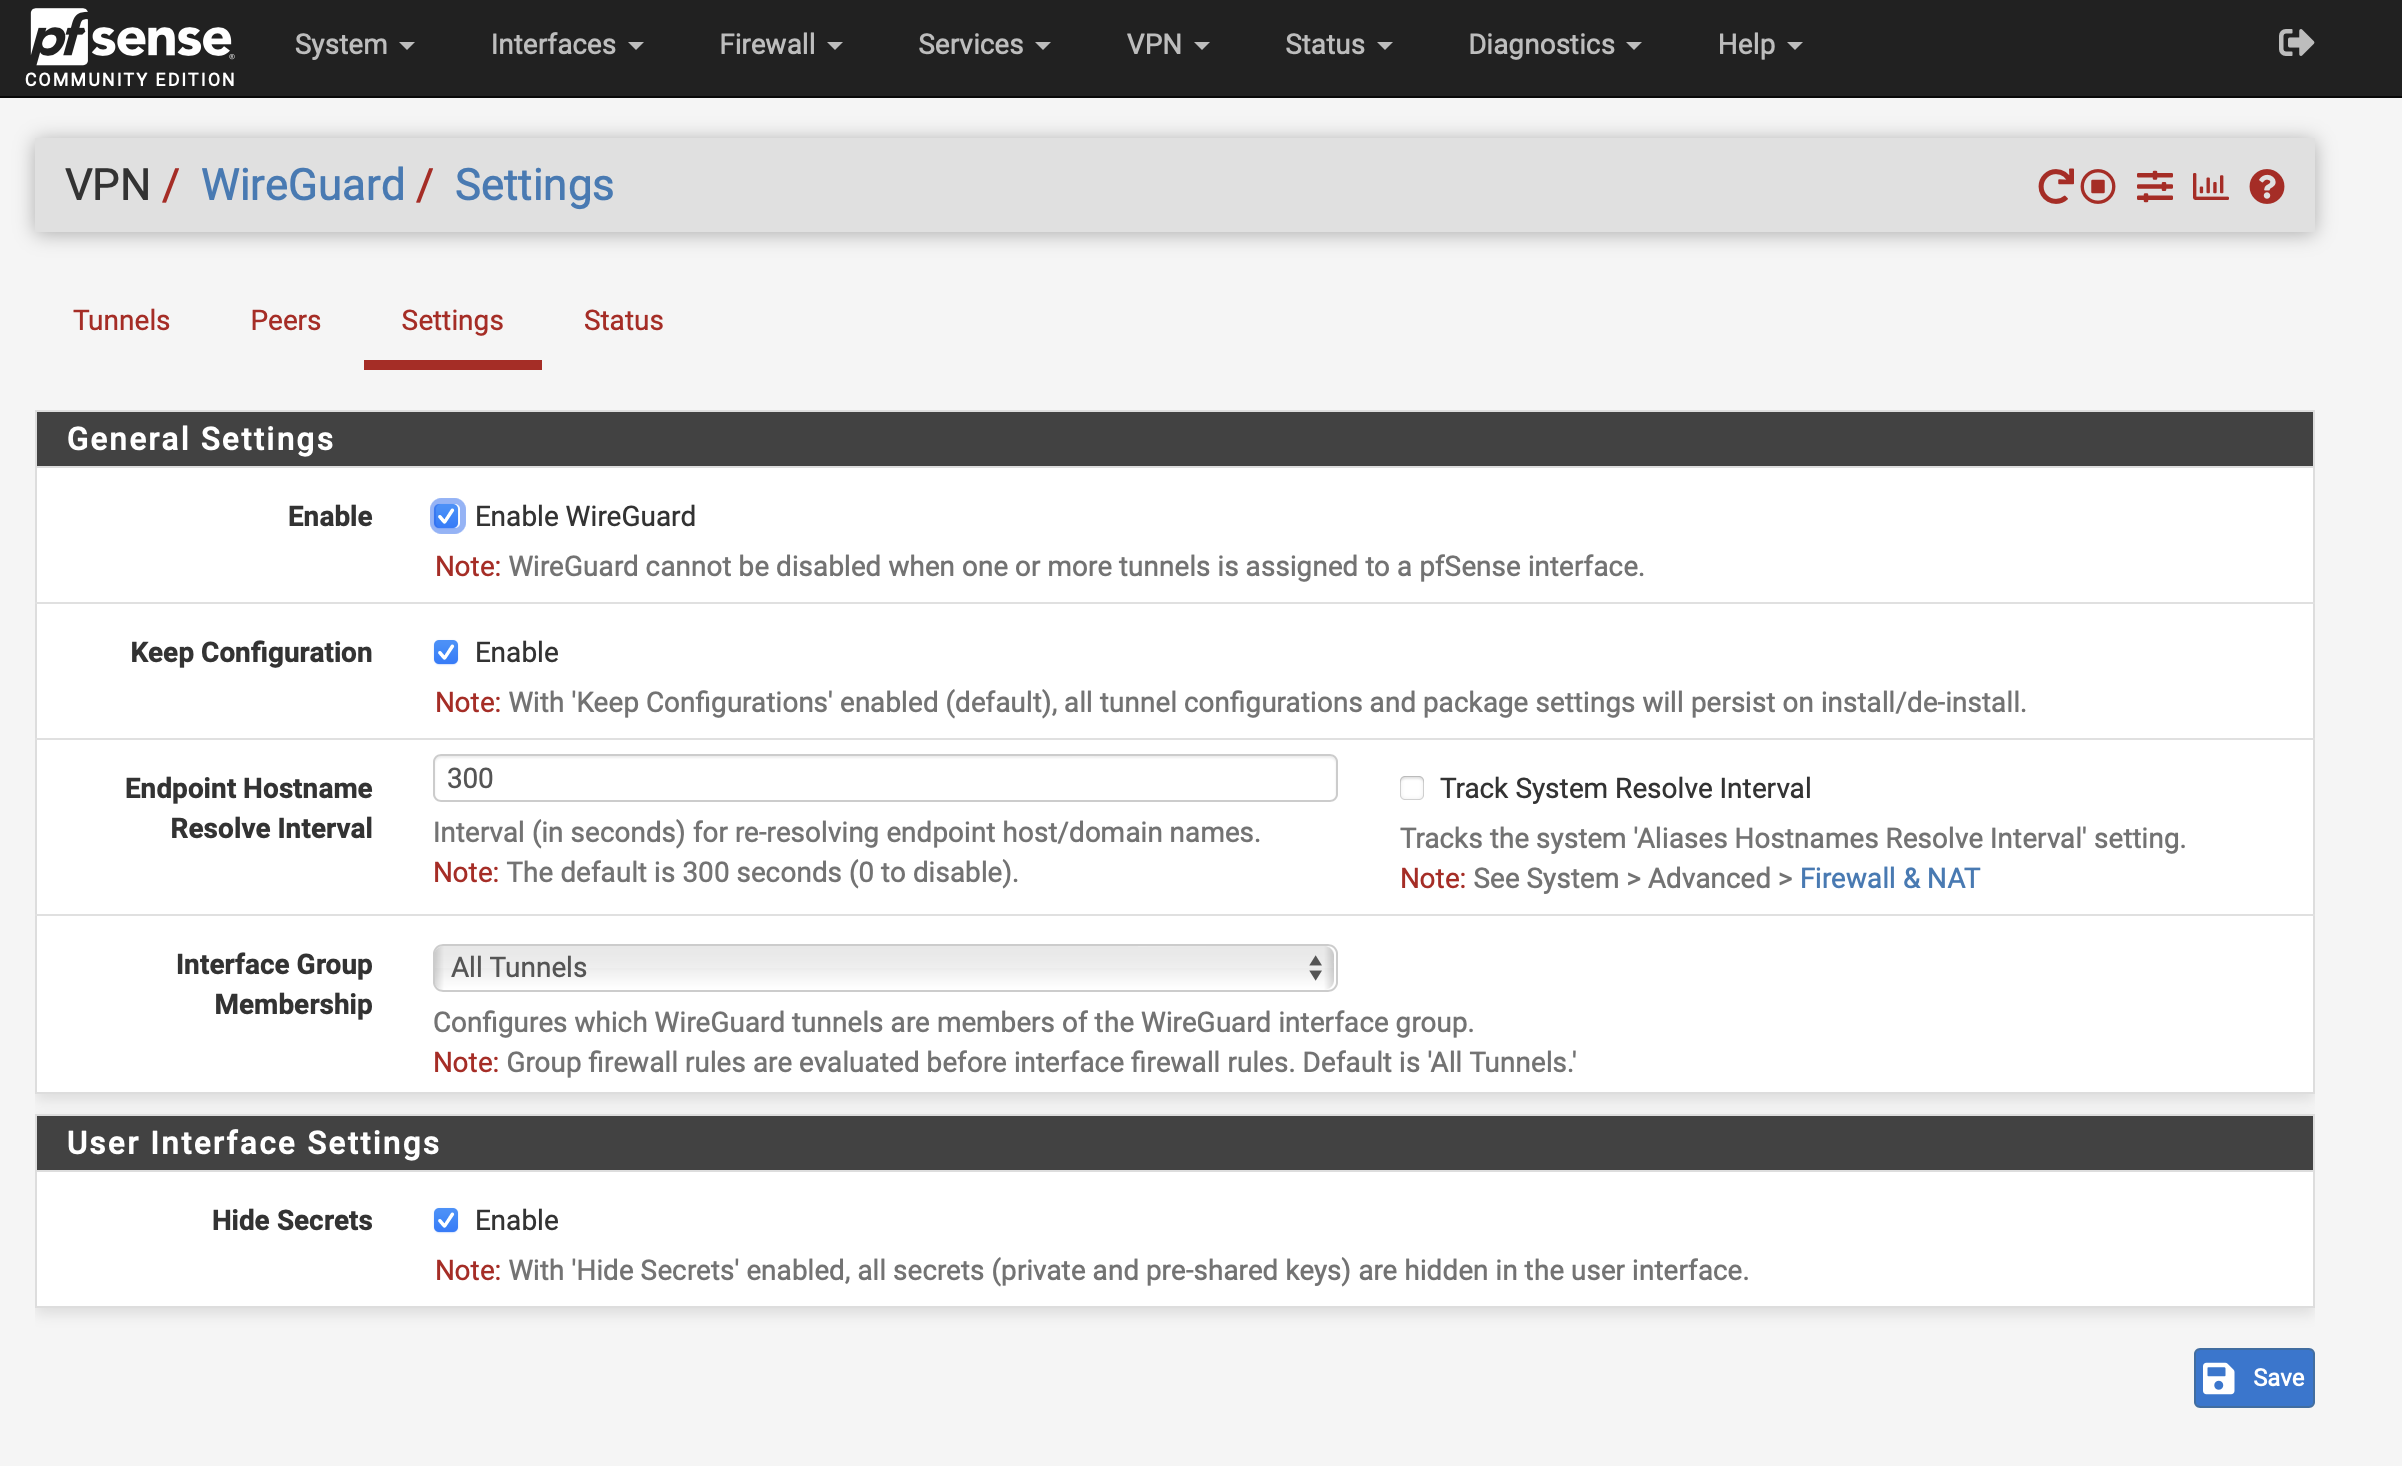
Enable WireGuard
Go to Settings tab, check "Enable WireGuard" and click Save:
Assign Interface
Navigate to Interfaces → Assignments
Click +Add next to tun_wg0 and click Save
The interface will be assigned as OPT1 or similar
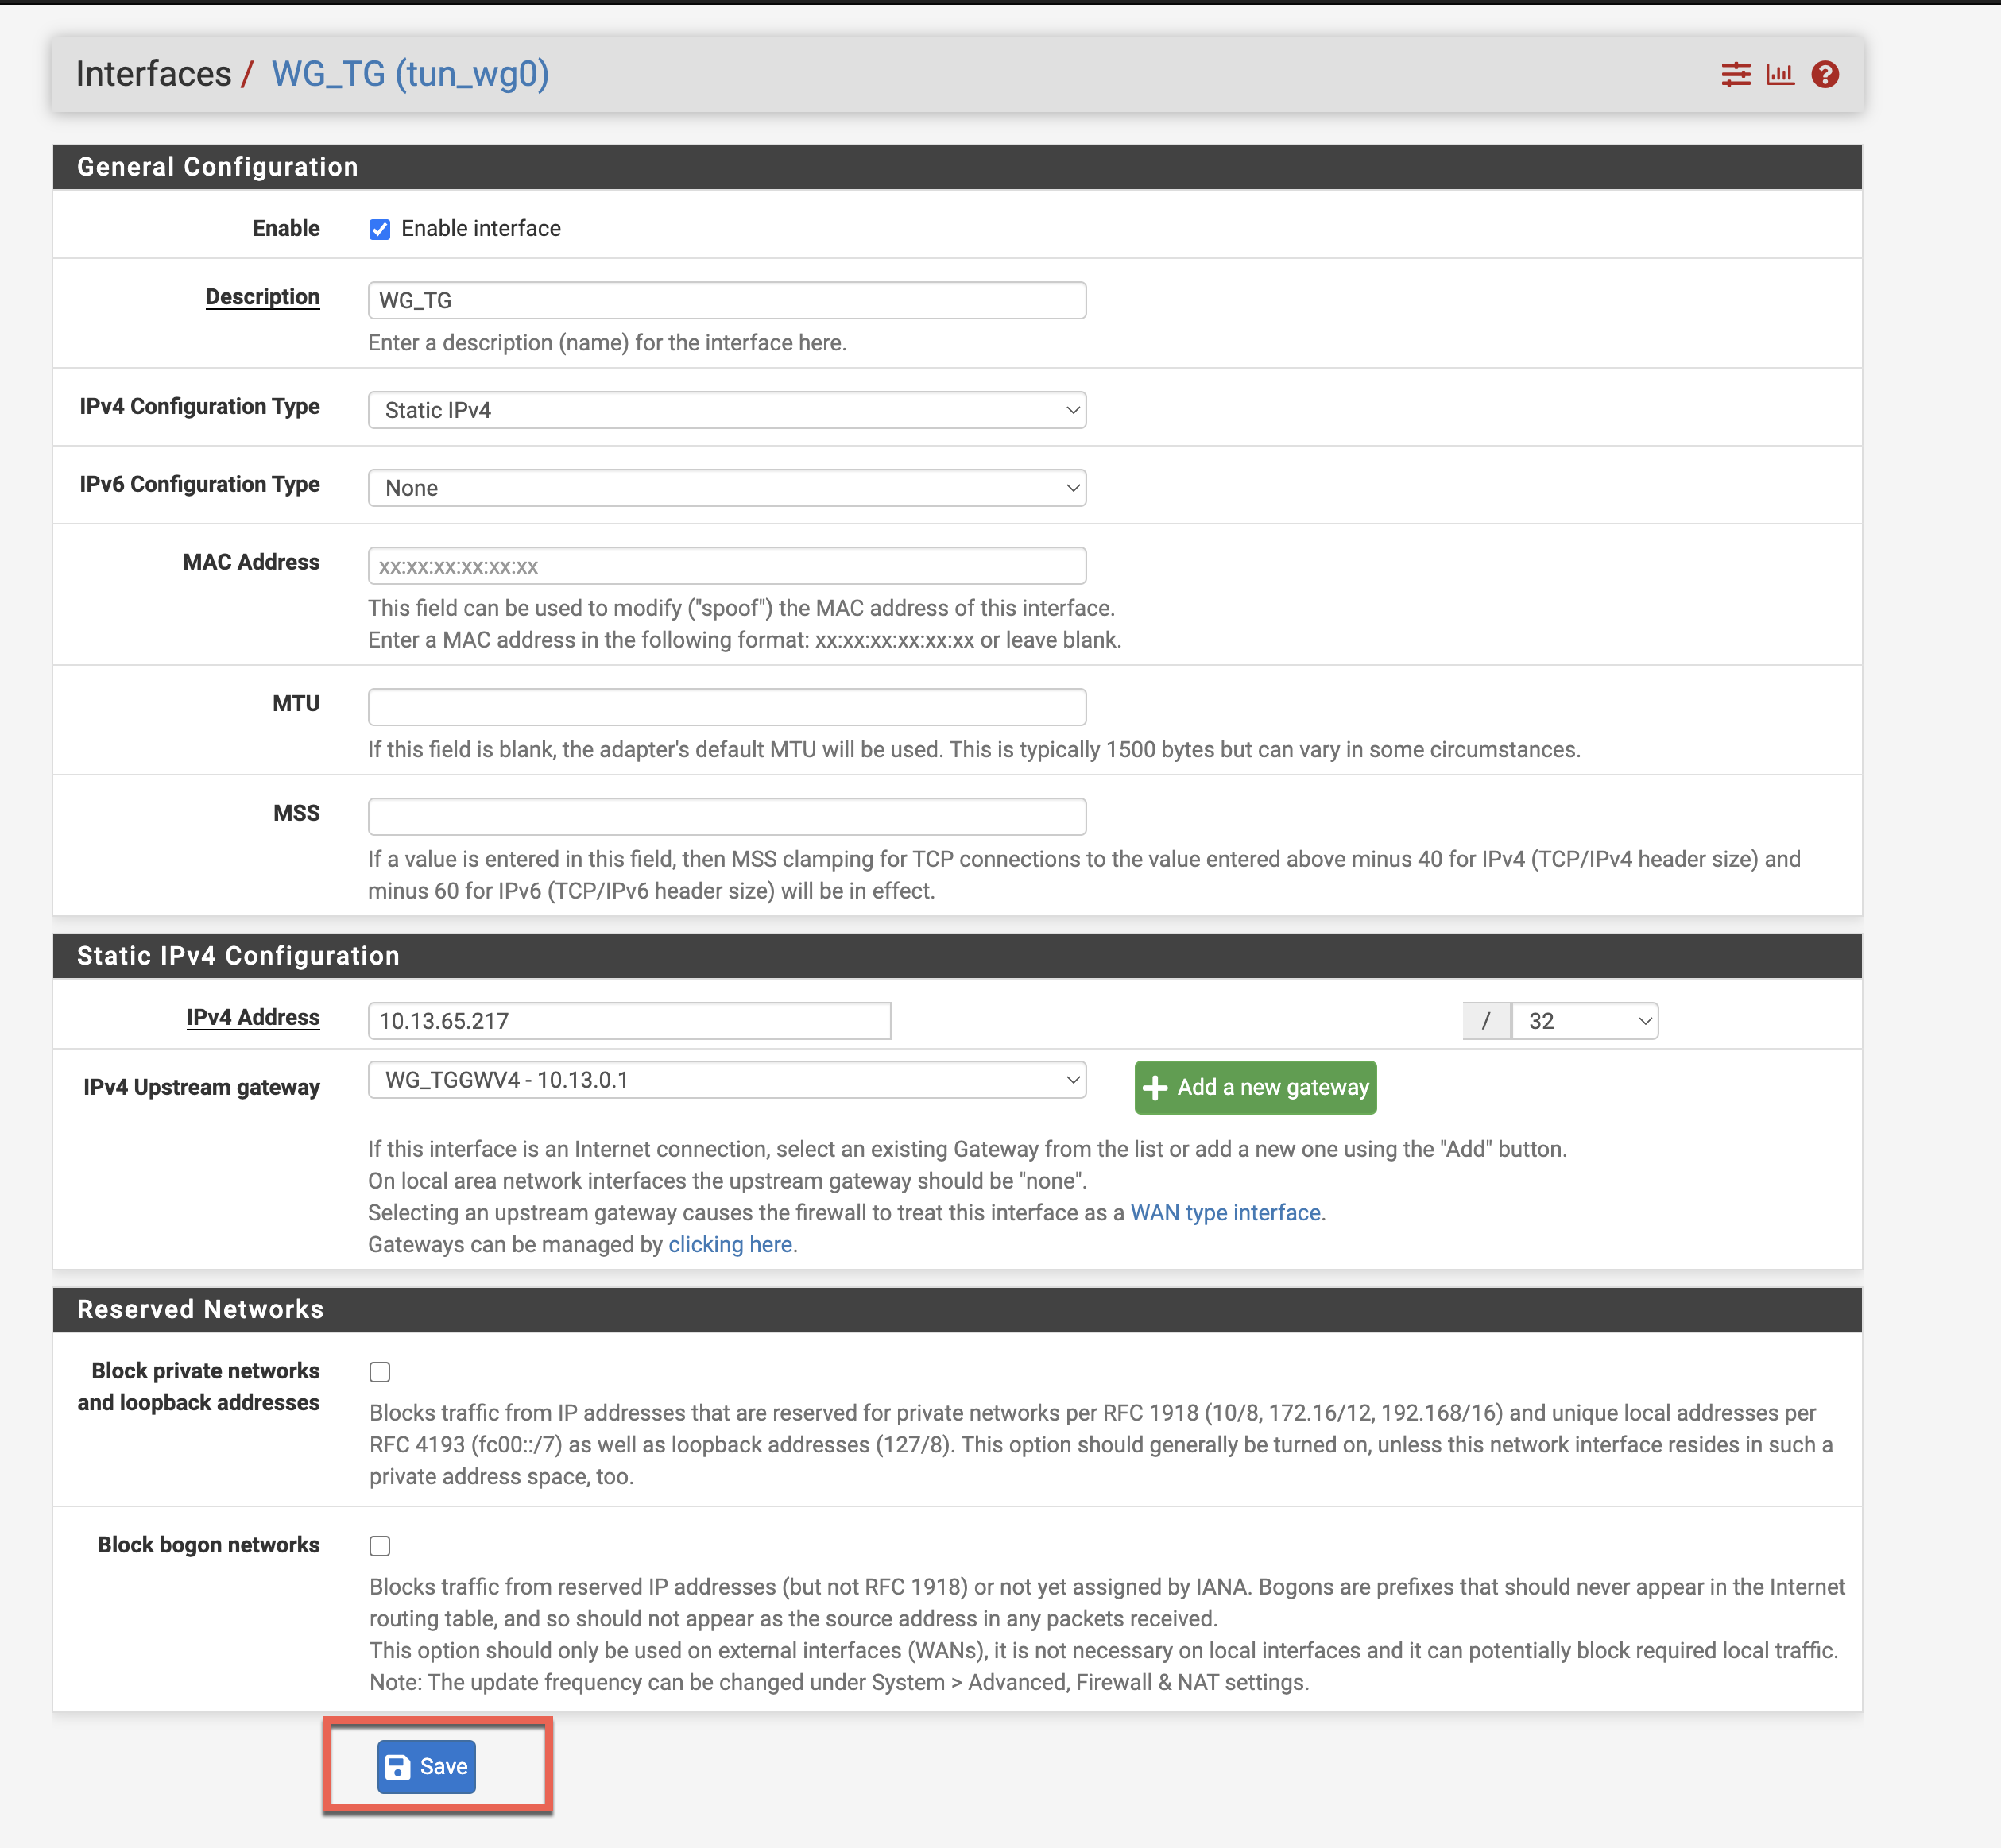
Configure Interface
Click the OPT1 link to configure:
- ✓ Check Enable
- Change description to WG_TG
Set Static IP
Configure the interface IP settings:
- Set IPv4 Configuration Type to Static IPv4
- Set IPv4 Address to the IP from [Interface] section of your config (e.g., 10.13.65.217/32)
- Next to IPv4 Upstream Gateway, click +Add a new gateway
- Gateway name: WG_TG_GWV4
- Gateway IPv4: Same as IPv4 Address (e.g., 10.13.65.217)
- Click Add
Click Save and Apply Changes:
Configure LAN MSS
Navigate to Interfaces → LAN
Set MSS to 1412
Click Save and Apply Changes
💡 Why MSS?
This prevents packet fragmentation issues with WireGuard's overhead
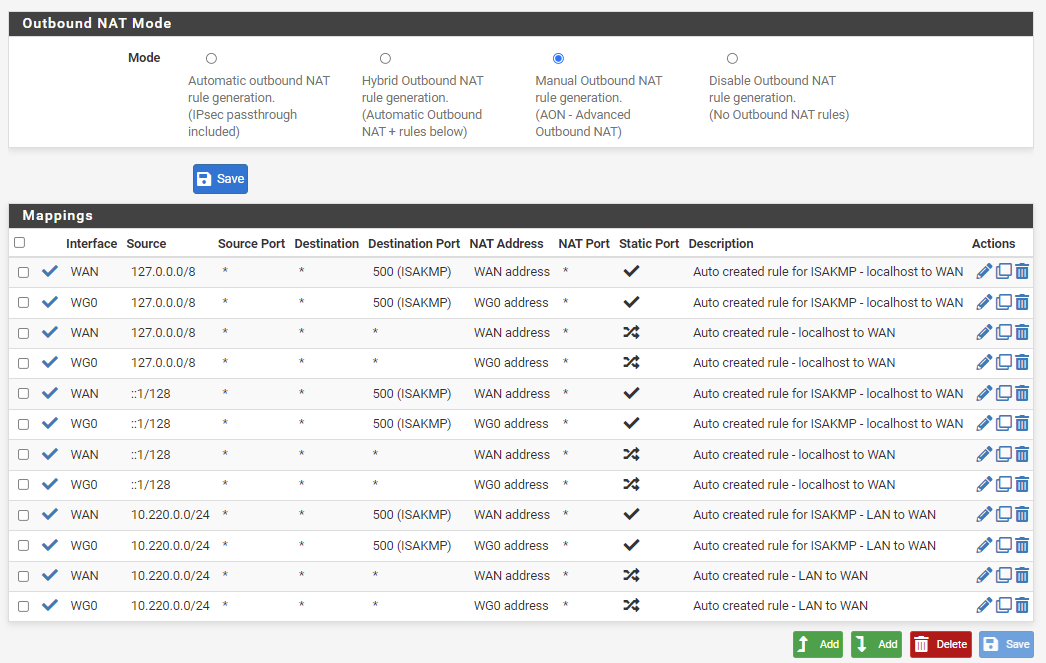
Configure NAT Rules
Navigate to Firewall → NAT → Outbound
- Select Manual Outbound NAT rule generation
- Click Save and Apply Changes
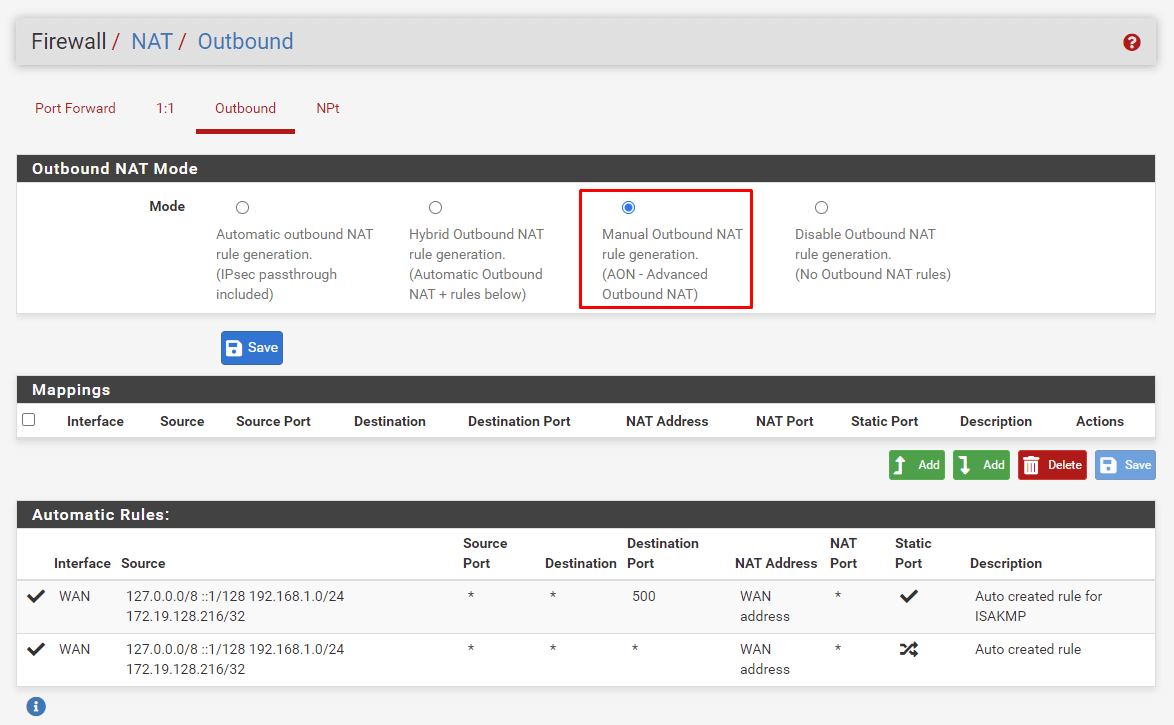
For each existing rule under Mappings:
- Click Copy button
- Change Interface to WG_TG
- Click Save
Click Apply Changes after copying all rules:
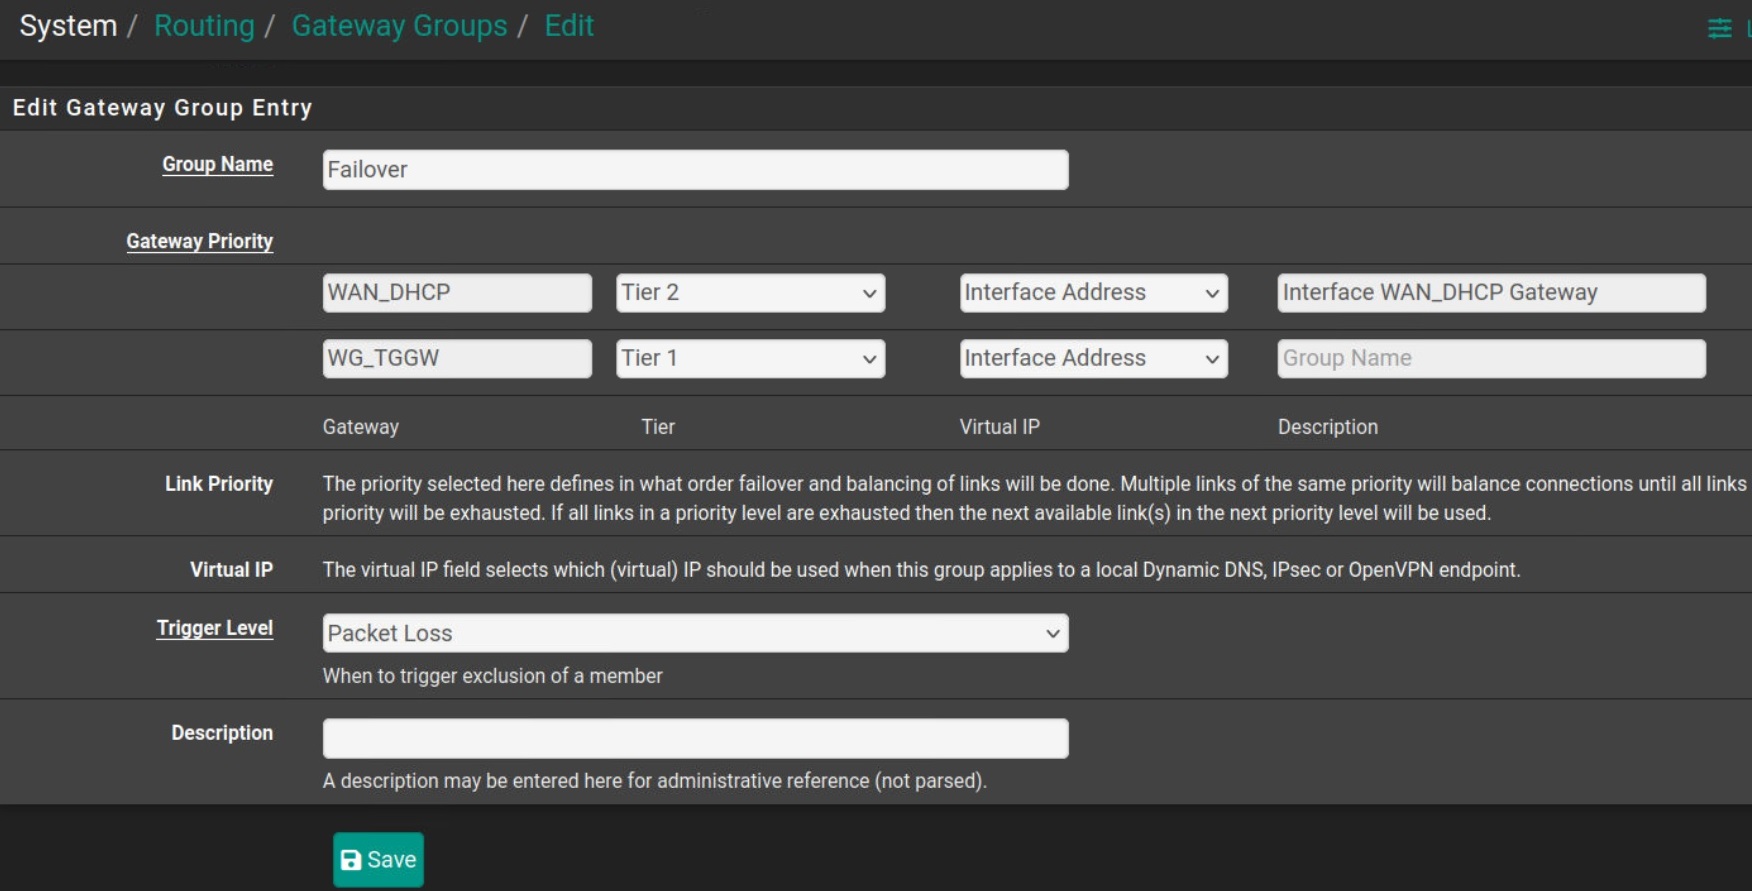
Fix Routing (If Needed)
If traffic doesn't route through the tunnel:
🔧 Routing Table Fix
- Go to System → Routing → Gateway Groups
- Add new group with:
- VPN interface: Tier 1 priority
- WAN interface: Tier 2 priority
- Trigger: Packet Loss
- Apply changes
- Go to System → Routing
- Set new group as Default IPv4 Gateway
- Apply changes
Verify Connection
✅ Test Your VPN
- From any device on your network, visit https://torguard.net/whats-my-ip.php
- Verify your IP has changed to the VPN server location
- Check for DNS leaks at dnsleaktest.com
Performance Optimization
⚡ Maximize Speed
- MTU Tuning: Experiment with MSS values (1380-1420)
- Hardware: Enable hardware crypto if available
- CPU: WireGuard uses single core - higher frequency better
- Server Selection: Choose closest server for lowest latency
- Port: 1443 generally performs well
Troubleshooting
🔍 Common Issues
No Internet Access
- Check NAT rules copied correctly
- Verify gateway configuration
- Ensure WireGuard enabled
- Apply routing fix (Step 13)
Tunnel Not Connecting
- Verify endpoint IP correct
- Check public key from config
- Ensure port 1443 not blocked
- Regenerate config if needed
Slow Speeds
- Lower MSS value
- Try different server
- Check CPU usage
- Disable unnecessary rules
DNS Issues
- Set DNS in System → General
- Use TorGuard DNS servers
- Disable DNS rebinding protection
- Clear DNS cache
Handshake But No Traffic
- Apply routing fix (Step 13)
- Check firewall rules
- Verify allowed IPs is 0.0.0.0/0
- Restart WireGuard service
Random Disconnects
- Increase keepalive to 30-60
- Check for duplicate IPs
- Monitor system logs
- Update pfSense
Security Best Practices
🔐 Important Security Tips
- Firewall Rules: Only allow necessary traffic through VPN
- DNS: Use TorGuard's DNS to prevent leaks
- Kill Switch: Configure failover to block traffic if VPN drops
- Updates: Keep pfSense and WireGuard package updated
- Monitoring: Check logs regularly for issues
Quick Reference
📋 Configuration Summary
WireGuard Settings
- Port: 1443
- Keepalive: 25
- Allowed IPs: 0.0.0.0/0
Interface Settings
- Type: Static IPv4
- Subnet: /32
- MSS: 1412
Required Changes
- Manual NAT rules
- Gateway group (if needed)
- LAN MSS adjustment
Need Help?
If you're having trouble setting up WireGuard on pfSense:
Include your pfSense version and any error messages