How to Add Dedicated IP to TorGuard Client
Dedicated IP addresses provide you with a static, exclusive IP that never changes and is used only by you. This guide covers both automatic and manual methods to configure your dedicated IP or port forward in the TorGuard VPN client.
Understanding Dedicated IPs vs Shared IPs
| Feature | Dedicated IP | Shared IP |
|---|---|---|
| IP Address | Static, never changes | Dynamic, changes regularly |
| Users | Only you | Multiple users |
| Anonymity | Lower (single user) | Higher (crowd blending) |
| Blacklist Risk | Very low | Possible (shared behavior) |
| Best For | Banking, remote access, gaming | General browsing, privacy |
| Cost | Additional fee | Included in plan |
Benefits of Dedicated IPs
Banking Access
Avoid security triggers from constantly changing IPs
Gaming
Lower latency and no IP bans from shared users
Remote Work
Whitelist your IP for secure access to work systems
Email Reputation
Better email deliverability with clean IP history
Setup Methods
Automatic Detection (Recommended)
Simply log in to the TorGuard client and disconnect once. Your dedicated IPs will appear automatically in the server list under "Dedicated IPs".
Manual Configuration
If automatic detection doesn't work, follow the manual setup steps below to add your dedicated IP.
Automatic Setup - Finding Your Dedicated IP
Once you've logged into the TorGuard client at least once, your dedicated IPs should appear automatically:
Manual Setup Instructions
If your dedicated IP doesn't appear automatically, follow these steps to add it manually:
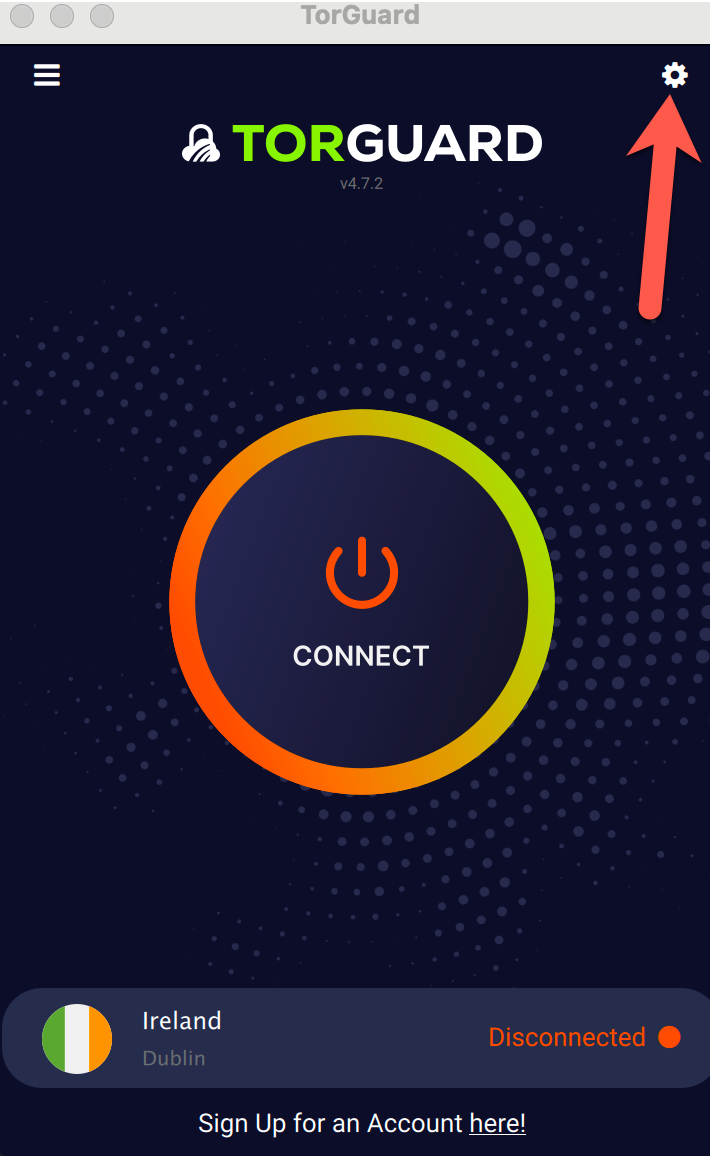
Step 1: Access Settings
Click the settings cog icon in the top right corner of the TorGuard client:
Step 2: Navigate to Servers Tab
Select the "Servers" tab from the settings menu:

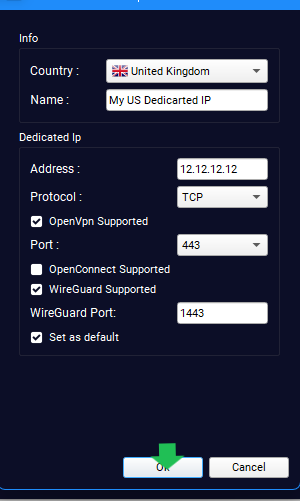
Step 3: Configure Your Dedicated IP
Fill in the following configuration fields:
Protocol-Specific Options
8. Set as Default: Check this option to automatically connect to this IP when launching TorGuard.
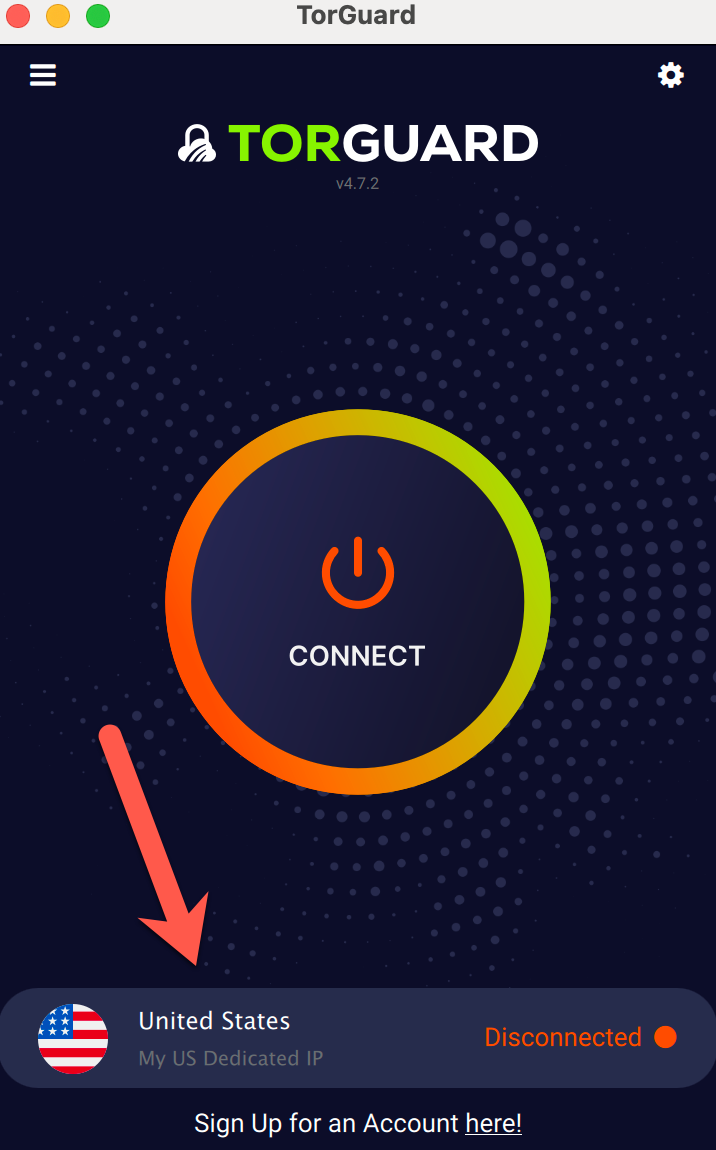
Step 4: Save and Connect
After clicking "OK", your dedicated IP is ready to use:
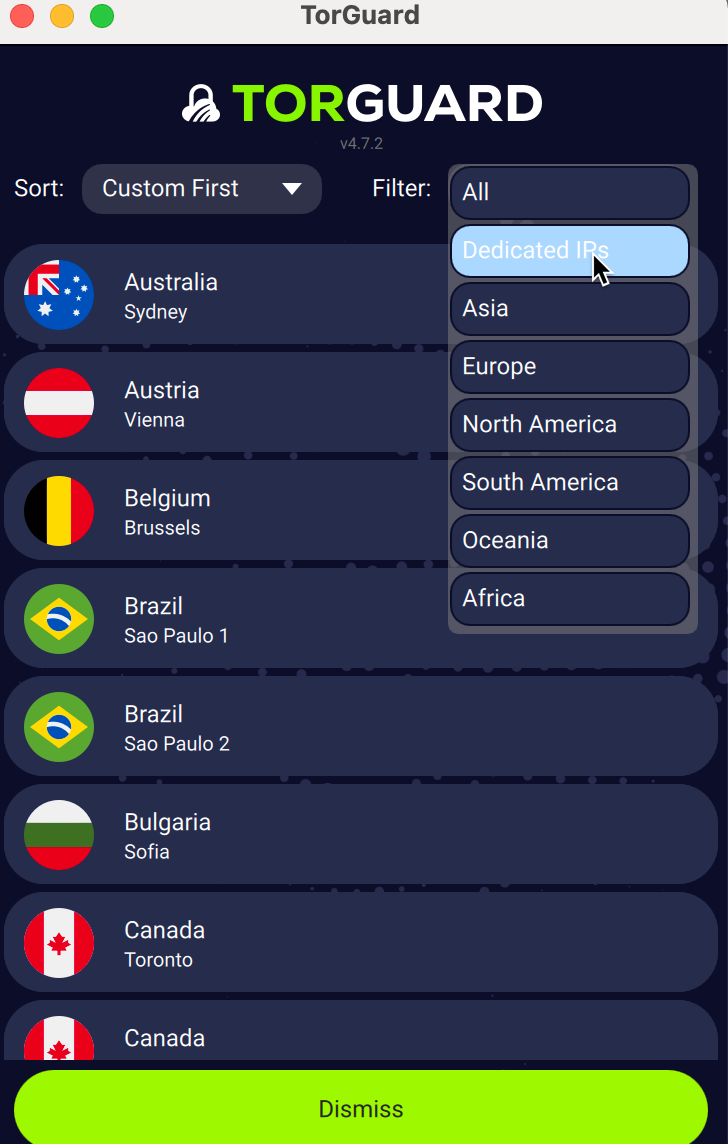
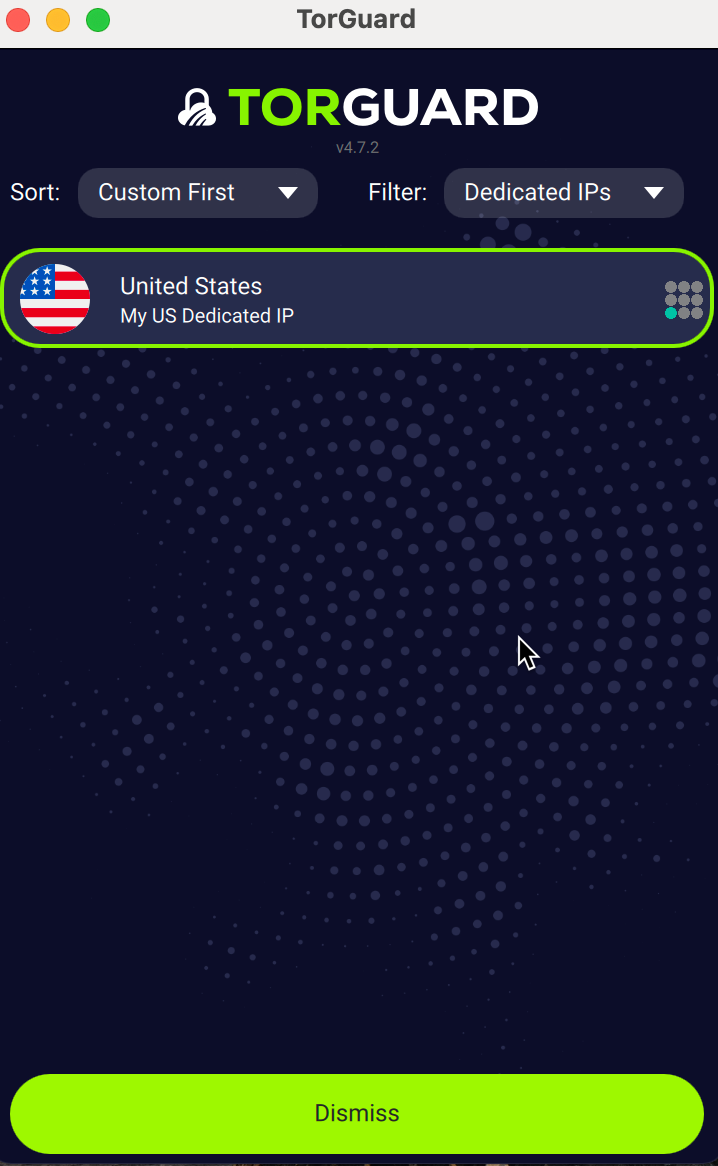
Step 5: Filter Your Server List
To view only your dedicated IPs:
- Click the filter dropdown in the server list
- Select "Dedicated IP's"
- Your custom configurations will appear at the top
Common Configuration Examples
| Use Case | Recommended Protocol | Port | Why This Configuration |
|---|---|---|---|
| General Use | OpenVPN UDP | 1194 | Best balance of speed and reliability |
| Bypass Firewalls | OpenVPN TCP | 443 | Uses HTTPS port, rarely blocked |
| Maximum Speed | WireGuard | 51820 | Latest protocol with best performance |
| Restrictive Networks | OpenConnect | 443 | Designed for enterprise compatibility |
| Gaming | OpenVPN UDP | 1194 or custom | Lower latency for real-time applications |
Port Forwarding vs Dedicated IP
- Dedicated IP: Your own static IP address for all traffic
- Port Forward: Opens specific ports on a shared IP for incoming connections
- Combination: You can have port forwarding on a dedicated IP for maximum functionality
Troubleshooting Common Issues
🔧 Dedicated IP Not Appearing
- Ensure you've logged into the client at least once
- Click "Disconnect" if currently connected
- Wait 30 seconds and check the server list again
- Try logging out and back in
- If still not visible, use manual setup
🔧 Connection Failed
- Check IP Address: Verify it matches your activation email exactly
- Protocol Mismatch: Ensure TCP/UDP setting matches your configuration
- Port Number: Confirm the port is entered correctly
- Firewall: Temporarily disable to test if it's blocking the connection
- Credentials: Re-enter your TorGuard username and password
🔧 Slow Speeds
- Try switching between TCP and UDP protocols
- Test different ports if multiple are available
- Consider upgrading to WireGuard protocol
- Check if your ISP throttles VPN traffic
- Contact support for server optimization
Best Practices for Dedicated IPs
- Regular Use: Use your dedicated IP regularly to maintain its reputation
- Secure Activities: Perfect for banking, work VPNs, and gaming
- Backup Configuration: Save your settings in case you need to reconfigure
- Monitor Performance: Track speeds and latency for optimal performance
- Update Client: Keep TorGuard client updated for best compatibility
Advanced Configuration Options
- Custom DNS: Configure specific DNS servers for your dedicated IP
- Kill Switch: Enable to block internet if VPN disconnects
- Split Tunneling: Route only specific apps through the dedicated IP
- Auto-Connect: Set TorGuard to connect on system startup
Dedicated IP Locations
TorGuard offers dedicated IPs in numerous locations worldwide:
Americas
USA, Canada, Mexico, Brazil
Europe
UK, Germany, Netherlands, France
Asia-Pacific
Japan, Singapore, Australia, Hong Kong
Other Regions
Middle East, Africa, Eastern Europe
Managing Multiple Dedicated IPs
If you have multiple dedicated IPs:
- Give each a descriptive name (e.g., "US Gaming", "UK Streaming")
- Set your most-used IP as default
- Use the filter to quickly switch between them
- Consider different IPs for different activities
Need Help?
If you encounter any issues setting up your dedicated IP, our support team is here to help:
Available 24/7 via ticket system
Frequently Asked Questions
Can I change my dedicated IP location?
Yes, but you'll need to contact support to arrange a location change. There may be a small fee depending on availability.
How many devices can use my dedicated IP?
You can use your dedicated IP on up to 8 devices simultaneously with a standard TorGuard account.
Will my dedicated IP ever change?
No, dedicated IPs are static and remain the same as long as your subscription is active.
Can I use dedicated IP with streaming services?
Yes, dedicated IPs work well with streaming services as they're less likely to be detected as VPN traffic.
What happens if my dedicated IP gets blacklisted?
Since you're the only user, blacklisting is rare. If it occurs, contact support for a replacement IP.