🌐 About WireGuard Gateway
TorGuard's Private VPN Cloud service can be configured as a WireGuard gateway on OpenWRT routers, enabling secure remote access to your local network or allowing remote users to share your local IP address through an encrypted WireGuard tunnel.
What is a VPN Gateway?
A VPN gateway allows you to:
- Access your home network securely from anywhere
- Share your residential IP with remote users
- Create a secure bridge between multiple locations
- Bypass geo-restrictions using your home connection
Use Cases
Remote Home Access
Access home servers, NAS, smart devices from anywhere
Local IP Sharing
Let family/friends use your residential IP remotely
Office Network Access
Secure remote work with office network access
Streaming Access
Access local streaming services while traveling
Secure Bridge
Connect multiple locations securely
Gaming
Host game servers with stable connection
Network Architecture
🔗 How It Works
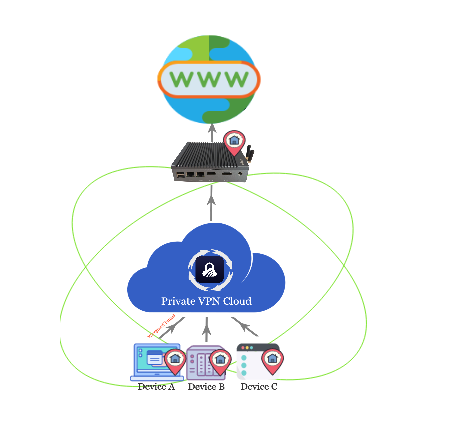
Remote devices → WireGuard tunnel → Your OpenWRT router → Local network/Internet with your IP
Prerequisites
📋 What You'll Need
- ✅ Active TorGuard Private VPN Cloud subscription
- ✅ OpenWRT router (or DD-WRT/pfSense/OPNsense)
- ✅ TorGuard WireGuard package for OpenWRT
- ✅ Basic networking knowledge
- ✅ Access to router configuration
⚠️ Router Compatibility
This guide focuses on OpenWRT, but the setup is similar for DD-WRT, pfSense, and OPNsense routers.
WireGuard Performance
Faster than OpenVPN
Connection time
Less CPU usage
ChaCha20 encryption
Step-by-Step Setup
Access TorGuard Client Area
Log in to your TorGuard account:
- Go to TorGuard Client Area
- Log in with your credentials
Navigate to VPN Cloud
Access your Private VPN Cloud service:
- Search for your service
- Click Manage dropdown
- Select Manage VPN Cloud

VPN Cloud Control Panel
In your VPN Cloud control panel, you'll see:
- Service info and billing status
- VPN server status
- Start/Stop/Reboot controls
- WireGuard configuration section

Enable WireGuard Gateway
Scroll down to the WireGuard VPN Configuration section:
- Click WireGuard VPN Configuration dropdown
- Enable the gateway feature
- Configure your settings

💡 Gateway Mode
When enabled, this allows remote devices to access your local network and use your local IP address for outbound connections.
Add Gateway Device
Add your OpenWRT router as a gateway device:
- Click Add Device button
- Enter a descriptive name (e.g., "Home Gateway")
- Select Gateway as device type
- Click Add to generate configuration

Download Configuration
Download the generated WireGuard configuration:
- Click Download Config for your gateway device
- Save the .conf file to your computer
- Open it with a text editor to view the settings
Configuration Parameters
| Parameter | Description |
|---|---|
| PrivateKey | Your gateway's private key |
| Address | VPN IP address for gateway |
| PublicKey | Server's public key |
| Endpoint | VPN server address:port |
| AllowedIPs | Traffic routing configuration |
Install TorGuard WireGuard Package
Install the TorGuard WireGuard package on your OpenWRT router:
- Download the TorGuard WireGuard package
- Access your OpenWRT router's web interface
- Go to System → Software
- Click Upload Package
- Select the downloaded .ipk file
- Click Install
✅ Package Features
- Easy WireGuard configuration
- Gateway mode support
- Automatic routing setup
- Compatible with all OpenWRT versions
Configure WireGuard on OpenWRT
Set up WireGuard using the downloaded configuration:
- In OpenWRT, go to VPN → TorGuard WireGuard
- Copy values from your .conf file to matching fields
- Enable Gateway Mode option
- Click Save & Apply
- Click Start WireGuard

Configure Local Network Routing
Set up routing for your local network access:
For Remote Access to Local Network:
For Sharing Local IP:
Add Remote Devices
Add devices that will connect through your gateway:
- Return to VPN Cloud control panel
- Click Add Device
- Enter device name (e.g., "Laptop", "Phone")
- Select Standard device type
- Download config for each device

Configure Remote Devices
Set up WireGuard on your remote devices:
Windows/Mac/Linux:
- Install WireGuard client
- Import the downloaded .conf file
- Connect to establish tunnel
iOS/Android:
- Install WireGuard app
- Scan QR code or import config
- Enable connection
✅ Connection Test
Once connected, visit https://torguard.net/whats-my-ip.php - you should see your home IP address!
Port Forwarding (Optional)
🔌 Configure Port Forwarding
To access specific services on your local network:
| Service | Port | Protocol | Example Use |
|---|---|---|---|
| Web Server | 80, 443 | TCP | Home automation |
| SSH | 22 | TCP | Remote management |
| RDP | 3389 | TCP | Windows remote desktop |
| Plex | 32400 | TCP | Media server |
Add Port Forward in VPN Cloud:
- Go to Port Forwarding section
- Click Add Rule
- Configure external and internal ports
- Save configuration
Device Requirements
📡 Compatible Routers
OpenWRT
Recommended - Full support
DD-WRT
Supported with manual config
pfSense
Enterprise-grade option
OPNsense
Open source alternative
Security Benefits
🔐 Enhanced Security
- End-to-End Encryption: All traffic encrypted with ChaCha20-Poly1305
- No Port Exposure: Your home ports stay closed to the internet
- Authentication: Only authorized devices can connect
- Perfect Forward Secrecy: Compromised keys don't affect past sessions
- DDoS Protection: Your real IP remains hidden
- Zero Trust Model: Each device authenticated individually
Troubleshooting
🔧 Common Issues & Solutions
Can't Access Local Network
- Check AllowedIPs includes local subnet
- Verify routing table on router
- Ensure firewall allows forwarding
- Check MTU settings (try 1420)
Connection Drops
- Enable persistent keepalive
- Check router CPU/memory
- Verify stable internet
- Update router firmware
Slow Performance
- Check upload bandwidth
- Enable hardware acceleration
- Optimize MTU size
- Reduce encryption overhead
DNS Not Working
- Set DNS in WireGuard config
- Use router's DNS server
- Check DNS forwarding
- Try public DNS (8.8.8.8)
IP Not Changing
- Verify gateway mode enabled
- Check NAT configuration
- Restart WireGuard service
- Clear device DNS cache
Can't Connect
- Verify server is running
- Check firewall rules
- Confirm keys match
- Test with different port
Advanced Configuration
🔧 Advanced Options
Split Tunneling:
Route only specific traffic through the VPN:
Multiple Gateways:
Set up failover or load balancing between locations
Site-to-Site VPN:
Connect multiple locations permanently
Custom DNS:
Use your home DNS server for all queries
Best Practices
✅ Recommendations
- Regular Updates: Keep router firmware and WireGuard updated
- Strong Keys: Never share private keys
- Backup Configs: Save all configuration files securely
- Monitor Usage: Check logs for unauthorized access
- Bandwidth Planning: Ensure adequate upload speed
- Firewall Rules: Only open necessary ports
- Access Control: Limit device access as needed
Need Help?
If you need assistance setting up your WireGuard gateway:
Our team can help with configuration and troubleshooting