Note: This guide is specifically for DD-WRT builds from 2011-2013. For newer DD-WRT builds (2015+), please see our updated guide.
Prerequisites
Before starting this setup, ensure you have:
- A DD-WRT router with build version 14896 or newer (2011-2013 builds)
- An active TorGuard VPN subscription
- Your TorGuard VPN username and password
- At least 8MB of flash memory on your router
- Basic familiarity with router administration
Router Compatibility: This guide works with DD-WRT builds from 2011-2013. Common compatible routers include Linksys WRT54GL, Asus RT-N16, and Buffalo WZR-HP-G300NH.
Why Use VPN on Your Router?
Setting up VPN on your DD-WRT router provides:
- Network-Wide Protection: All devices automatically use VPN
- Device Limit Bypass: Router counts as one connection
- Always-On Security: No need to connect each device individually
- Guest Network VPN: Secure your guest WiFi automatically
Step 1: Access Your DD-WRT Router
- Open your web browser and navigate to your router's IP address:
- Default:
192.168.1.1 - Alternative:
192.168.0.1or10.0.0.1
- Default:
- Enter your router's admin username and password
- You should now see the DD-WRT control panel
Can't access your router? Try resetting it to factory defaults by holding the reset button for 30 seconds.
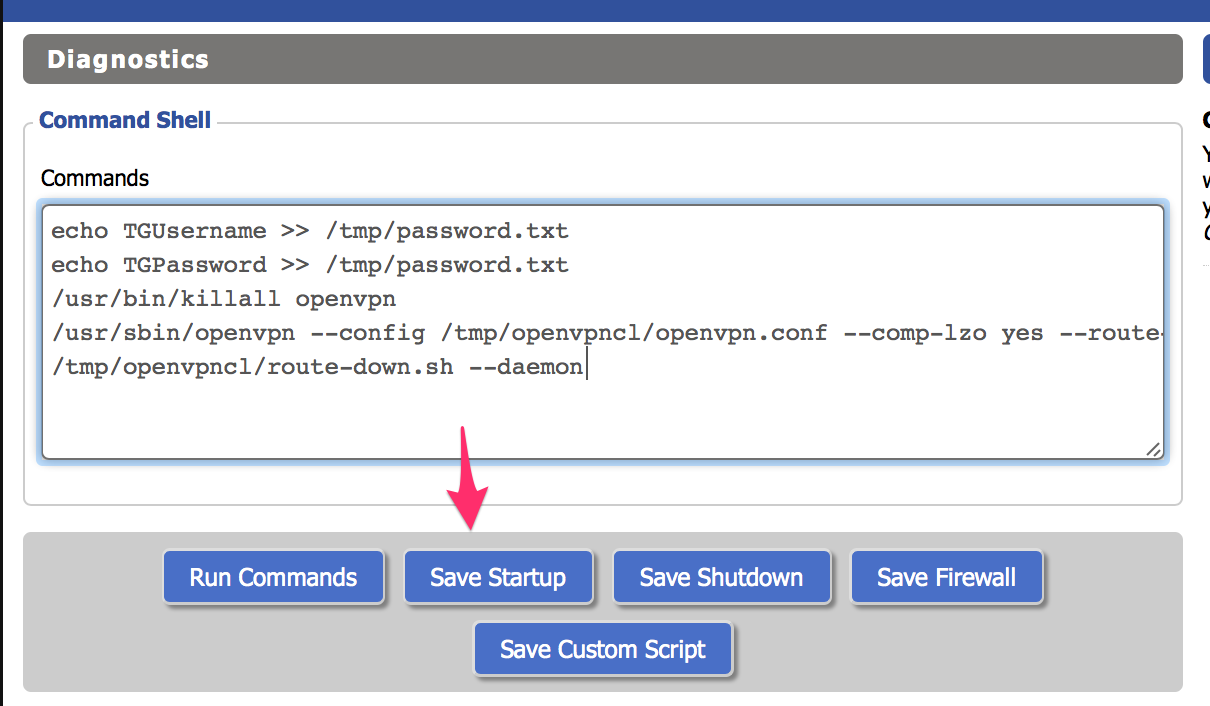
Step 2: Configure Startup Script
- Navigate to Administration → Commands
- Copy and paste the following script into the Commands box:
echo YOUR_VPN_USERNAME >> /tmp/password.txt
echo YOUR_VPN_PASSWORD >> /tmp/password.txt
/usr/bin/killall openvpn
/usr/sbin/openvpn --config /tmp/openvpncl/openvpn.conf --comp-lzo yes --route-up /tmp/openvpncl/route-up.sh --down-pre /tmp/openvpncl/route-down.sh --daemon
- Important: Replace
YOUR_VPN_USERNAMEandYOUR_VPN_PASSWORDwith your actual TorGuard VPN credentials - Click Save Startup
Step 3: Enable OpenVPN Client
- Navigate to Services → VPN
- Under "OpenVPN Client", check Enable
Step 4: Configure OpenVPN Settings
Enter the following settings in the OpenVPN client configuration:
| Setting | Value |
|---|---|
| Server IP/Name | Your chosen server (e.g., ny.east.usa.torguardvpnaccess.com) |
| Port | 443 (or port matching your cipher) |
| Tunnel Device | TUN |
| Tunnel Protocol | UDP (faster) or TCP (more reliable) |
| Encryption Cipher | Blowfish CBC (default) |
| Hash Algorithm | SHA1 |
| Advanced Options | Enable |
| LZO Compression | Enable or Adaptive |
| NAT | Enable |
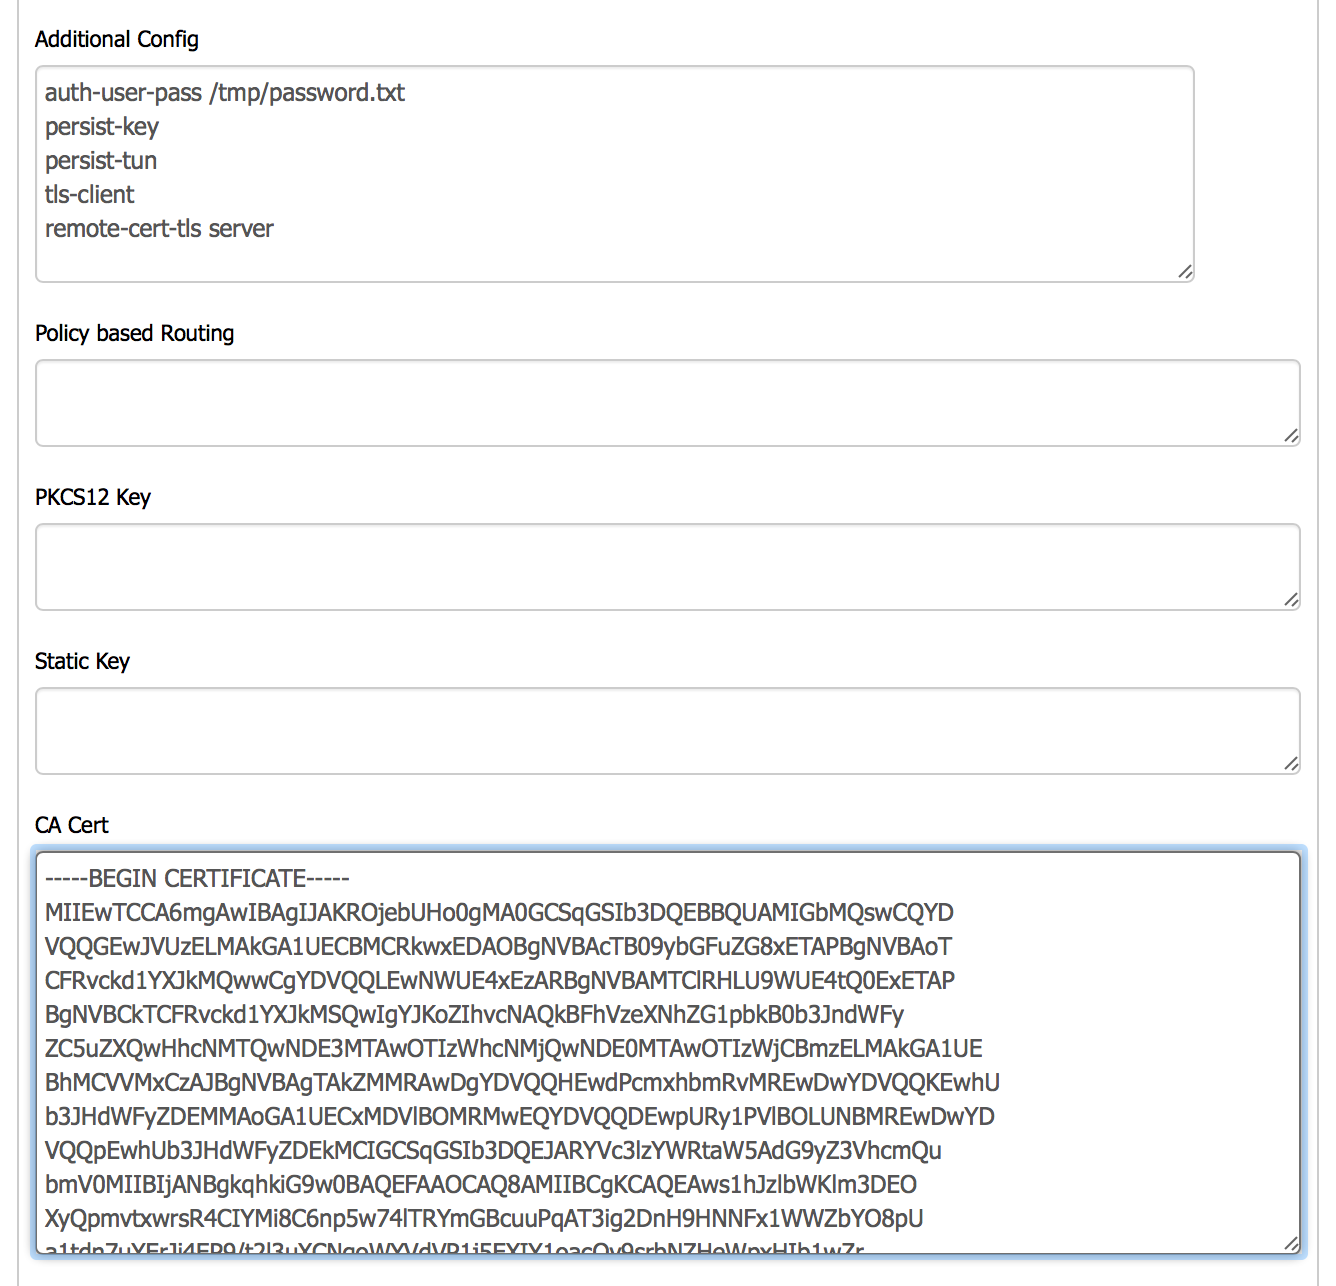
Additional Configuration
In the Additional Config box, enter:
auth-user-pass /tmp/password.txt
persist-key
persist-tun
tls-client
remote-cert-tls server
CA Certificate
- Download the TorGuard CA certificate from here
- Copy the entire certificate content
- Paste it into the CA Cert or Certificate Authority field
Step 5: Save and Reboot
- Click Save at the bottom of the page
- Click Apply Settings
- Navigate to Administration → Management
- Click Reboot Router
- Wait 2-3 minutes for the router to fully restart
Step 6: Verify Connection
After the router reboots:
- Navigate to Status → OpenVPN
- Wait 30-60 seconds for the connection to establish
- You should see "Client: CONNECTED SUCCESS" status
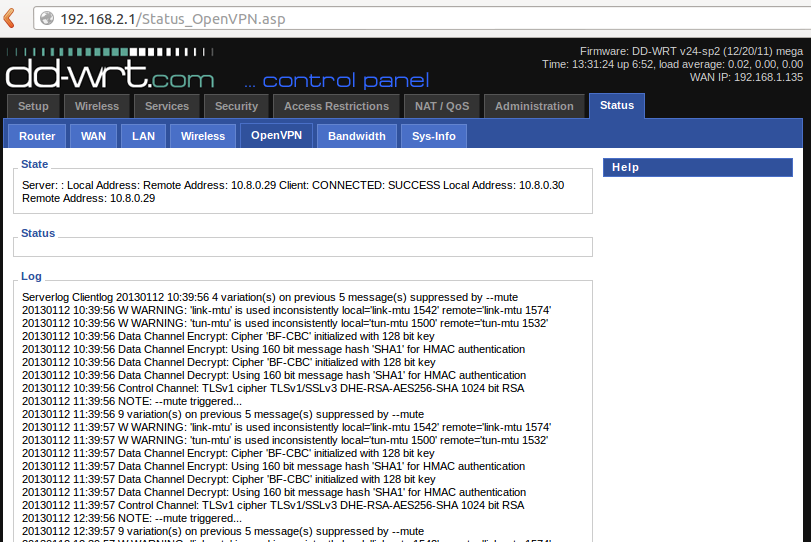
Success! Your DD-WRT router is now connected to TorGuard VPN. All devices on your network are protected.
Testing Your VPN Connection
To verify everything is working correctly:
- From any device on your network, visit TorGuard's IP checker
- Confirm your IP shows the VPN server location
- Test for DNS leaks at DNS leak test
- Run a speed test to check performance
Troubleshooting Common Issues
VPN Won't Connect
- Check credentials: Ensure you're using VPN service credentials, not website login
- Verify server address: Try a different server from your server list
- Port conflicts: Try port 1194 instead of 443
- Time sync: Enable NTP client in DD-WRT settings
Slow Internet Speeds
- CPU limitations: Older routers may struggle with encryption
- Try different servers: Connect to servers closer to your location
- Reduce encryption: Consider using AES-128 instead of Blowfish
- Check MTU settings: Try setting MTU to 1400
DNS Issues
- Add TorGuard DNS servers manually:
10.8.0.1 - Enable "Force DNS Redirection" in DD-WRT
- Disable DNSMasq if experiencing conflicts
Advanced Configuration Options
Policy-Based Routing
Route specific devices through or around the VPN:
route 192.168.1.100 255.255.255.255 net_gateway
Kill Switch Implementation
Add to firewall script to block internet if VPN drops:
iptables -I FORWARD -i br0 -o $(nvram get wan_iface) -j DROP
Multiple Server Profiles
Create scripts to switch between servers:
- Save different configurations as custom scripts
- Use scheduled tasks to switch servers automatically
- Implement failover to backup servers
Performance Optimization
For 2011-2013 DD-WRT Builds:
- Overclock CPU: If supported, modest overclocking can improve VPN performance
- Reduce logging: Disable unnecessary logging to free resources
- Optimize buffer sizes: Add to Additional Config:
sndbuf 393216
rcvbuf 393216
Security Best Practices
- Change default passwords: Update both router and VPN passwords regularly
- Disable unnecessary services: Turn off Telnet, SSH if not needed
- Enable firewall: Ensure DD-WRT firewall is active
- Regular updates: Check for DD-WRT security updates
Upgrade Consideration: While these 2011-2013 builds work well, consider upgrading to newer DD-WRT builds or modern routers for better performance and security features.