🔒 About Dedicated IPs
Dedicated IPs provide you with a static IP address that's exclusively yours. Perfect for accessing IP-restricted services, avoiding CAPTCHA challenges, and maintaining consistent access to sensitive systems.
Dedicated IP Benefits
✨ Why Use a Dedicated IP?
Banking Access
Avoid security blocks from financial institutions
Gaming
Lower latency and no IP bans
Email Reputation
Better deliverability with static IP
Remote Access
Whitelist your IP for secure systems
No CAPTCHAs
Avoid constant verification challenges
Streaming
Consistent access to geo-restricted content
IP Type Comparison
🔒 Dedicated IP
- Static IP address exclusively yours
- Available in multiple countries
- Works with all protocols
- No sharing with other users
- Perfect for whitelisting
- Monthly subscription
Best for: Business use, banking, remote access
🔌 Port Forward IP
- Static IP with open ports
- Allows incoming connections
- Perfect for hosting services
- P2P applications support
- Gaming server hosting
- Remote desktop access
Best for: Servers, P2P, remote access
Prerequisites
⚠️ Before You Begin
- Active Dedicated IP: Purchase from TorGuard website
- Activation Email: Contains your IP address and settings
- TorGuard iOS App: Latest version installed
- Account Credentials: Your TorGuard username/password
- Check Protocol: Verify IP protocol at Services → My Fixed IPs
Step-by-Step Configuration
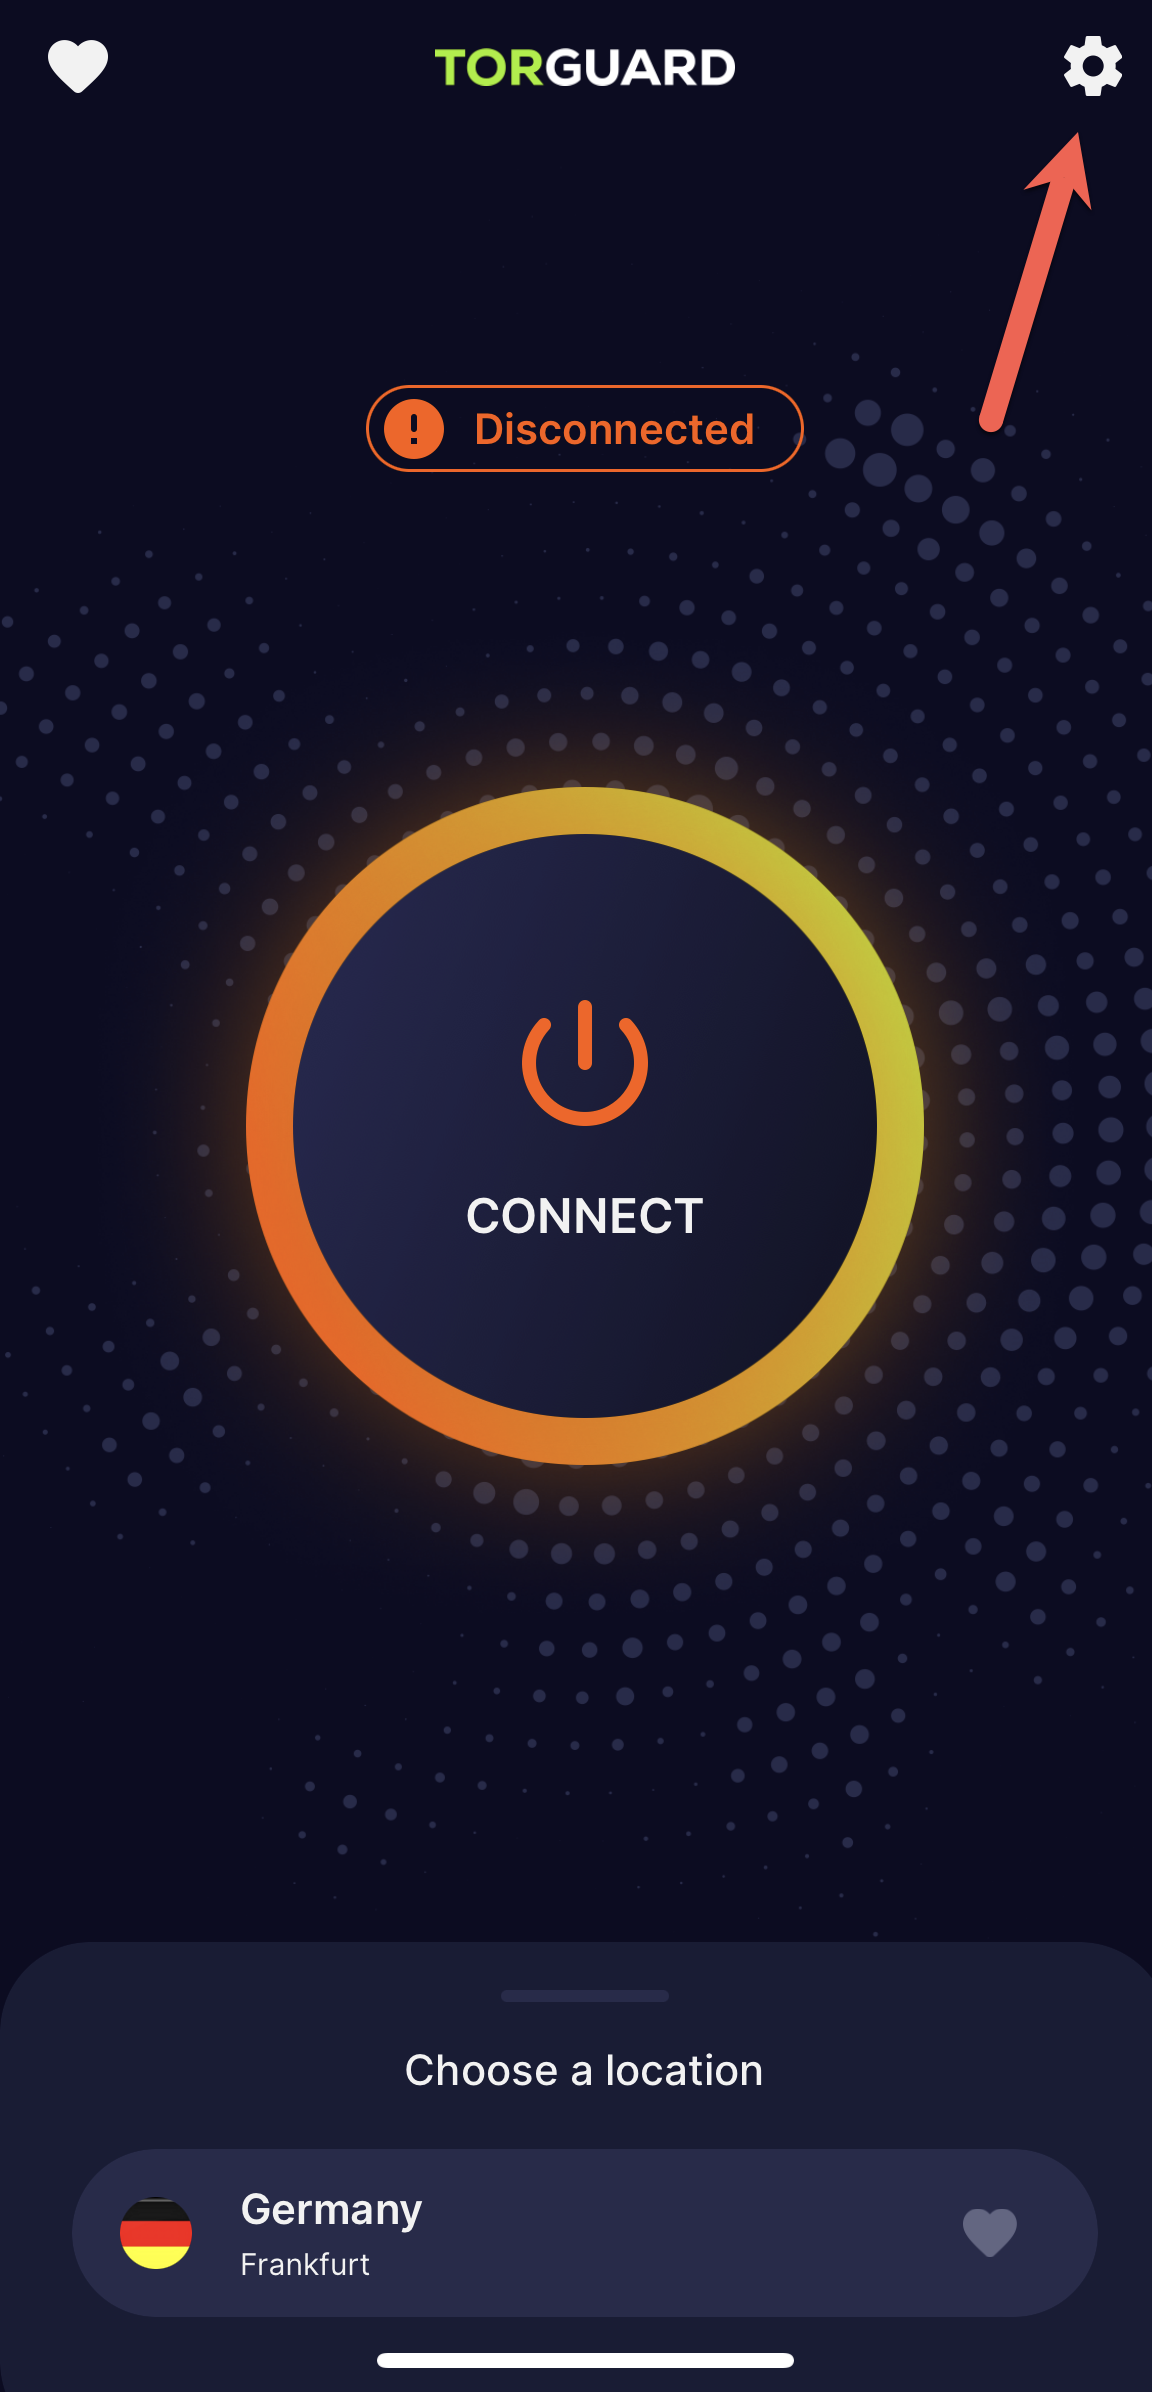
Access Settings
On the TorGuard iOS app main screen, tap the settings cog icon in the top right corner:
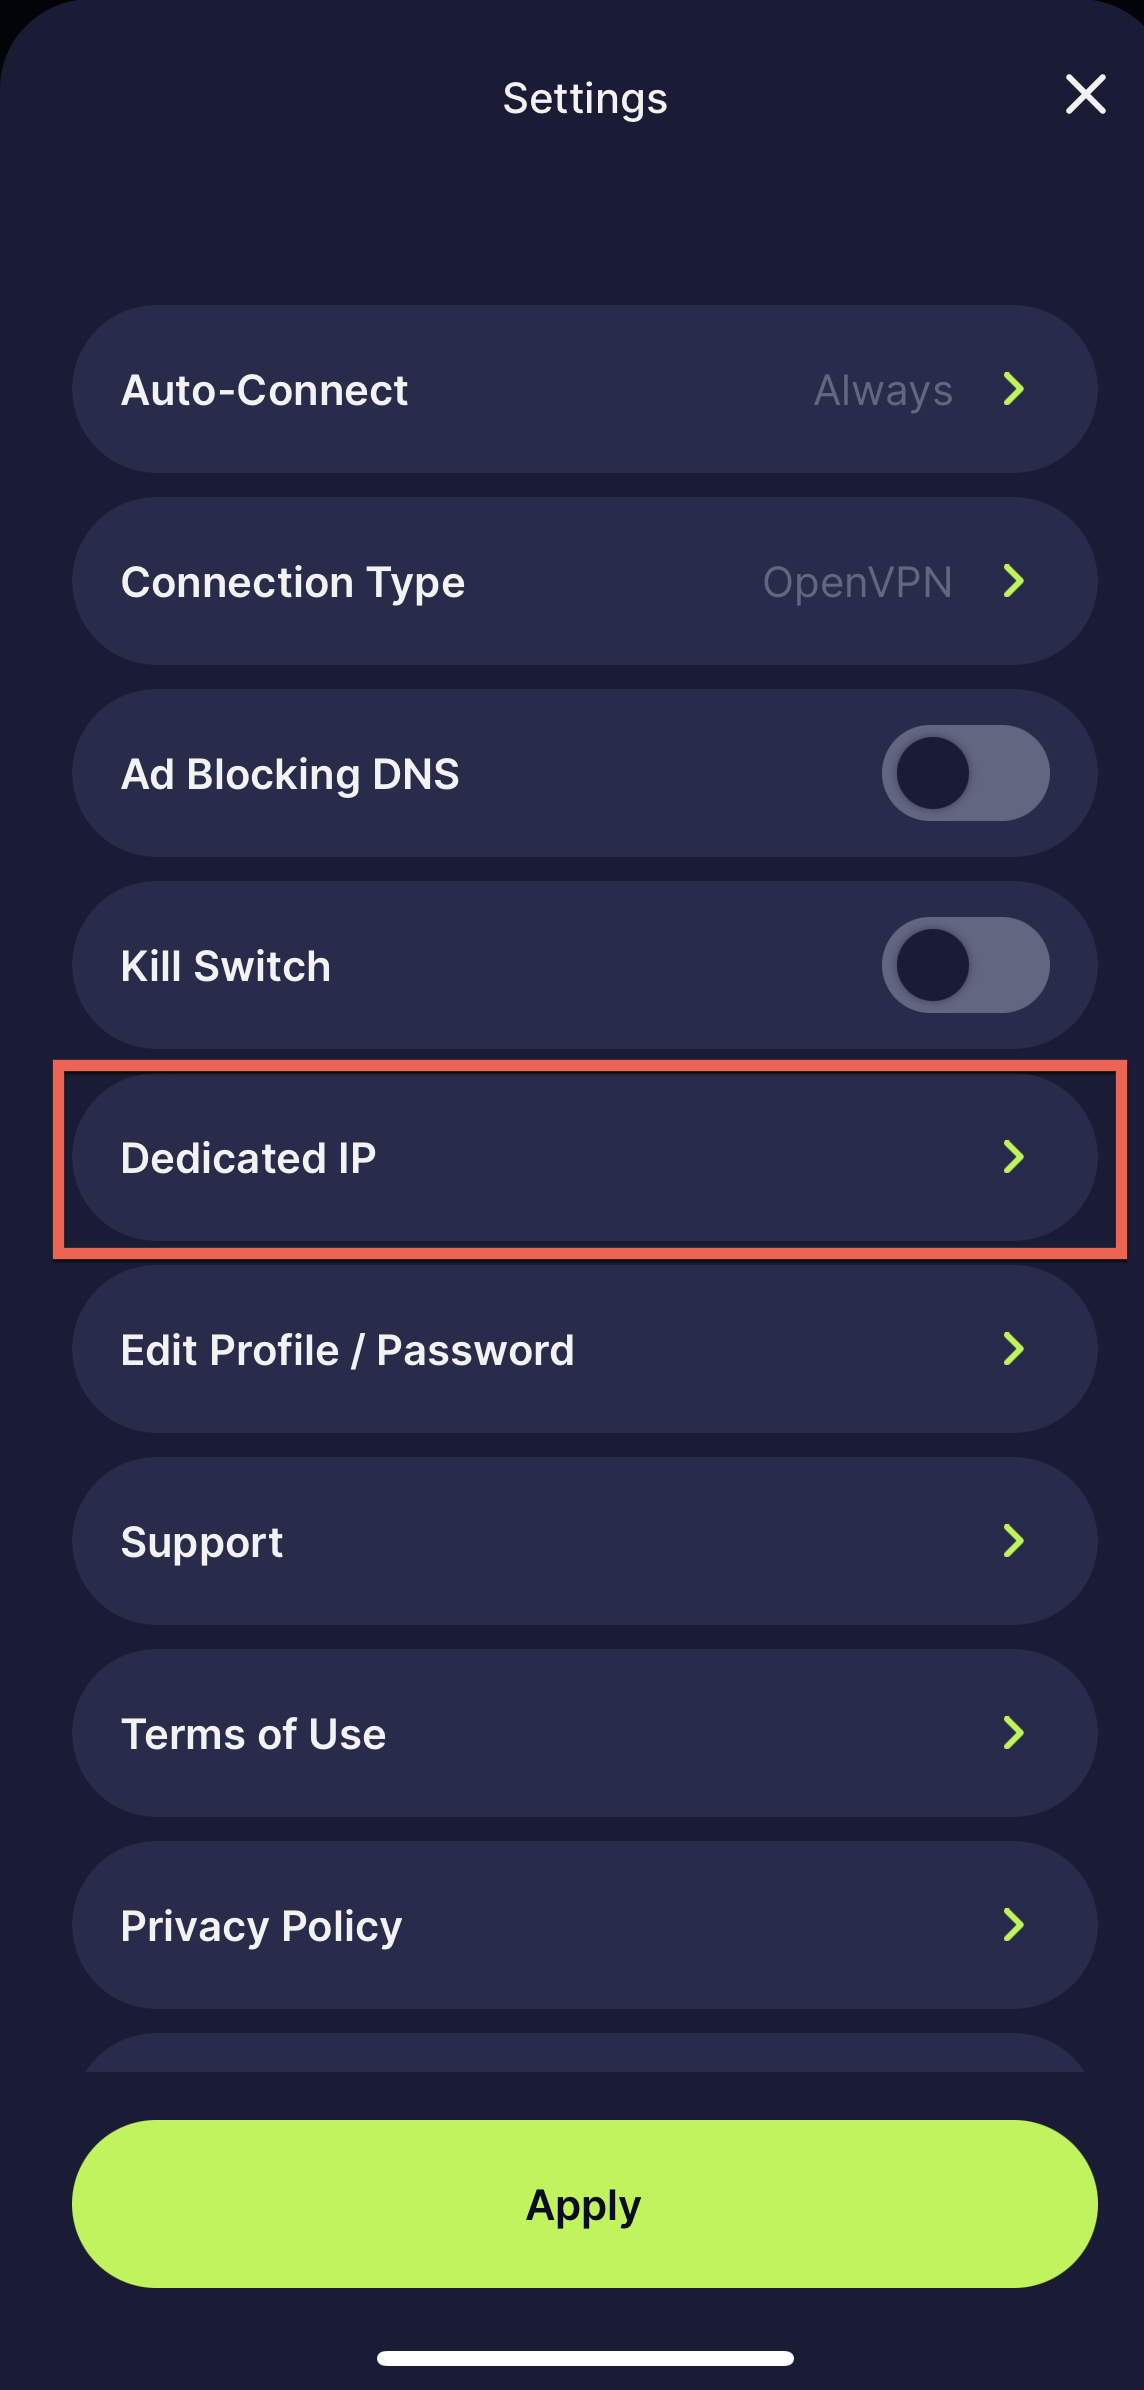
Navigate to Dedicated IP
In the settings menu, tap on "Dedicated IP":
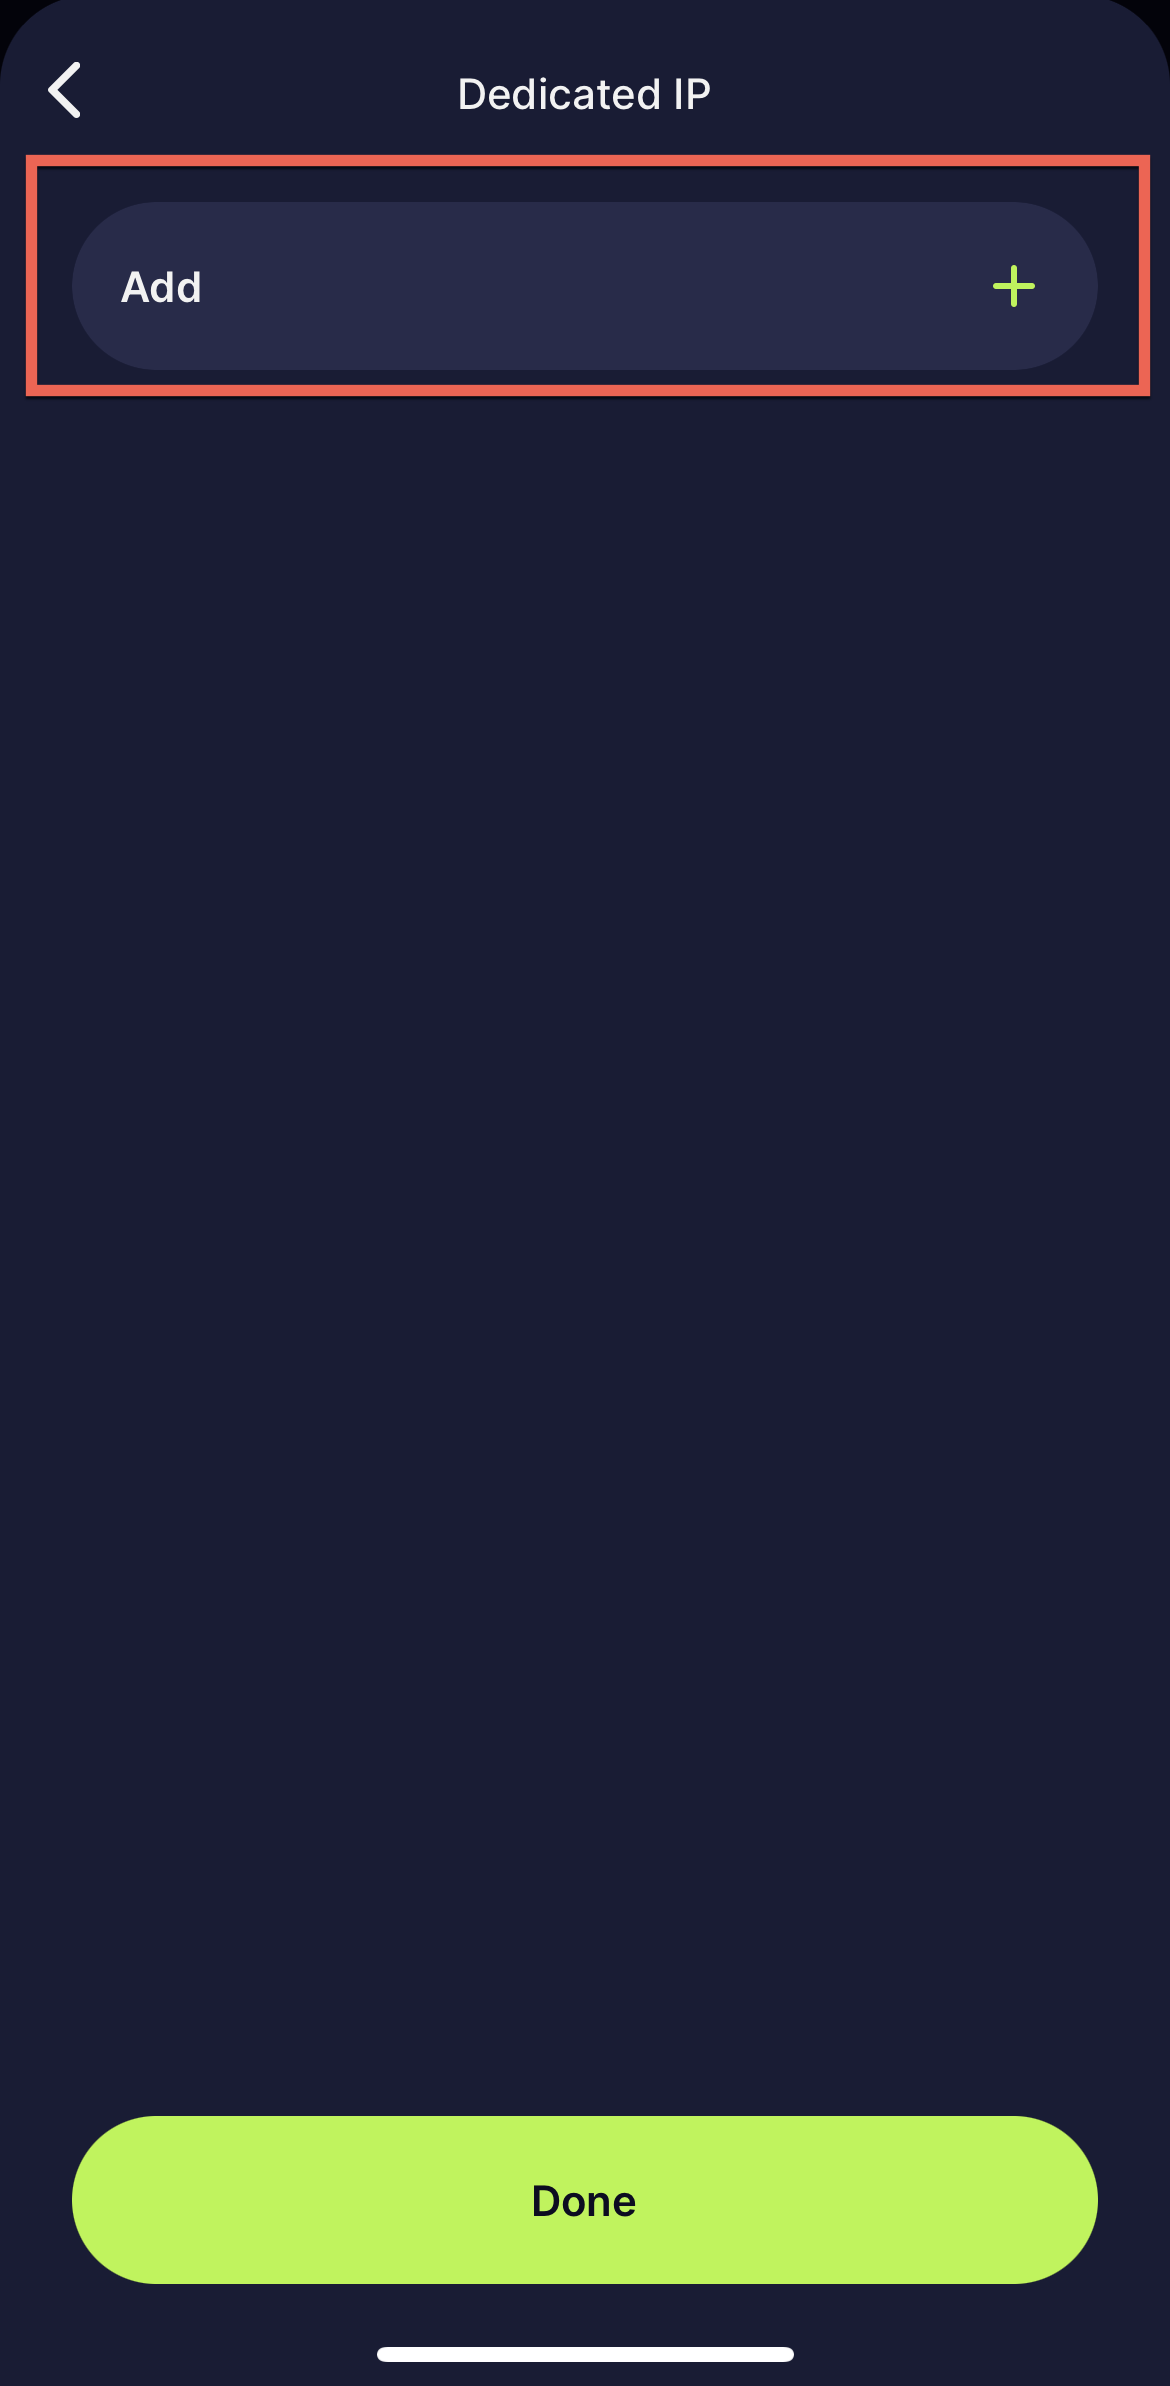
Add New IP
Tap the "Add" button to configure your dedicated IP:
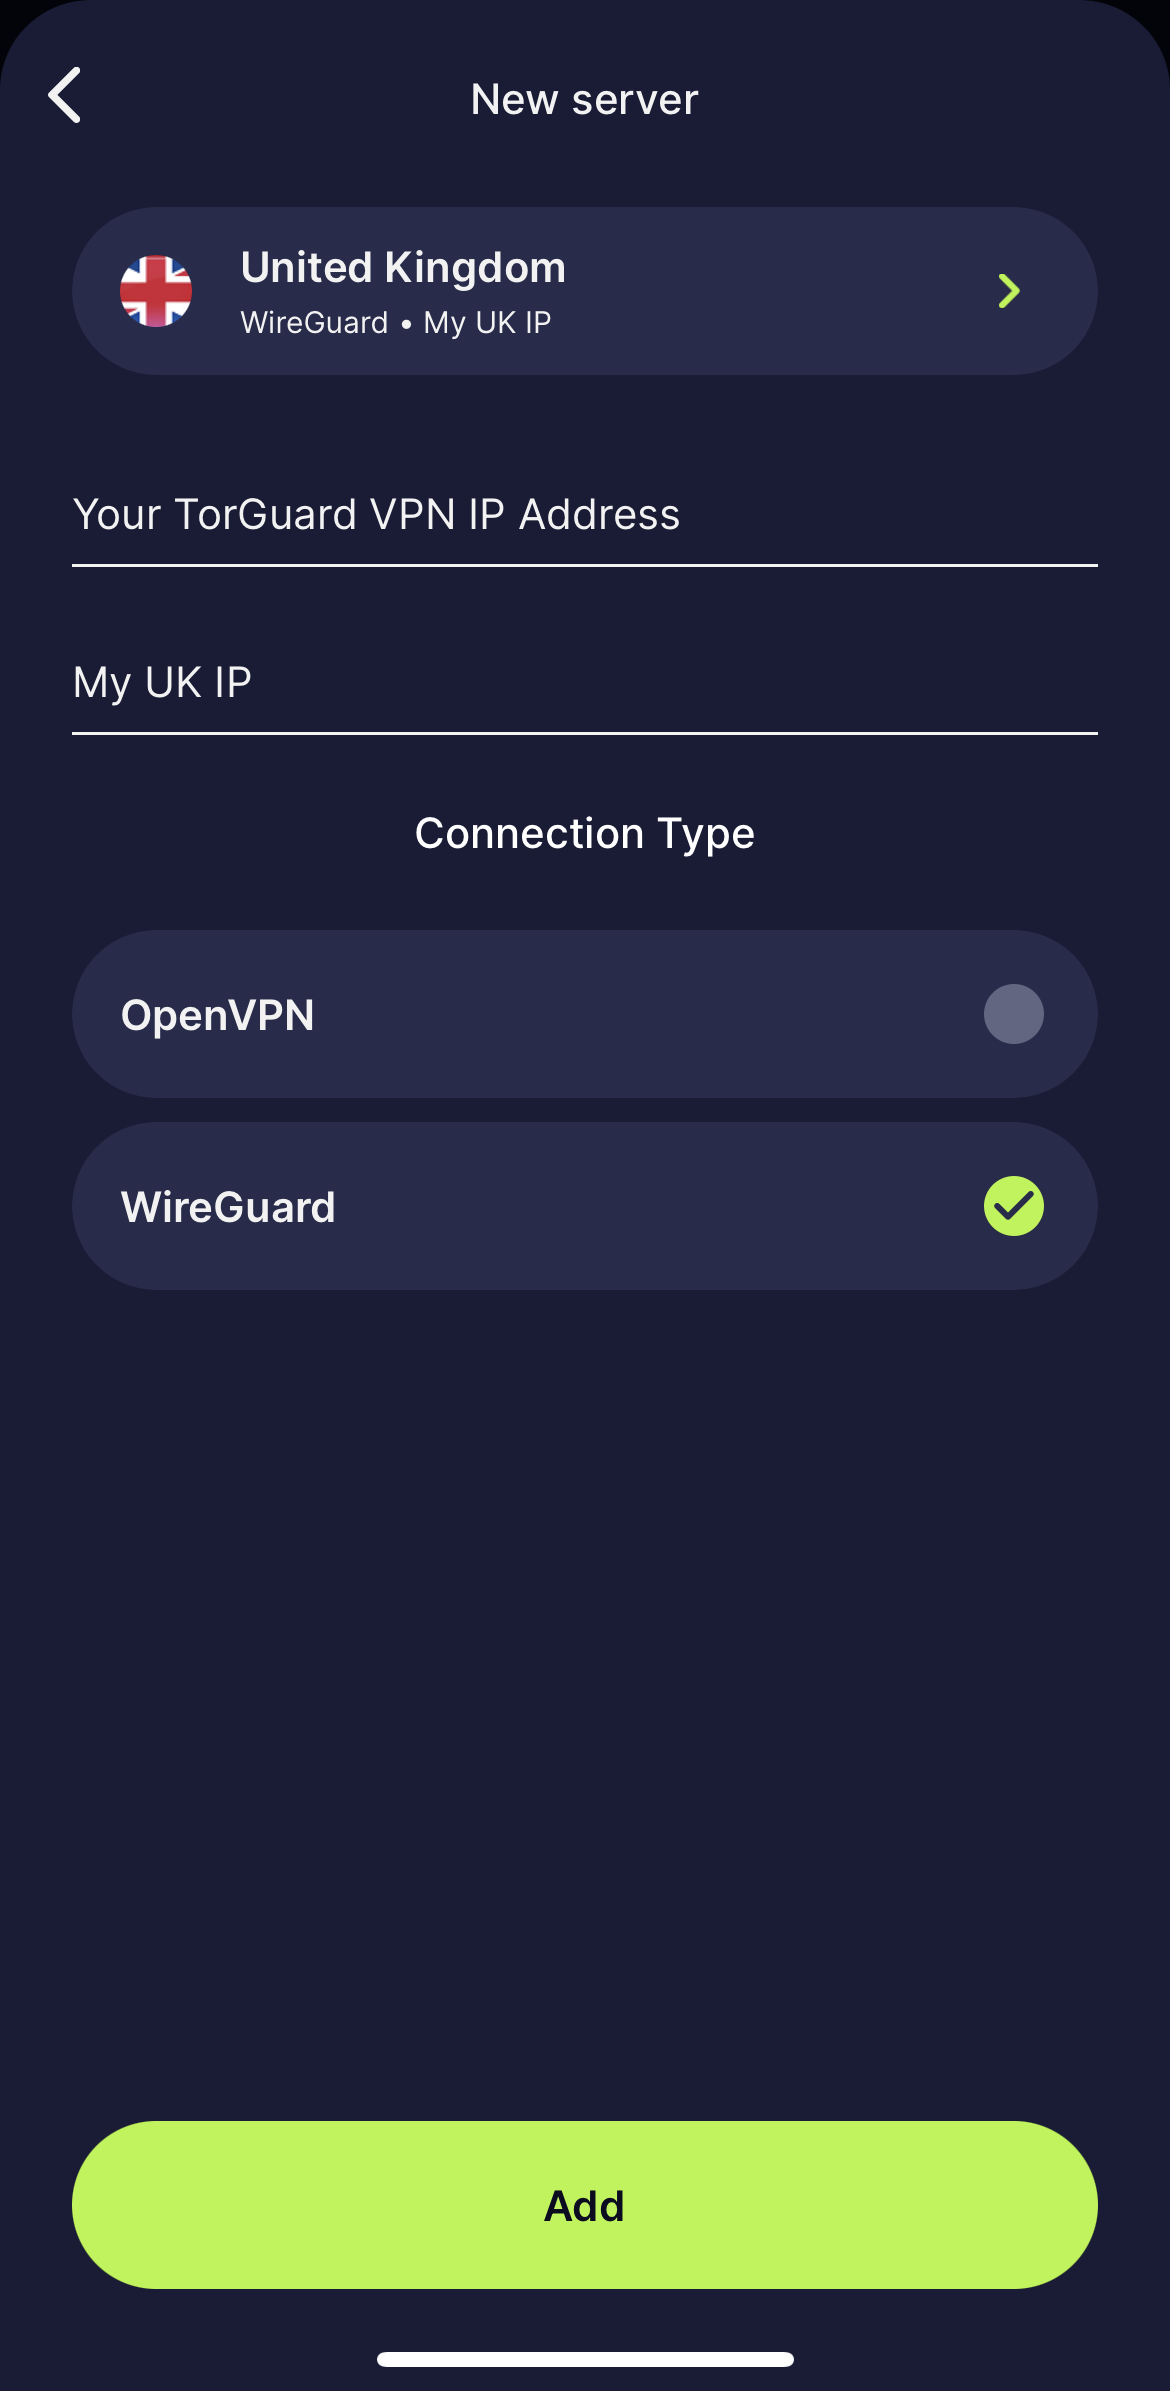
Configure IP Settings
📍 Finding Your IP Information
Before configuring, check your dedicated IP details:
- Log into TorGuard website
- Go to Services → My Fixed IPs
- Note your IP address, protocol, and port
Enter the following information:
🔐 OpenVPN Settings
If using OpenVPN, also configure:
- Port: From activation email
- Protocol: TCP or UDP
- Common ports: 443, 1194, 1912
⚡ WireGuard Settings
If using WireGuard:
- No additional settings needed
- Tap "Add" to finish
- Automatic configuration
Connect to Your Dedicated IP
After adding your IP:
- Navigate back to the server list
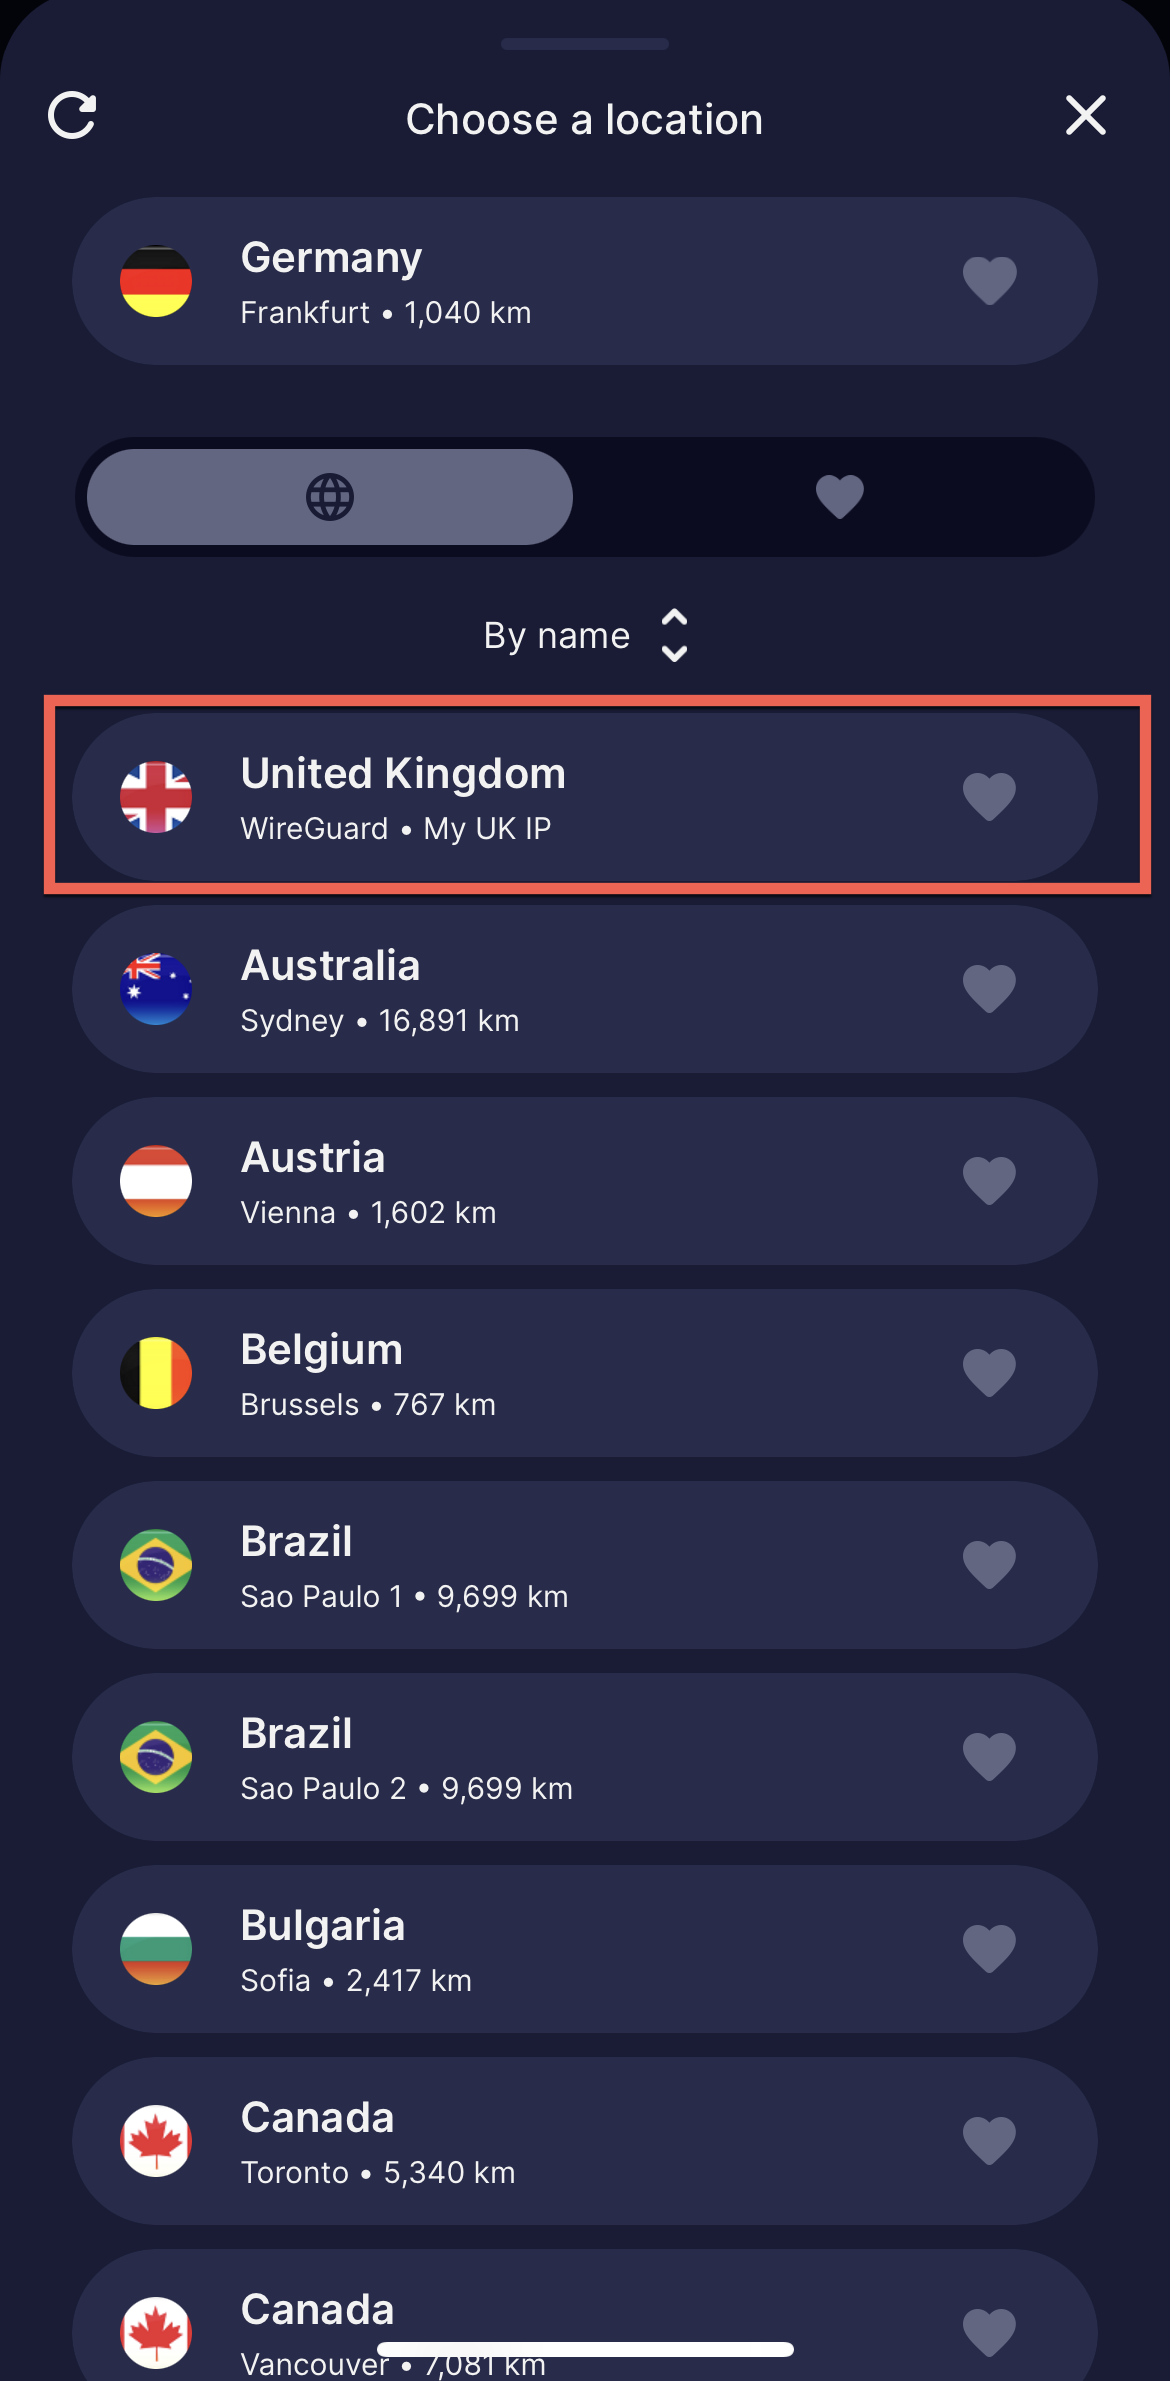
- Your dedicated IP appears at the top of the list
- Simply tap it to connect
✅ Connection Successful!
Your iPhone/iPad is now connected through your dedicated IP address.
Common Port Configurations
| Protocol | Common Ports | Best For |
|---|---|---|
| OpenVPN TCP | 443, 80, 110 | Bypassing firewalls |
| OpenVPN UDP | 1194, 1195, 1912 | Speed & performance |
| WireGuard | 1443 (automatic) | Best overall performance |
Use Cases
🎯 Perfect For These Scenarios
Consistent IP prevents security blocks
Improve email deliverability
Whitelist for company resources
Avoid IP bans and reduce latency
Reliable access to services
Secure remote administration
Quick Tips
💡 Pro Tips
- Save Multiple IPs: Add all your dedicated IPs for easy switching
- Naming Convention: Use descriptive names like "US Banking IP" or "UK Gaming"
- Protocol Choice: WireGuard offers best performance on iOS
- Auto-Connect: Set your dedicated IP as default for automatic connection
- Regular Checks: Verify your IP at torguard.net/whats-my-ip.php
Troubleshooting
Cannot Find My IP Details
- Check activation email from TorGuard
- Log into website → Services → My Fixed IPs
- Ensure IP is active and not expired
- Contact support if IP isn't listed
Connection Fails
- Verify IP address is entered correctly
- Check protocol matches your IP settings
- Ensure port number is correct for OpenVPN
- Try different port if one is blocked
- Restart iOS device and try again
Wrong Protocol Selected
- Delete the IP configuration
- Check correct protocol at My Fixed IPs
- Re-add with correct settings
- WireGuard and OpenVPN are not interchangeable
IP Not Showing in List
- Force close and restart app
- Check you saved the configuration
- Ensure you're looking at top of server list
- Try logging out and back in
Frequently Asked Questions
Yes! You can add all your dedicated IPs to the app and switch between them easily. Each IP appears at the top of your server list.
Dedicated IPs provide a static address for outgoing connections. Port forward IPs also allow incoming connections, perfect for hosting services or P2P applications.
You'll need to delete and re-add the IP with the new protocol. The protocol must match what's configured in your account at Services → My Fixed IPs.
Yes, dedicated IPs work on both Wi-Fi and cellular connections. Some carriers may block certain ports, so try TCP 443 if you have issues.
Managing Your Dedicated IPs
📱 iOS App Features
- Quick Access: Dedicated IPs always appear at the top
- Easy Switching: Tap to connect to different IPs
- Edit/Delete: Swipe left on any IP to modify
- Connection Status: See real-time connection info
Need Help?
If you're having trouble adding your dedicated IP:
Include your IP address and any error messages