This tutorial will guide you through setting up TorGuard VPN Service on a Tomato Router.
To begin, we assume your router has already been flashed with the latest version of tomato firmware. To Purchase a pre-flashed router already set up with your VPN account please visit the TorGuard store.
Step 1
Access your tomato router at the default IP which is usually: http://192.168.1.1/
Step 2
Select VPN tunnelling on the left-hand side under "USB and NAS" as per the image below.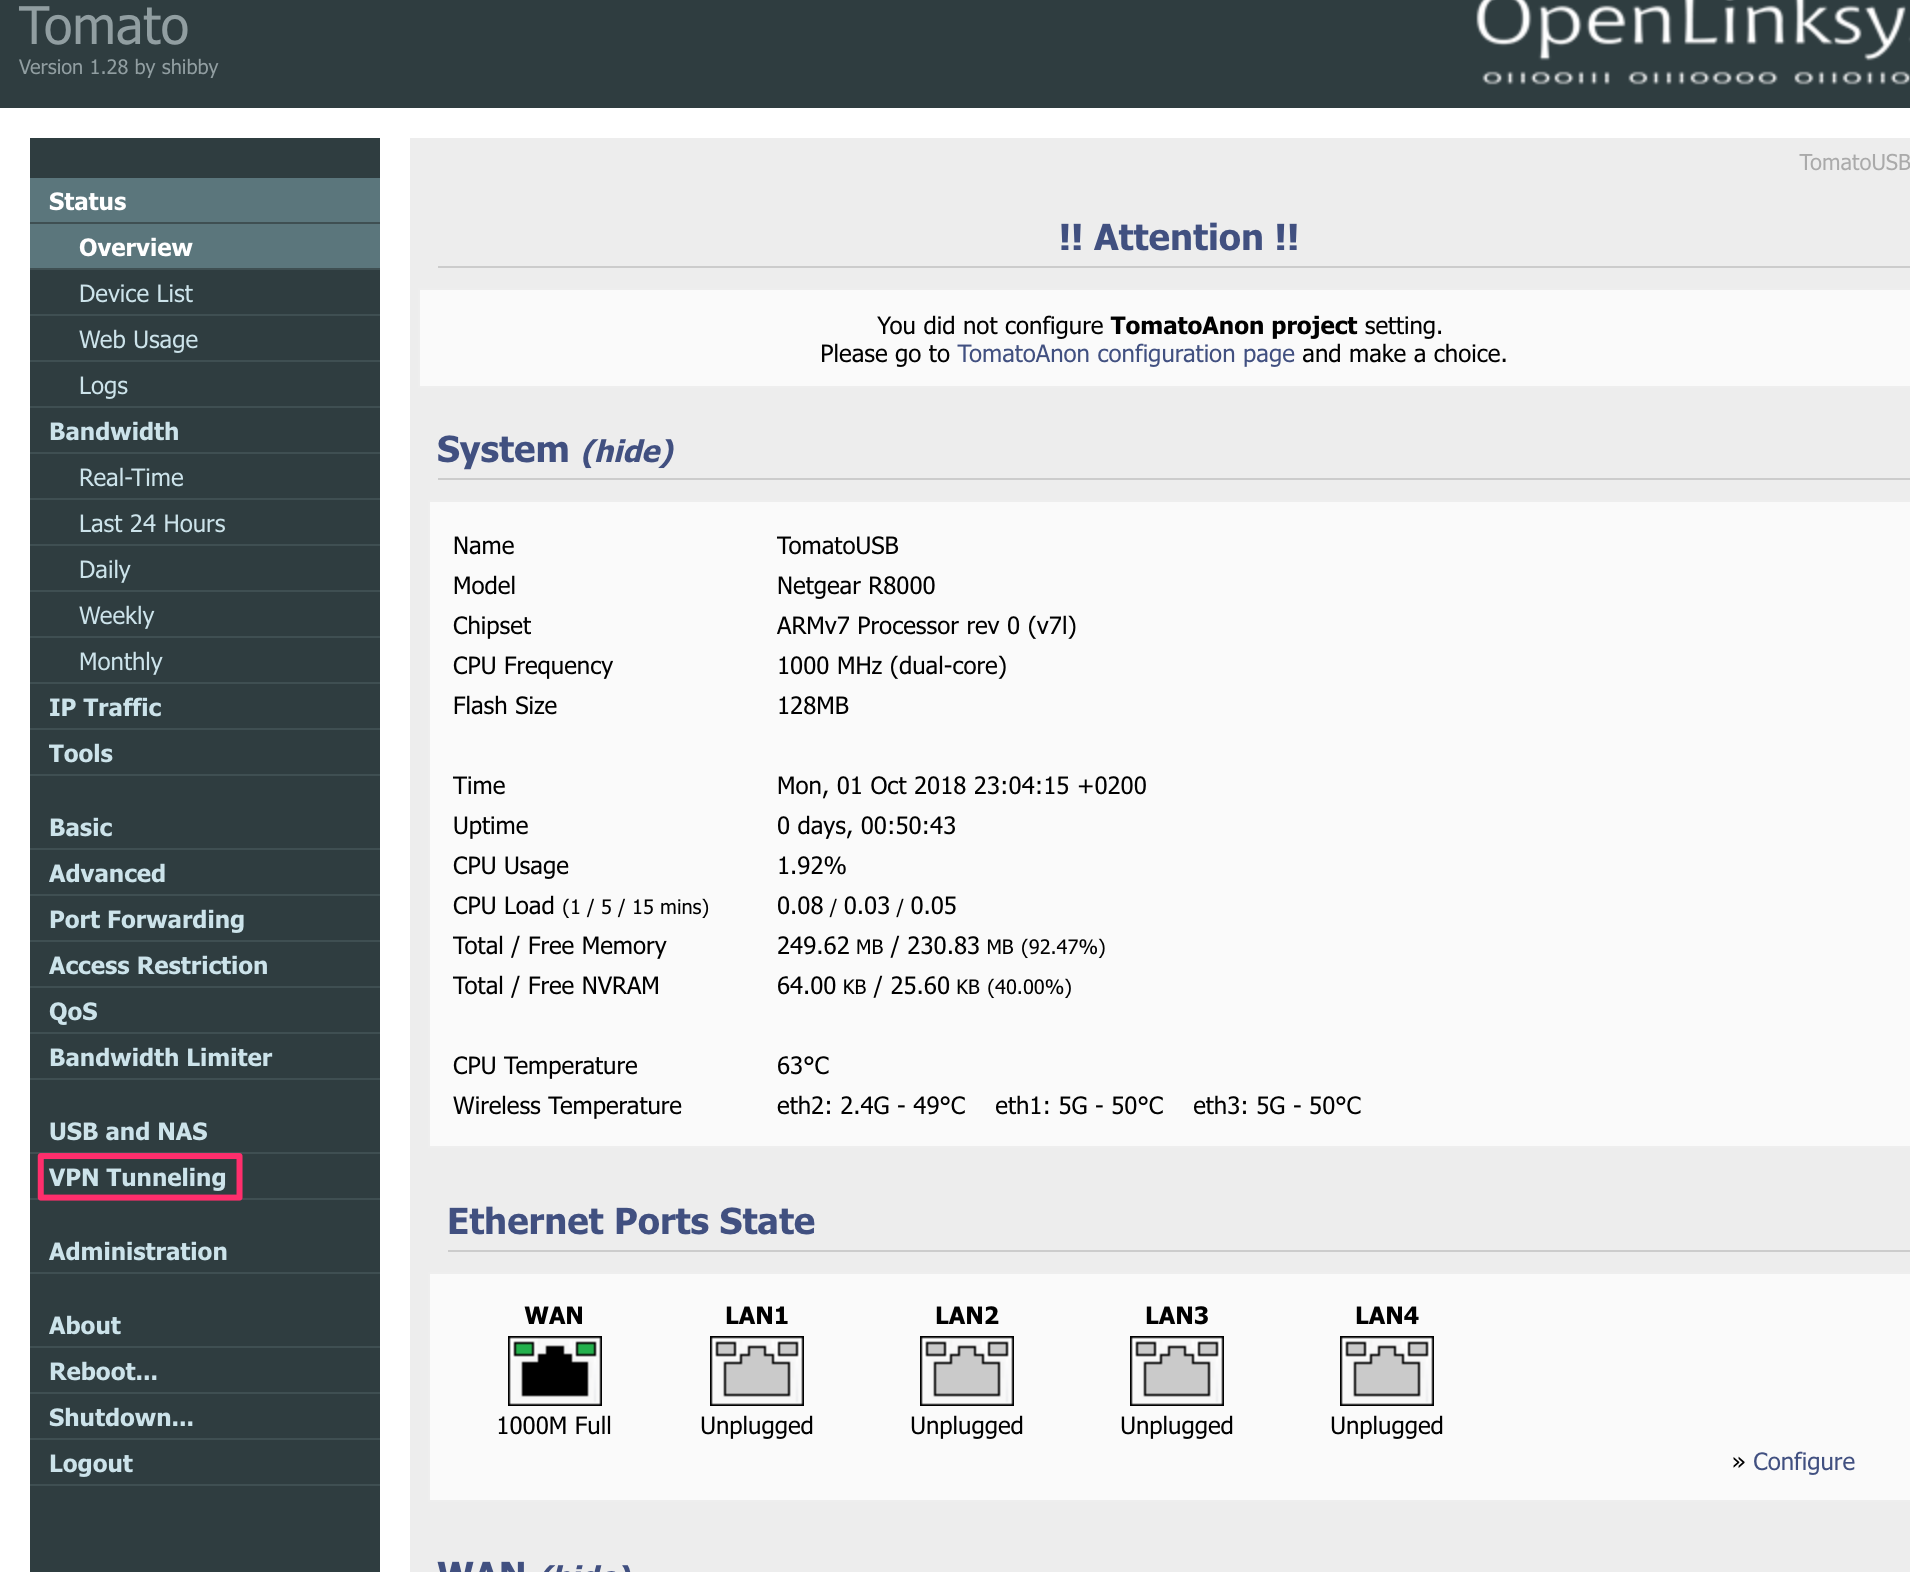
Step 3
Select OpenVPN client in the sub-menu, fill out the fields :
Set Start with WAN Checked or Unchecked (Start VPN on boot)
Set Interface Type: TUN
Set Protocol: UDP or TCP, whichever works best for you, UDP may be blocked on some networks.
Set Server Address/Port: Server hostnames can be found here, set the port to 1912
Set Firewall to Automatic
Set Authorization Mode to TLS
Set Username/Password Authentication: Check and enter your TorGuard VPN Username and Password, if you are not sure of those you can change those here
Set Username Authen. Only to Checked
Set Extra-HMAC Authorization (tls-auth) to Outgoing (1)
Set Create NAT on tunnel to Checked
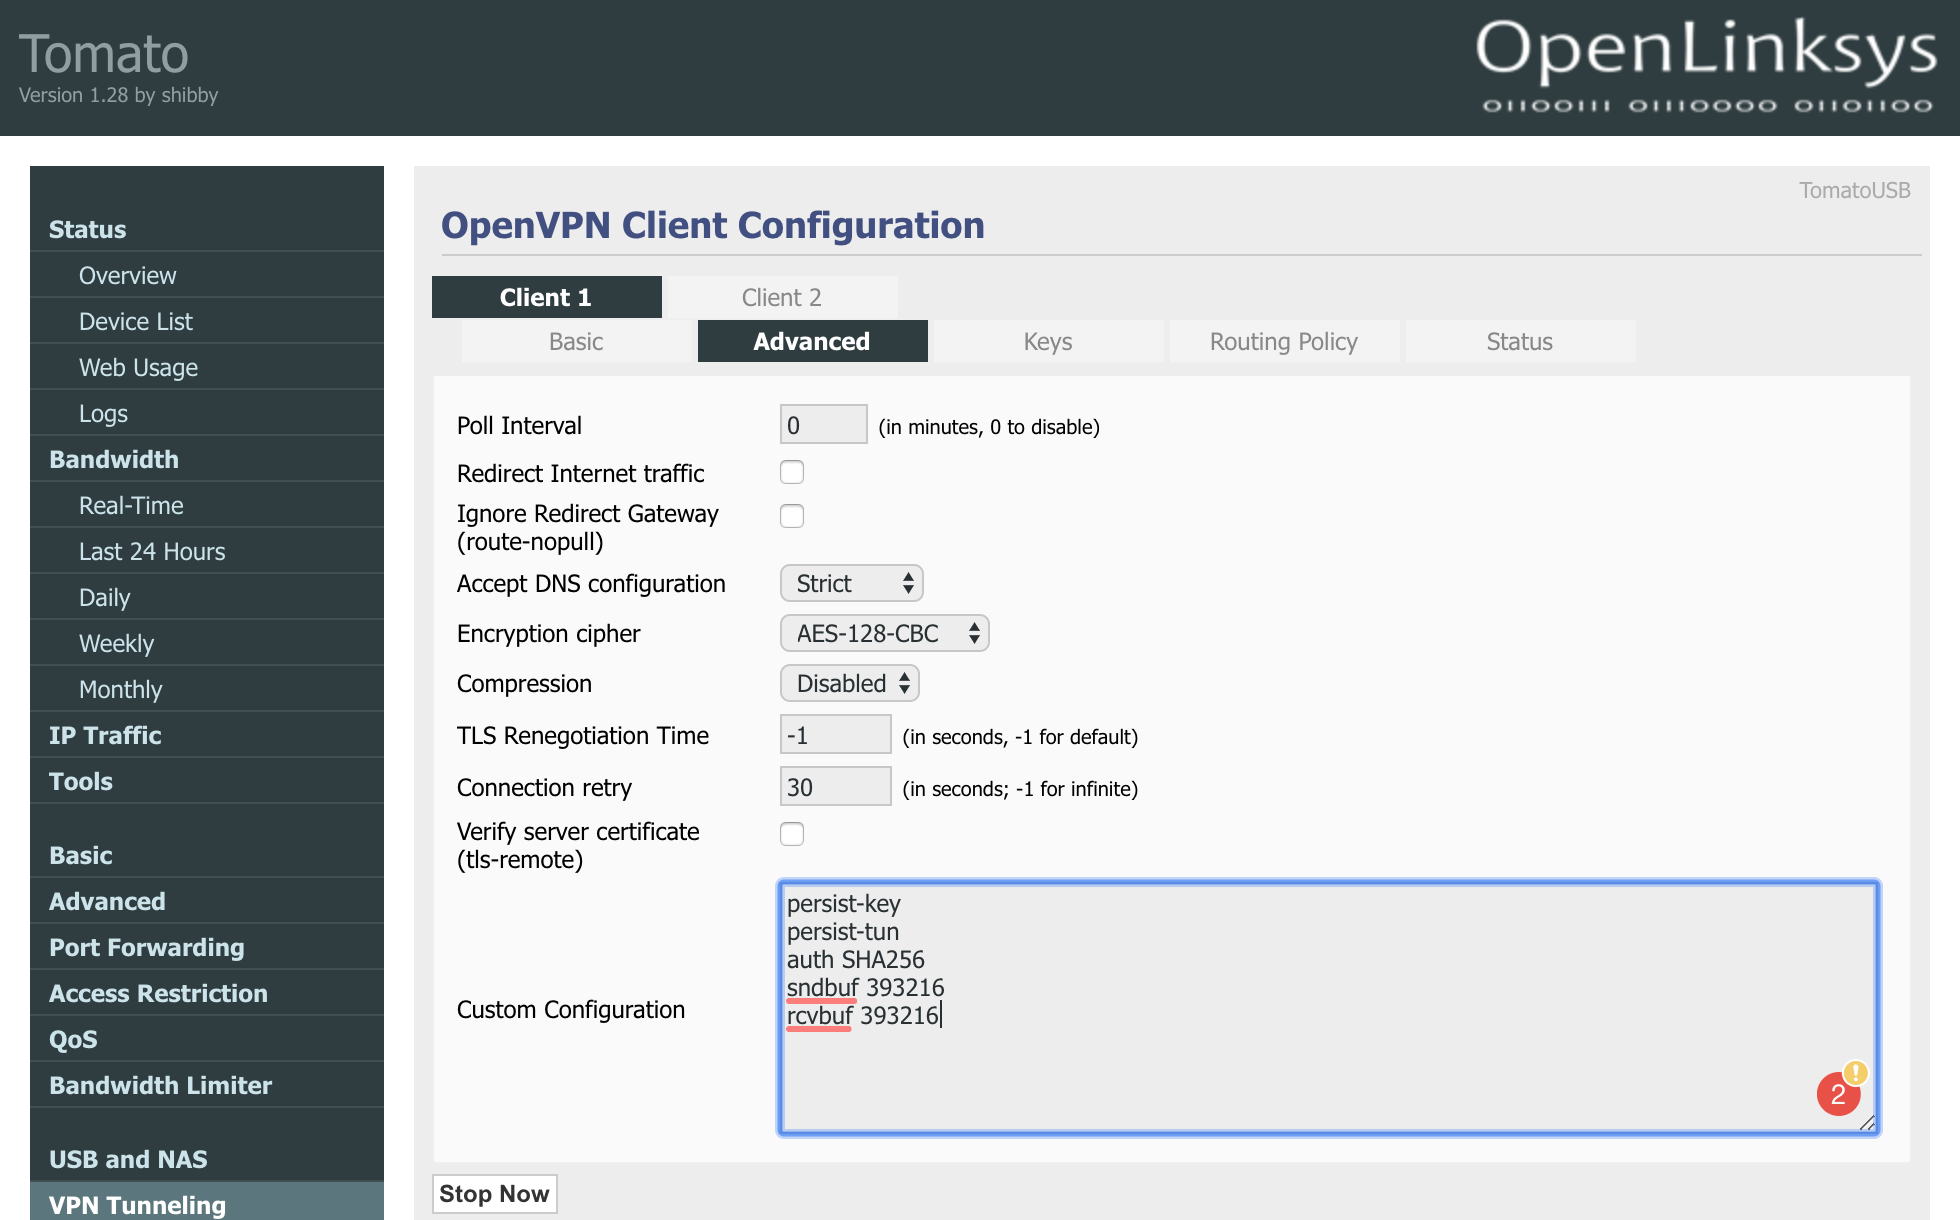
Step 4
Click the Advanced tab and set the options to match below:
Set Poll Interval to 0
Set Redirect Internet Traffic to Unchecked
Set Ignore Redirect Gateway to Unchecked
Set Accept DNS Configuration to Strict
Set Encryption Cipher to AES-128-CBC
Set compression to Disabled
Set TLS-Renegotiation Time to default -1
Set Connection Retry to default 30
Set Verify Server Certificate to Unchecked
Under Custom Configuration set the below lines:
persist-key
persist-tun
auth SHA256
sndbuf 393216
rcvbuf 393216
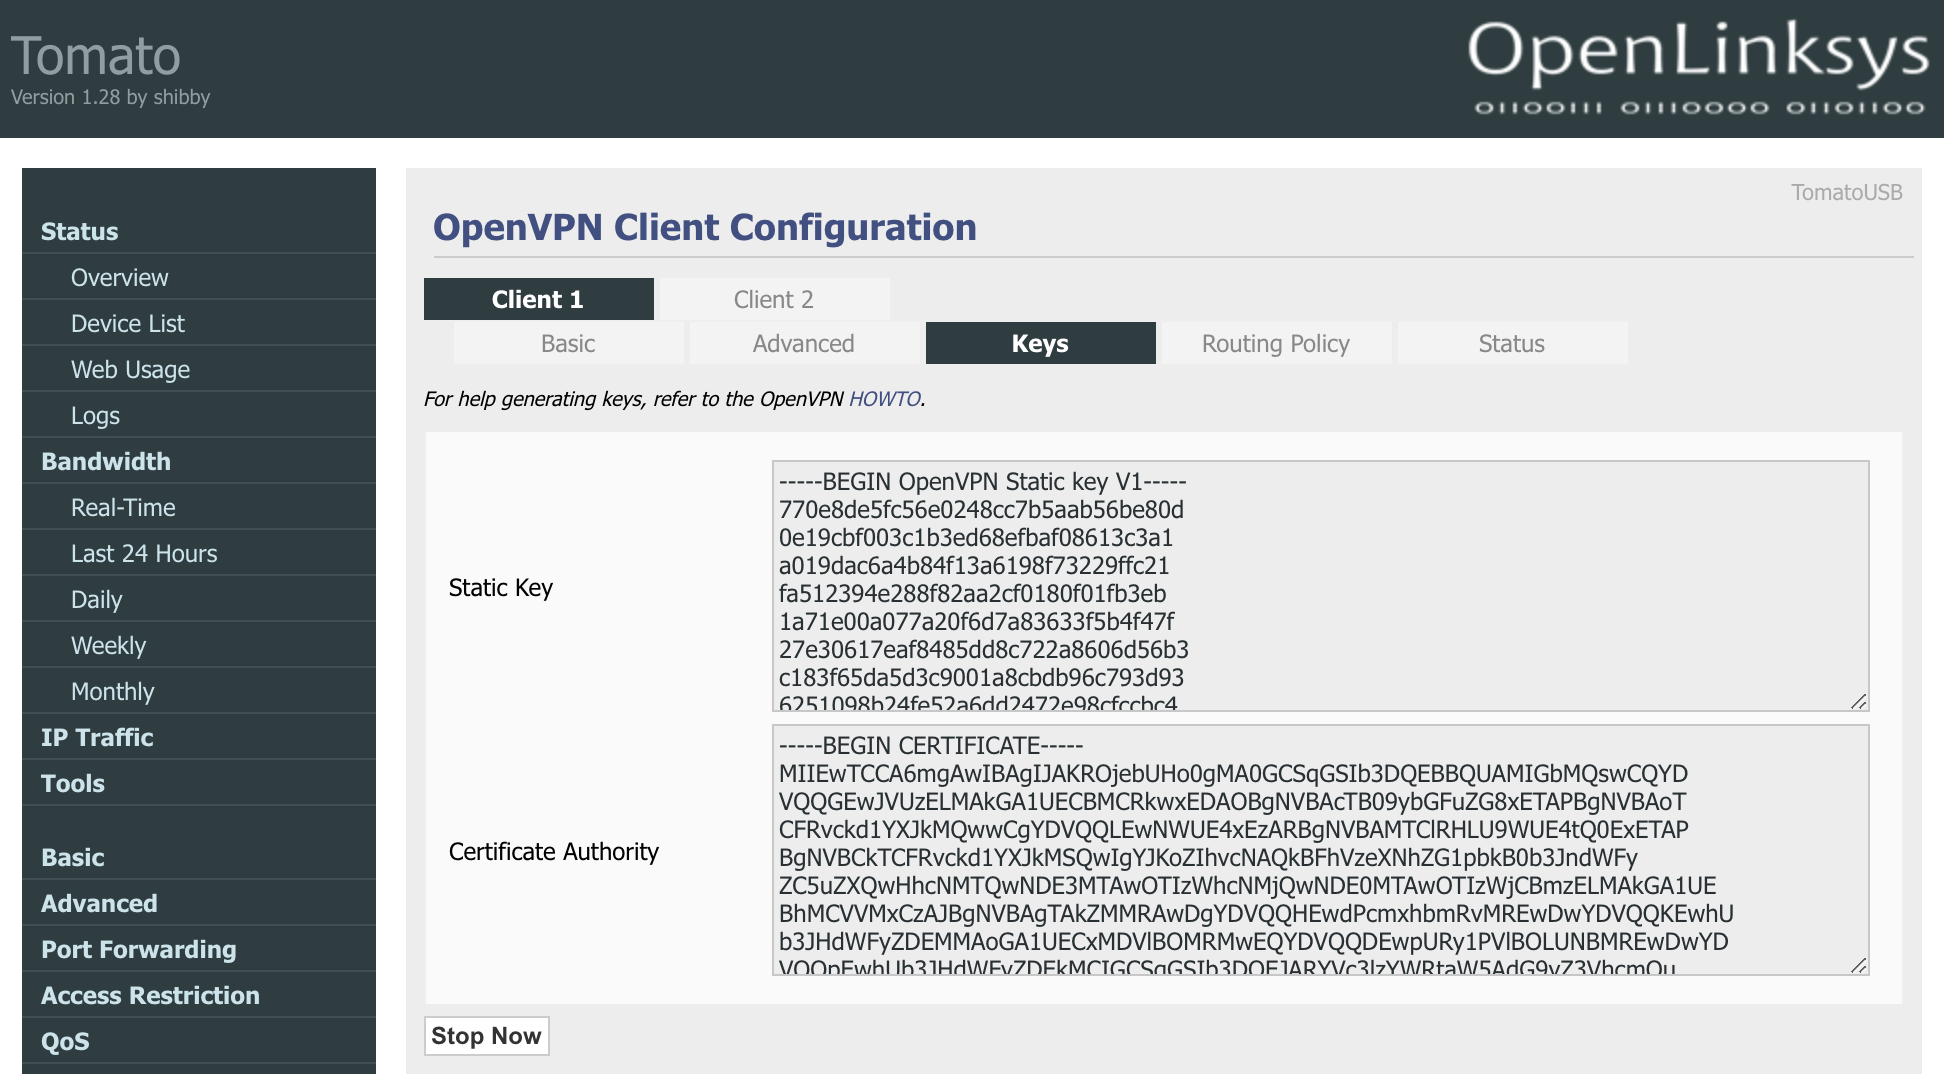
Step 5
Now click the Keys tab, enter the TLS-AUTH Key into the Static Key box, then enter the OpenVPN CA into the Certificate Authority box, both keys and cert can be found here
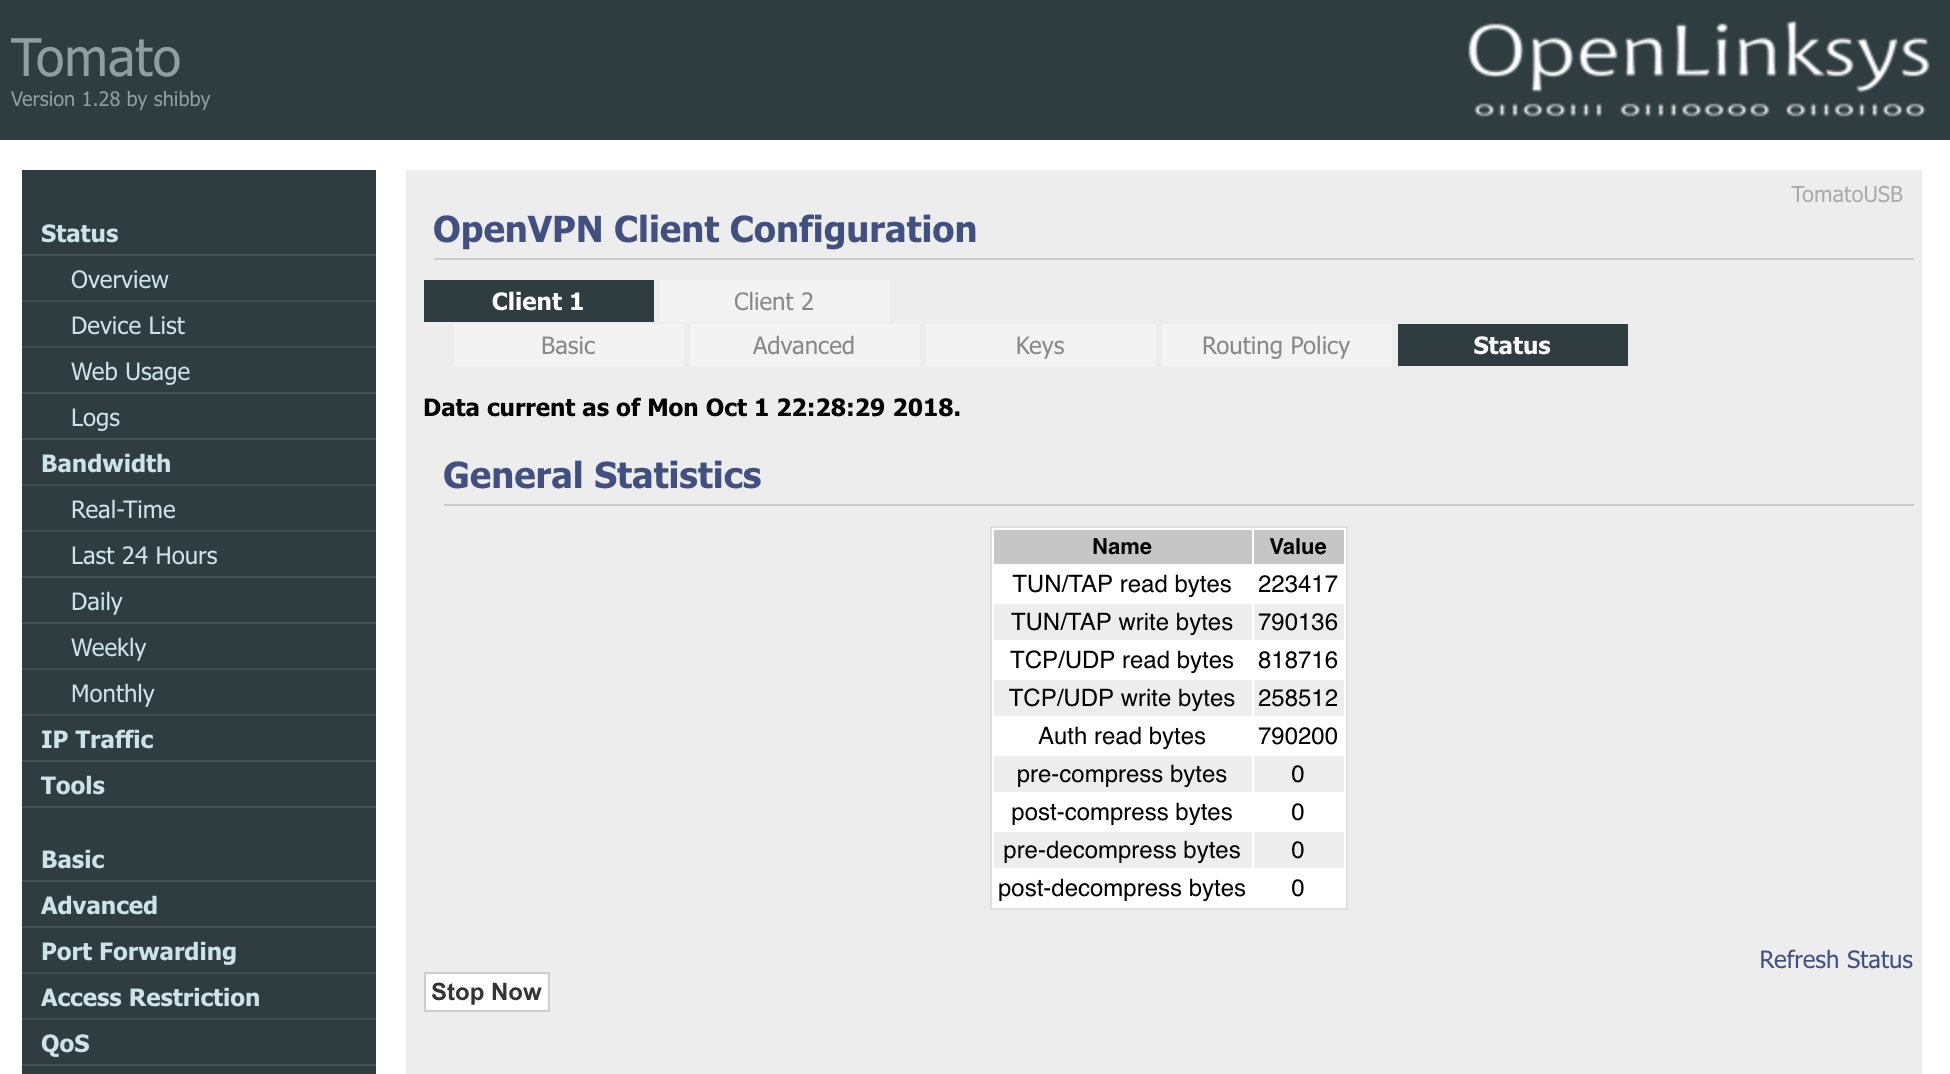
Step 6
Click the status tab and then click save on the bottom right-hand corner - then hit Start Now - it should now connect you to your VPN and display as below.