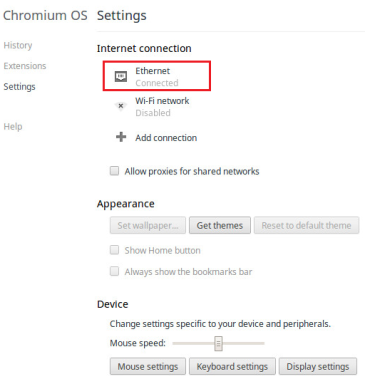
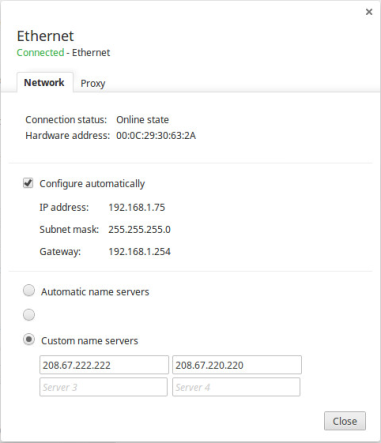
By standard you are using the DNS server of your internet provider. But they can be slow or blocking access to certain websites. In order to avoid this, you can easily change your DNS settings on your Chromebook.
We recommend to use OpenDNS rather than other DNS servers. However, here's a list of DNS servers you can use:
- OpenDNS: 208.67.222.222 + 208.67.220.220
- GoogleDNS: 8.8.4.4 + 8.8.8.8
- ComodoDNS: 156.154.70.22 + 156.154.71.22
- UltraDNS: 156.154.70.1 + 156.154.71.1
- NortonDNS: 198.153.192.1 + 198.153.194.1
If you're unable to set your DNS settings as described below, you might need to enable the "Experimental static IP configuration". To do so, navigate to chrome://flags in your omnibox. Find the flag "Experimental static IP configuration" and enable it. Then select the option that appears on the bottom of your screen to restart your device. After rebooting your device, you should be able to follow the steps below:
1) Open your browser and click on the  sign in the top right corner of your screen.
2) Navigate to "Settings"

3) Under "Internet Connection", click on the name of your network

4) Then, under the "Network" tab choose "Custom name servers" and enter e.g.208.67.222.222 in one field and 208.67.220.220 in another. Click "Close" when you're done.

