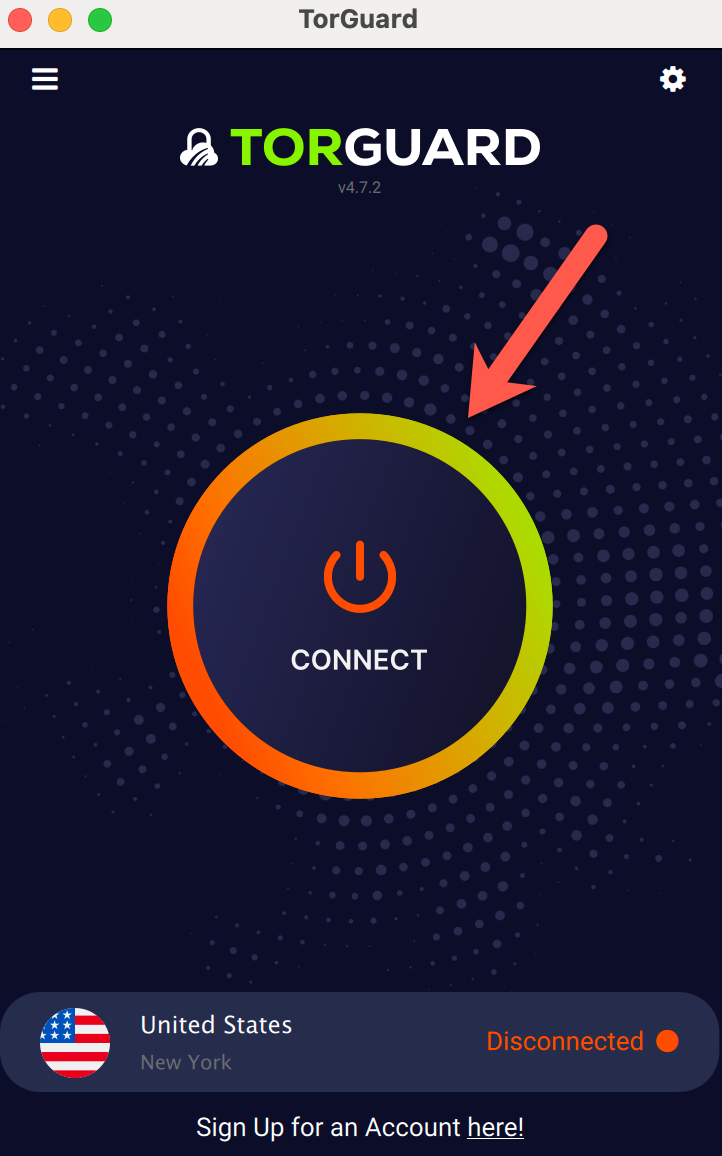
STEP 1) Connect the app to your prefered location by clicking the big round connect button, it's hard to miss :)
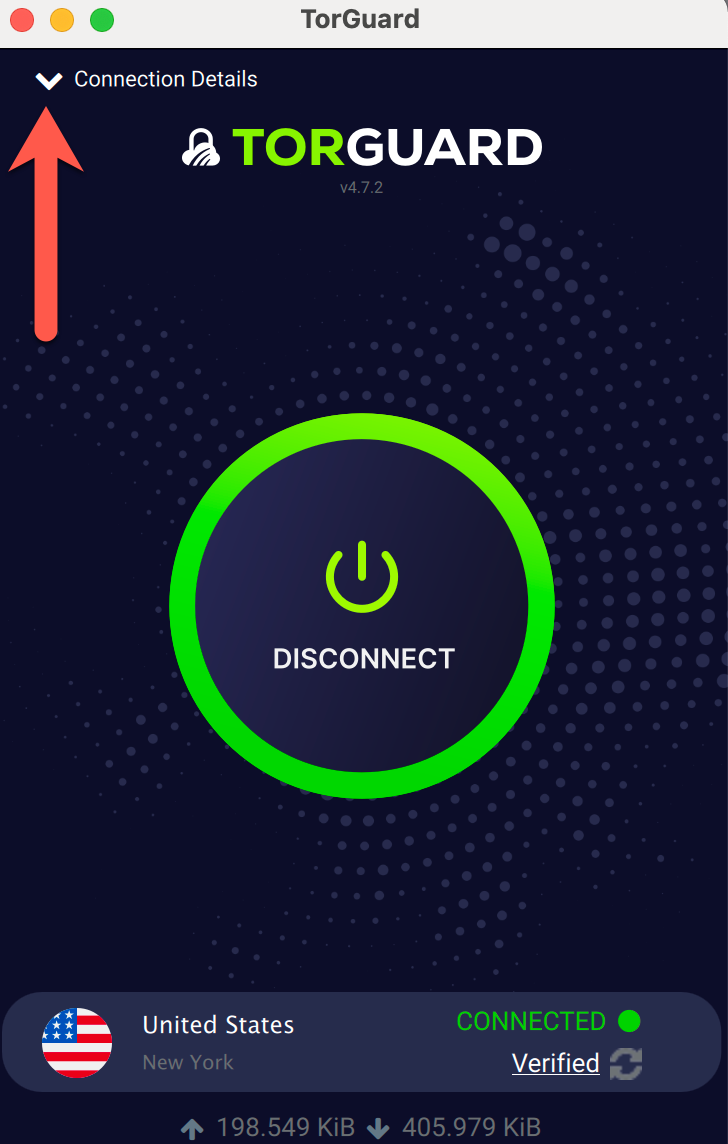
STEP 2) Once connected you will see "Connection Details" on the top left-hand corner with the little down arrow, click this to see all connection details.
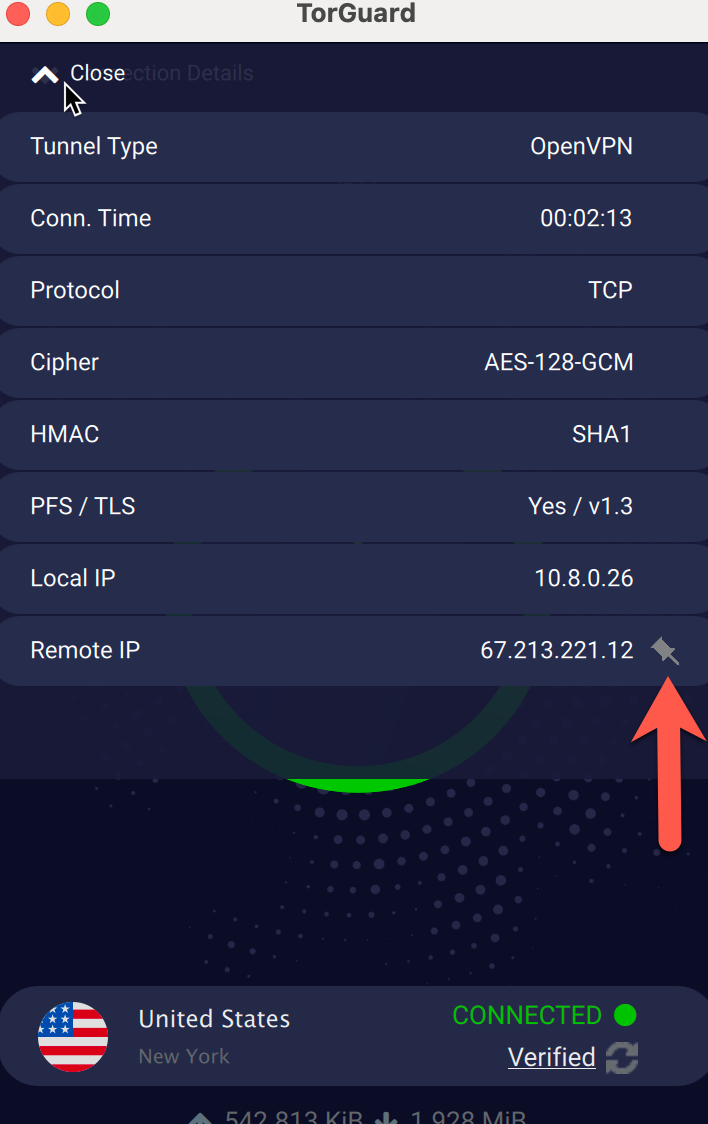
STEP 3) Look for the "Remote IP" line and you will see a little pin to the right of the IP - click it to pin this IP.
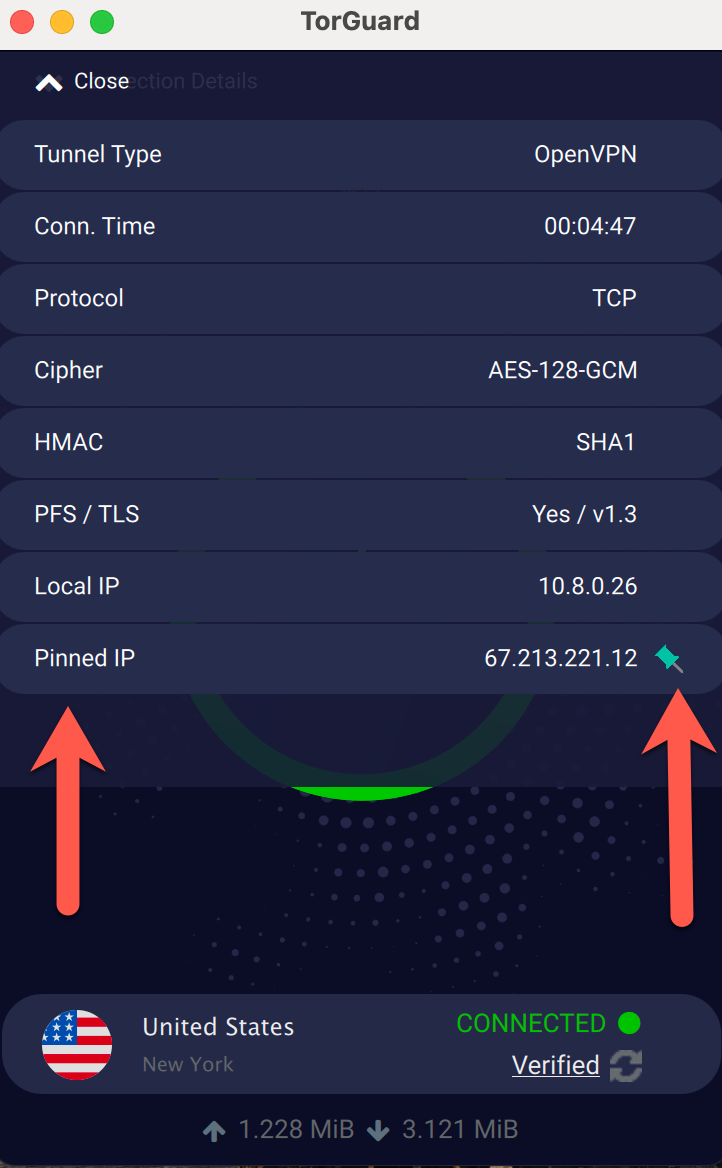
Now "Remote IP" will change to "Pinned IP" and the little icon becomes lighter as in the image below.
STEP 4) How to remove the Pinned IP:
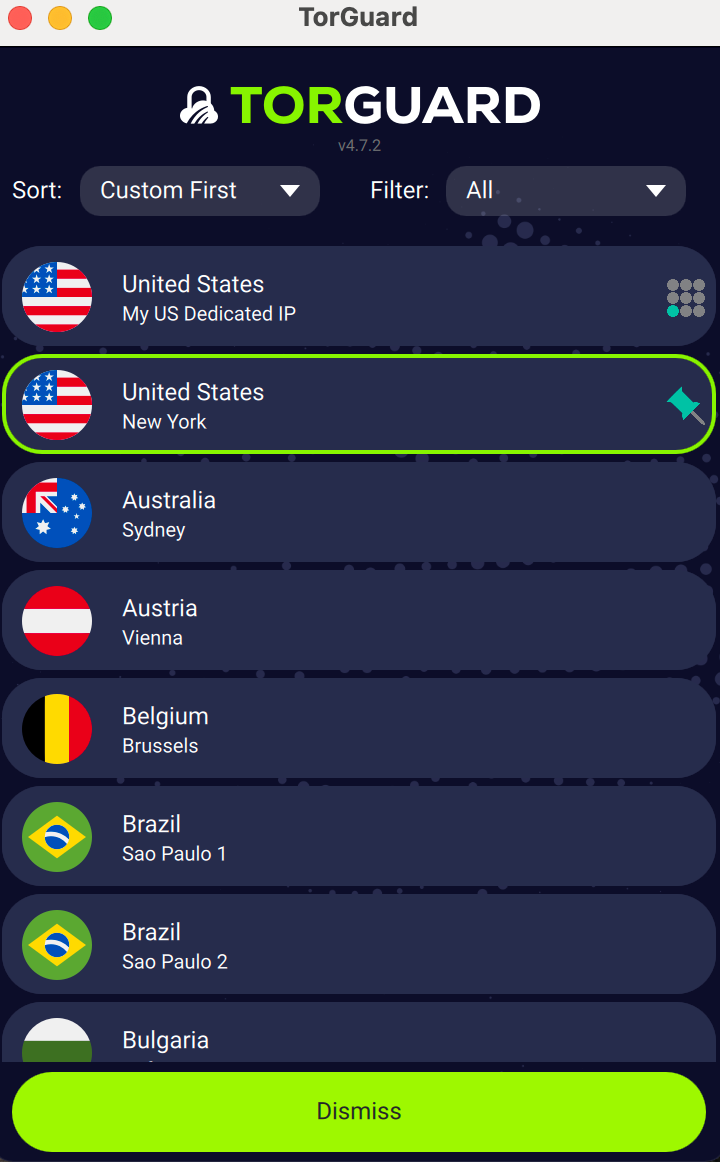
If you hit disconnect you will see that every time you click the server list, in our case New York, it will show a pin meaning it will connect to your pinned IP every time you connect to this location as in the image below.
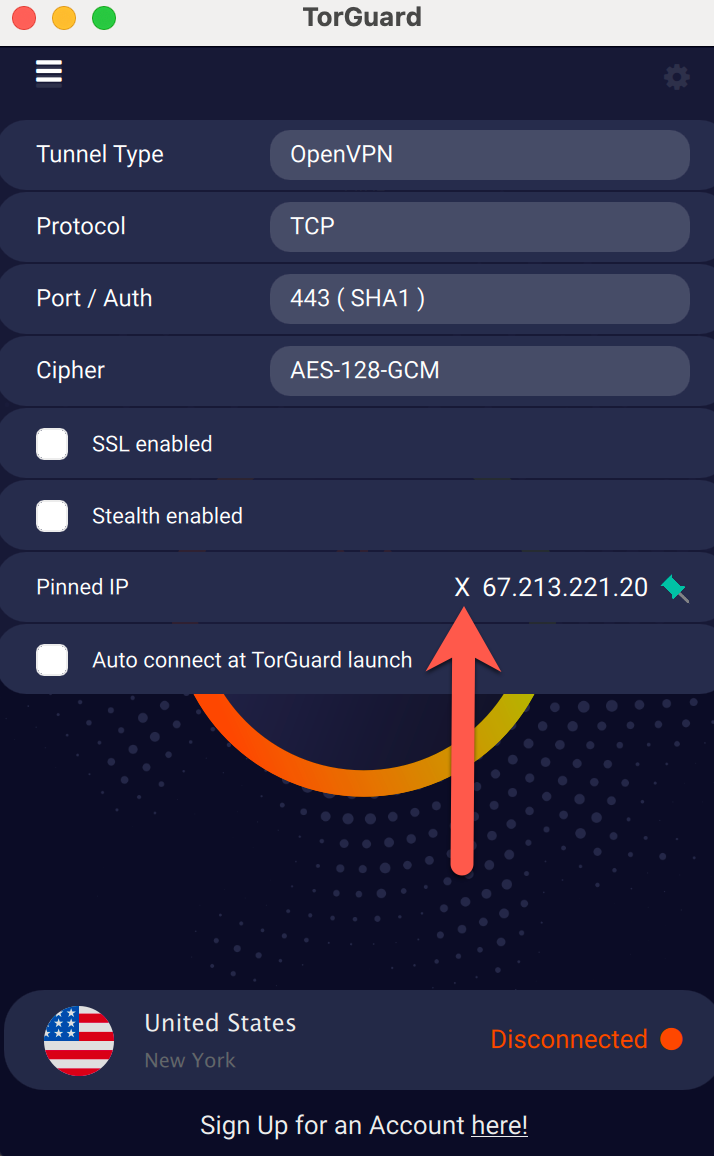
To remove the pinned IP, click the burger menu on the top left and then click the little cross icon on the left side of the pinned IP and you will then be able to connect to dynamic IPs again on that location.
If you have any issues with this process please don't hesitate to ask our support desk.
