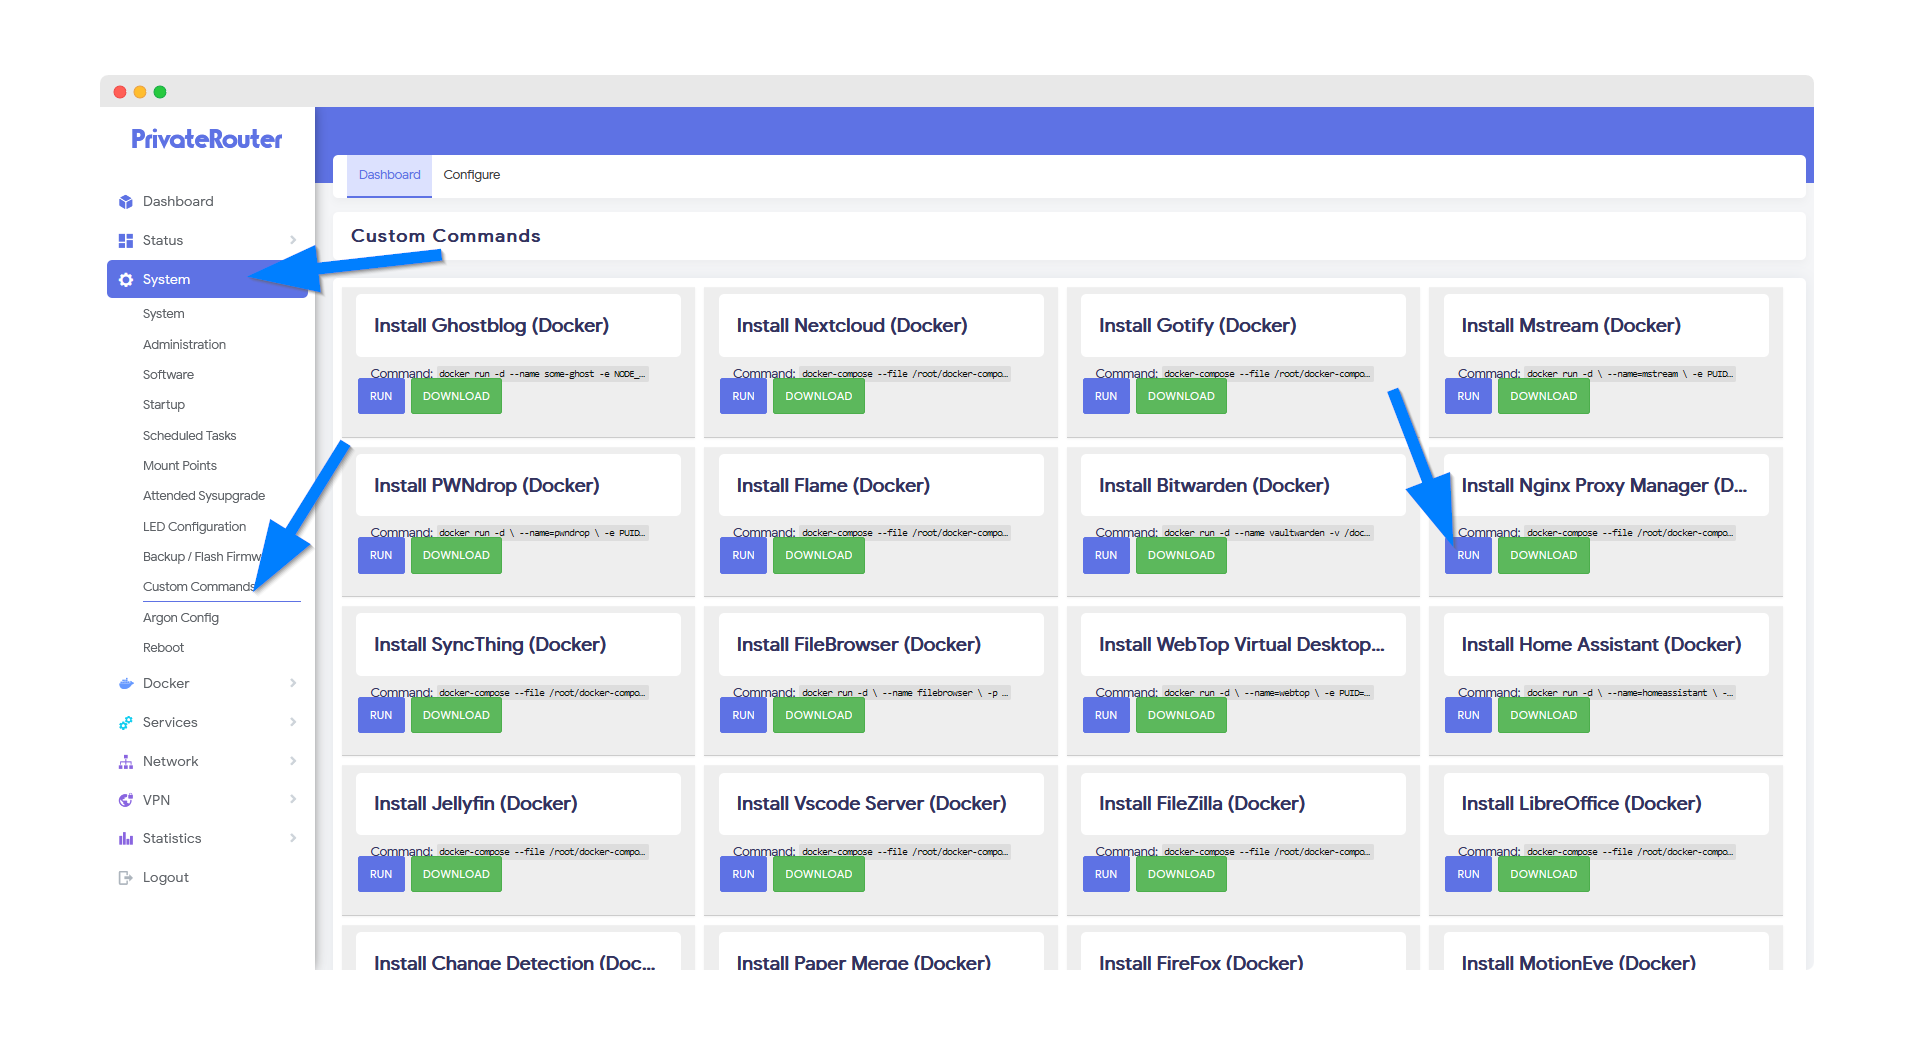
1.) To install Nginx Proxy Manager first login to your PrivateRouter and click the System menu. Select Custom Commands then locate Nginx Proxy Manager and click the RUN button.
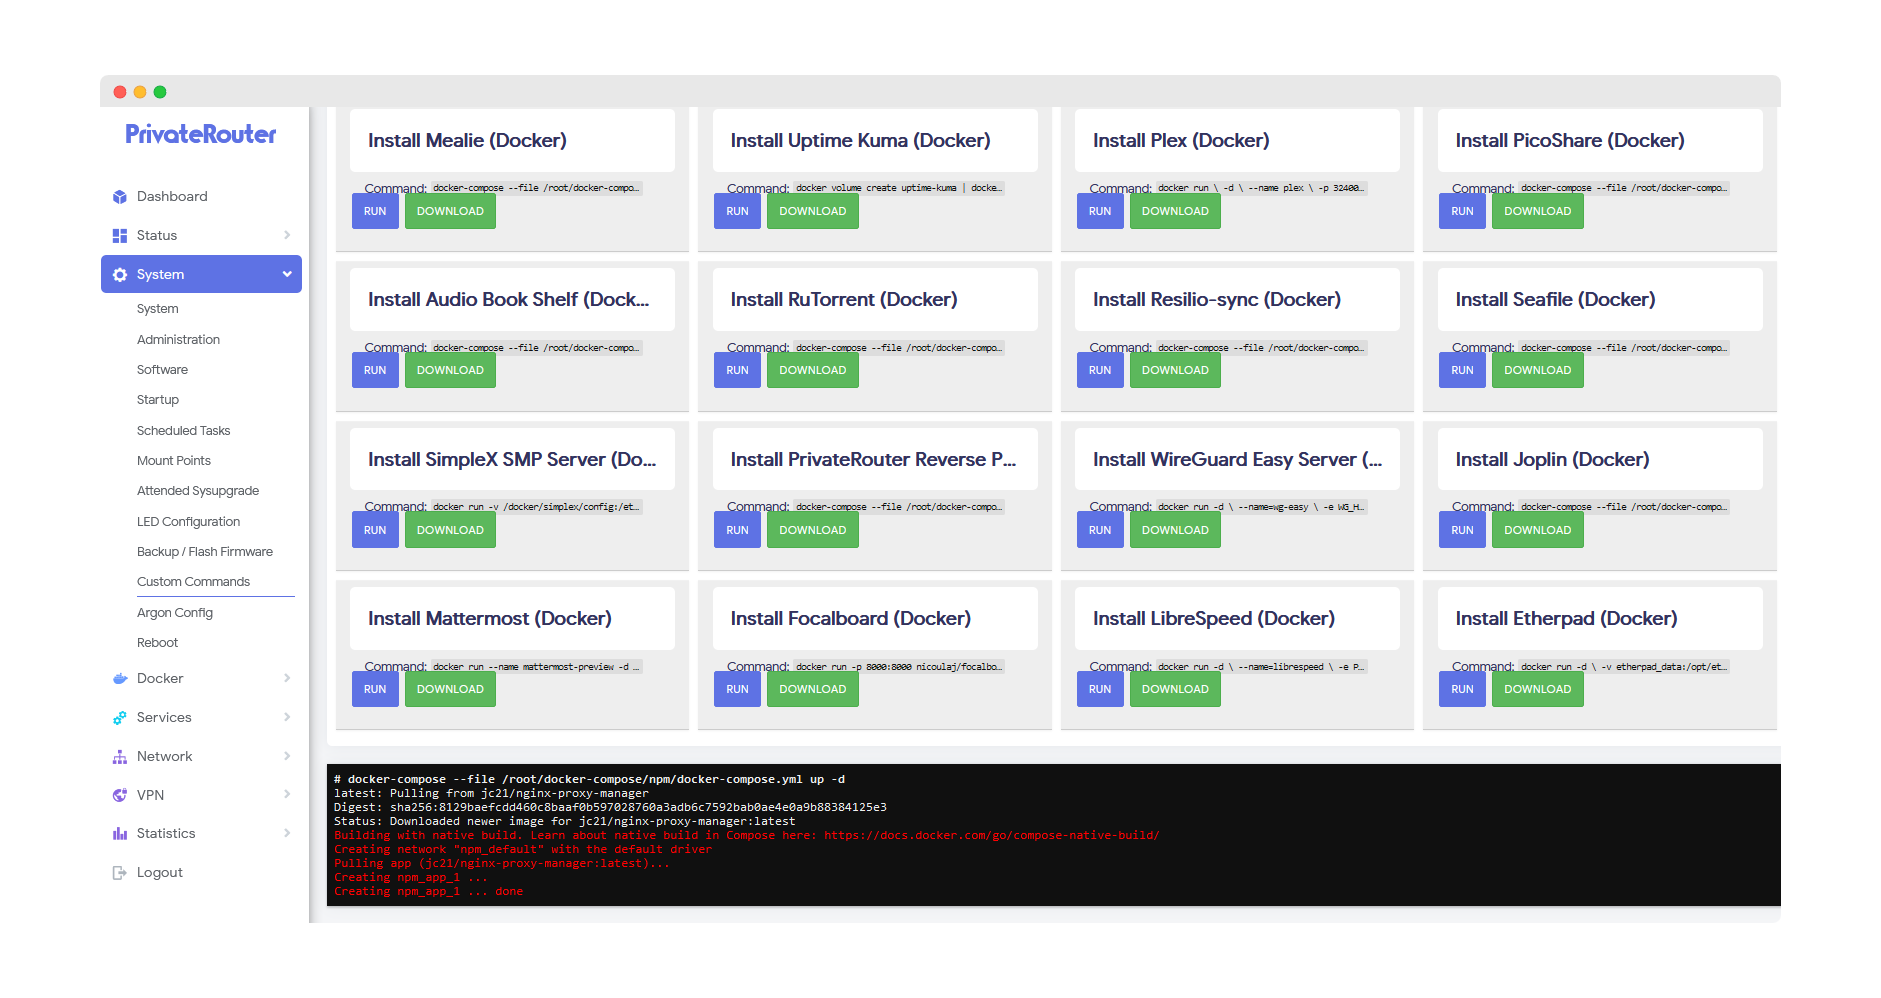
2.) Wait a few minutes for Docker to complete the app install. Scroll to the bottom and you will see output similar to the commands below when the install has been completed. (If you receive an error instead of docker output this can happen if the install takes longer. Nginx Proxy Manager will still be installed so be patient and proceed to the next step.)
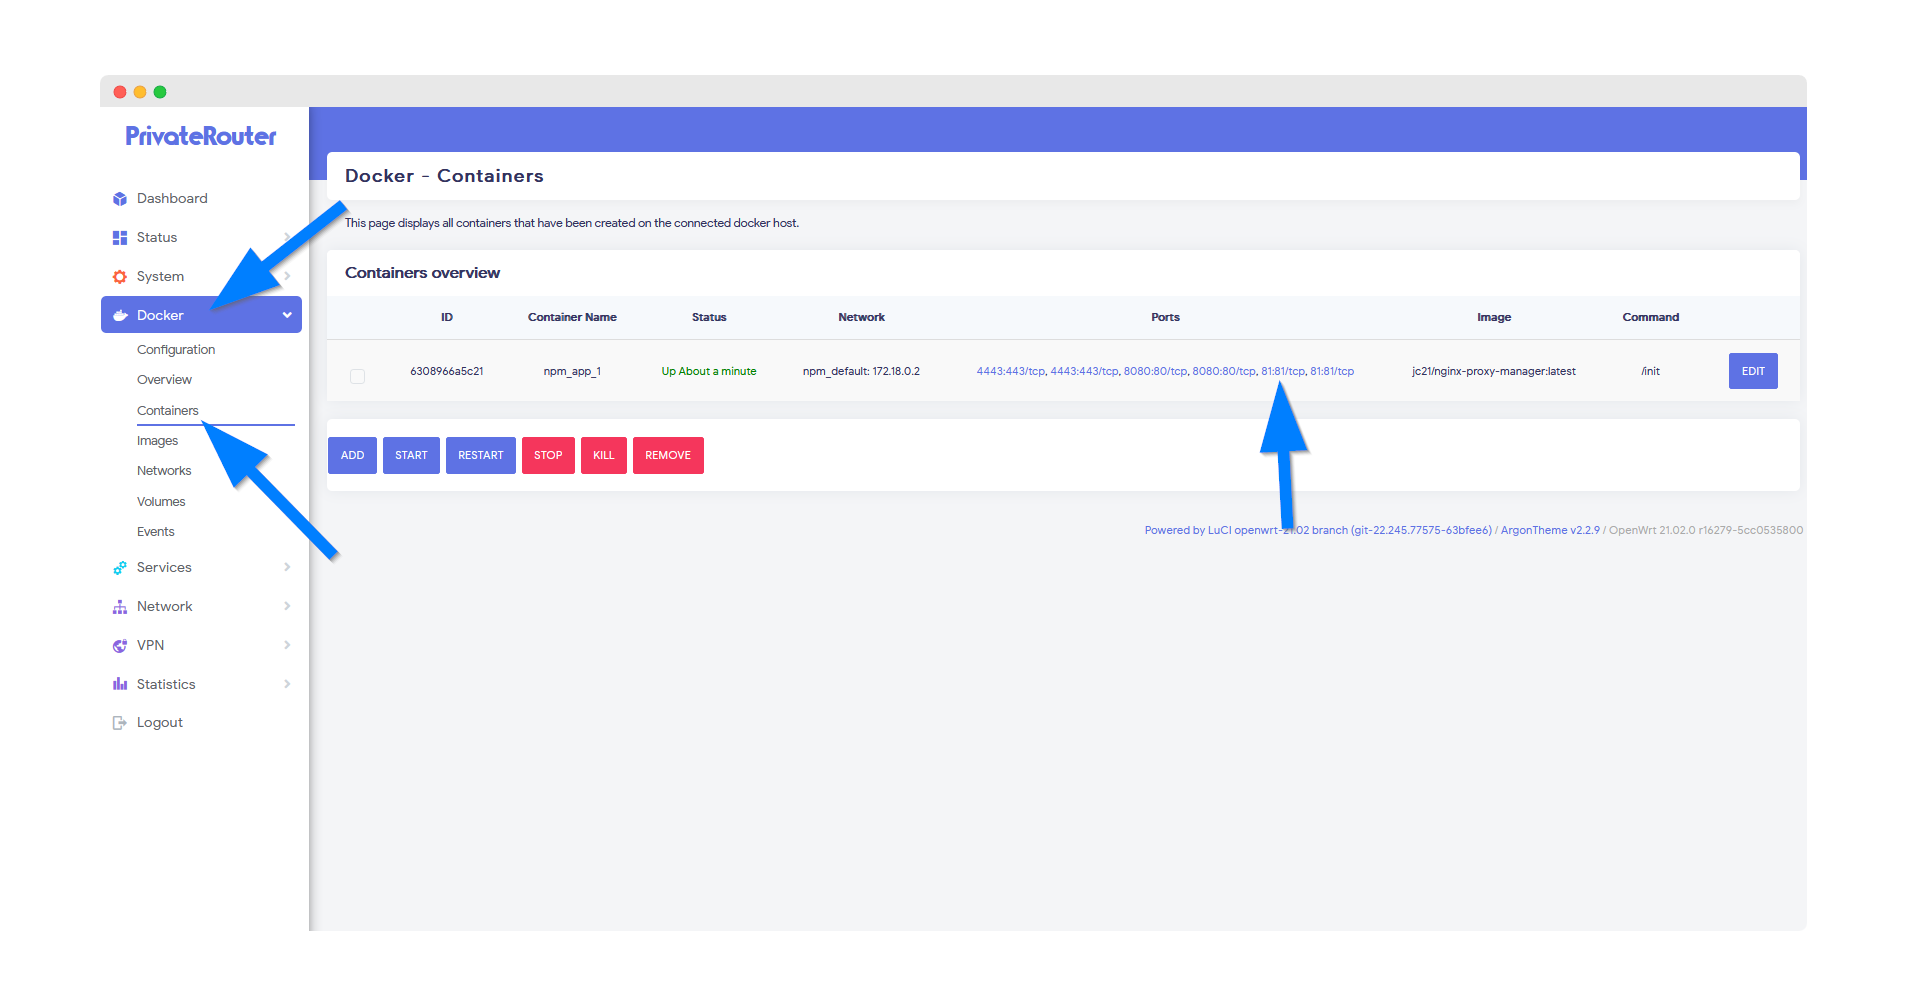
3.) To access Nginx Proxy Manager after it's been installed click the Docker menu then select Containers. You should see the newly created Nginx Proxy Manager (npm) container with a green UP status. This means Nginx Proxy Manager is up and running. Next click the port link to access Nginx Proxy Manager via your local router IP address and port. With default settings this will load at the local URL: http://192.168.0.1:81
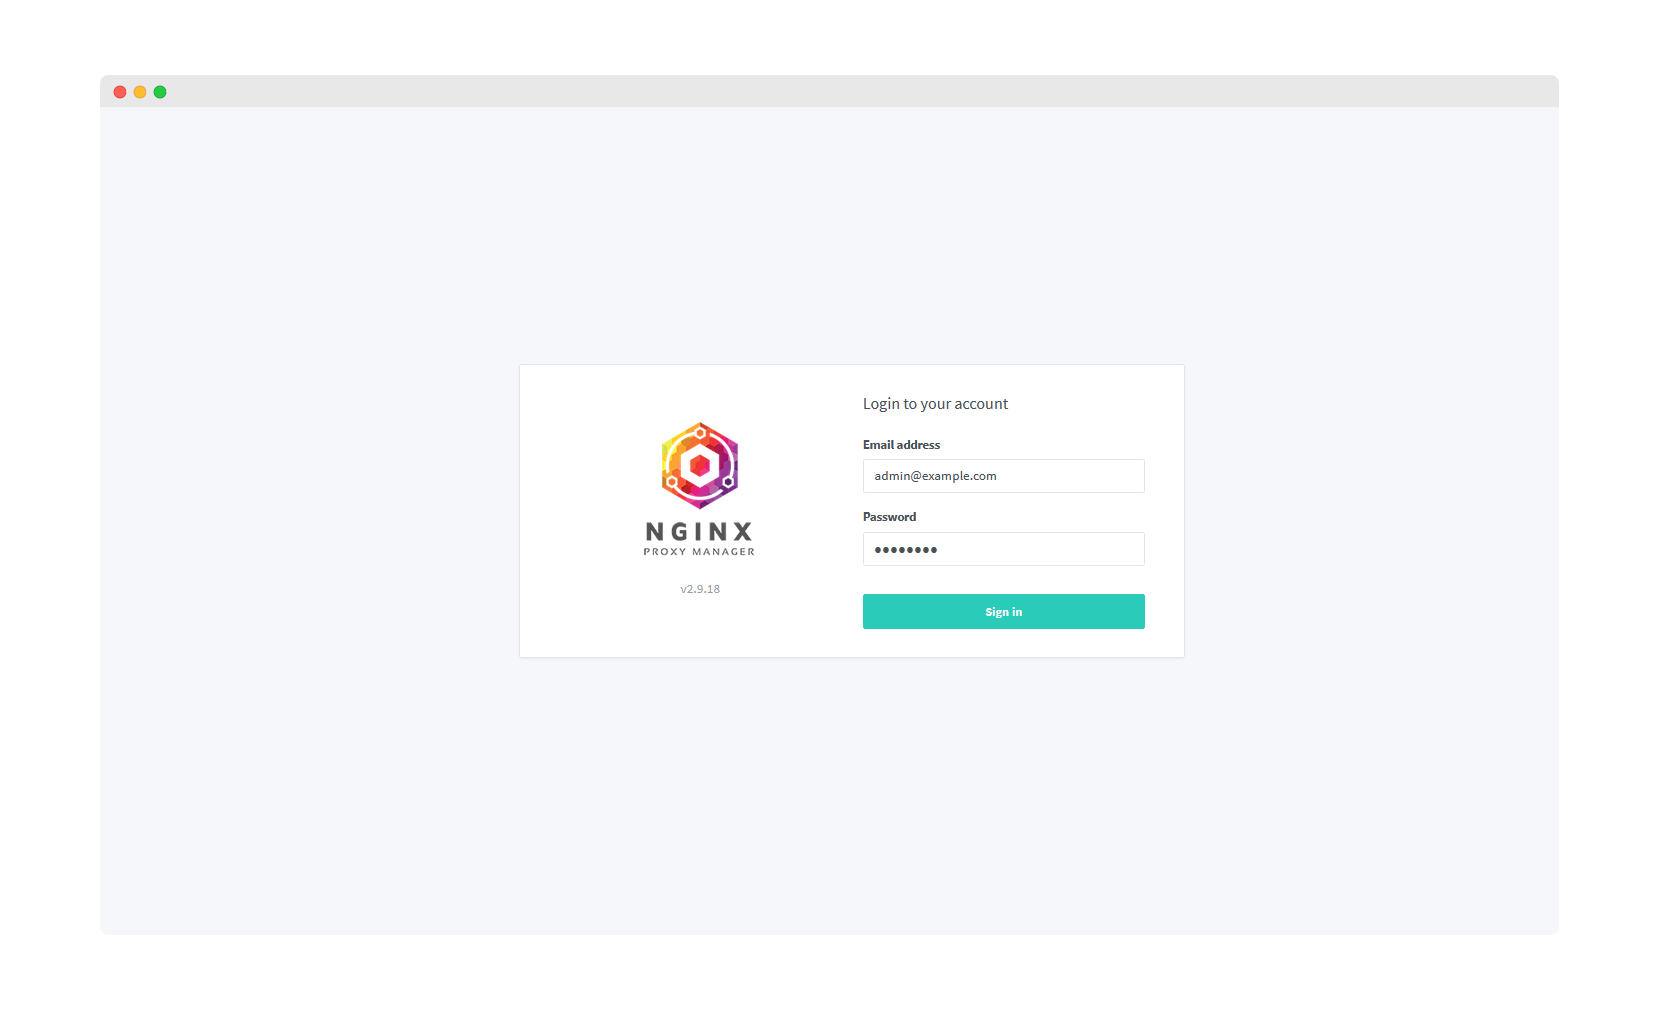
Nginx Proxy Manager will load with the login screen below. The first time you can login with the default username [email protected] and password changeme.
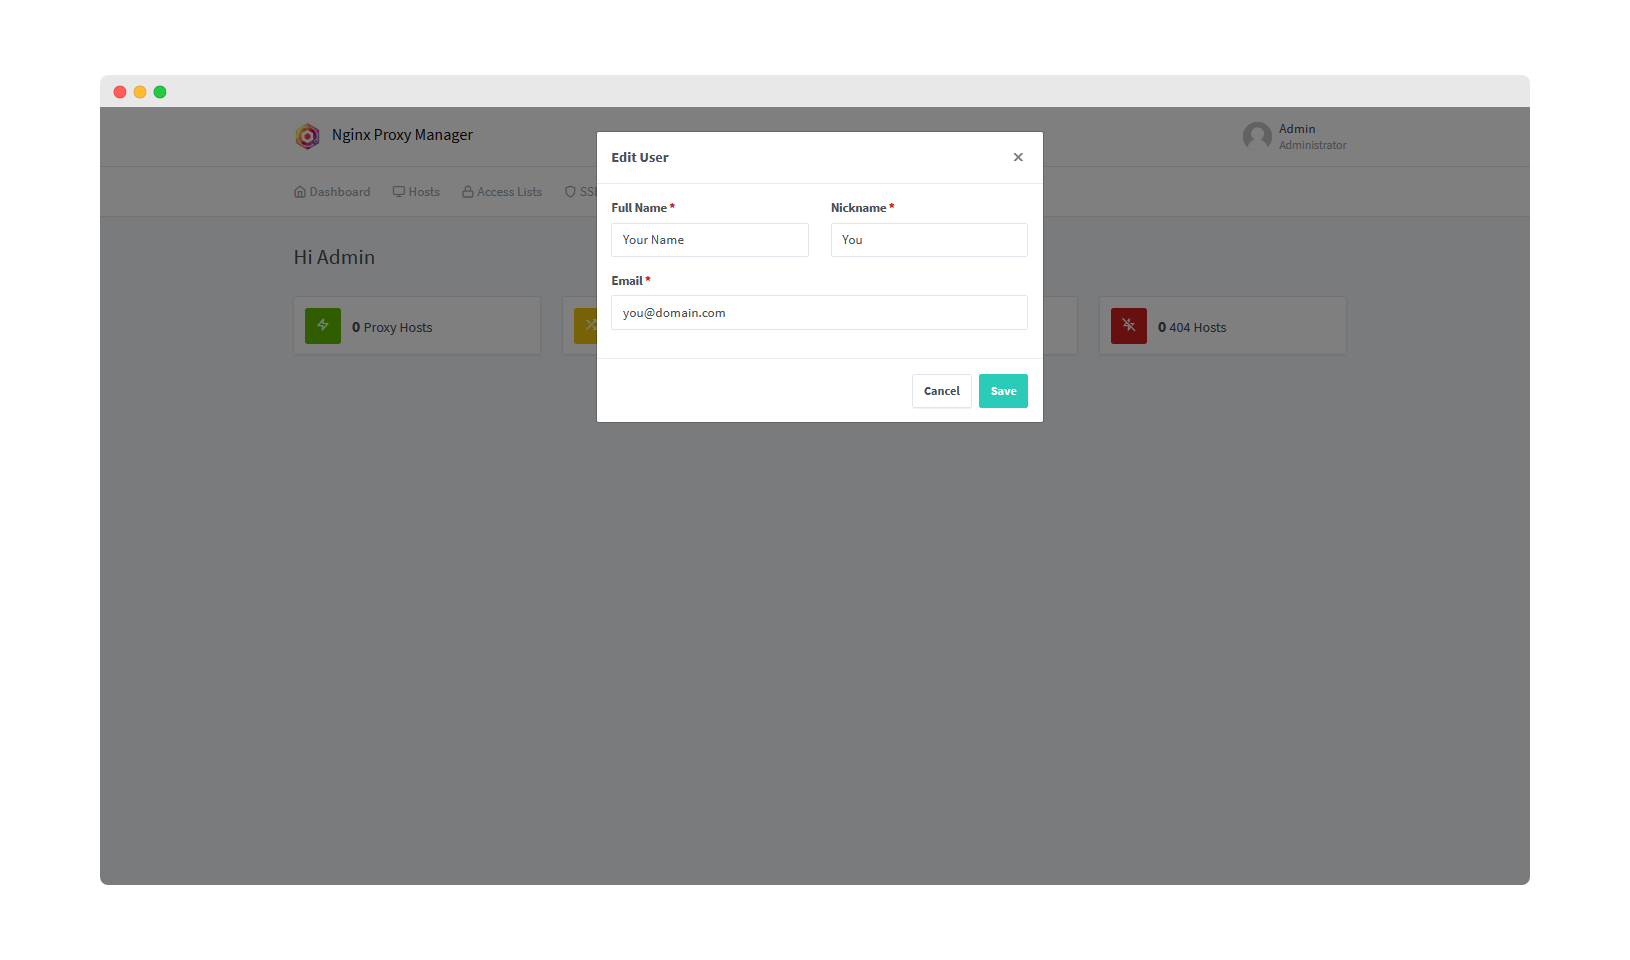
Enter your name and email address so Let's Encrypt can notify you about free SSL cert renewals then proceed to change the default password.
4.) Next we will show how to add a local docker container IP and port address before securing it with Let's Encrypt SSL.
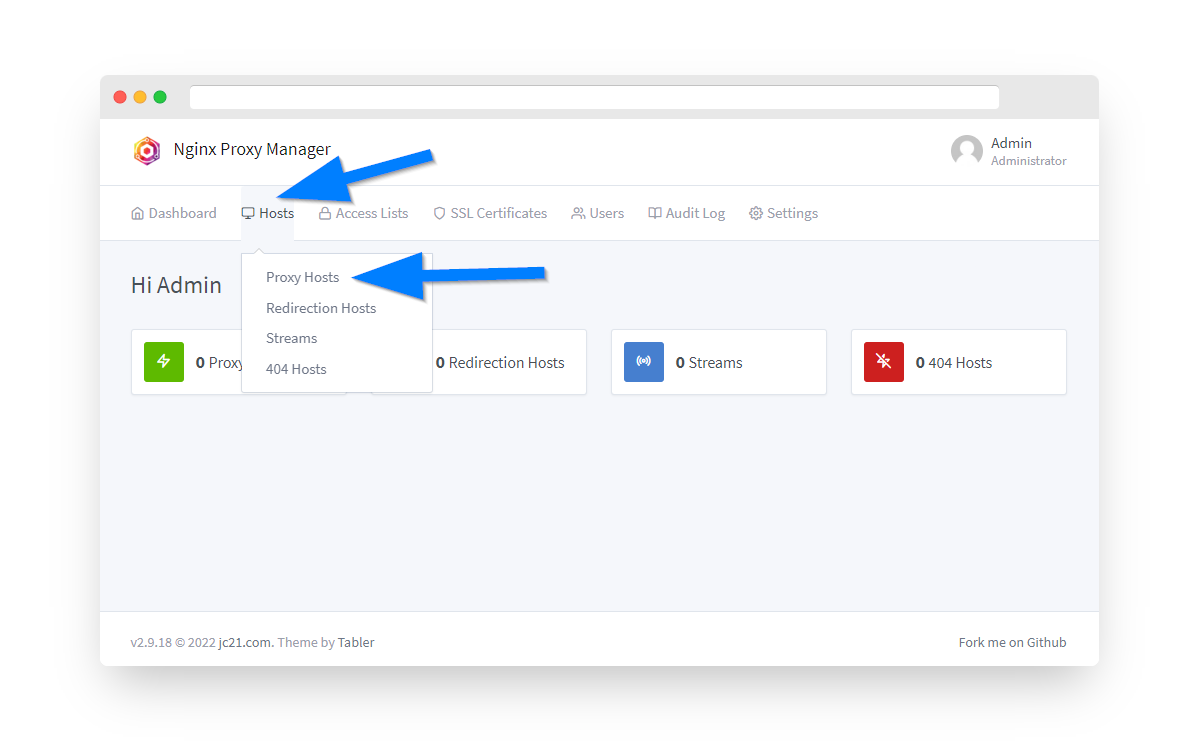
Once you are logged in click the Hosts menu option then select "Proxy Hosts".
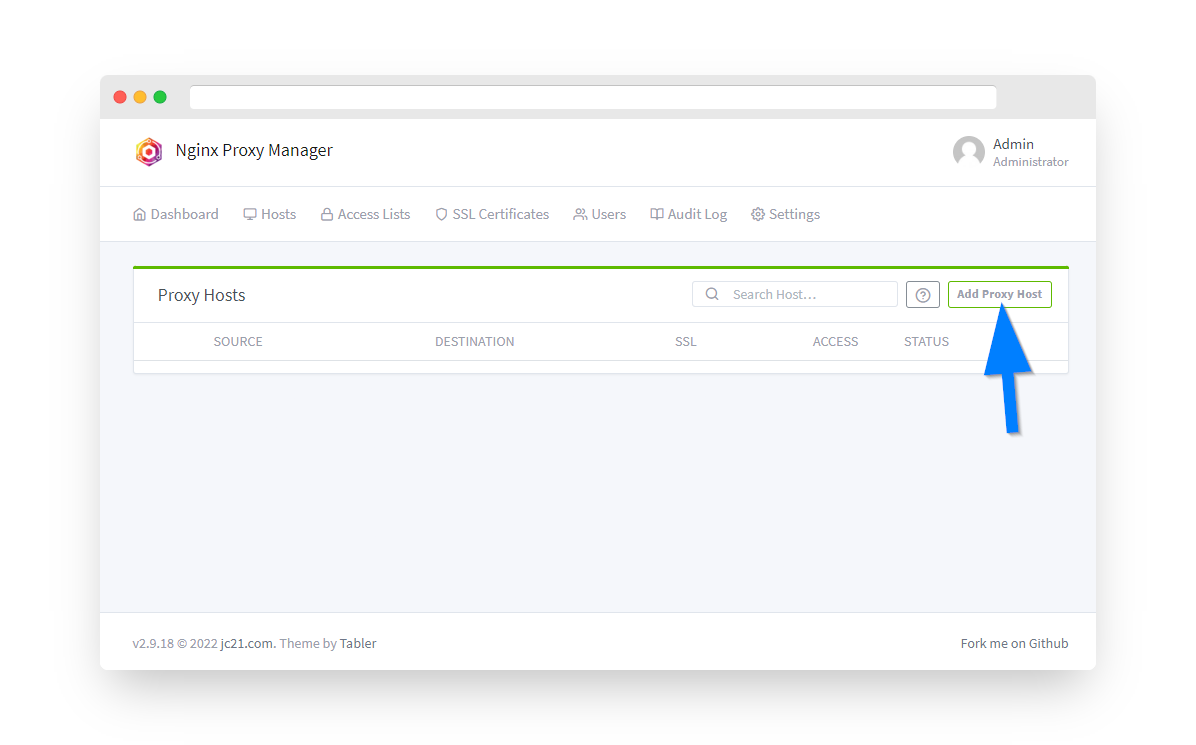
5.) Click the Add Proxy Host button.
6. Before proceeding first make sure you have pointed an A record or A Wildcard record with your domain's registrar at your Private VPN Cloud VPN IP address and setup external/internal port forwarding 80/8080 and 443/4443. Then enter the domain name or subdomain under Domain Names. (example: files.yourdomain.com) Select "https" under Scheme and the enter your Router's IP address (192.168.0.1). For the port enter the web app's port number (for example 8984). Click the SSL tab next.
**For most apps make sure to set the Websockets Support switch to ON**
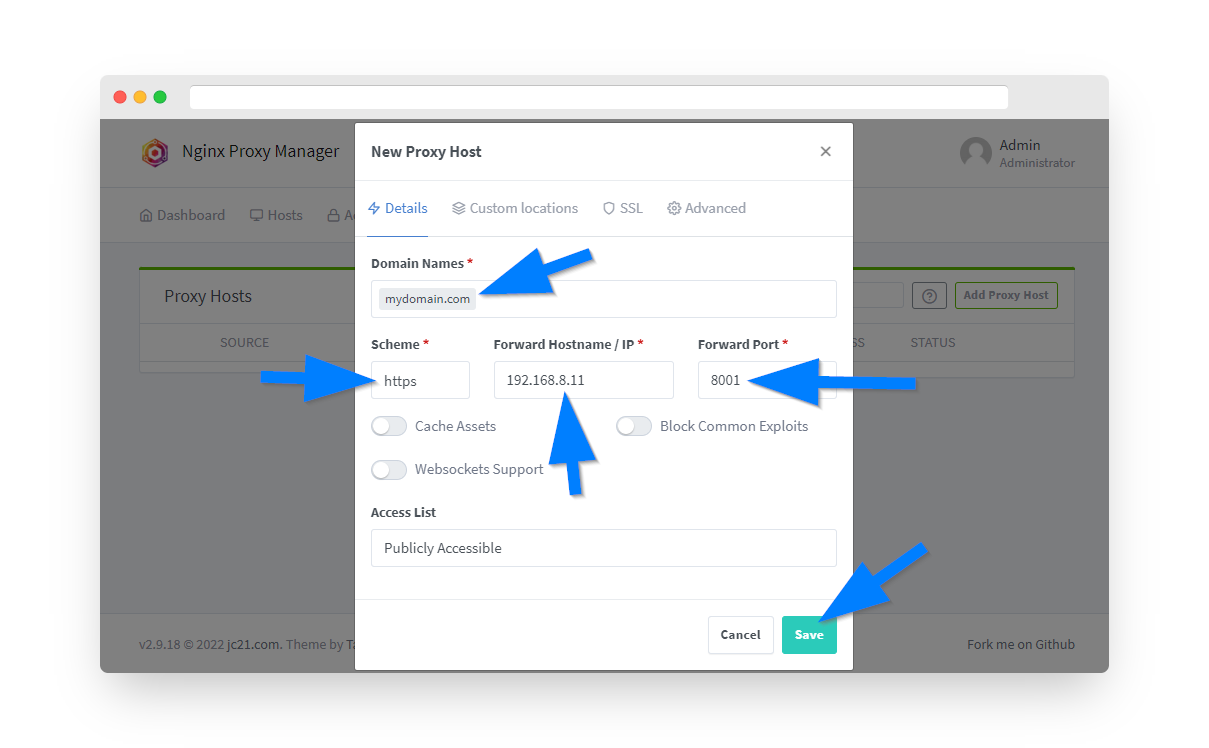
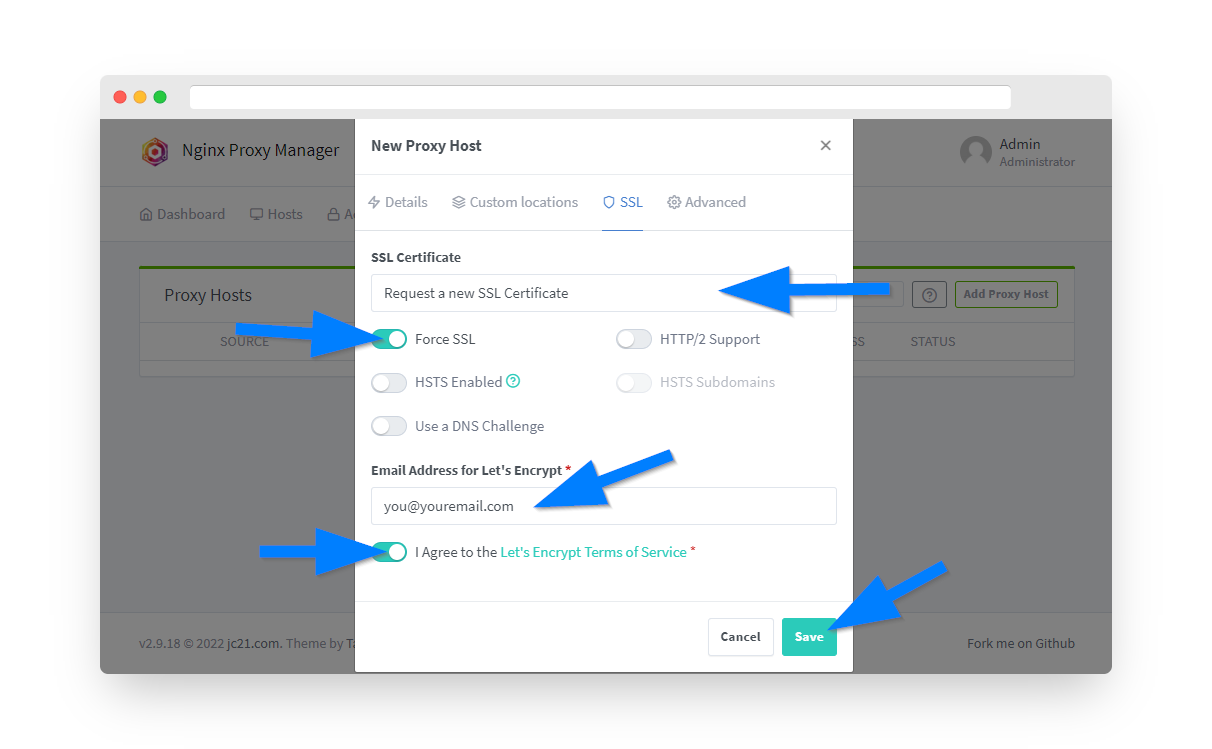
7. Under the SSL tab now proceed with obtaining a free Let's Encrypt SSL certificate. Under the SSL Certificate dropdown select "Request a new SSL Certificate with Let's Encrypt". Click the "Force SSL" option switch and enter an email address to register your SSL cert by with Let's Encrypt. Finally, click the "I Agree" switch on Let's Encrypt Terms and Conditions and click the save button. After a few moments you should see your new proxy host on the Nginx Proxy Manager dashboard with a green "online" status. To verify things are working open a new browser window and enter in your domain name. You should see your web app is now loading through your domain instead of the local IP address.
