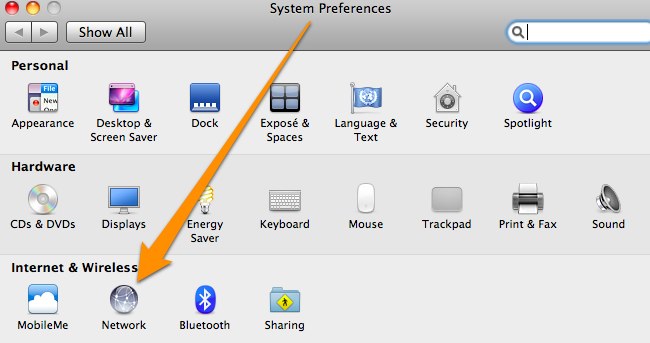
You’ll need to first head into the System Preferences…

Then click on the Network icon…

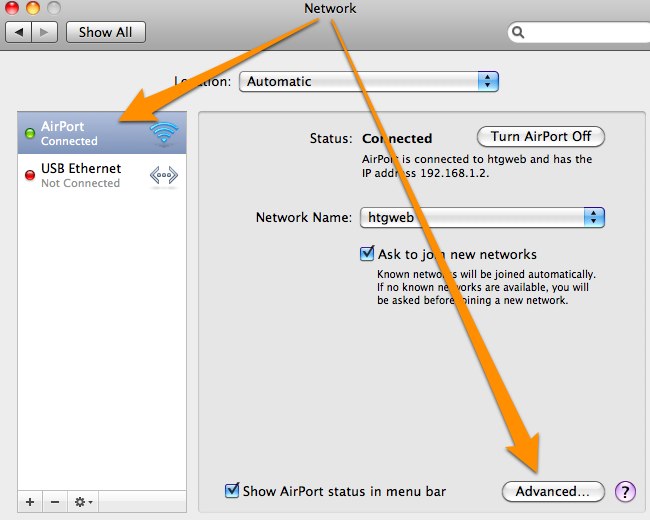
Then you’ll want to select your network card on the left—you’ll see in my example that I’ve got an AirPort card—and then select the Advanced button near the bottom right corner.

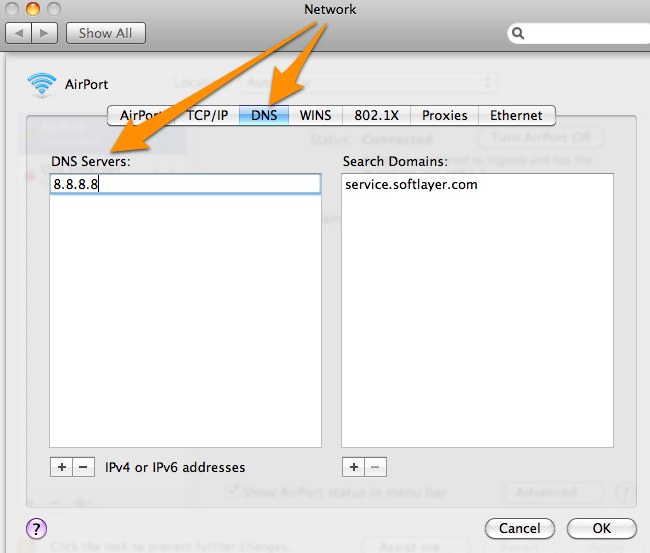
Once you’re there, switch over to the DNS tab, and you can start adding in DNS entries into the list. If you see entries that are grayed out, just ignore them, and click the + symbol at the bottom to add new ones.

Switching to Google DNS
If you want to use Google’s DNS servers, you can add the following two items to the list:
- 8.8.8.8
- 8.8.4.4
Switching to OpenDNS
If you’d rather use OpenDNS instead, which has lots of extra features, you can use the following two entries:
- 208.67.222.222
- 208.67.220.220
That’s pretty much all there is to it.
