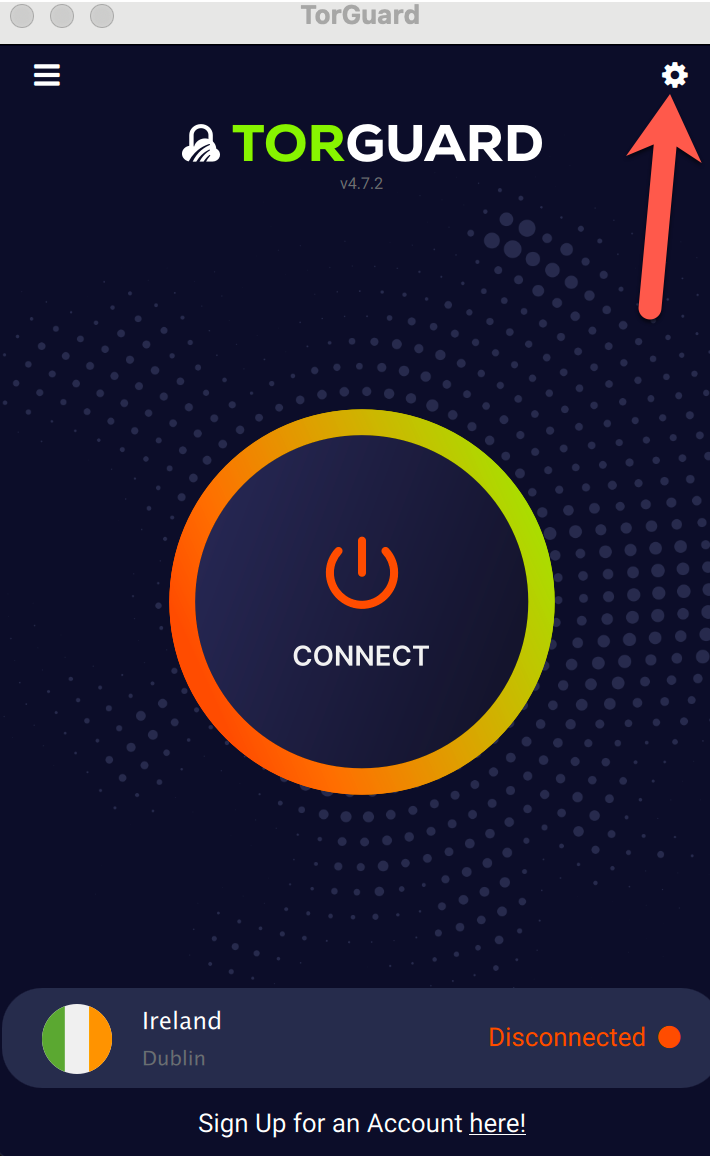
STEP 1) Open the TorGuard Desktop client application, then click on the Settings cog on the top right-hand corner.
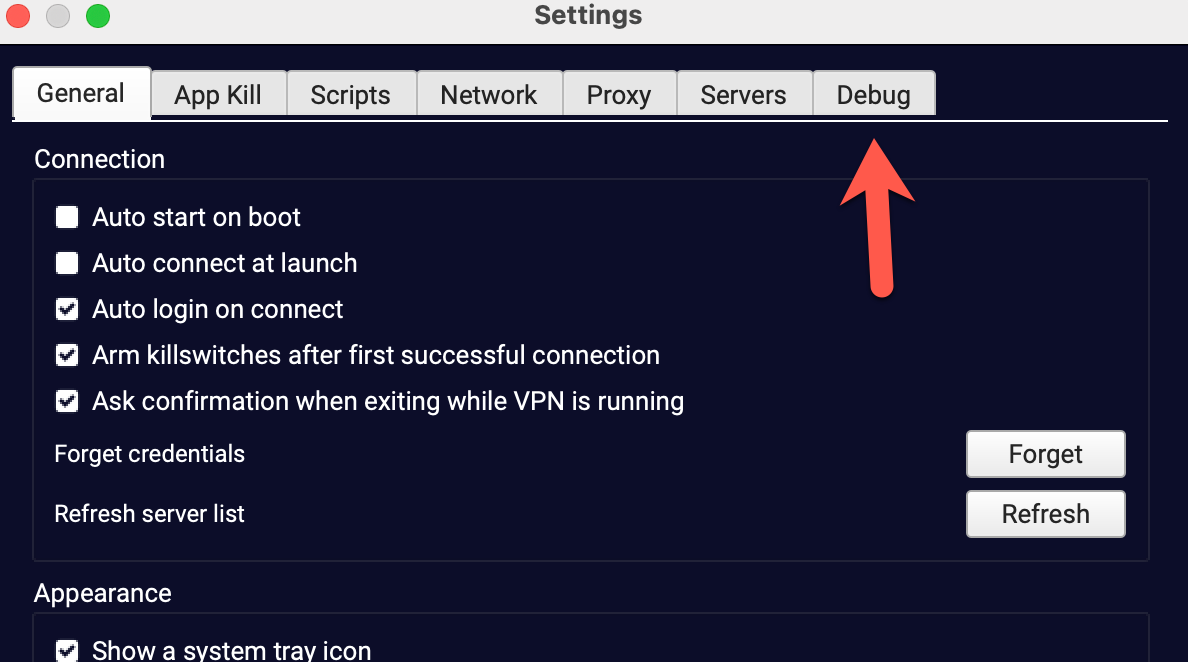
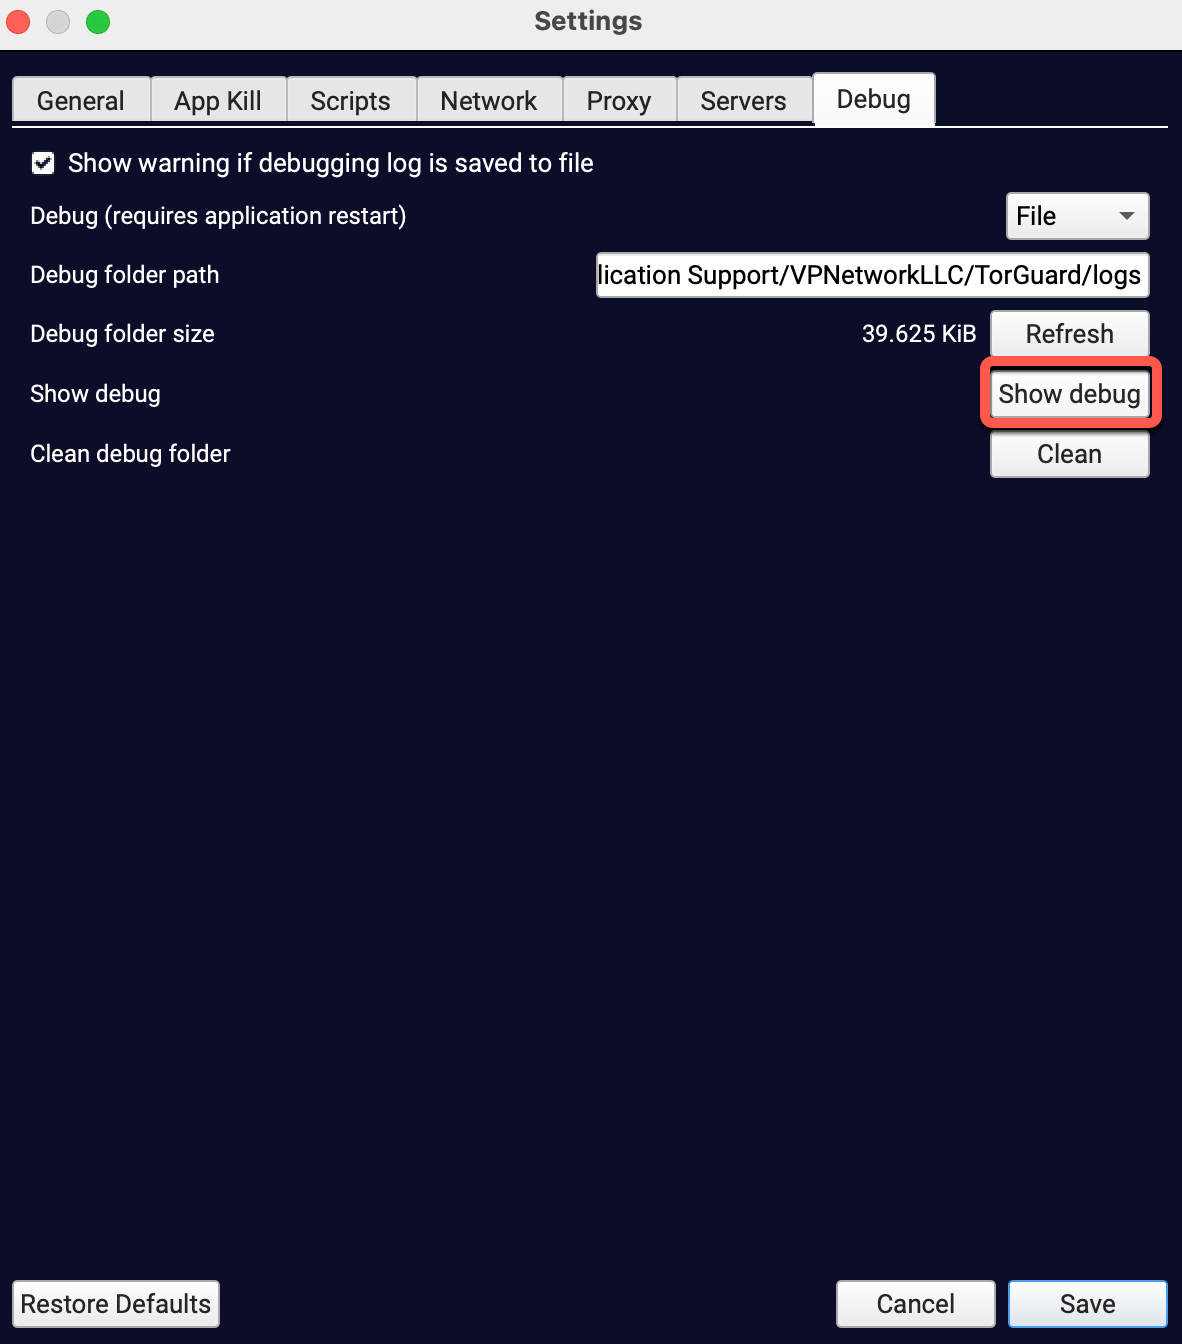
STEP 2) Now click the Debug tab
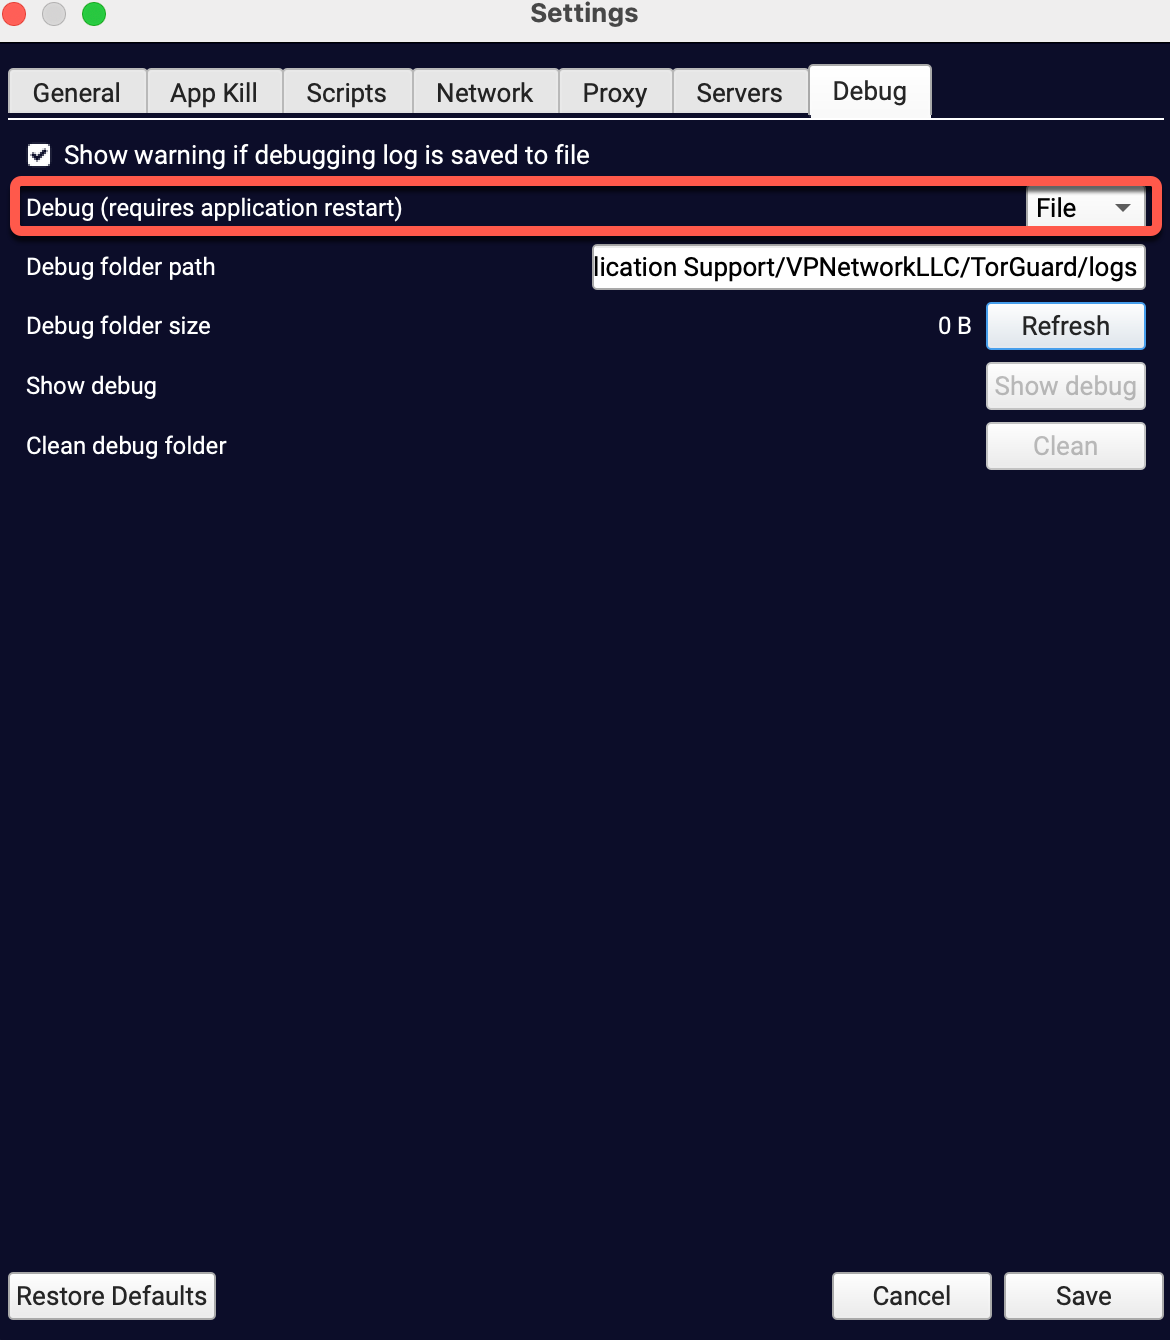
STEP 3) Now where it says Debug (Requires Restart) select "File" in the drop-down menu then click save and restart the Torguard Client.
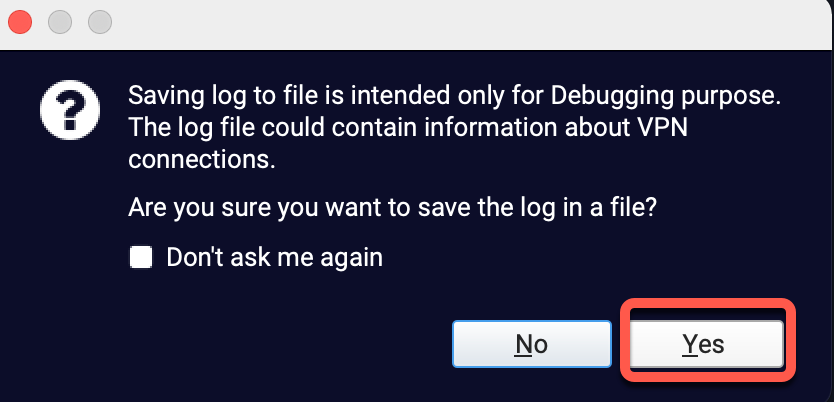
You will see the popup dialogue below, be sure to click yes.
STEP 4) Navigate back to Settings --> Debug tab and click on "Show debug"
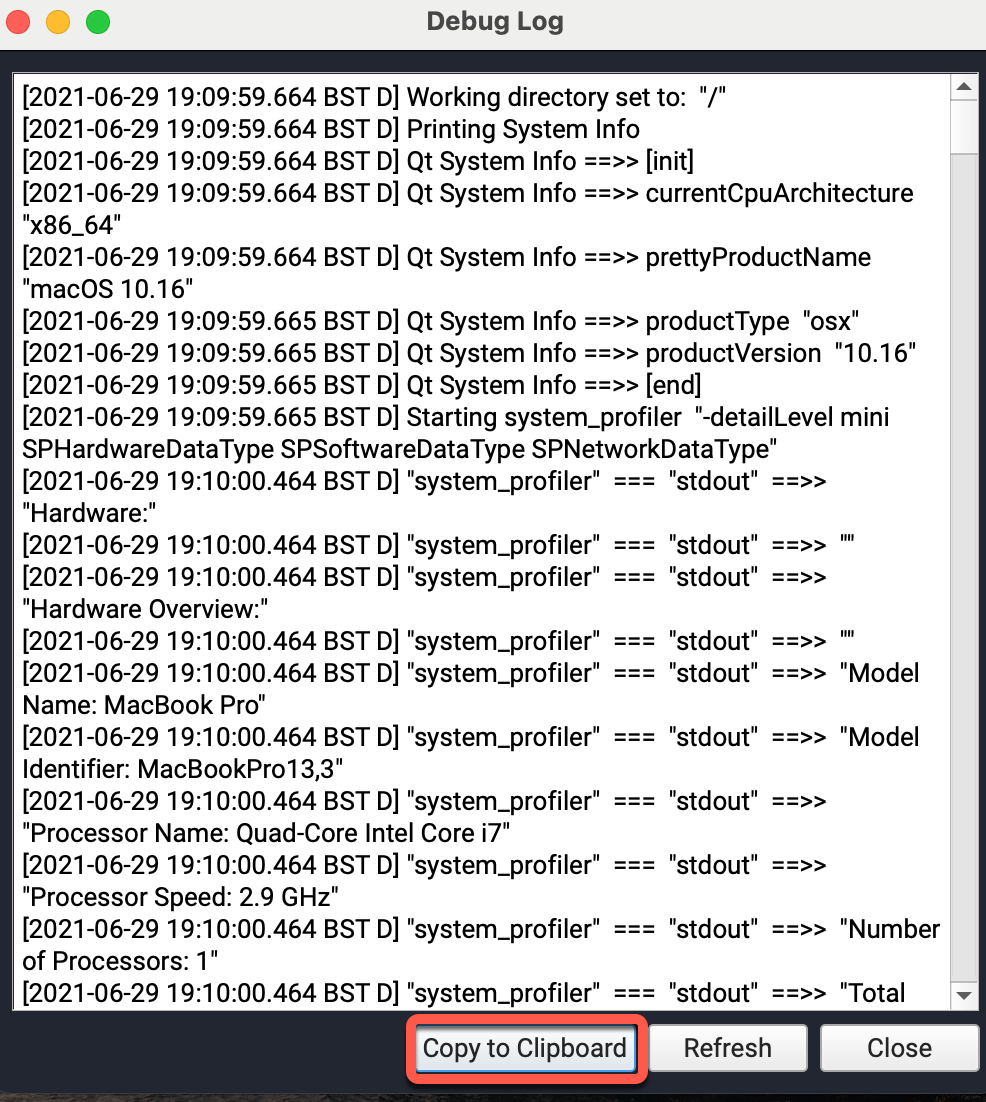
STEP 5) Now you will see the logs within the debug window - click save on the main settings tab and then just click "Copy to Clipboard" on the debug log window.
STEP 6) Now pass these logs over to the support agent via our main