STEP 1:
Navigate to the home page of your router - By default 192.168.1.1.
STEP 2:
Go to Setup > Tunnels > and click the Add Tunnel button. Choose Enable and select WireGuard from the dropdown menu - now click save. STEP 3:
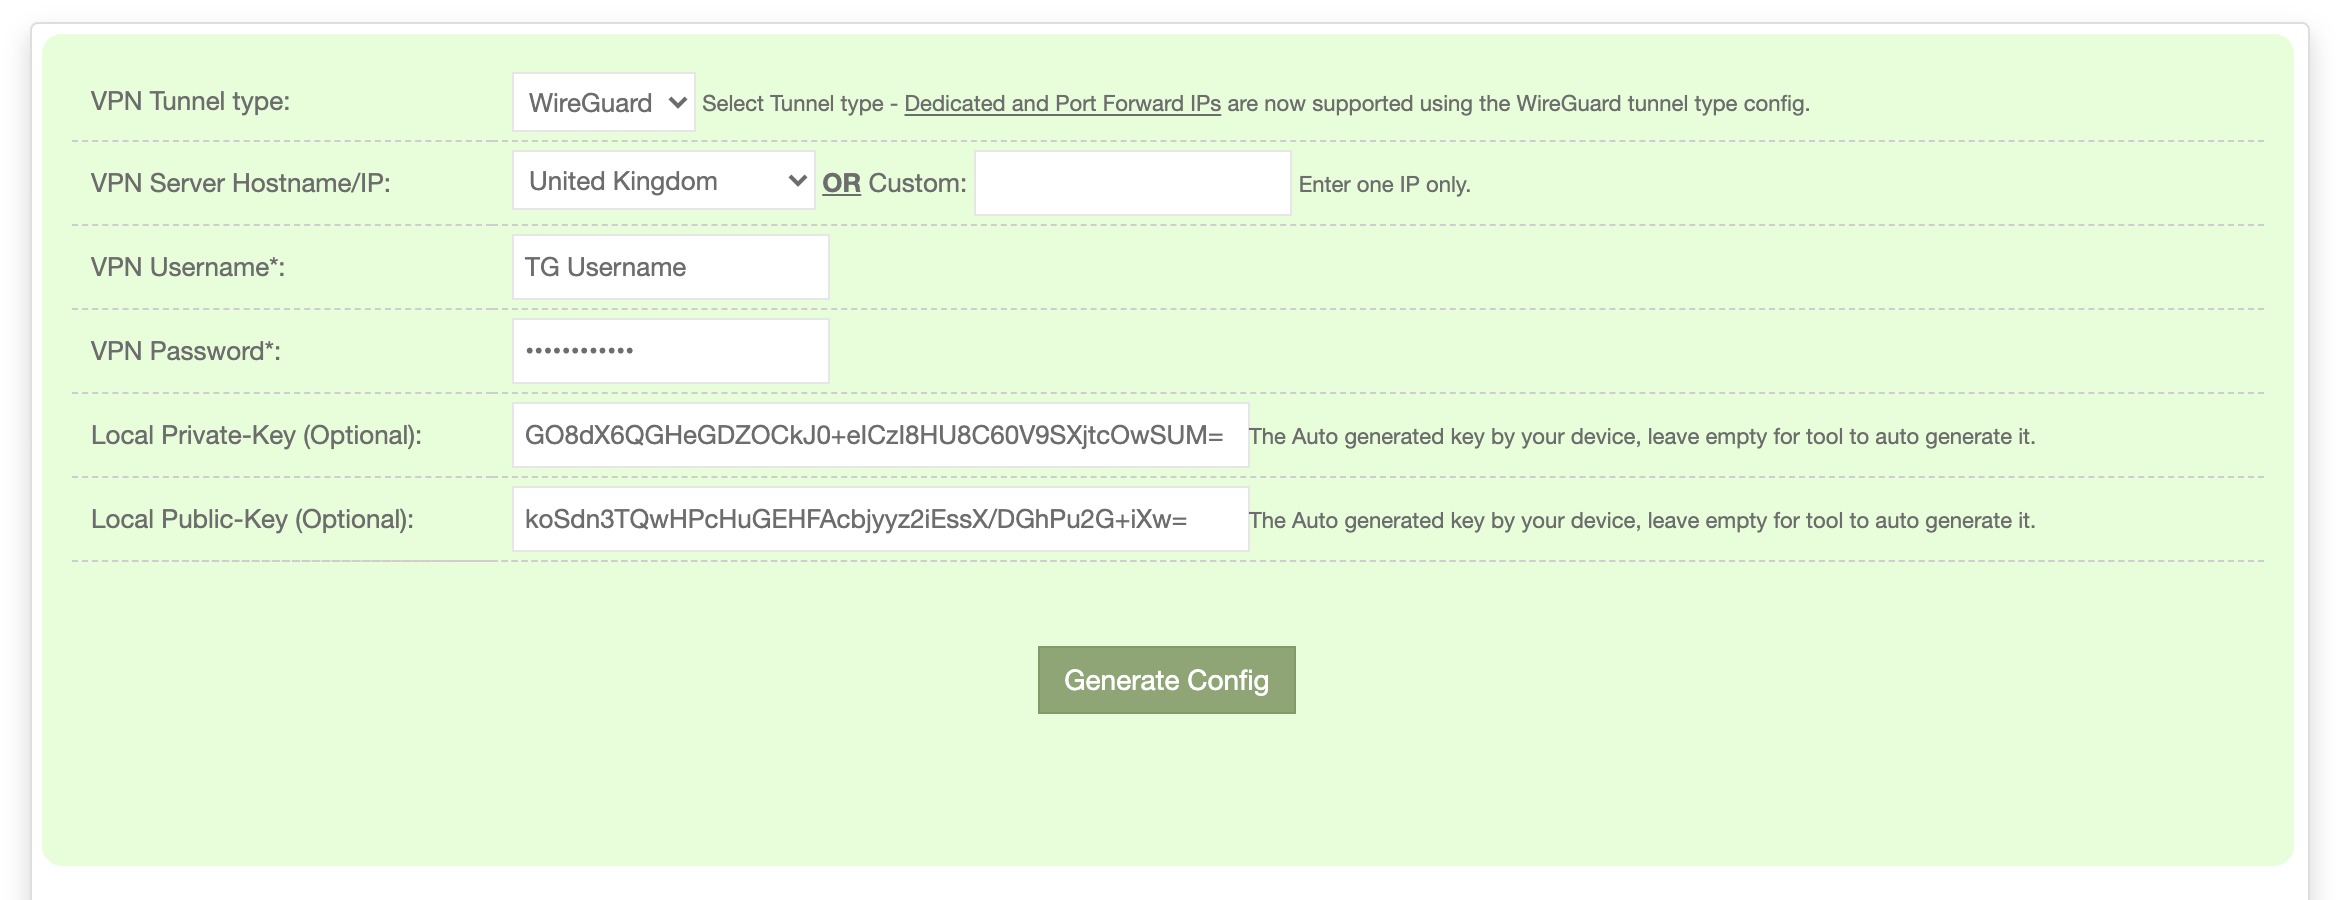
Click the Generate Key button copy the key and head over to the config generator on the TorGuard website and follow the steps below:
a) Select Wireguard from the VPN Tunnel type: menu.
b) Select your location or enter your Dedicated IP or Port Forward IP.
c) Enter your VPN username.
d) Add the keys generated in dd-wrt to the Local Public-Key and Local Private-Key fields.
e) Generate your config - it should look similar to below:

STEP 3:
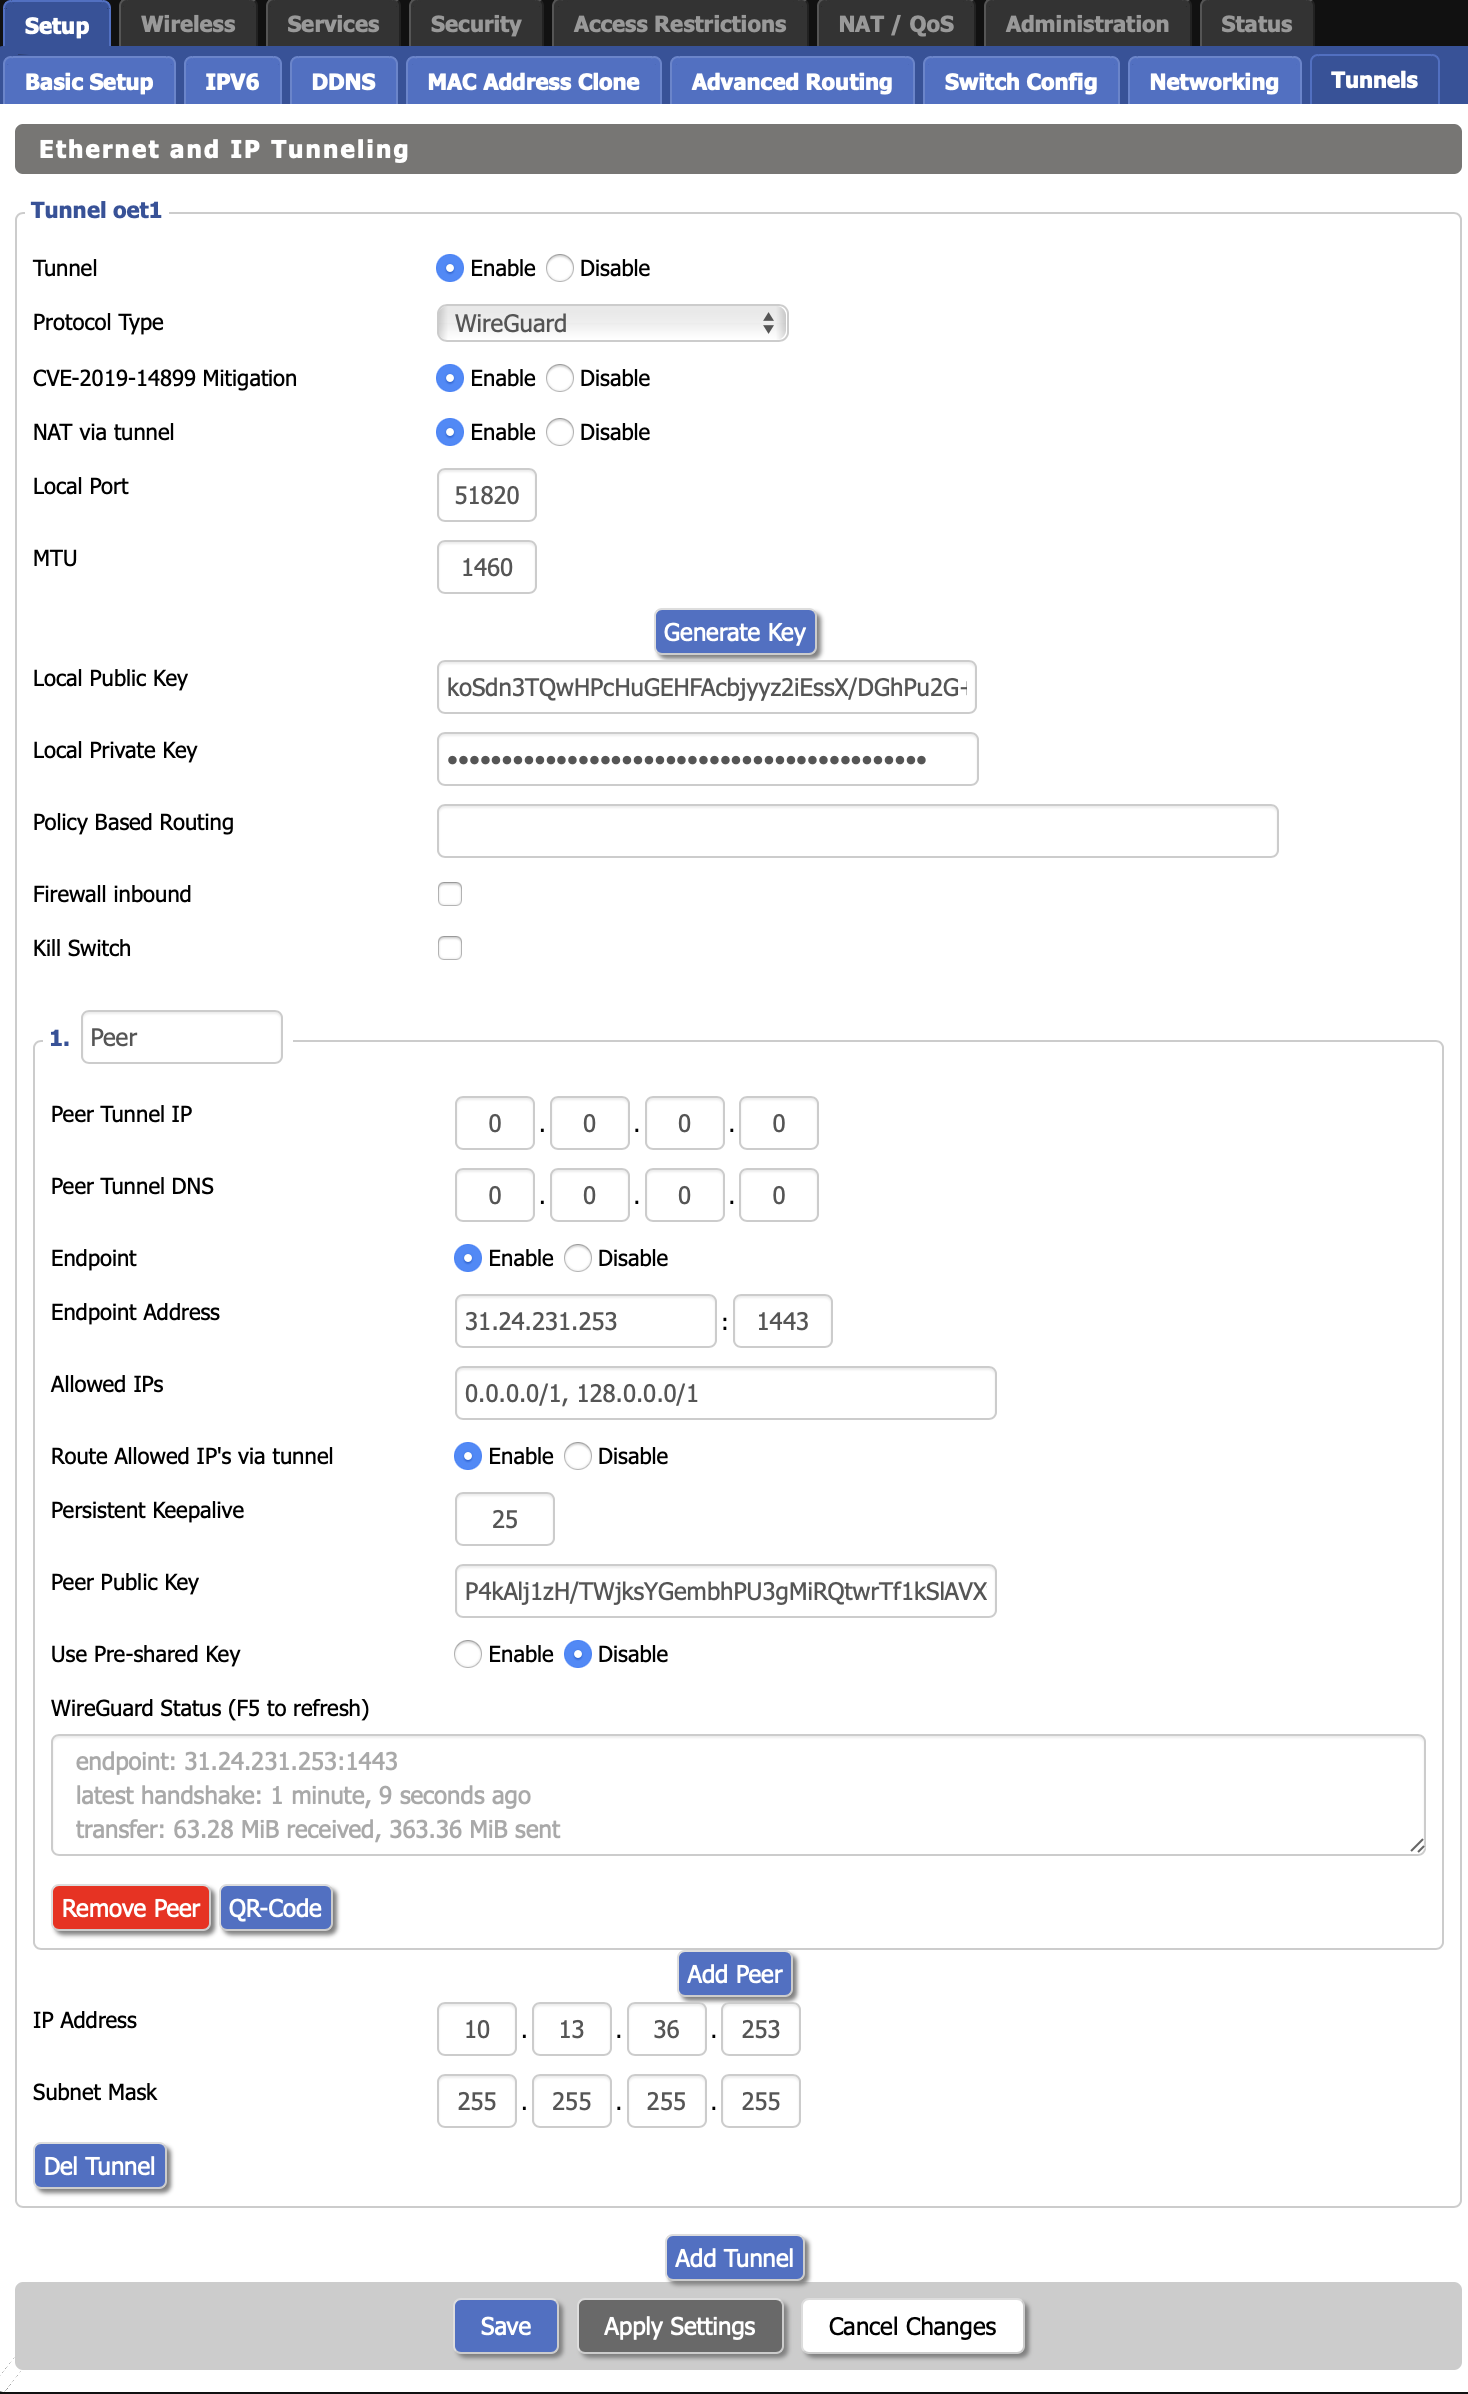
Now use the generated config to fill in the following fields.
a) Enable "NAT via tunnel"
b) Enable "Endpoint"
c) Enter the Endpoint IP from the config you generated as well as the port 1443
d) Set allowed IPs to: 0.0.0.0/1, 128.0.0.0/1
e) Enable "Route allowed IP's via tunnel"
f) Enter keepalive: 25
g) Add your public key from the generated config.
h) Under Add Peer copy the IP from the "Address" field in the config you generated into the IP Address field.
i) Enter the subnet mask as 255.255.255.255 and hit save.
It should look similar to the below image:

j) Now hit Apply Settings.
STEP 4:
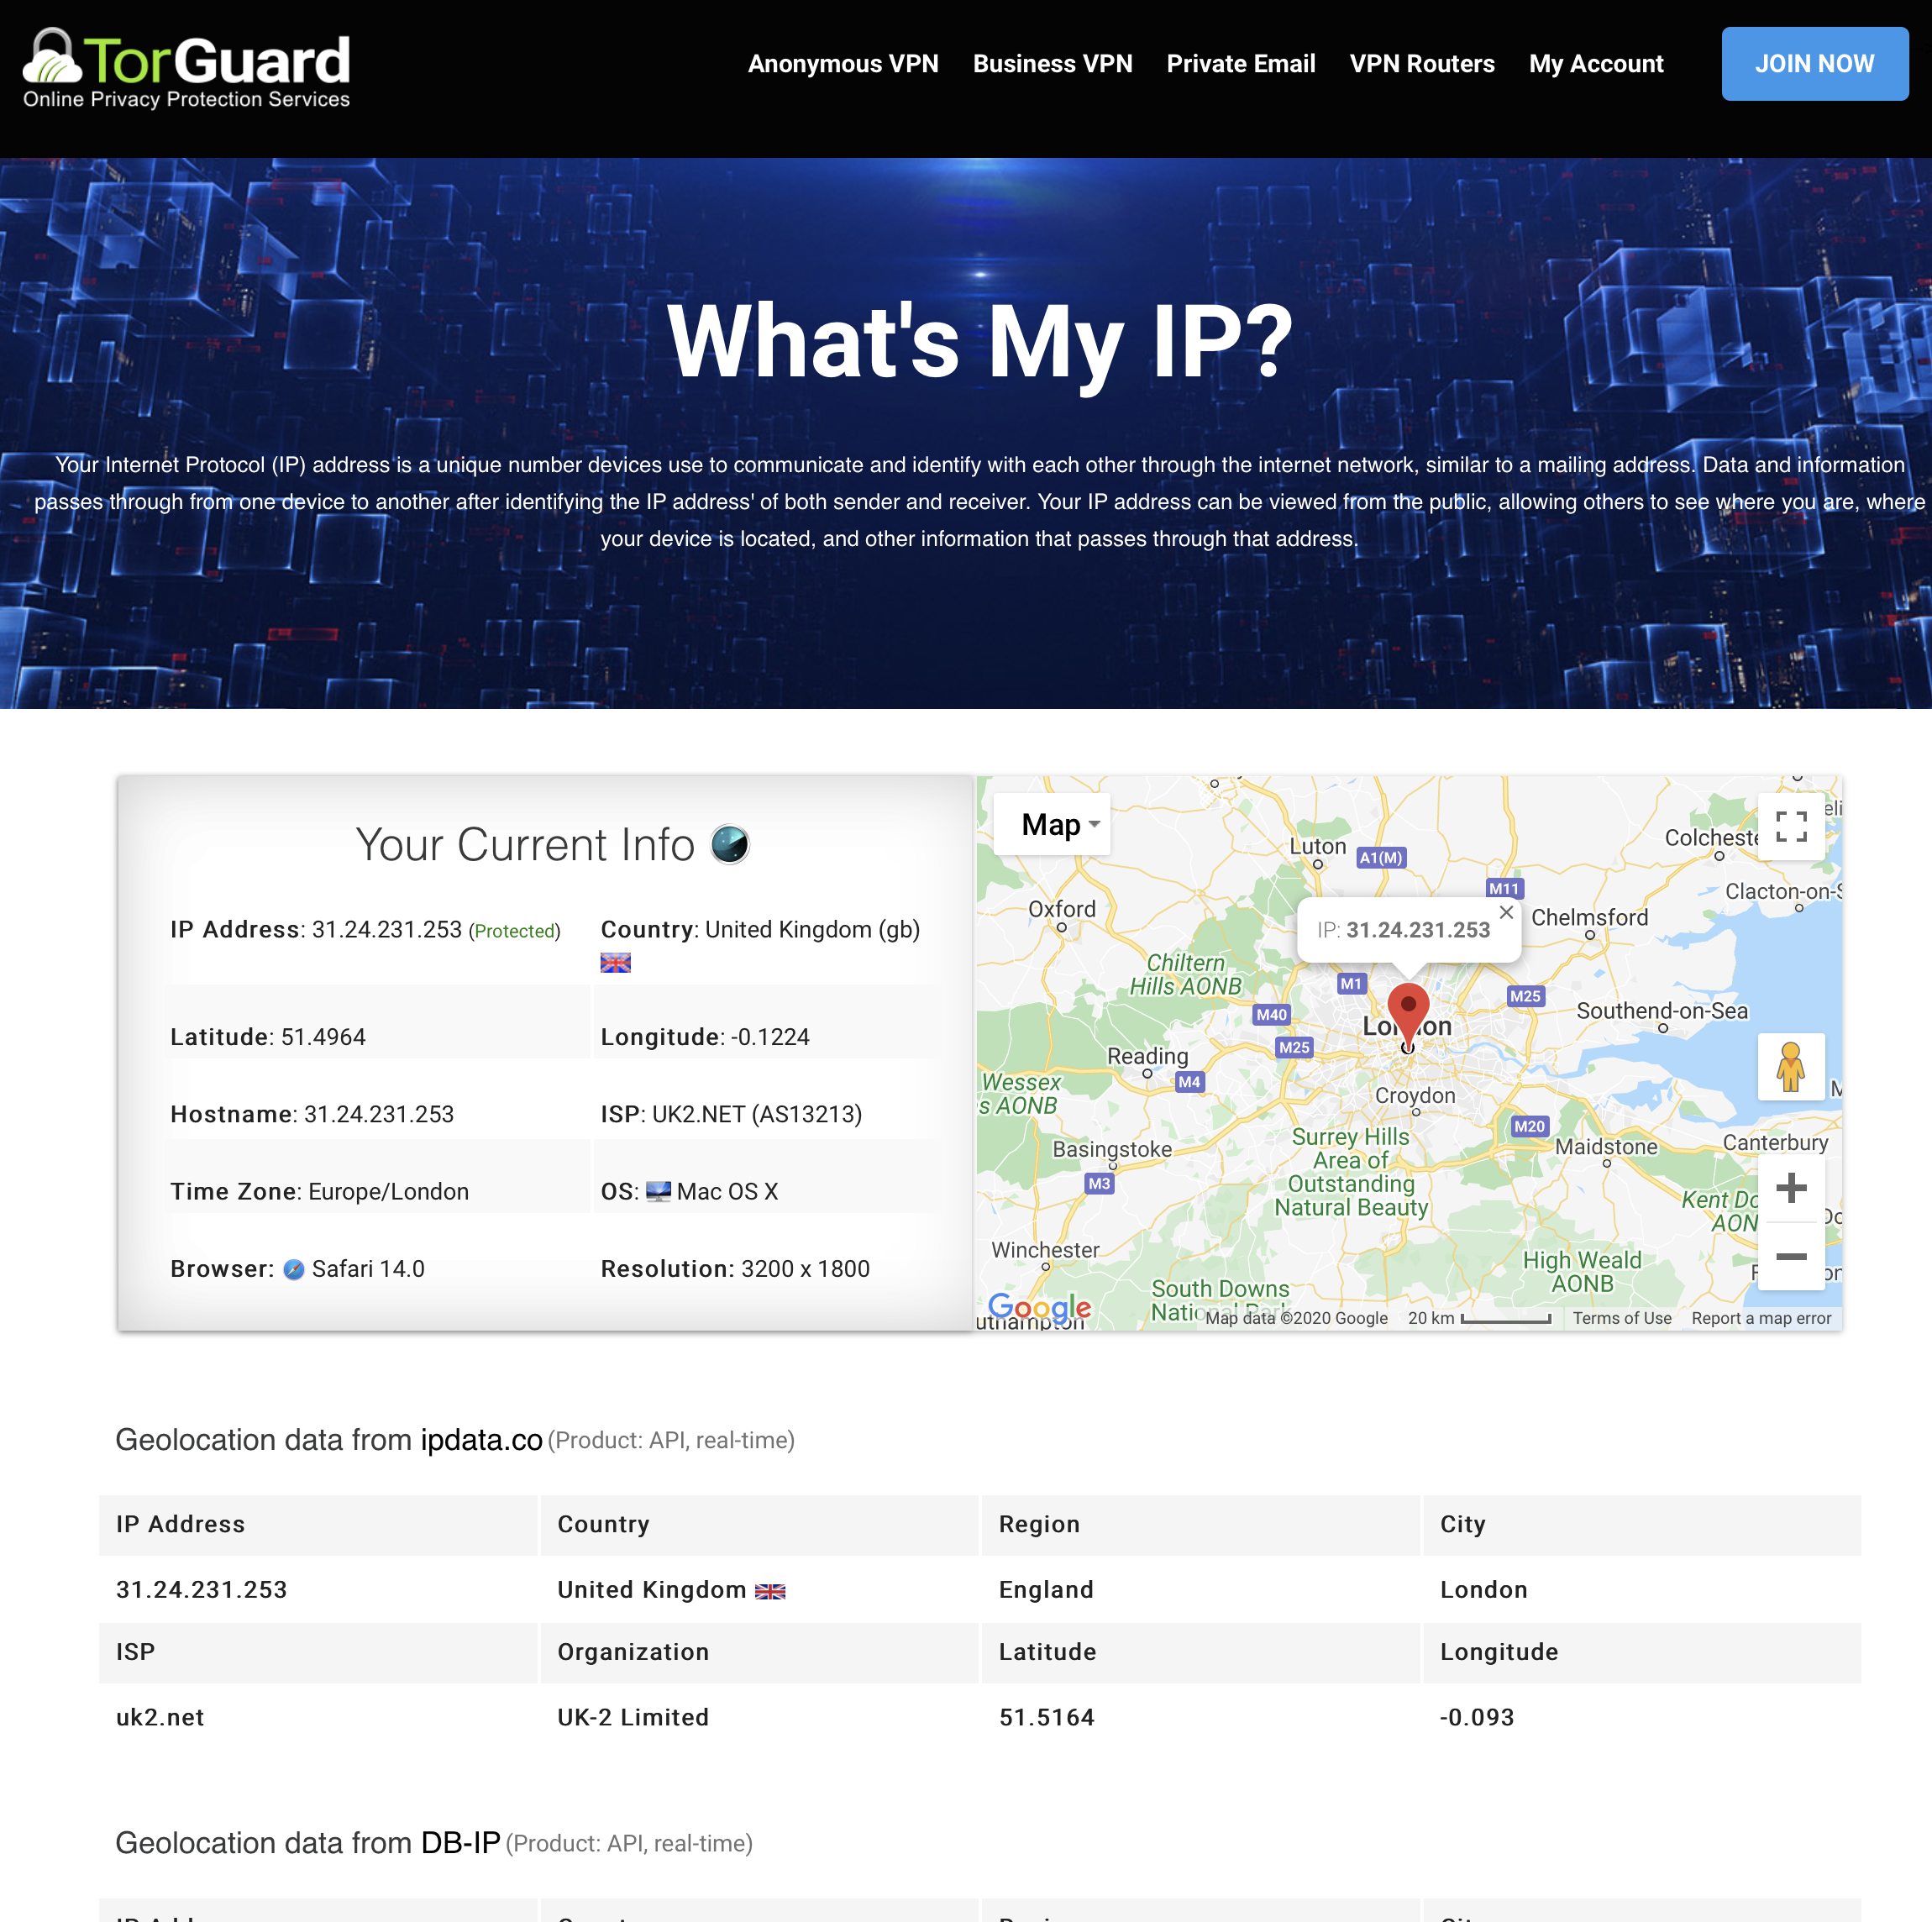
Verify your VPN connection by connecting one of your devices to the DD-WRT router Wifi and follow below:
a) Browse to https://torguard.net/whats-my-ip.php
b) Make sure the IP Address line shows a TorGuard IP and states "Protected".

