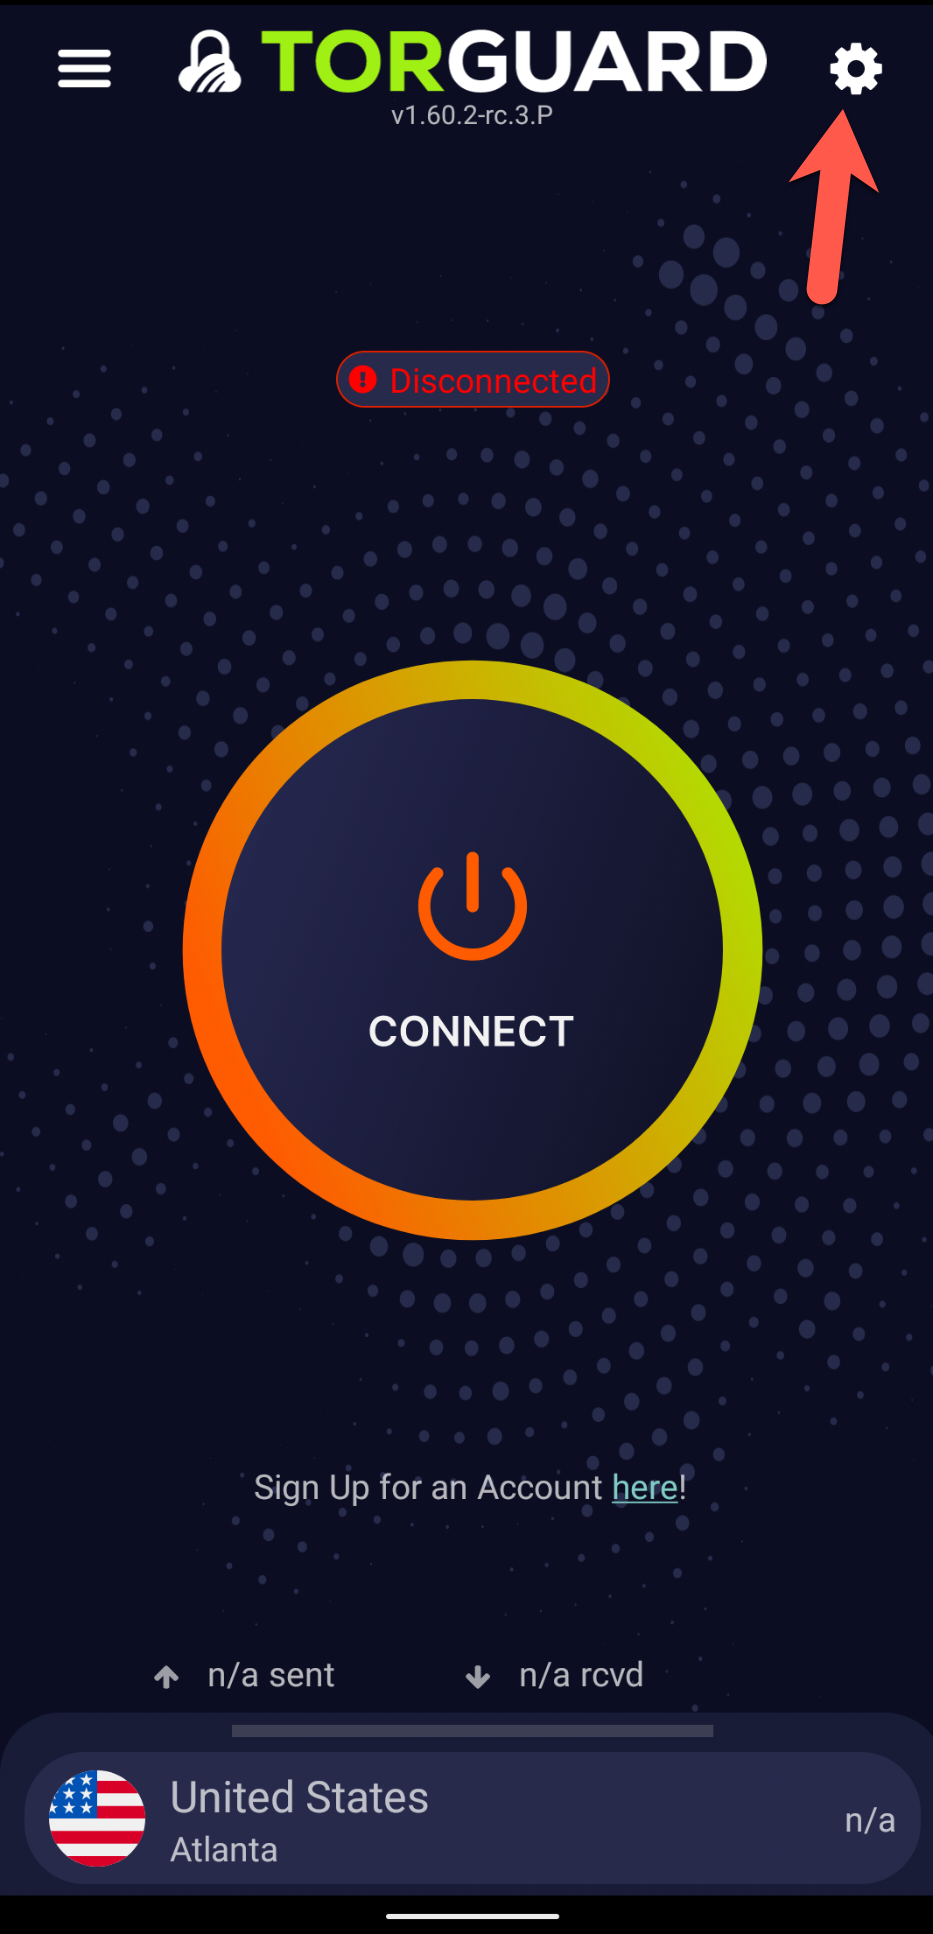
STEP 1) On the TorGuard Android app main screen tap the settings cog on the top right.
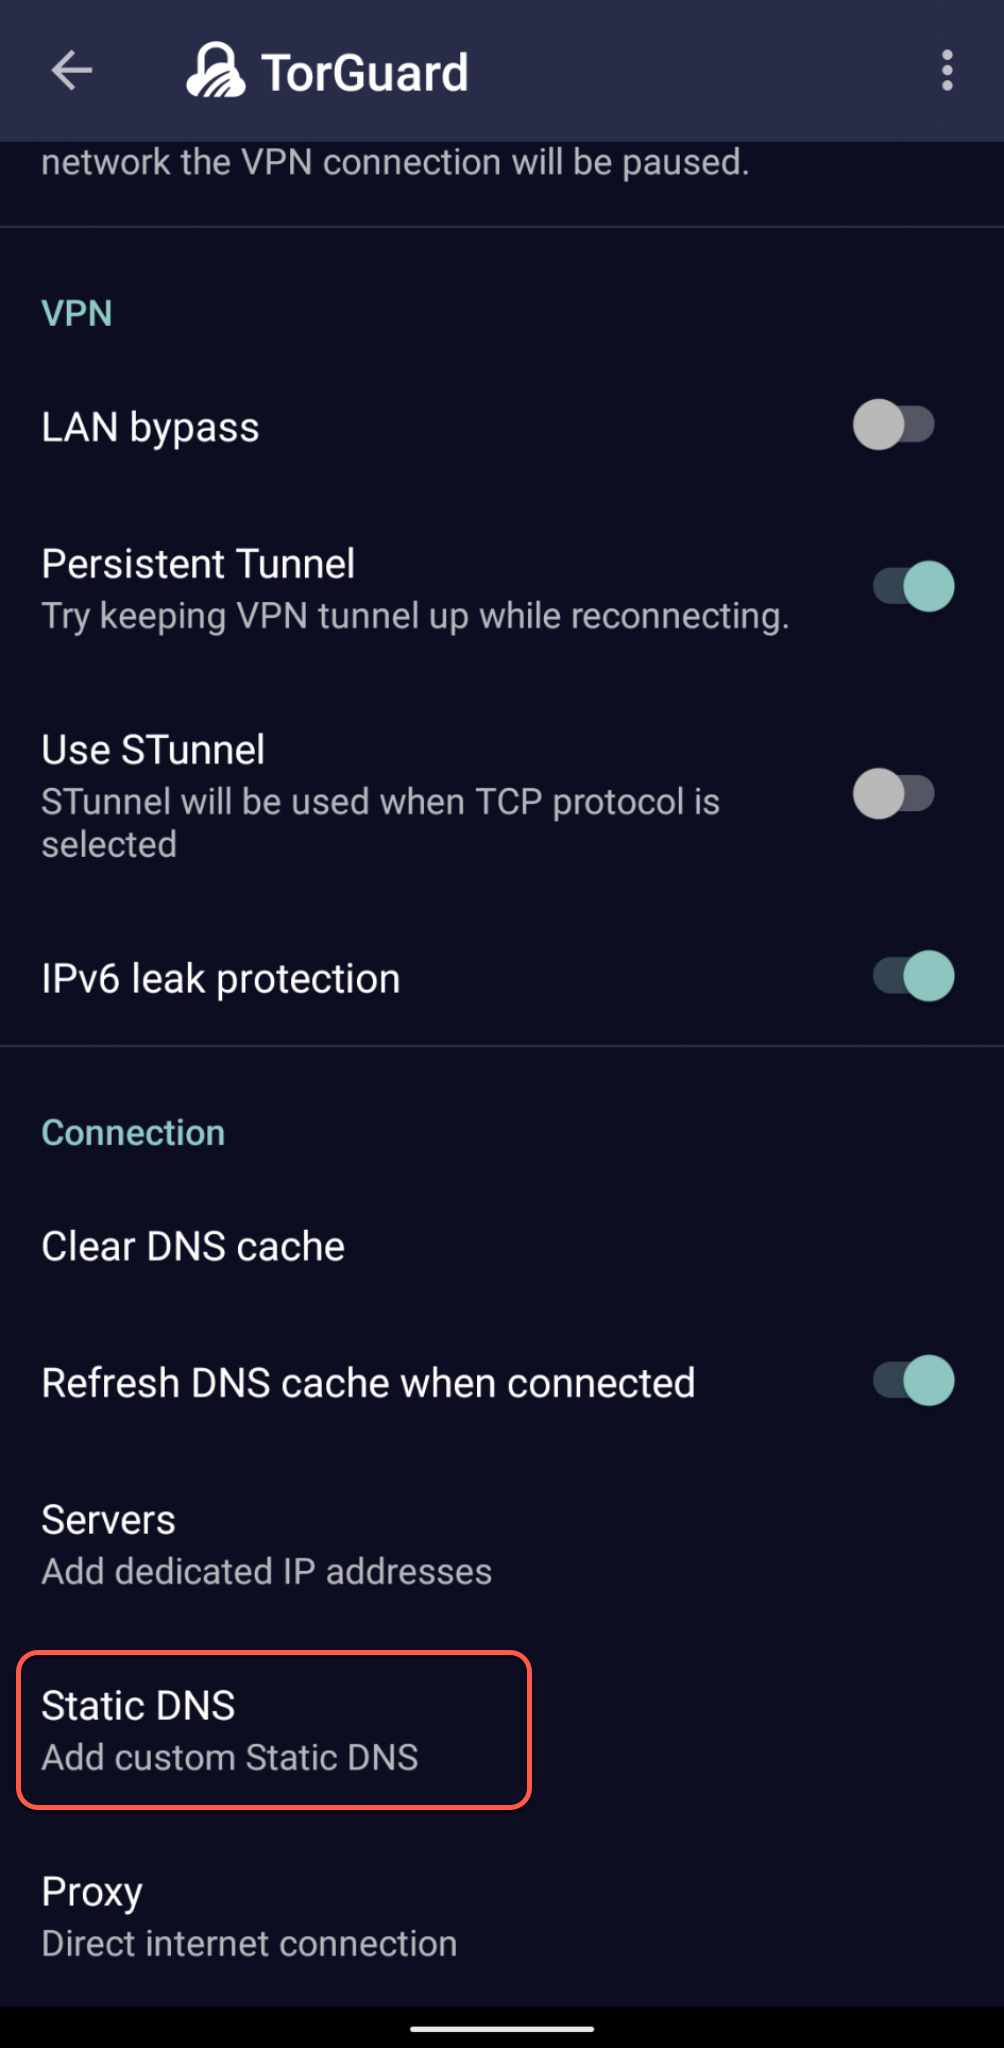
STEP 2) Scroll all the way down and tap "Static DNS - Add custom Static DNS"
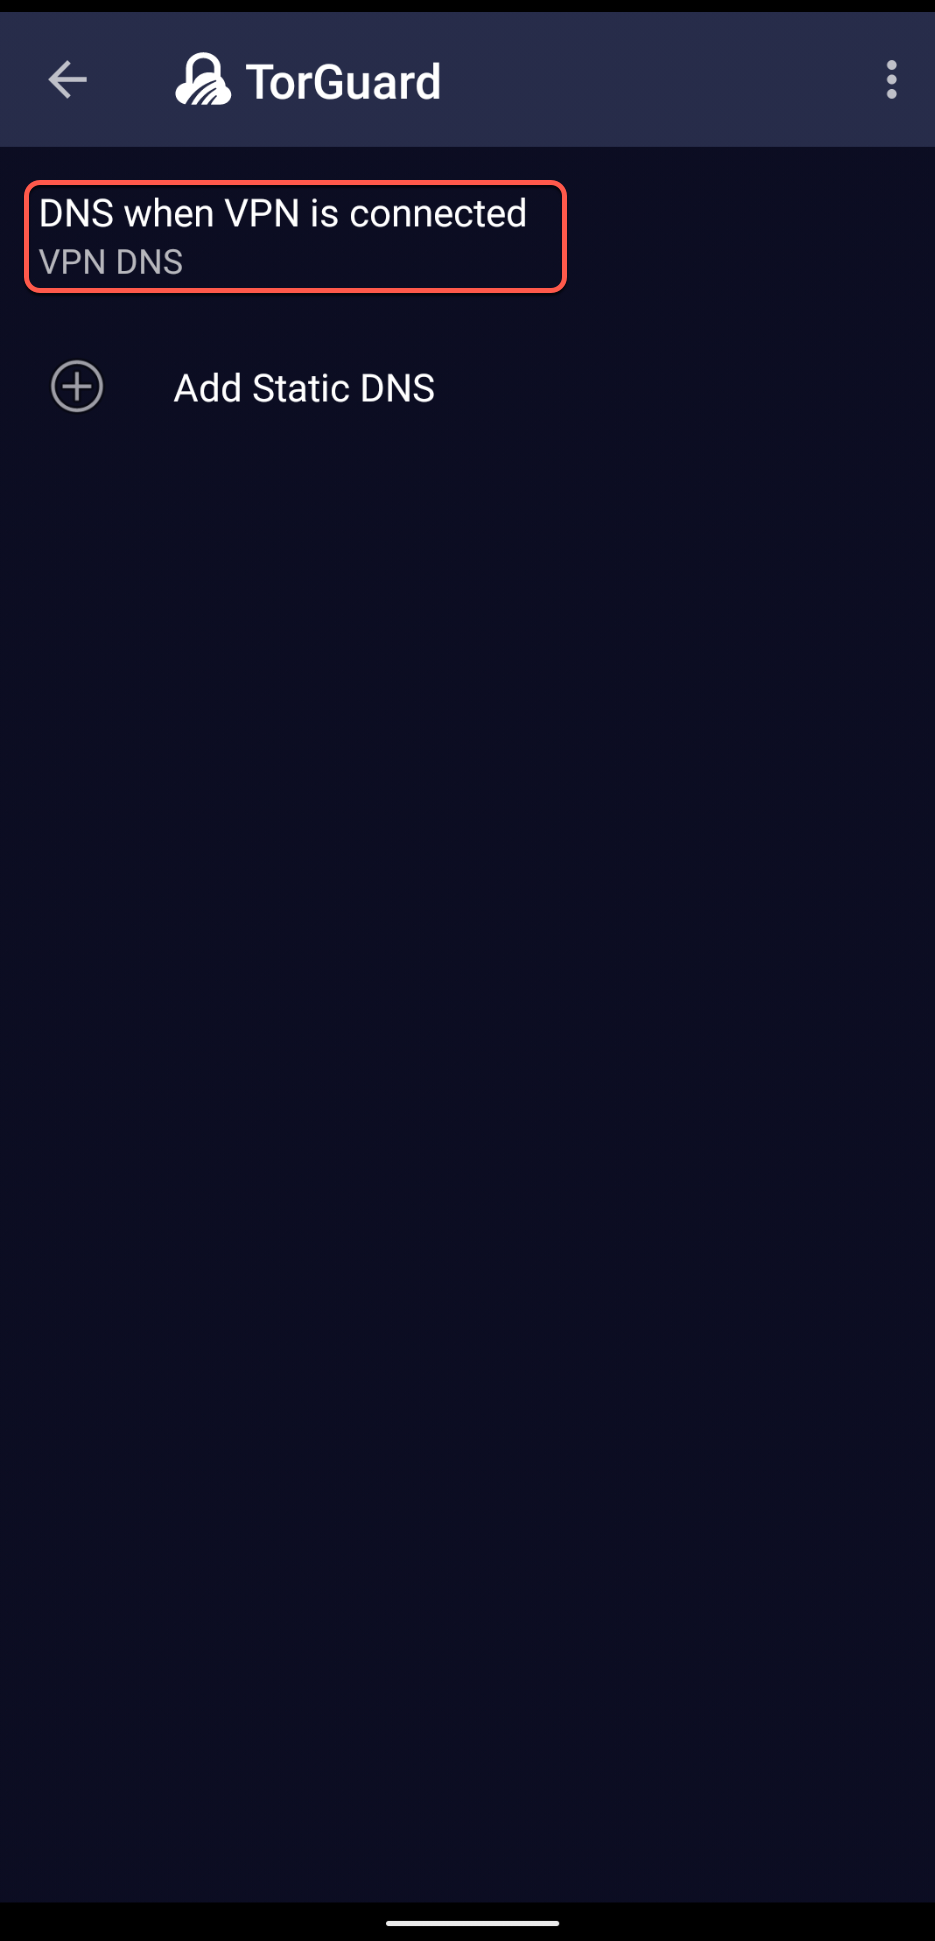
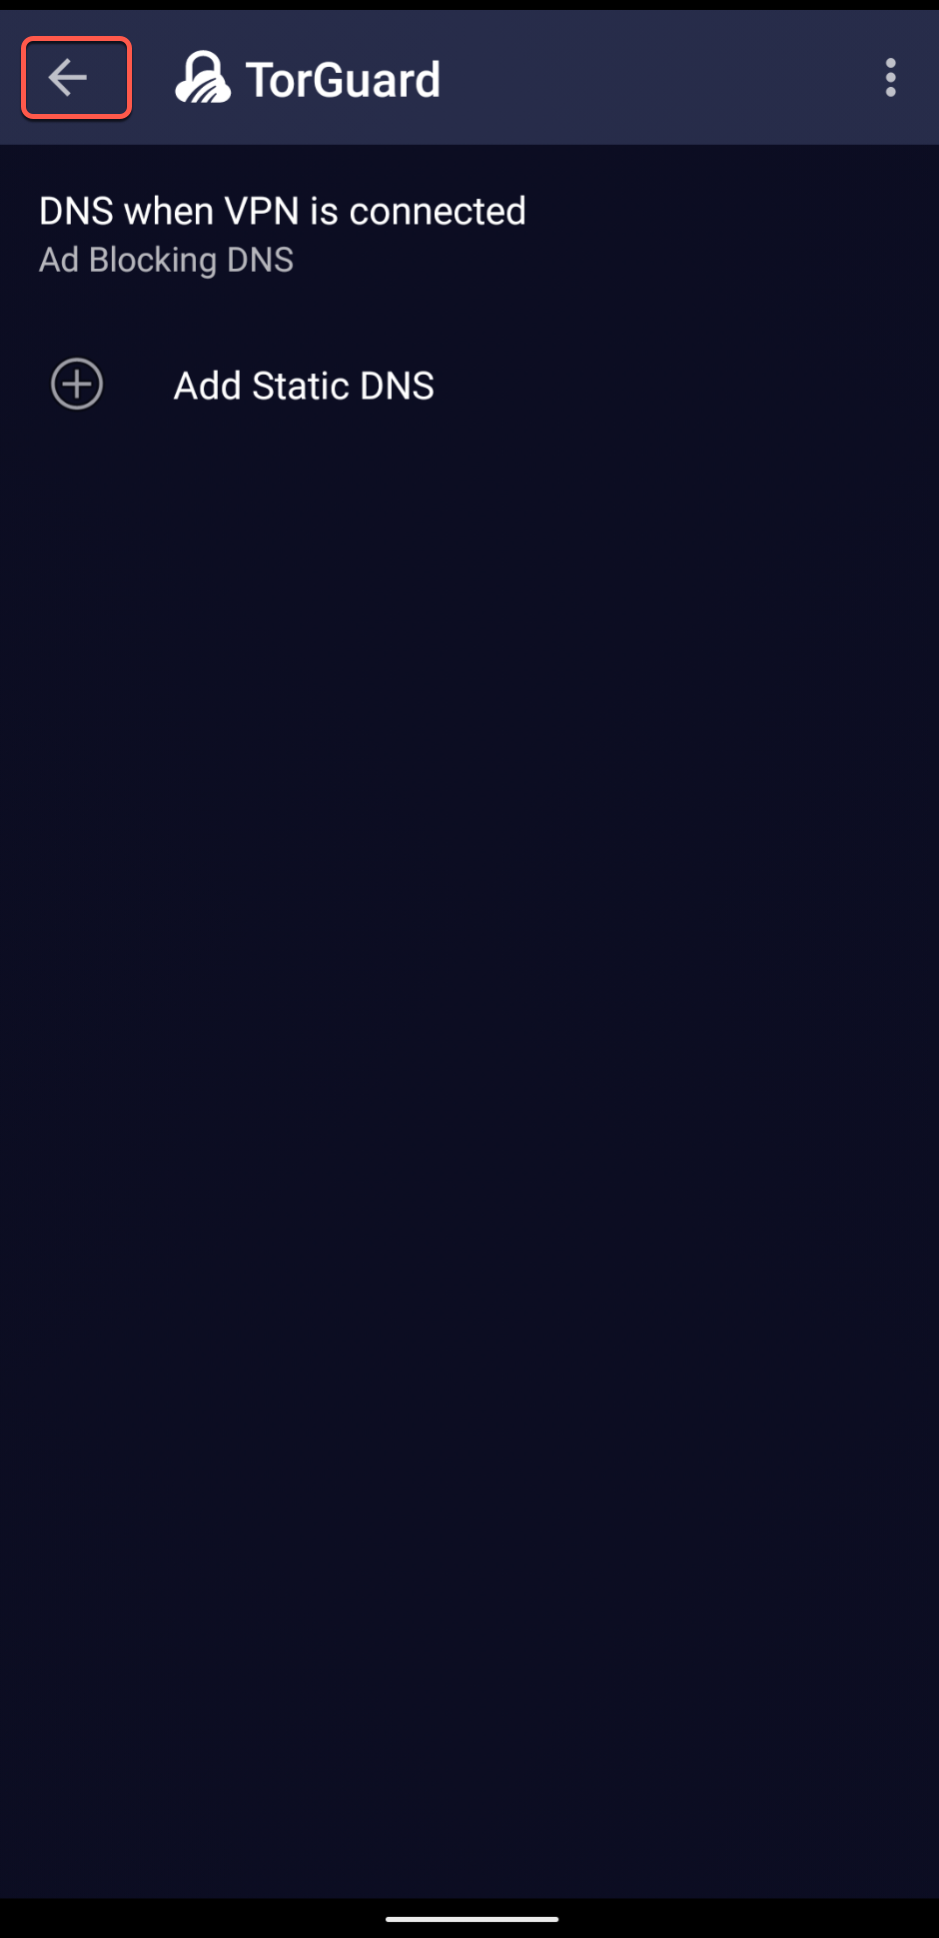
STEP 3) Then tap "DNS when VPN is connected"
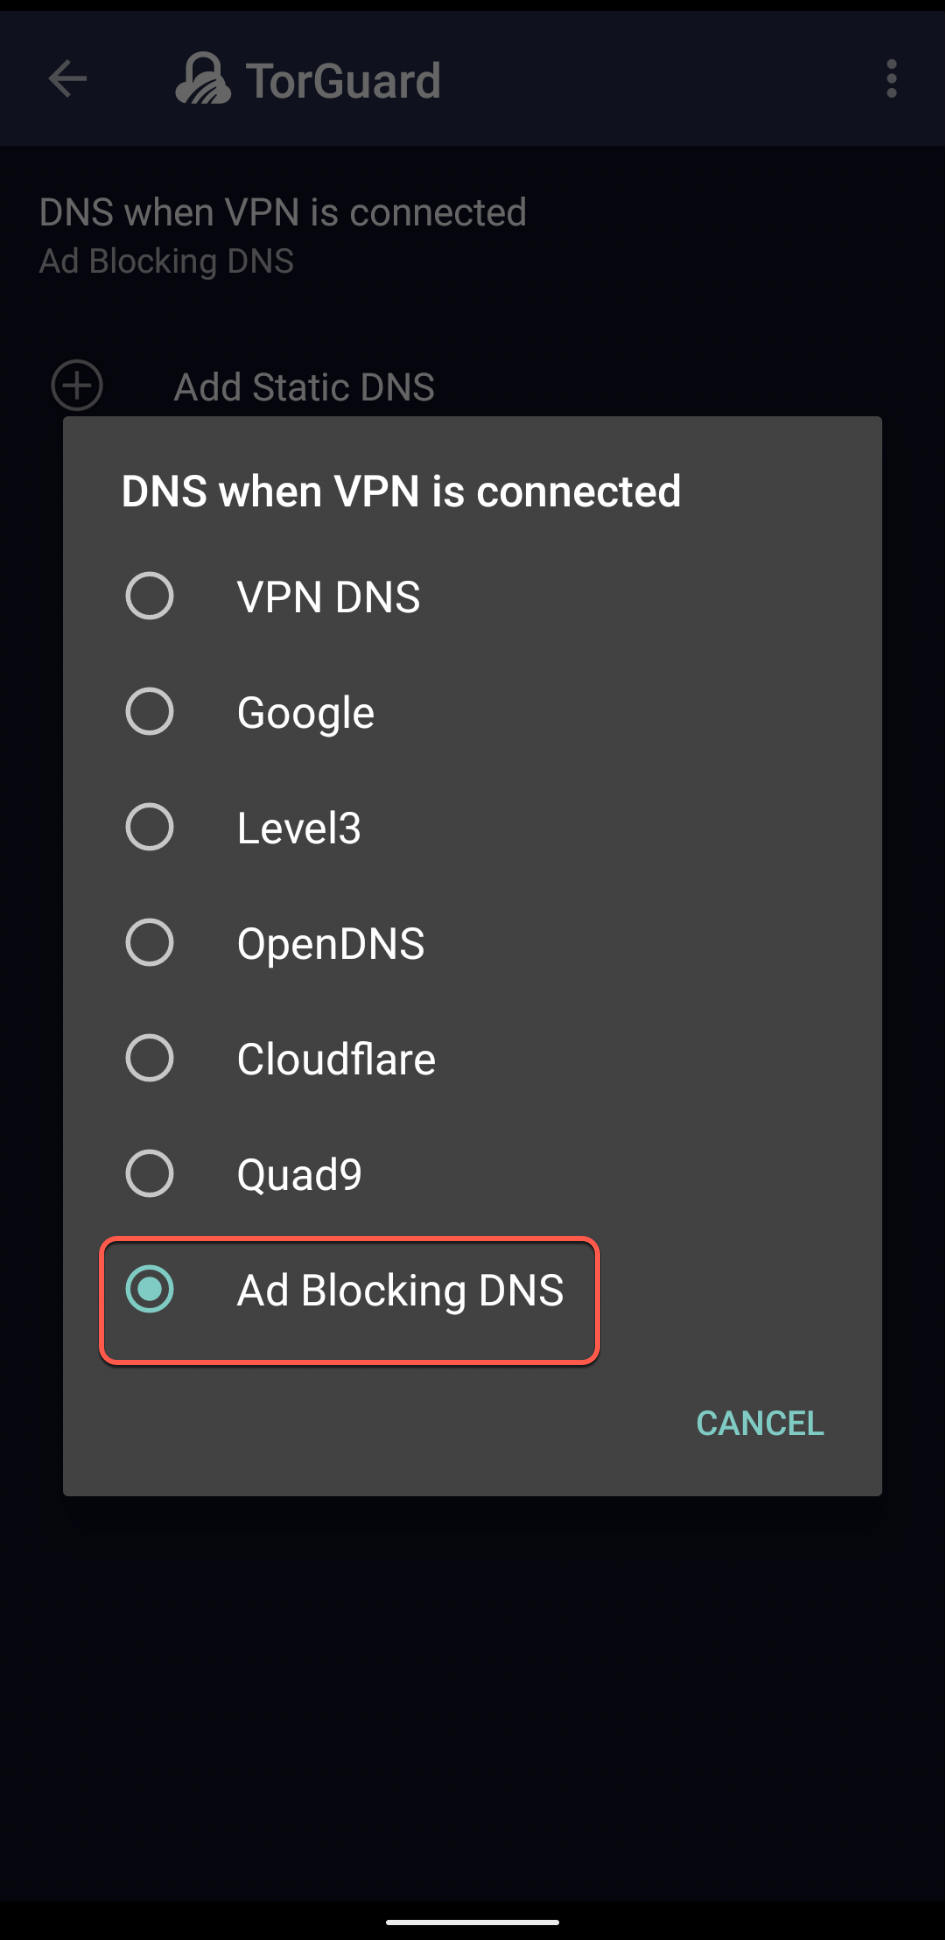
STEP 4) Tap "Ad Blocking DNS"
STEP 5) It should automatically return to the previous screen - tap the top left-hand corner twice to get back to the connect screen.
If for any reason you still see Ad's please be sure to clear your DNS cache and reconnect.
If you still have trouble with our Ad-Block DNS please don't hesitate to contact us on our support desk