What is VPN Binding? VPN binding (also called interface binding) forces Vuze to only use your VPN connection for torrenting. If the VPN disconnects, all torrent traffic stops immediately, preventing your real IP from being exposed. This creates an application-level kill switch specifically for Vuze.
Why Bind Vuze to VPN?
Binding Vuze to your VPN interface provides critical protection:
- Automatic Kill Switch: Torrents stop instantly if VPN drops
- Prevent IP Leaks: No accidental exposure of your real IP
- Peace of Mind: Download safely without constant monitoring
- Split Tunneling: Only Vuze uses VPN, other apps use regular connection
- No System Changes: Works within Vuze, no firewall rules needed
Prerequisites
Before setting up VPN binding in Vuze:
- Vuze (Azureus) installed on Windows 7/8/10/11
- TorGuard VPN client installed and configured
- Active TorGuard VPN subscription
- Basic understanding of network adapters
Important: You must connect to TorGuard VPN at least once before configuring Vuze. This creates the VPN network adapter that Vuze will bind to.
Step 1: Open Vuze Options Menu
- Launch Vuze torrent client
- Click on Tools in the menu bar
- Select Options from the dropdown menu
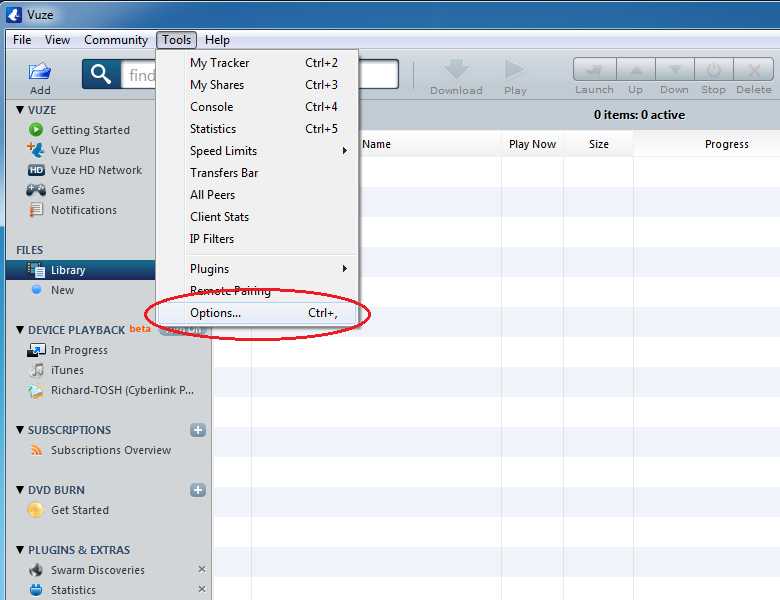
Quick Tip: You can also open Options directly using the keyboard shortcut Ctrl + , (Control + Comma)
Step 2: Open the Options Window
The Options window will open, showing various configuration categories:
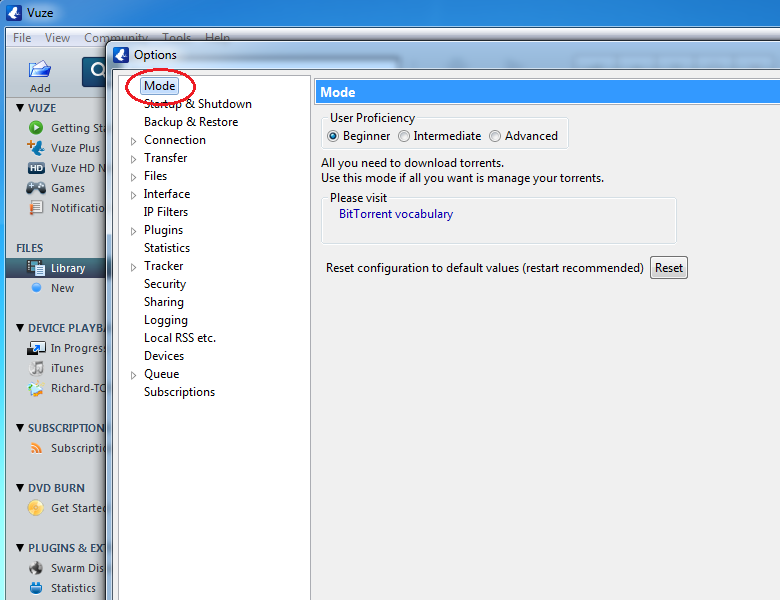
Step 3: Enable Advanced Mode
Network binding is an advanced feature, so you need to switch modes:
- Look for the Mode entry in the left sidebar
- Click on Mode
- Check your current mode setting:
- If it shows Beginner, continue to Step 4
- If already on Advanced, skip to Step 5
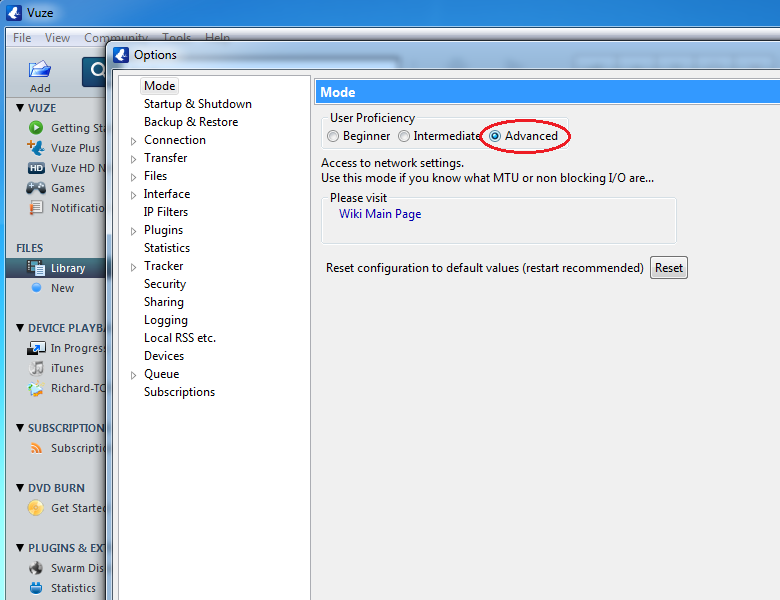
Step 4: Switch to Advanced Mode
- Select Advanced from the User Proficiency dropdown
- Additional options will now appear in the sidebar
- You'll see more configuration categories become available
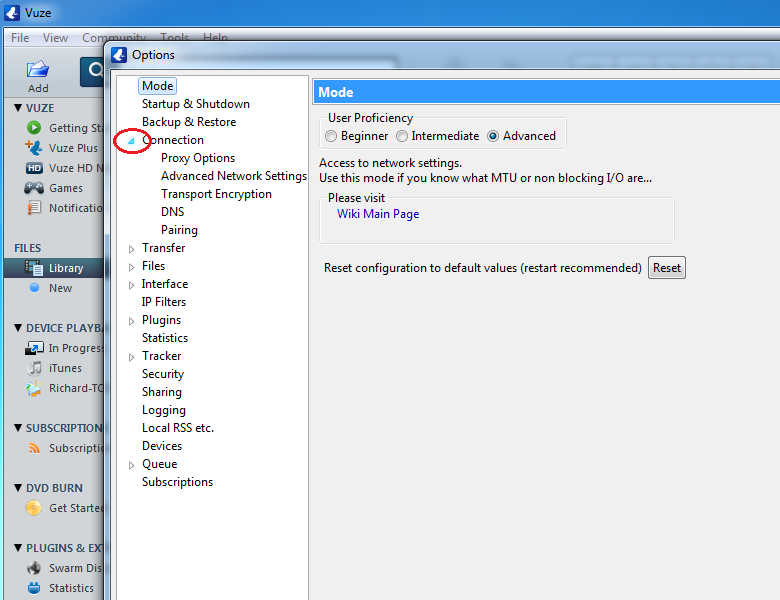
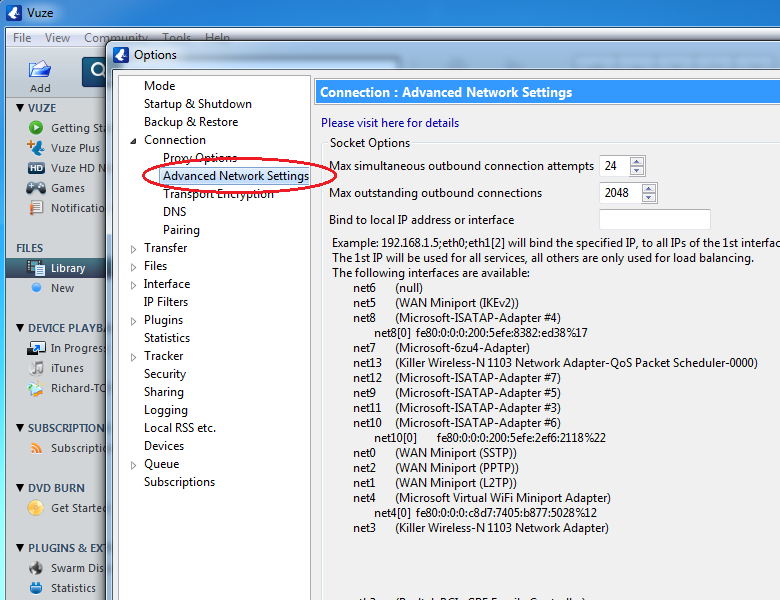
Step 5: Access Advanced Network Settings
- In the left sidebar, find Connection
- Click the small triangle/arrow next to Connection to expand it
- Click on Advanced Network Settings
Step 6: Identify Your VPN Network Adapter
This is the most critical step. You need to find your VPN's network adapter:
How to Identify the VPN Adapter:
- Connect to TorGuard VPN first (if not already connected)
- Look for adapters with these characteristics:
- TAP-Windows Adapter V9 (for OpenVPN)
- WireGuard Tunnel (for WireGuard)
- IP addresses in TorGuard range (10.x.x.x)
- Note the exact adapter name (e.g., "eth15", "Local Area Connection 2")
Important: The adapter name varies by system. Common names include:
- eth15, eth16, eth17 (numbered ethernet adapters)
- Local Area Connection 2, 3, 4
- TAP-Windows Adapter V9
- WireGuard Tunnel
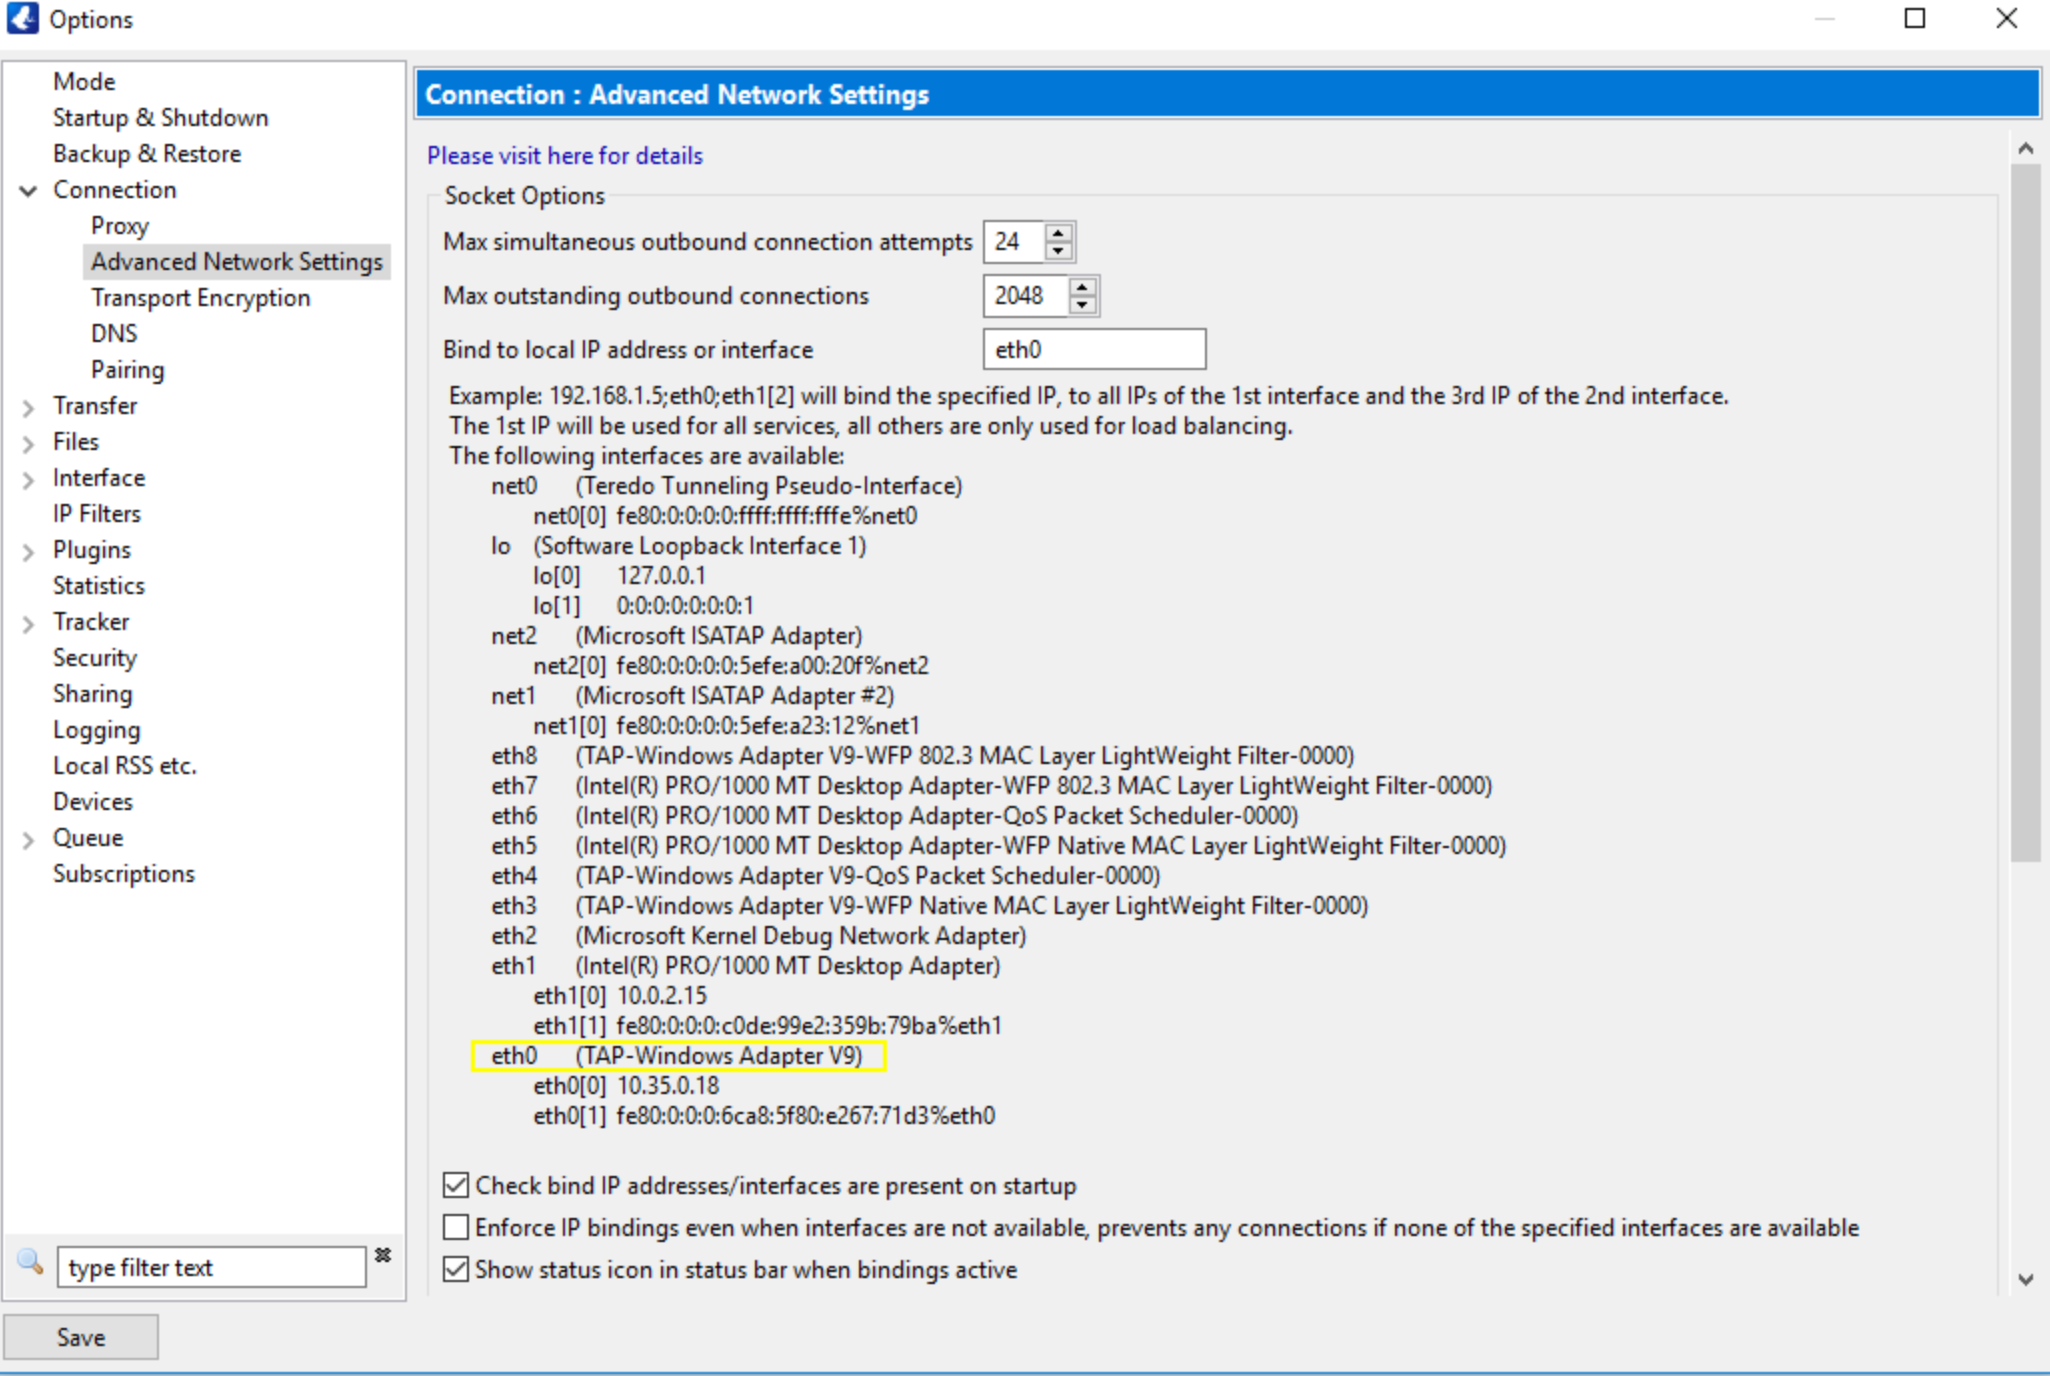
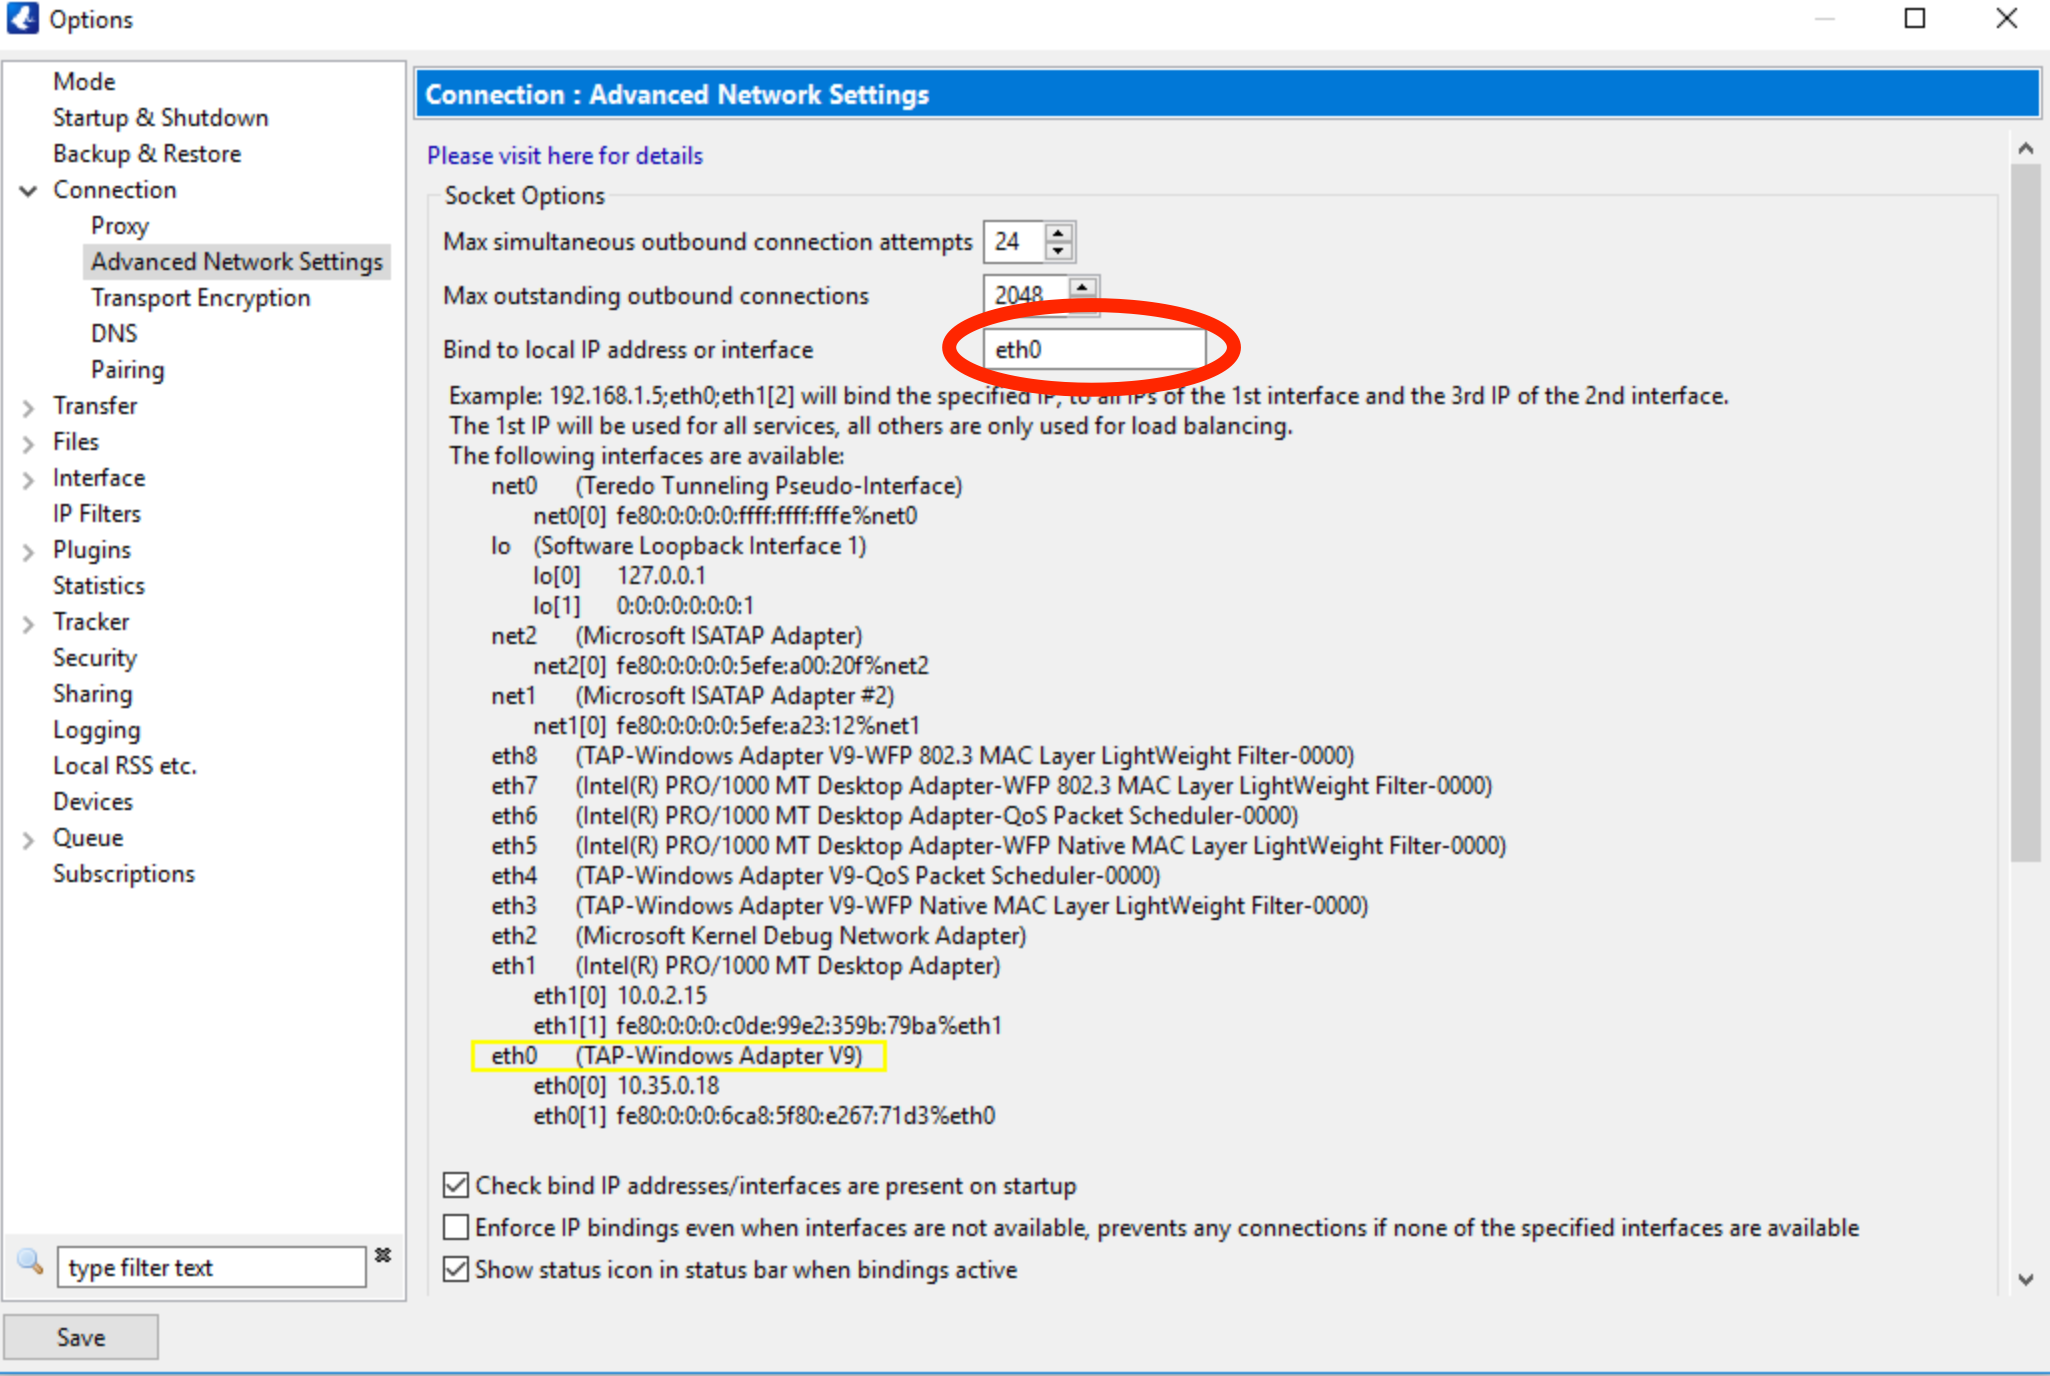
Step 7: Bind Vuze to VPN Interface
- Scroll to the top of Advanced Network Settings
- Find the field labeled "Bind to local IP address or interface"
- Enter your VPN adapter name exactly as shown (e.g., "eth15")
- Double-check the spelling and formatting
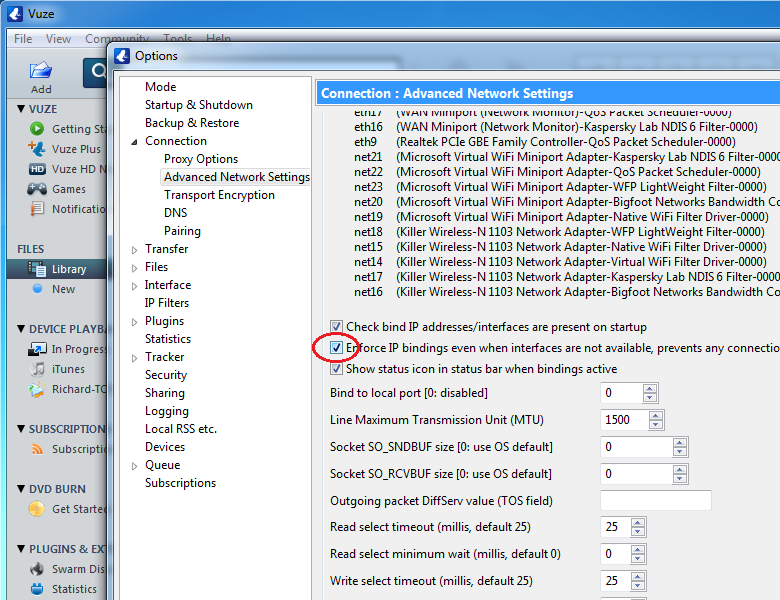
Step 8: Enforce IP Binding (Kill Switch)
This crucial setting ensures Vuze stops all activity when VPN disconnects:
- Scroll to the bottom of Advanced Network Settings
- Find "Enforce IP bindings even when interfaces are not available"
- Check this box - this creates the kill switch effect
- This prevents any torrent traffic if the VPN interface disappears
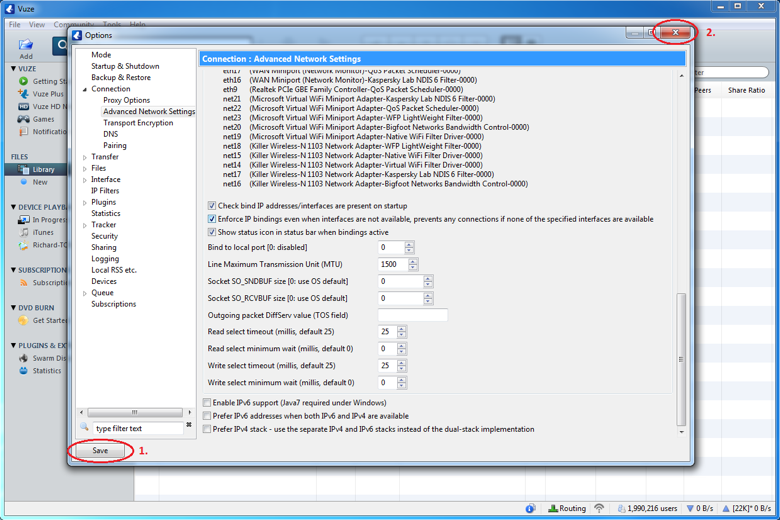
Step 9: Save and Apply Settings
- Click the Save button at the bottom left
- Close the Options window
- Restart Vuze for settings to take full effect
Configuration Complete! Vuze is now bound to your TorGuard VPN connection. Torrents will only work when VPN is active.
Understanding the Status Indicators
When VPN is Connected:
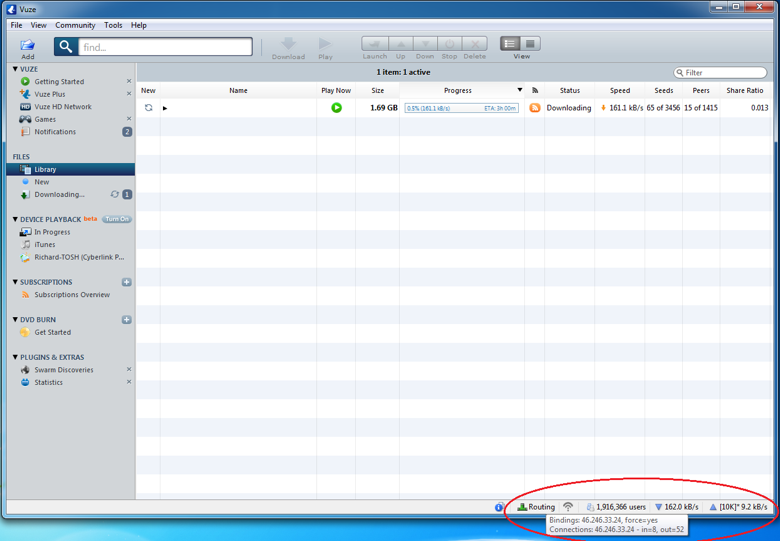
- Green network icon in status bar
- Hover over "Routing" to see your VPN IP
- Shows active connections through VPN
- Torrents download/upload normally
When VPN is Disconnected:

- Red network icon in status bar
- All torrent connections stopped
- No data transfer occurs
- Your real IP remains hidden
Testing Your Configuration
It's crucial to verify the binding works correctly:
- Connect to TorGuard VPN
- Start a torrent - verify green network icon
- Check your torrent IP at TorGuard IP Checker
- Disconnect VPN - network icon should turn red
- Verify torrents stop - no upload/download activity
- Reconnect VPN - torrents should resume automatically
Troubleshooting Common Issues
Vuze Won't Connect After Binding
- Wrong adapter name: Double-check exact spelling and format
- VPN not connected: Ensure VPN is active before starting Vuze
- Adapter changed: Windows may rename adapters after updates
- Try IP binding: Use VPN IP address instead of adapter name
Red Network Icon with VPN Connected
- Incorrect binding: Re-verify adapter name in network settings
- Multiple VPN adapters: Try each one until correct
- Restart required: Close and reopen Vuze completely
- Windows firewall: Add Vuze exception for VPN adapter
Finding the Correct Adapter Name
Alternative methods to identify VPN adapter:
Method 1: Command Prompt
ipconfig /all
Look for adapter with TorGuard IP (10.x.x.x range)
Method 2: Network Connections
- Open Control Panel → Network and Sharing Center
- Click "Change adapter settings"
- Identify TAP or WireGuard adapter
- Note the connection name
Advanced Configuration Options
Binding to Specific IP
Instead of interface name, you can bind to VPN IP:
- Connect to VPN and note your assigned IP
- Enter IP address (e.g., "10.8.0.25") in binding field
- Works well for static VPN IPs
Multiple VPN Support
For multiple VPN connections:
- Create separate Vuze profiles
- Bind each profile to different VPN adapter
- Switch profiles based on VPN server
Proxy + VPN Binding
For maximum anonymity:
- Bind Vuze to VPN interface
- Configure SOCKS5 proxy within Vuze
- Creates double-layer protection
Best Practices
- Always verify binding: Test regularly with IP checker
- Update after Windows updates: Adapter names may change
- Use dedicated servers: Better performance for torrenting
- Enable protocol encryption: Additional privacy layer
- Monitor status icon: Ensure green before downloading
Alternative Torrent Clients with Kill Switch
If you have issues with Vuze, consider these alternatives:
- qBittorrent: Built-in network interface binding
- BiglyBT: Vuze fork with similar binding features
- Deluge: Requires plugin but supports binding
- Transmission: Basic binding support on Windows
Pro Tip: For system-wide kill switch protection, use TorGuard's desktop client kill switch feature in addition to Vuze binding. This provides redundant protection.