TorGuard's SSH tunnel network provides extremely fast download speeds and can bypass VPN blocks or tough Internet filters. This tutorial will show in a few easy steps how to set up a secure SSH tunnel using SagerNet and TorGuard SSH tunnel for Premium Proxy service owners.
What is SSH Tunneling on Android?
SSH tunneling creates an encrypted connection between your Android device and a remote server. SagerNet is a powerful Android app that supports SSH protocol along with many other proxy protocols, providing a versatile solution for secure connections.
Strong Encryption
Military-grade SSH encryption for all traffic
Firewall Bypass
SSH on port 22 is rarely blocked
Android Native
Full Android VPN framework integration
Battery Efficient
Optimized for mobile devices
🚀 Why Use SSH with SagerNet?
- Bypass strict firewalls and content filters
- Secure connections on public WiFi
- Works where VPNs are blocked
- Multiple protocol support in one app
- Advanced routing capabilities
- Kill switch protection
Prerequisites
Before you begin, ensure you have:
- Android device (version 5.0 or later)
- Active TorGuard Premium Proxy subscription
- TorGuard Premium Proxy username and password
- Internet connection
- Google Play Store access (or ability to sideload APK)
⚠️ Important: SSH tunnel access is only available with TorGuard Premium Proxy service, not standard VPN subscriptions.
SagerNet Protocol Support
While this guide focuses on SSH, SagerNet supports multiple protocols:
| Protocol | Port | Best For | Firewall Bypass |
|---|---|---|---|
| SSH | 22 | General use | ✅ Excellent |
| VMess | Various | Advanced obfuscation | ✅ Excellent |
| HTTPS | 443 | Web traffic | ✅ Good |
| Shadowsocks | Various | Speed | ✅ Very Good |
Installation and Configuration
Step 1a: Enable SSH Access
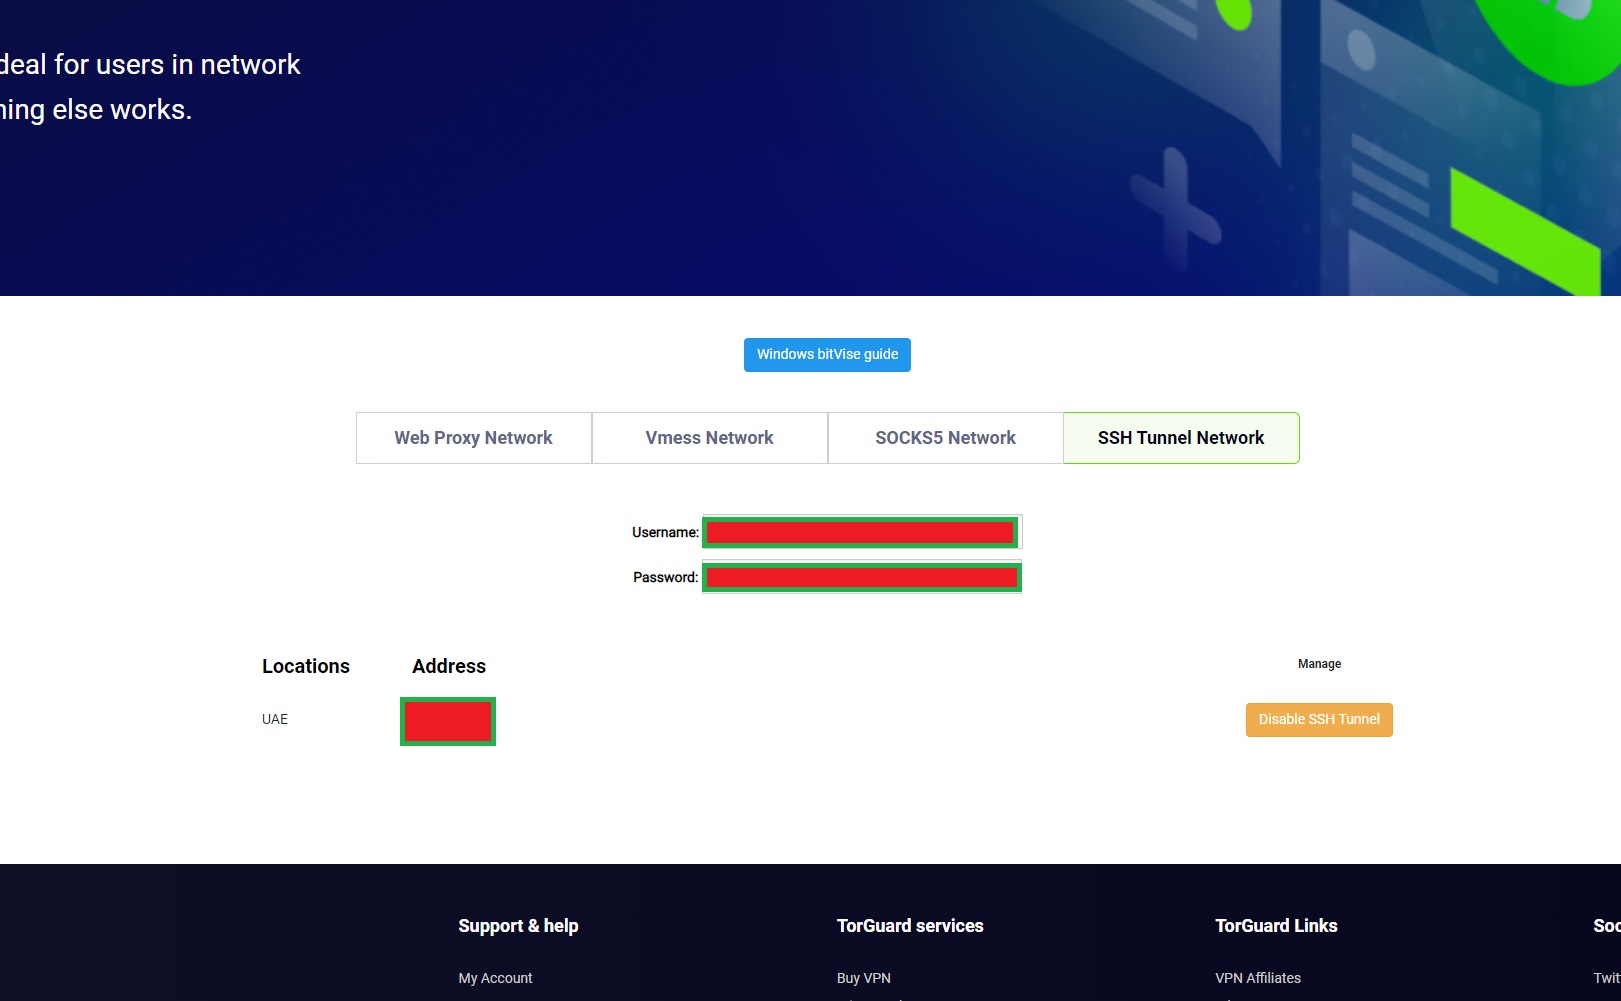
First, enable SSH access on your desired server by visiting your control panel here.
📝 SSH Activation: After enabling SSH, it may take a few minutes for the service to become active on your selected server.
Step 1b: Install SagerNet
Visit the Google Play Store and download the SagerNet app.

💡 Alternative Installation: If Google Play is unavailable, you can download the APK from the SagerNet GitHub releases.
Step 2: Add SSH Configuration
Tap the + icon in the top right corner and select SSH to add a TorGuard SSH tunnel location.
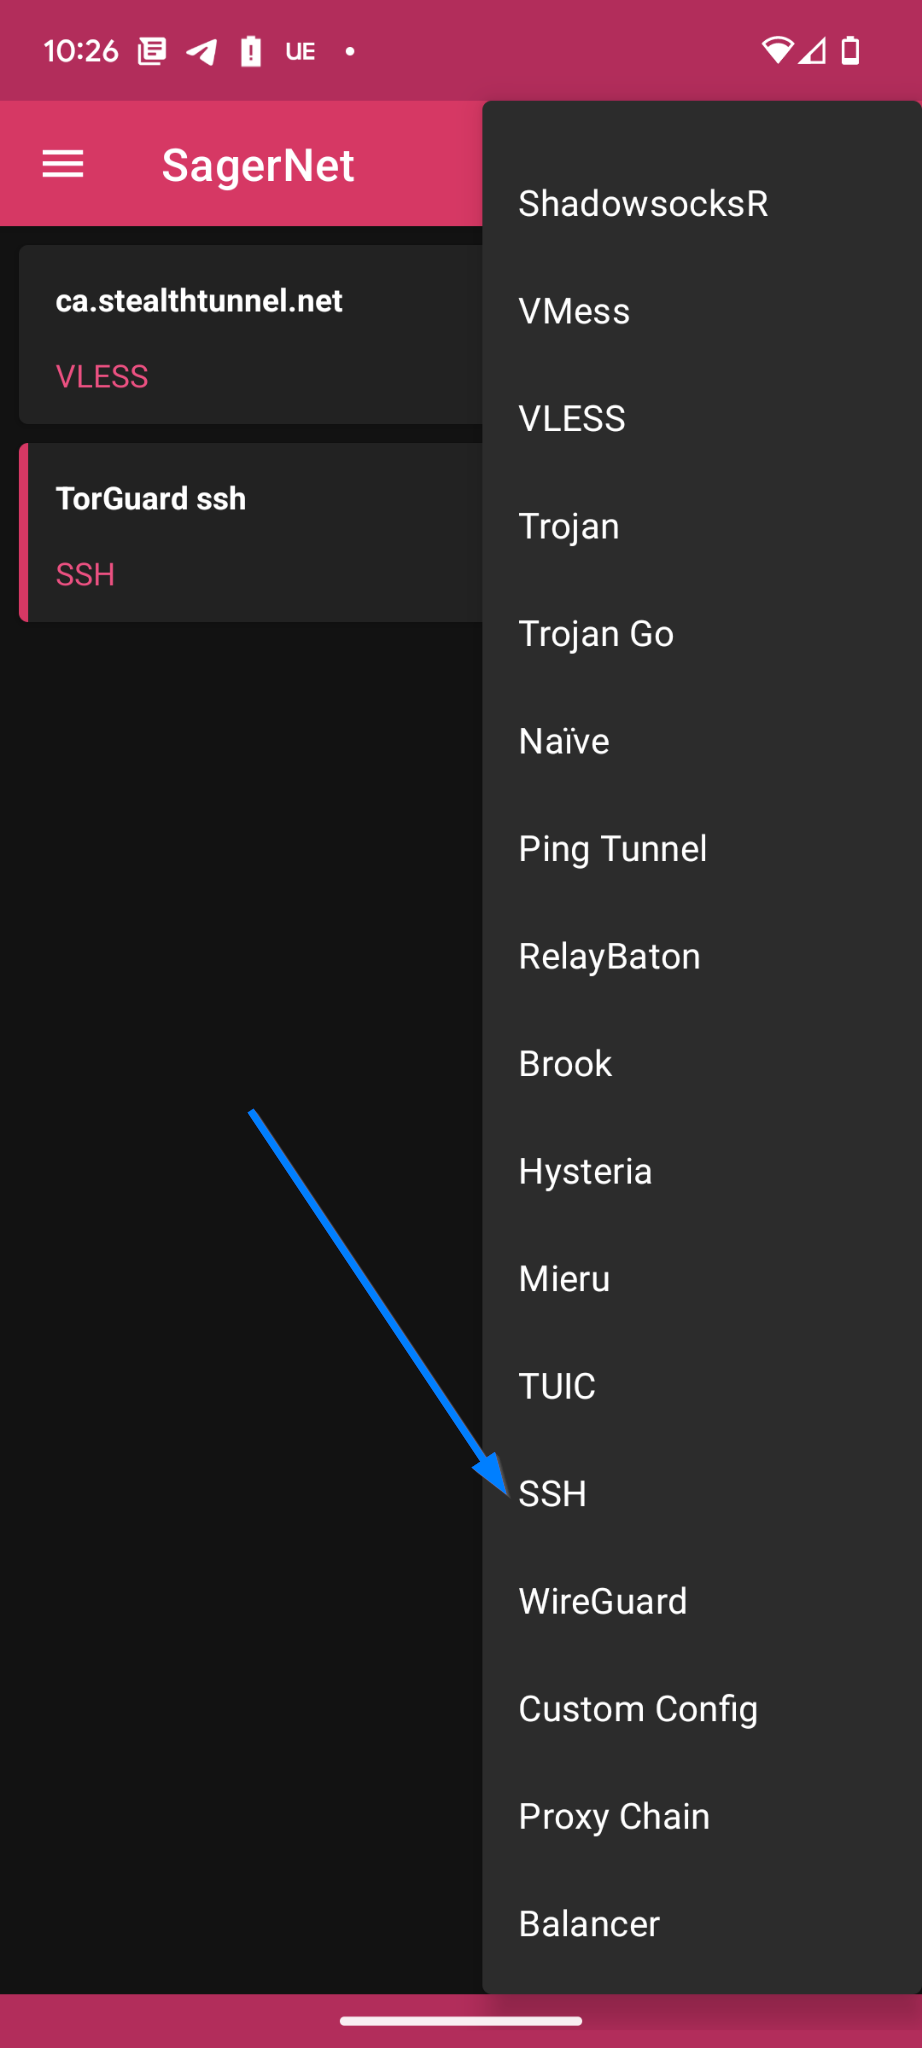
🔧 Configuration Types: SagerNet shows many protocol options. Select SSH for this tutorial.
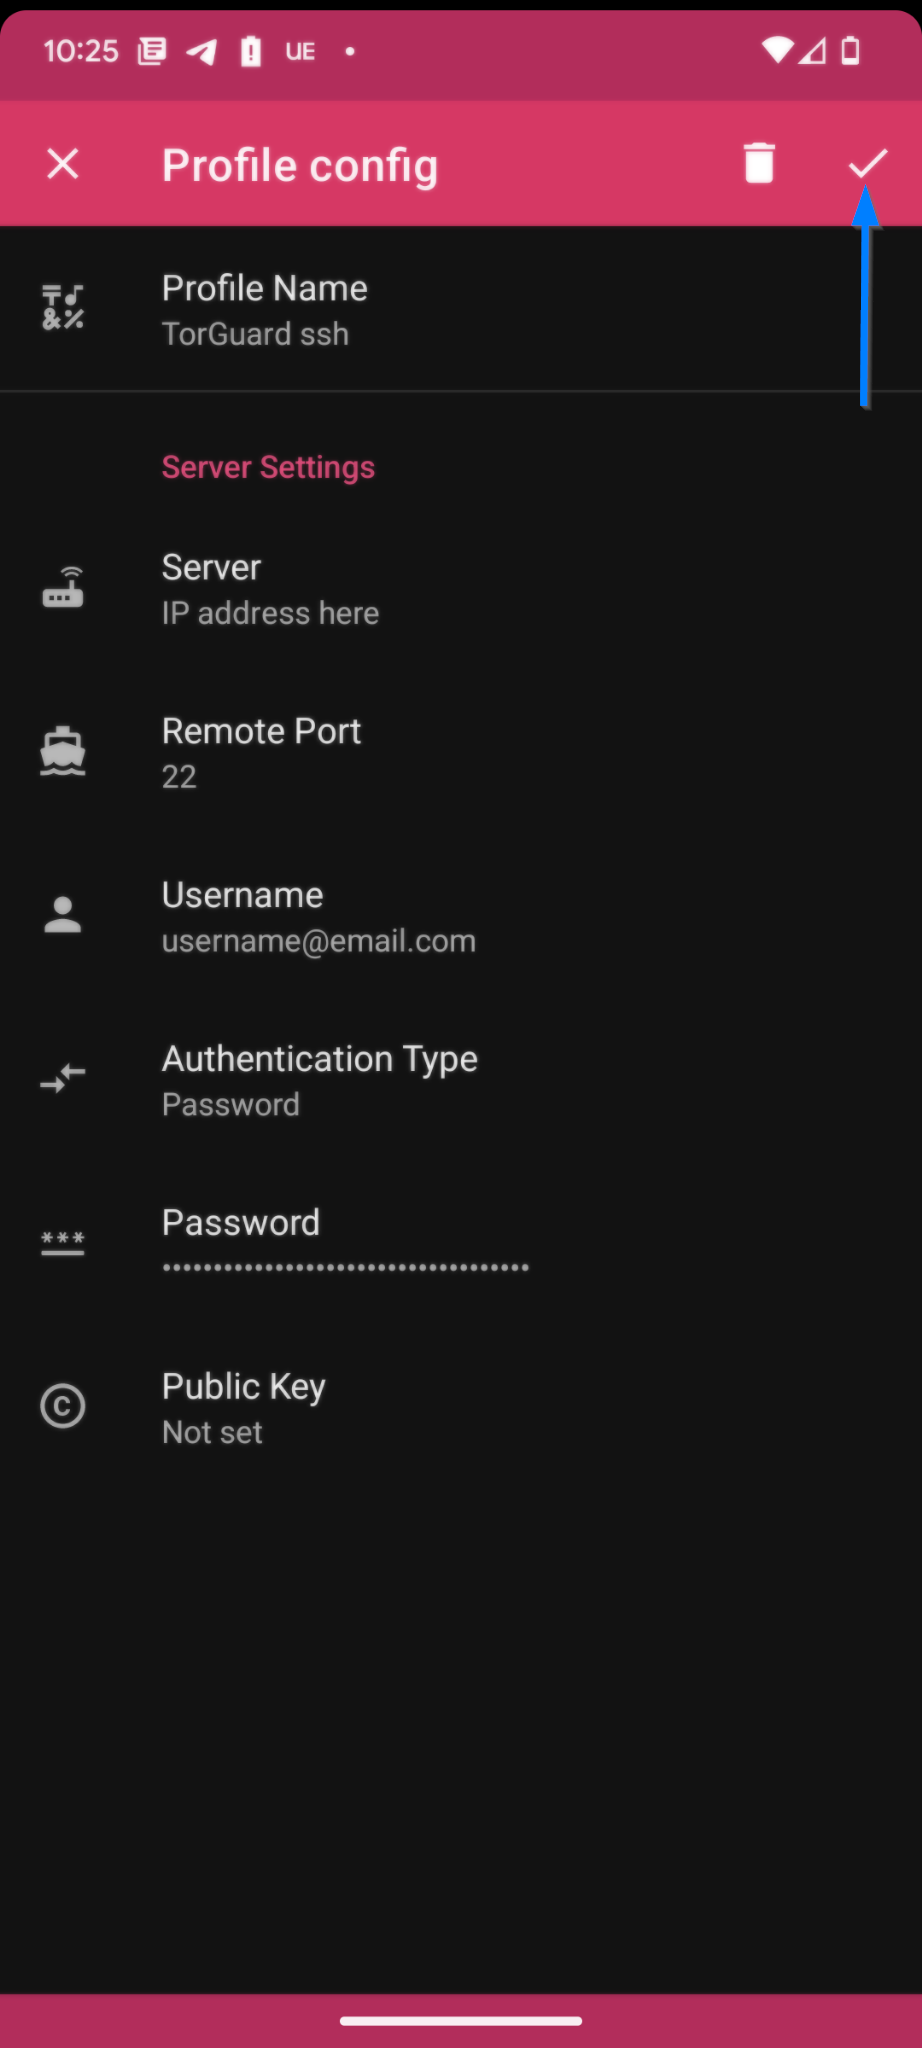
Step 3: Configure SSH Connection
For Profile Name, enter the TorGuard location you are adding.
Fill in the fields:
- Host: Select the SSH Tunnel IP from here
- Port: 22
- Username: Your TorGuard Premium Proxy Username
- Password: Your TorGuard Premium Proxy Password
Click the checkmark in the top right corner to save this new connection profile.
🔑 Credentials: Use your Premium Proxy credentials, not your main TorGuard account login. These can be managed at managecredentials.php
Step 4: Configure DNS Settings
Tap the three lines (hamburger menu) in the top left corner. Scroll down to DNS Settings and make sure the "Use Local DNS as Direct DNS" switch is toggled OFF.
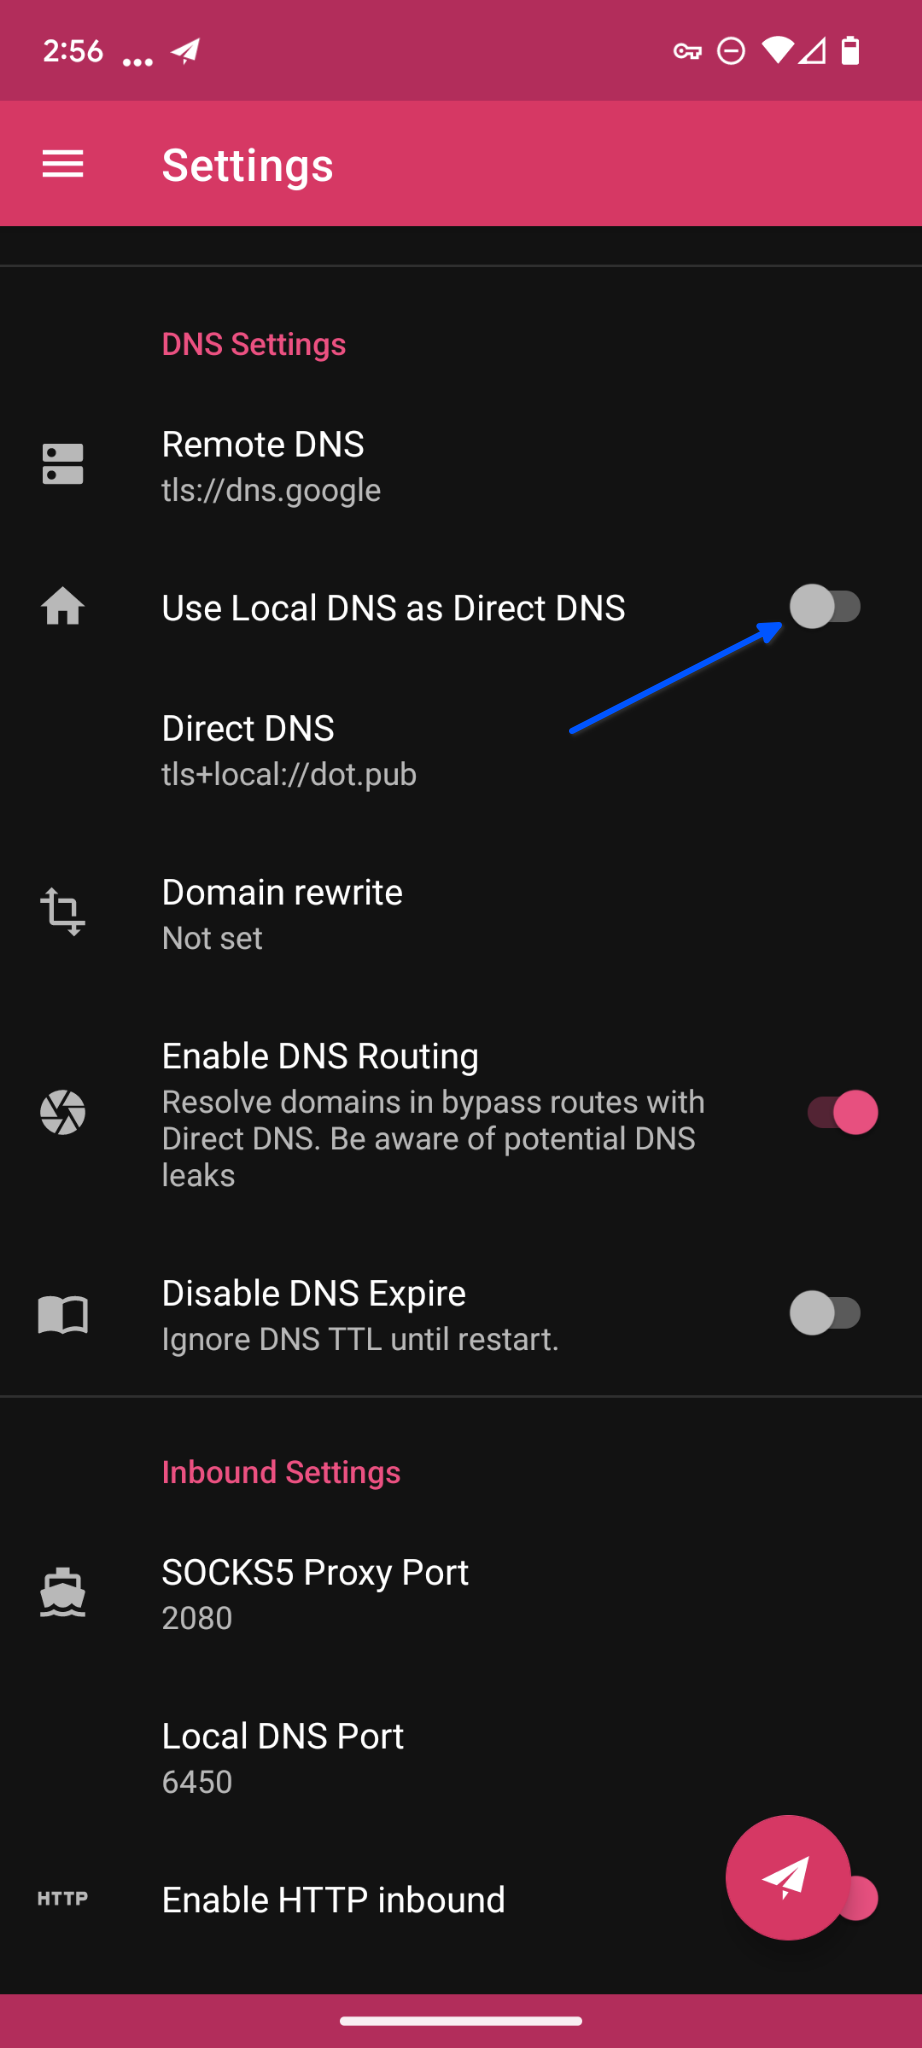
⚠️ DNS Note: This option is not required on most networks. Only toggle it ON if you experience no internet connection, which might indicate DNS issues.
Step 5: Connect to SSH Tunnel
To connect to TorGuard's SSH tunnel, tap the paper airplane icon in the bottom right corner. You should now see inbound and outbound data flowing to show the app is connected.
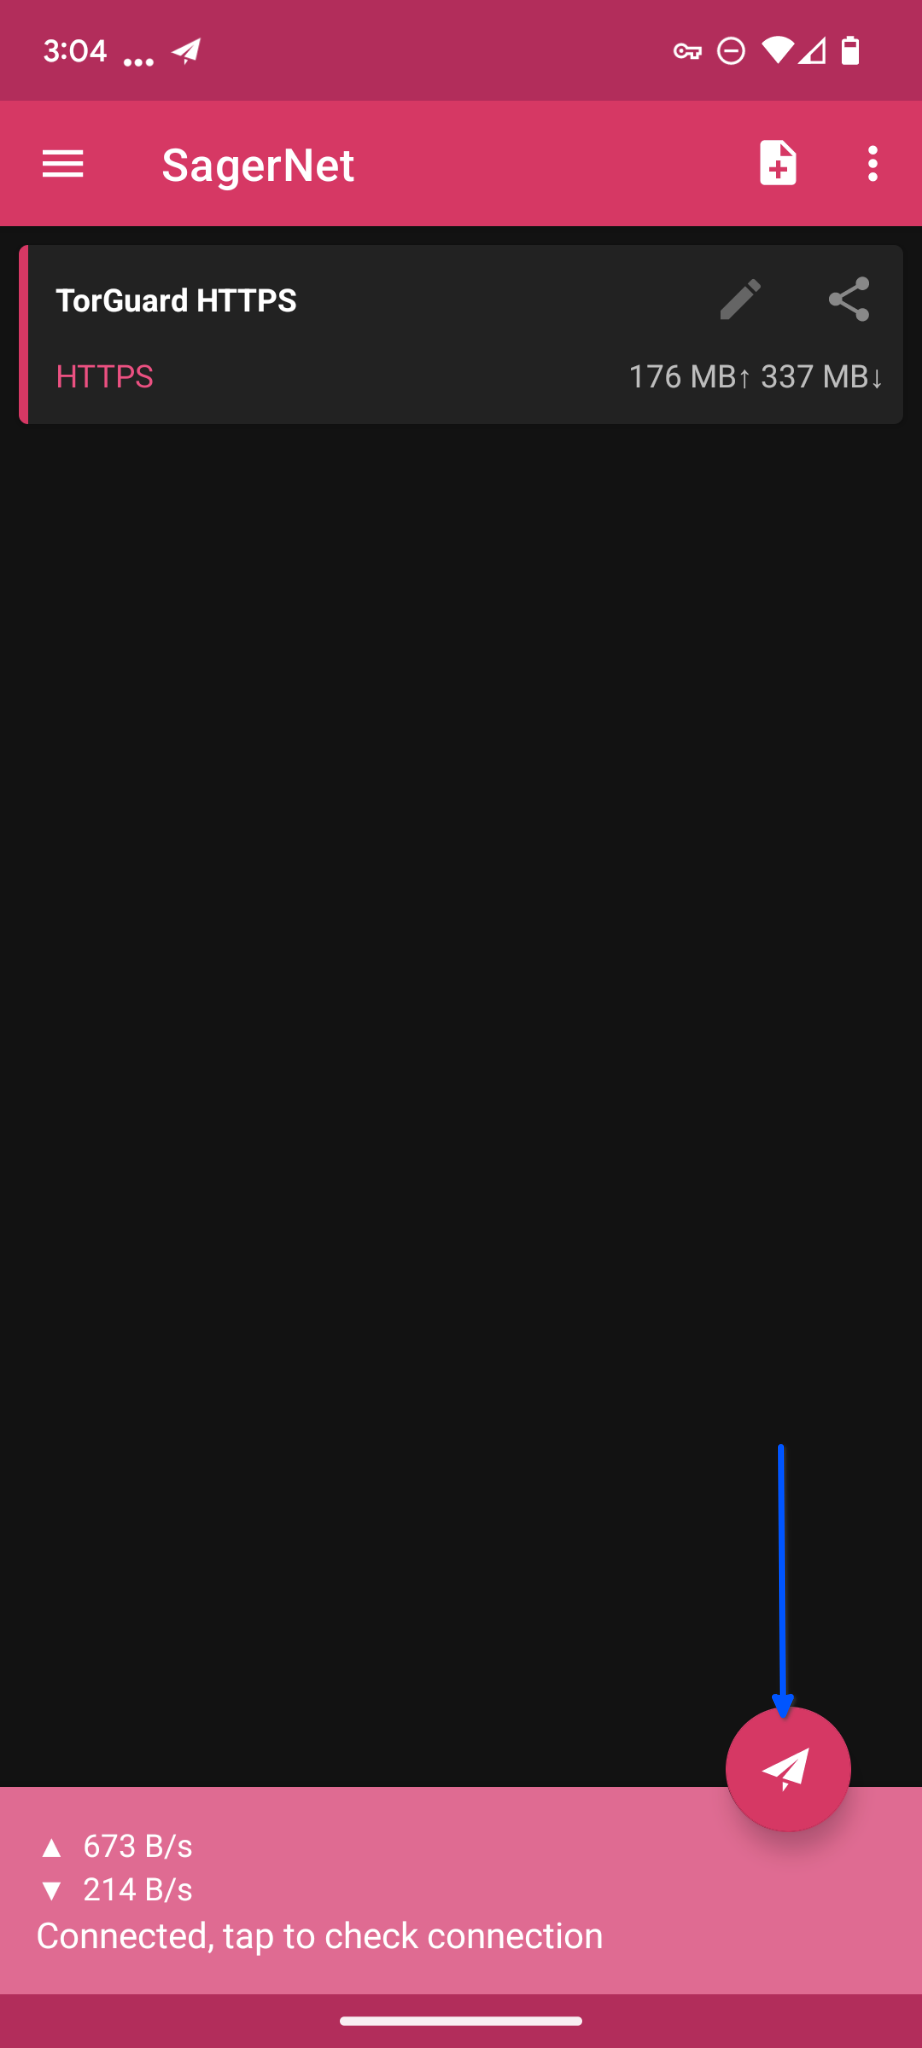
✅ Connected! The data flow indicators show your SSH tunnel is active and all traffic is encrypted.
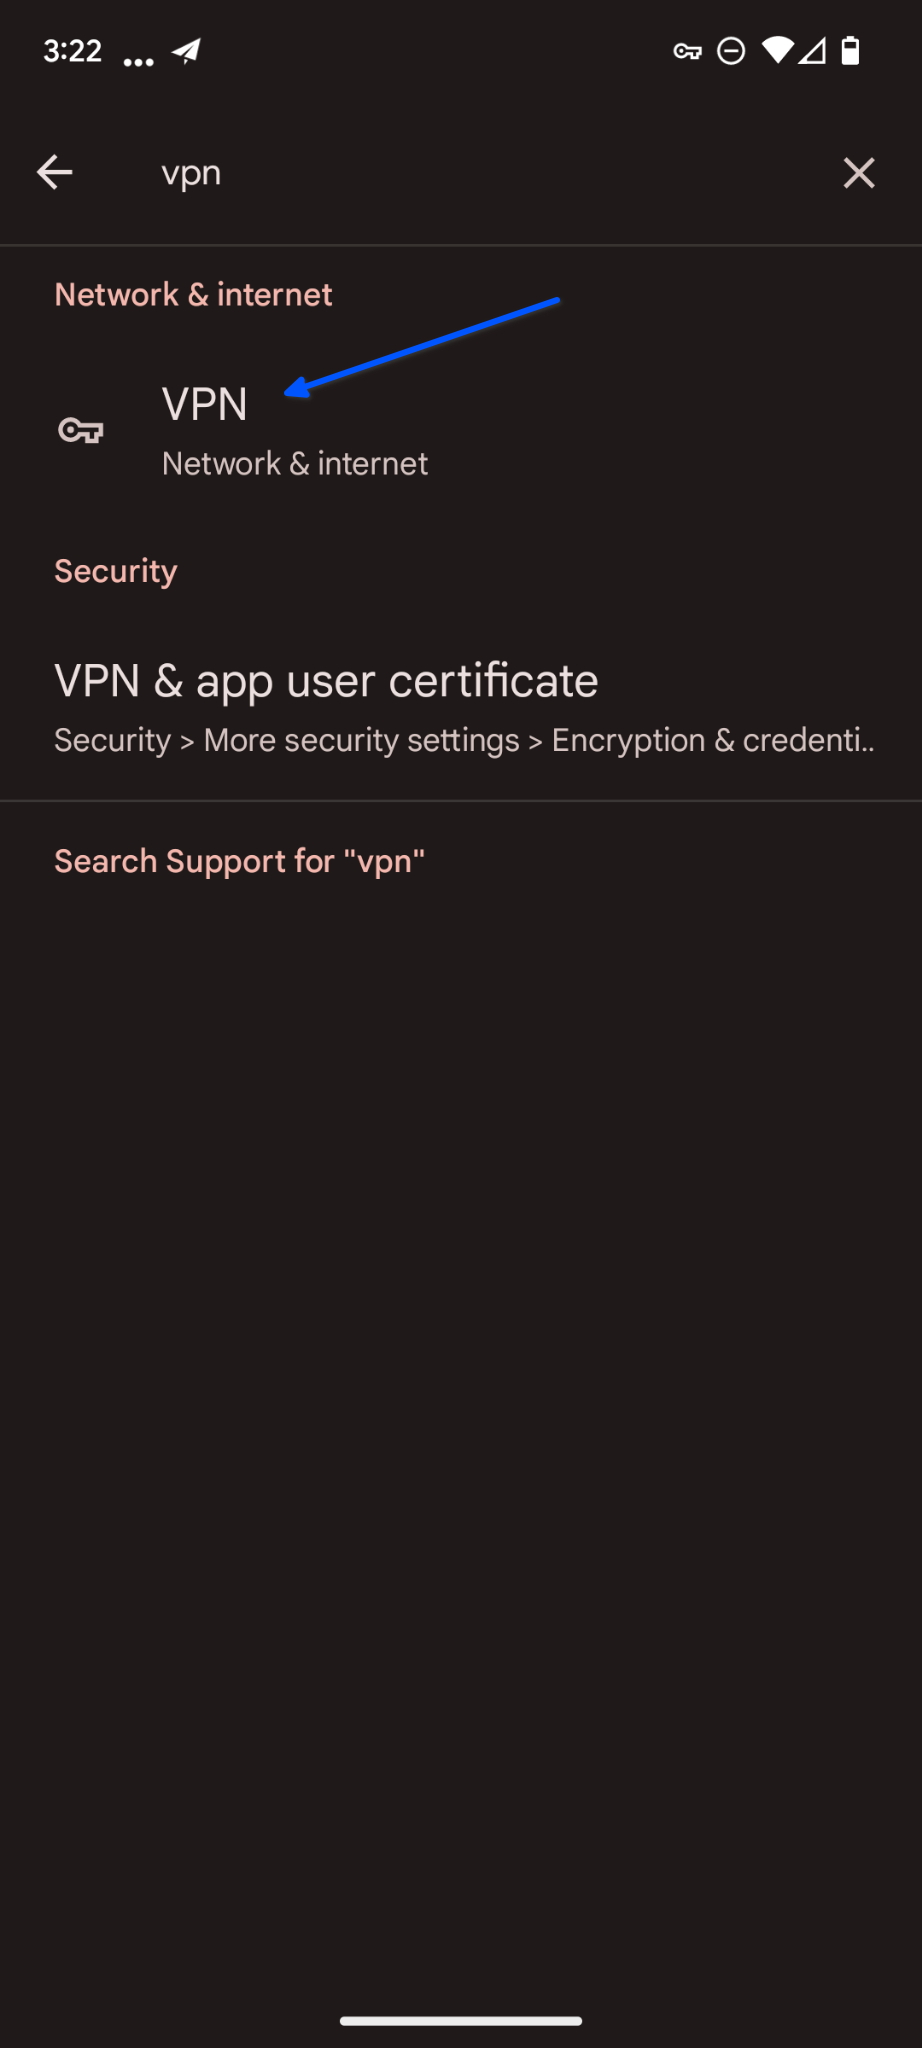
Step 6: Enable Kill Switch (Part 1)
To ensure your connection doesn't leak, access the Settings menu in Android and search for "VPN". Under Network & Internet, tap the VPN option.
Step 7: Access VPN Settings
In the Network & Internet menu, tap the VPN option at the bottom.
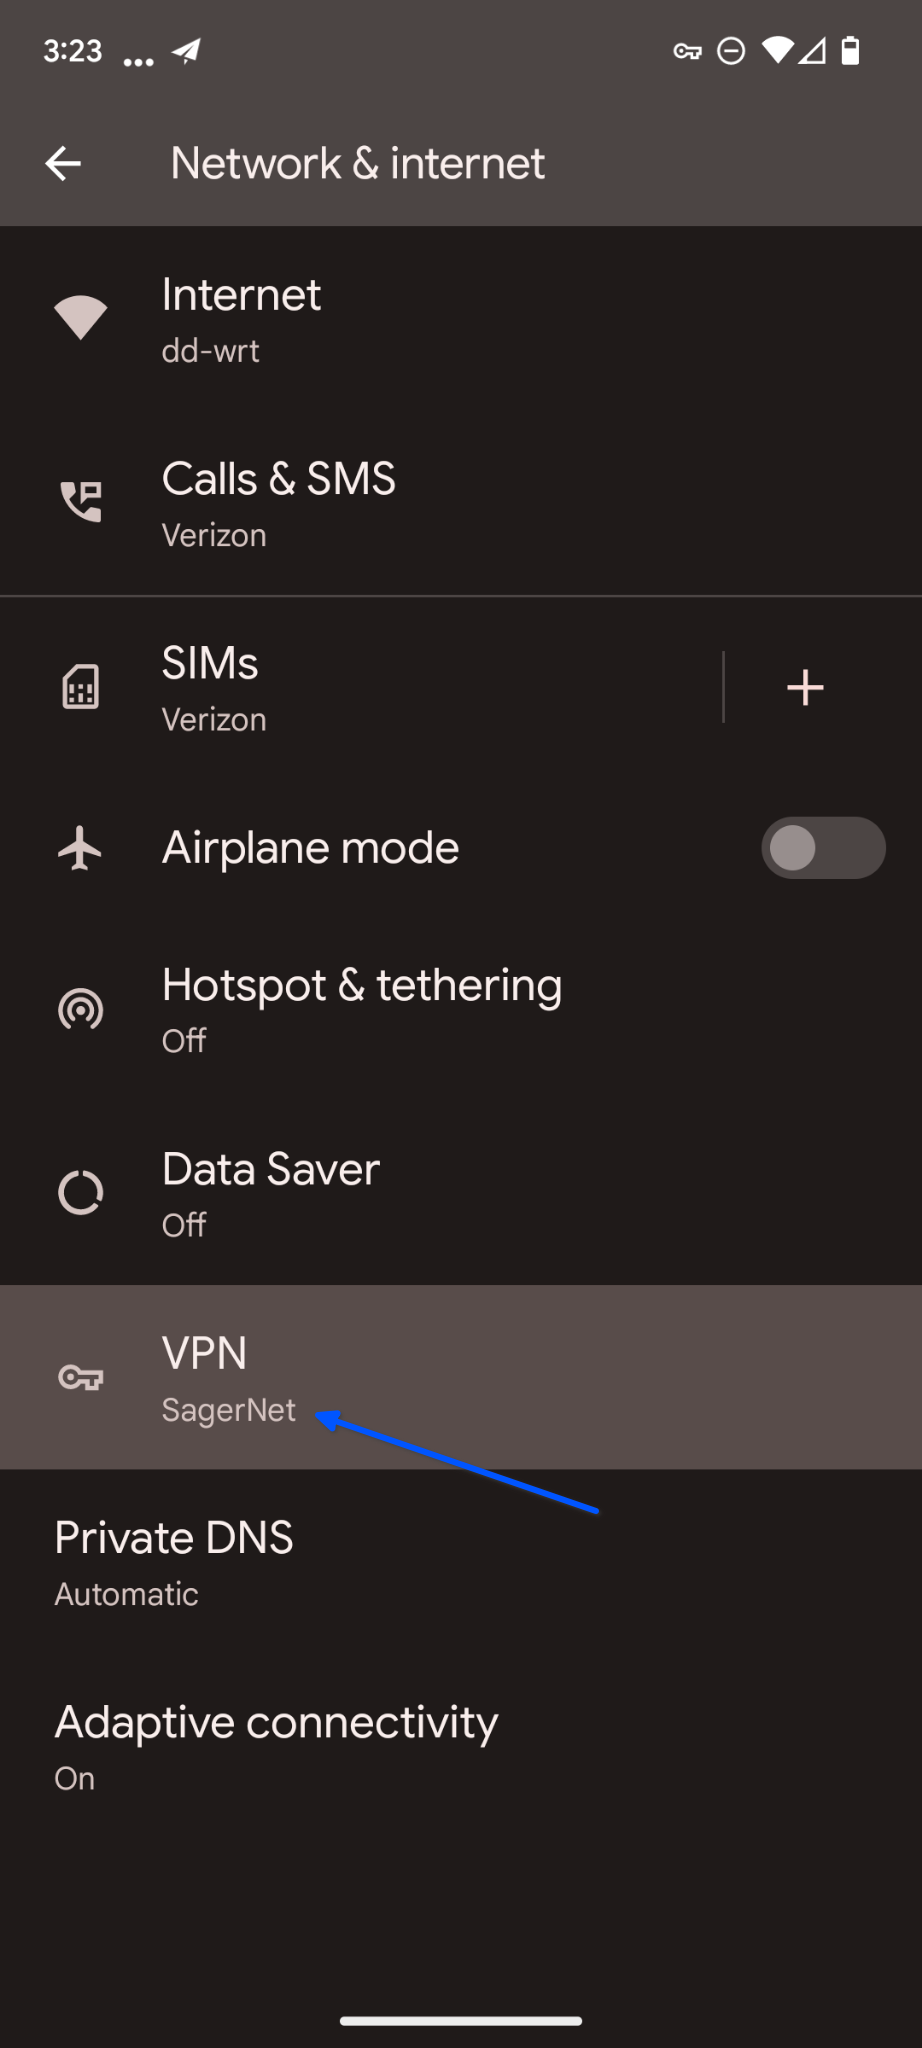
Step 8: Configure Always-On VPN
In your list of installed VPN apps, tap the settings icon (gear) next to SagerNet.
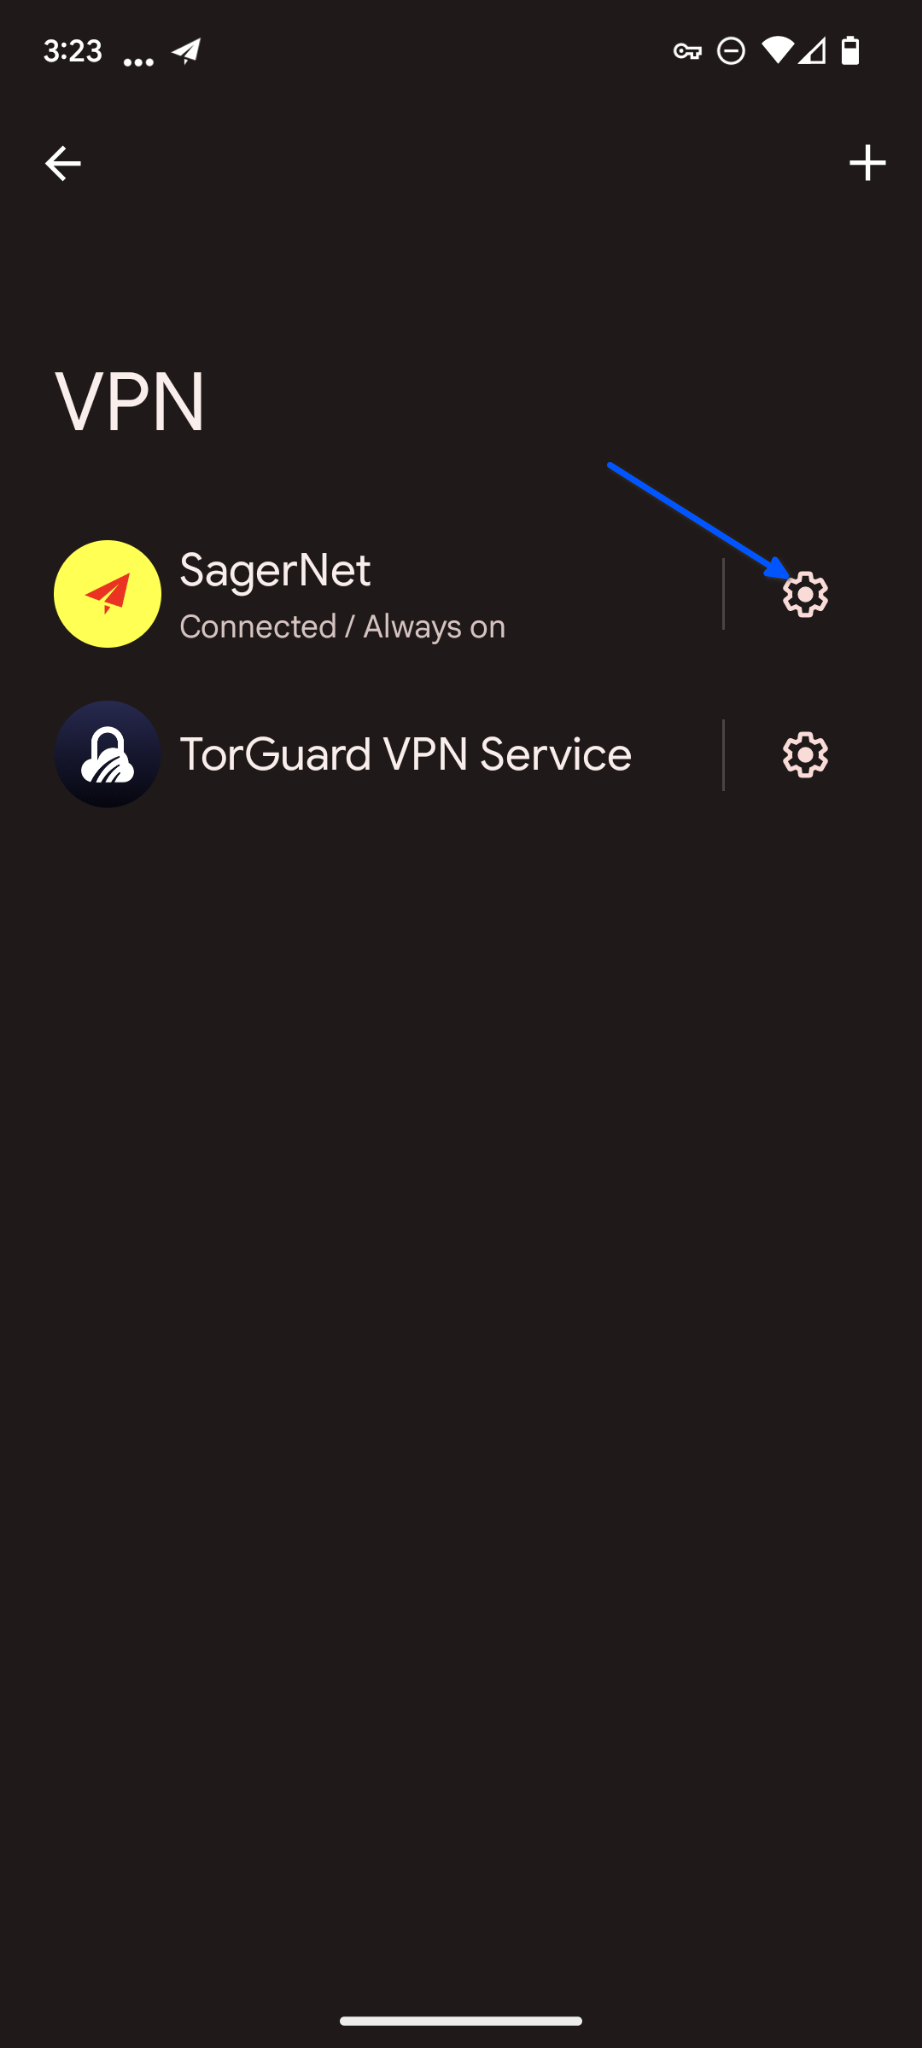
Step 9: Enable Kill Switch Protection
Make sure the Always-on VPN and Block connections without VPN switches are toggled ON.
Your entire Android device is now connected through TorGuard's SSH tunnel. You can add more TorGuard SSH tunnel locations in the SagerNet app.
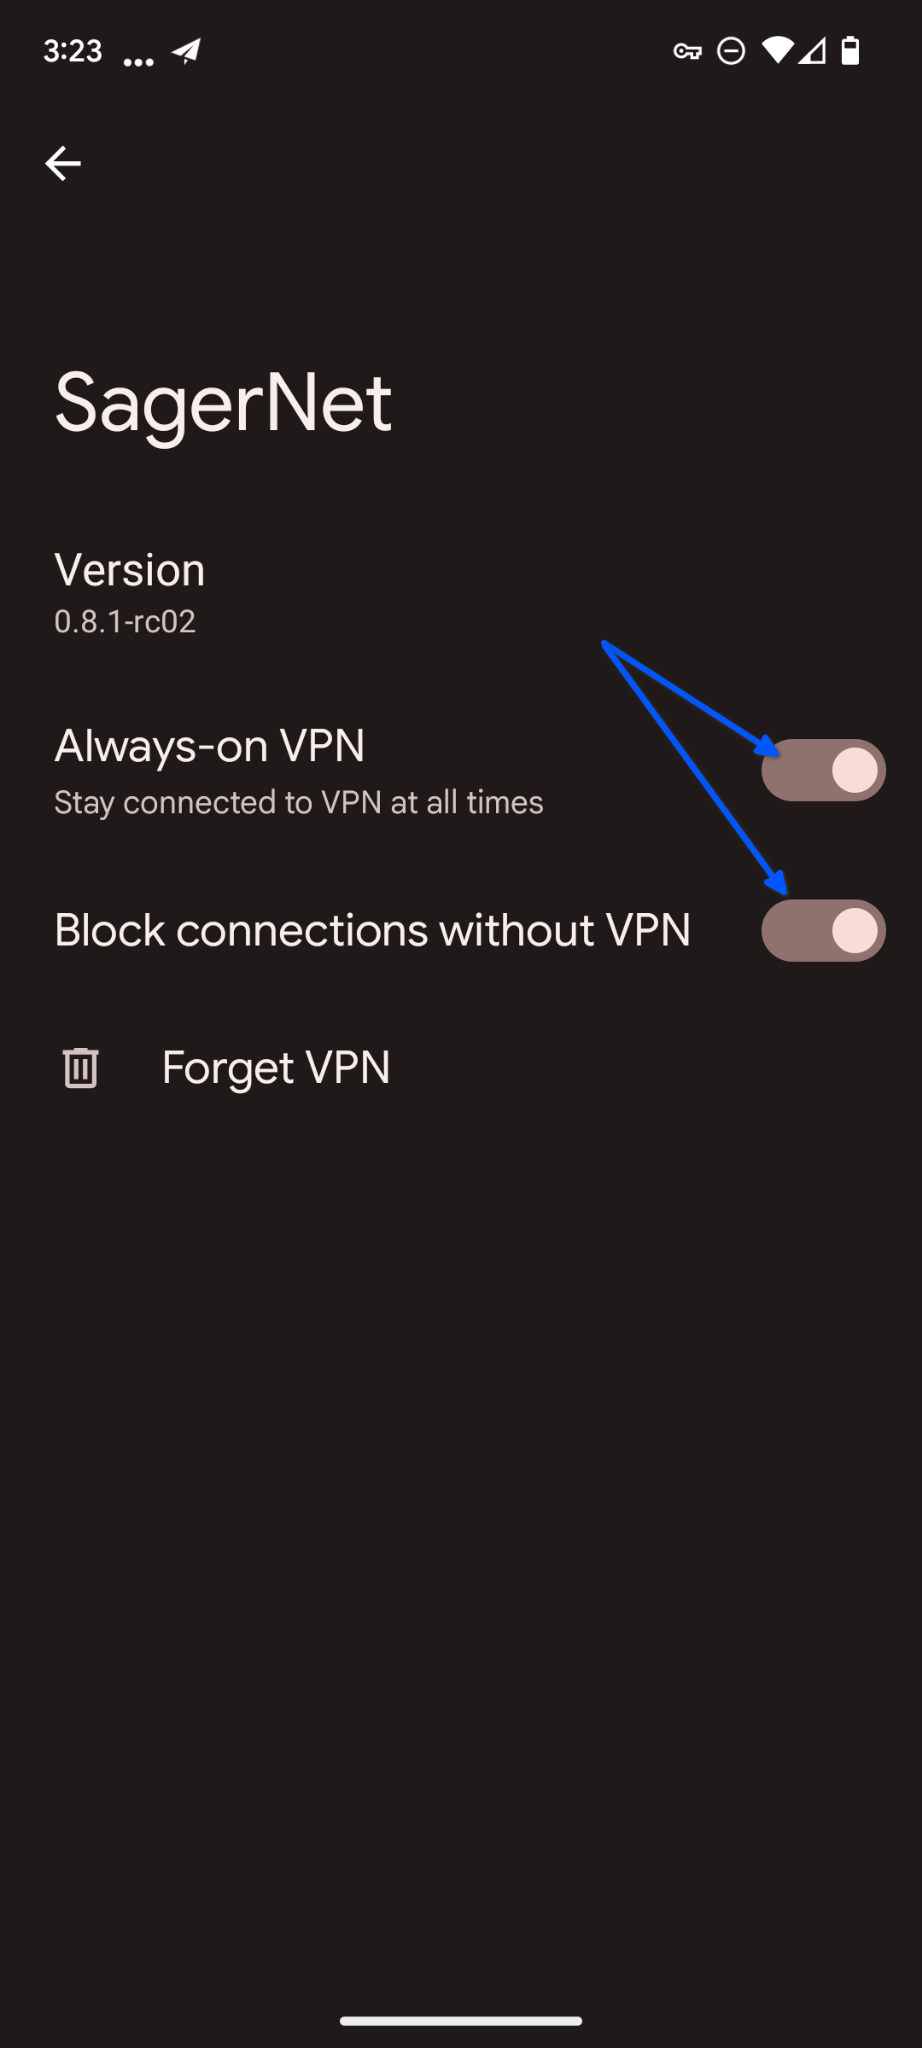
🛡️ Kill Switch Active! With these settings enabled, your device will block all internet connections if the SSH tunnel disconnects, preventing IP leaks.
Advanced SagerNet SSH Features
🎯 Per-App Proxy
Configure which apps use the SSH tunnel:
- Go to Settings → Route
- Select "Include" or "Exclude" mode
- Choose apps to route through SSH
- Useful for banking apps or local services
🔀 Multiple SSH Profiles
Add multiple TorGuard SSH servers:
- Create profiles for different regions
- Quick switch between servers
- Test latency for best performance
- Backup connections ready
⚡ SSH Performance Options
- Compression: Enable for slow connections
- Keep-alive: Maintain persistent connections
- TCP No Delay: Reduce latency
- Server Alive Interval: Prevent timeouts
🌐 Advanced Routing
- Domain-based routing rules
- IP-based routing
- Bypass local networks
- Custom rule sets
SSH Tunnel Tips
🚀 Optimization
Improve SSH tunnel performance:
- Enable compression for mobile data
- Use persistent connections
- Choose servers with low ping
- Adjust MTU if needed
🔒 Security
- SSH provides strong encryption by default
- Port 22 traffic looks legitimate
- Difficult to detect or block
- No additional obfuscation needed
Troubleshooting Common Issues
SSH Connection Failed
Solution:
- Verify SSH is enabled for your server
- Check Premium Proxy credentials
- Ensure port 22 isn't blocked
- Try different SSH server
- Restart SagerNet app
Slow Connection Speed
Solution:
- Enable compression in SSH settings
- Connect to closer server location
- Switch between WiFi and mobile data
- Close background apps
- Check base internet speed
Connection Drops Frequently
Solution:
- Enable keep-alive in SSH settings
- Disable battery optimization for SagerNet
- Check for stable internet connection
- Try different SSH server
- Update SagerNet to latest version
Apps Not Using Tunnel
Solution:
- Check per-app proxy settings
- Restart apps after connecting
- Verify VPN is system-wide
- Some apps may bypass VPN
- Use "Include All" routing mode
Security Best Practices
🔐 SSH Security
- Use strong passwords
- Keep credentials secure
- Monitor active connections
- Rotate servers regularly
📱 Device Security
- Keep Android updated
- Use screen lock
- Review app permissions
- Enable Find My Device
🌐 Connection Security
- Always verify tunnel is active
- Check for IP/DNS leaks
- Use HTTPS websites
- Enable kill switch
🔑 Account Security
- Protect SSH credentials
- Use unique passwords
- Enable 2FA on TorGuard
- Monitor account activity
Summary
You've successfully configured SagerNet to create an SSH tunnel on Android! This setup provides:
- ✅ Secure encrypted SSH tunnel
- ✅ System-wide VPN protection
- ✅ Excellent firewall bypass capabilities
- ✅ Kill switch protection against leaks
- ✅ Battery-efficient operation
- ✅ Multiple protocol support in one app