Changing DNS servers in Windows 10 and 11 can significantly improve your internet experience by enhancing privacy, speed, and security. This comprehensive guide covers all methods, from the traditional Control Panel approach to the modern Settings app with DNS over HTTPS (DoH) support, ensuring you can configure DNS regardless of your Windows version or preference.
🎯 Why Change DNS?
- Privacy: ISP DNS servers log all your browsing
- Speed: Public DNS often faster than ISP
- Security: Block malware and phishing domains
- Reliability: Avoid ISP DNS outages
- Content Access: Bypass DNS-based blocking
Recommended DNS Providers
| Provider | Primary DNS | Secondary DNS | DoH Support | Features | Privacy |
|---|---|---|---|---|---|
| TorGuard DNS | 10.8.0.1 | 10.8.0.2 | ✅ | No logs, VPN users | ⭐⭐⭐⭐⭐ |
| Cloudflare | 1.1.1.1 | 1.0.0.1 | ✅ | Fastest, malware option | ⭐⭐⭐⭐ |
| Quad9 | 9.9.9.9 | 149.112.112.112 | ✅ | Malware blocking | ⭐⭐⭐⭐⭐ |
| NextDNS | 45.90.28.0 | 45.90.30.0 | ✅ | Custom filtering | ⭐⭐⭐⭐ |
| AdGuard | 94.140.14.14 | 94.140.15.15 | ✅ | Ad blocking | ⭐⭐⭐⭐ |
| 8.8.8.8 | 8.8.4.4 | ✅ | Fast, reliable | ⭐⭐ |
Method 1: Windows 11 Settings App (Newest)
For Wi-Fi Connections:
- Press Win + I to open Settings
- Navigate to Network & Internet → Wi-Fi
- Click Hardware properties
- Click Edit next to DNS server assignment
- Change from Automatic to Manual
- Toggle IPv4 on
- Enter DNS servers:
- Preferred DNS:
1.1.1.1 - Alternate DNS:
1.0.0.1 - DNS over HTTPS: On (automatic template)
- Preferred DNS:
- Click Save
For Ethernet Connections:
- Settings → Network & Internet → Ethernet
- Click your Ethernet connection
- Follow same steps as Wi-Fi above
Method 2: Windows 10 Settings App
Windows 10 version 2004 and later:
- Open Settings (Win + I)
- Go to Network & Internet
- Select Status → Properties
- Under IP settings, click Edit
- Change to Manual
- Enable IPv4 and enter DNS servers
- Save changes
Method 3: Control Panel (Traditional)
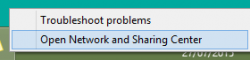
Step 1: Open Network and Sharing Center
Right-click network icon in system tray → Open Network and Sharing Center:
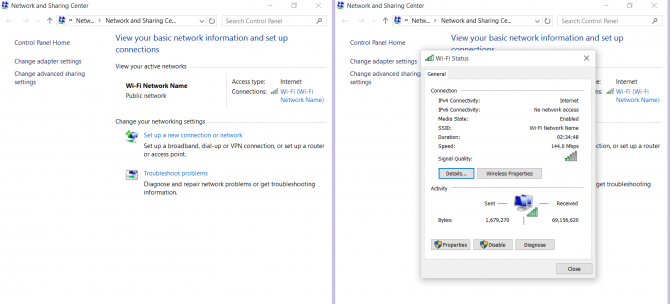
Step 2: Select Your Connection
Click on your active connection (Wi-Fi or Ethernet):
Step 3: Configure IPv4 DNS
- Select Internet Protocol Version 4 (TCP/IPv4)
- Click Properties
- Select Use the following DNS server addresses
- Enter your chosen DNS servers
- Click OK to save

Method 4: Command Line (PowerShell/CMD)
PowerShell (Administrator):
# View current DNS servers
Get-DnsClientServerAddress

# Set DNS for Wi-Fi
Set-DnsClientServerAddress -InterfaceAlias "Wi-Fi" -ServerAddresses 1.1.1.1, 1.0.0.1

# Set DNS for Ethernet
Set-DnsClientServerAddress -InterfaceAlias "Ethernet" -ServerAddresses 9.9.9.9, 149.112.112.112

# Reset to automatic
Set-DnsClientServerAddress -InterfaceAlias "Wi-Fi" -ResetServerAddresses
Command Prompt (Administrator):
# Set primary DNS
netsh interface ip set dns "Wi-Fi" static 1.1.1.1

# Add secondary DNS
netsh interface ip add dns "Wi-Fi" 1.0.0.1 index=2

# Reset to DHCP
netsh interface ip set dns "Wi-Fi" dhcp
Configure DNS over HTTPS (DoH)
🔒 Encrypt Your DNS Queries
DNS over HTTPS prevents ISPs and attackers from seeing your DNS queries.
Windows 11 DoH Setup:
- Use Method 1 above
- When entering DNS servers, select:
- DNS over HTTPS: On (automatic template)
- Or: On (manual template) and enter DoH URL
DoH URLs for Popular Providers:
| Provider | DoH URL |
|---|---|
| Cloudflare | https://cloudflare-dns.com/dns-query |
| Quad9 | https://dns.quad9.net/dns-query |
| NextDNS | https://dns.nextdns.io/YOUR_ID |
| AdGuard | https://dns.adguard.com/dns-query |
IPv6 DNS Configuration
For networks with IPv6 support:
| Provider | Primary IPv6 | Secondary IPv6 |
|---|---|---|
| Cloudflare | 2606:4700:4700::1111 | 2606:4700:4700::1001 |
| Quad9 | 2620:fe::fe | 2620:fe::9 |
| 2001:4860:4860::8888 | 2001:4860:4860::8844 |
Verify DNS Configuration
Method 1: Windows Commands
# Check current DNS servers
nslookup
> server

# Test DNS resolution
nslookup google.com

# View all DNS settings
ipconfig /all
Method 2: Online Tests
- DNS Leak Test - Check which DNS you're using
- Cloudflare Browser Check - Verify DoH is working
- IPLeak.net - Comprehensive DNS/IP test
Clear DNS Cache
After changing DNS, clear the cache:
# Flush DNS cache
ipconfig /flushdns

# Verify cache is cleared
ipconfig /displaydns

# Additional reset commands
netsh winsock reset
nbtstat -R
nbtstat -RR
Per-Application DNS (Advanced)
Configure specific DNS for certain apps:
- Use browser with built-in DoH (Firefox, Chrome, Edge)
- Configure proxy with custom DNS
- Use VPN with specific DNS servers
Firefox DoH Configuration:
- Settings → General → Network Settings
- Enable "DNS over HTTPS"
- Choose provider or custom
Troubleshooting DNS Issues
DNS Not Changing:
- Run commands as Administrator
- Disable IPv6 if not needed
- Check for VPN DNS override
- Verify no Group Policy restrictions
Slow DNS Resolution:
- Test different DNS servers
- Use DNS benchmark tool
- Check for ISP interference
- Try DNS over HTTPS
DNS Leaks with VPN:
- Enable DNS leak protection in VPN
- Use VPN provider's DNS
- Configure firewall rules
- Test at dnsleaktest.com
Router DNS vs Device DNS
| Configuration | Pros | Cons |
|---|---|---|
| Router DNS | • All devices protected • Single configuration • Guest networks covered |
• Less flexibility • Router limitations • No DoH on most routers |
| Device DNS | • Per-device control • DoH support • Easy testing |
• Must configure each device • Can be overridden • Mobile devices roam |
DNS Security Best Practices
- Use DoH when possible: Encrypts DNS queries
- Avoid ISP DNS: Often logged and censored
- Test regularly: DNS settings can revert
- Multiple DNS servers: Add redundancy
- VPN DNS: Use VPN provider's DNS when connected
- DNSSEC: Verify DNS responses aren't tampered
💡 Pro Tip: DNS Benchmark
Use Steve Gibson's DNS Benchmark tool to find the fastest DNS servers for your location:
- Download from GRC.com
- Run benchmark test
- Choose fastest servers
- Configure as shown above
Need DNS Configuration Help?
Our support team can help you choose the best DNS servers for your needs and troubleshoot any configuration issues.
Get DNS Support