- When exposing a port to the Internet make sure you either lock down the login to your software, or allow specific IPs to access this port remotely over the VPN.
- When testing to see if the port is open, always make sure the software that’s using this port is running - its always best to test from outside your network.
- You may need to open this port on your firewall.
- Be sure that when testing this port, TCP is open. UDP ports will not respond in the same way.
- We allow all ports above 2048 - we do not allow ports below, some ports above 2048 may be be reserved.
PORT FORWARDING ON A SHARED OR DEDICATED IP:
STEP 1:
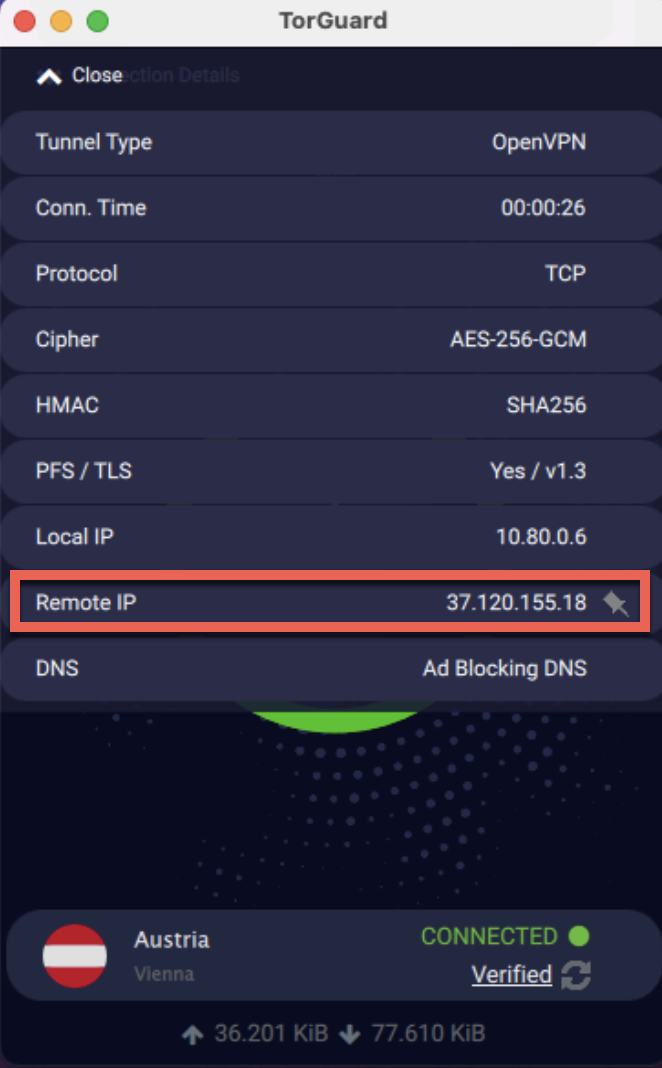
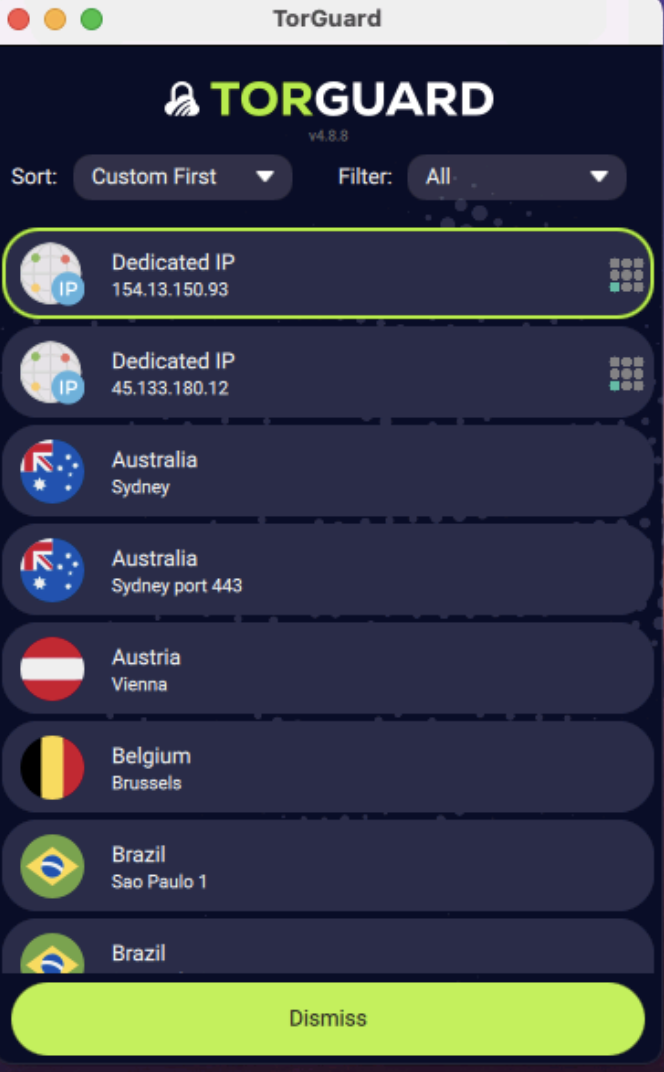
If you wish to open a port on a static shared IP, normally you would grab the IP from the TorGuard software while connected to the VPN, on the desktop app you will see this info under the "connection details" drop down on the top left and look for the "Remote IP" field.
If you purchased a Dedicated IP you would have already received your activation email and can skip to step 4.
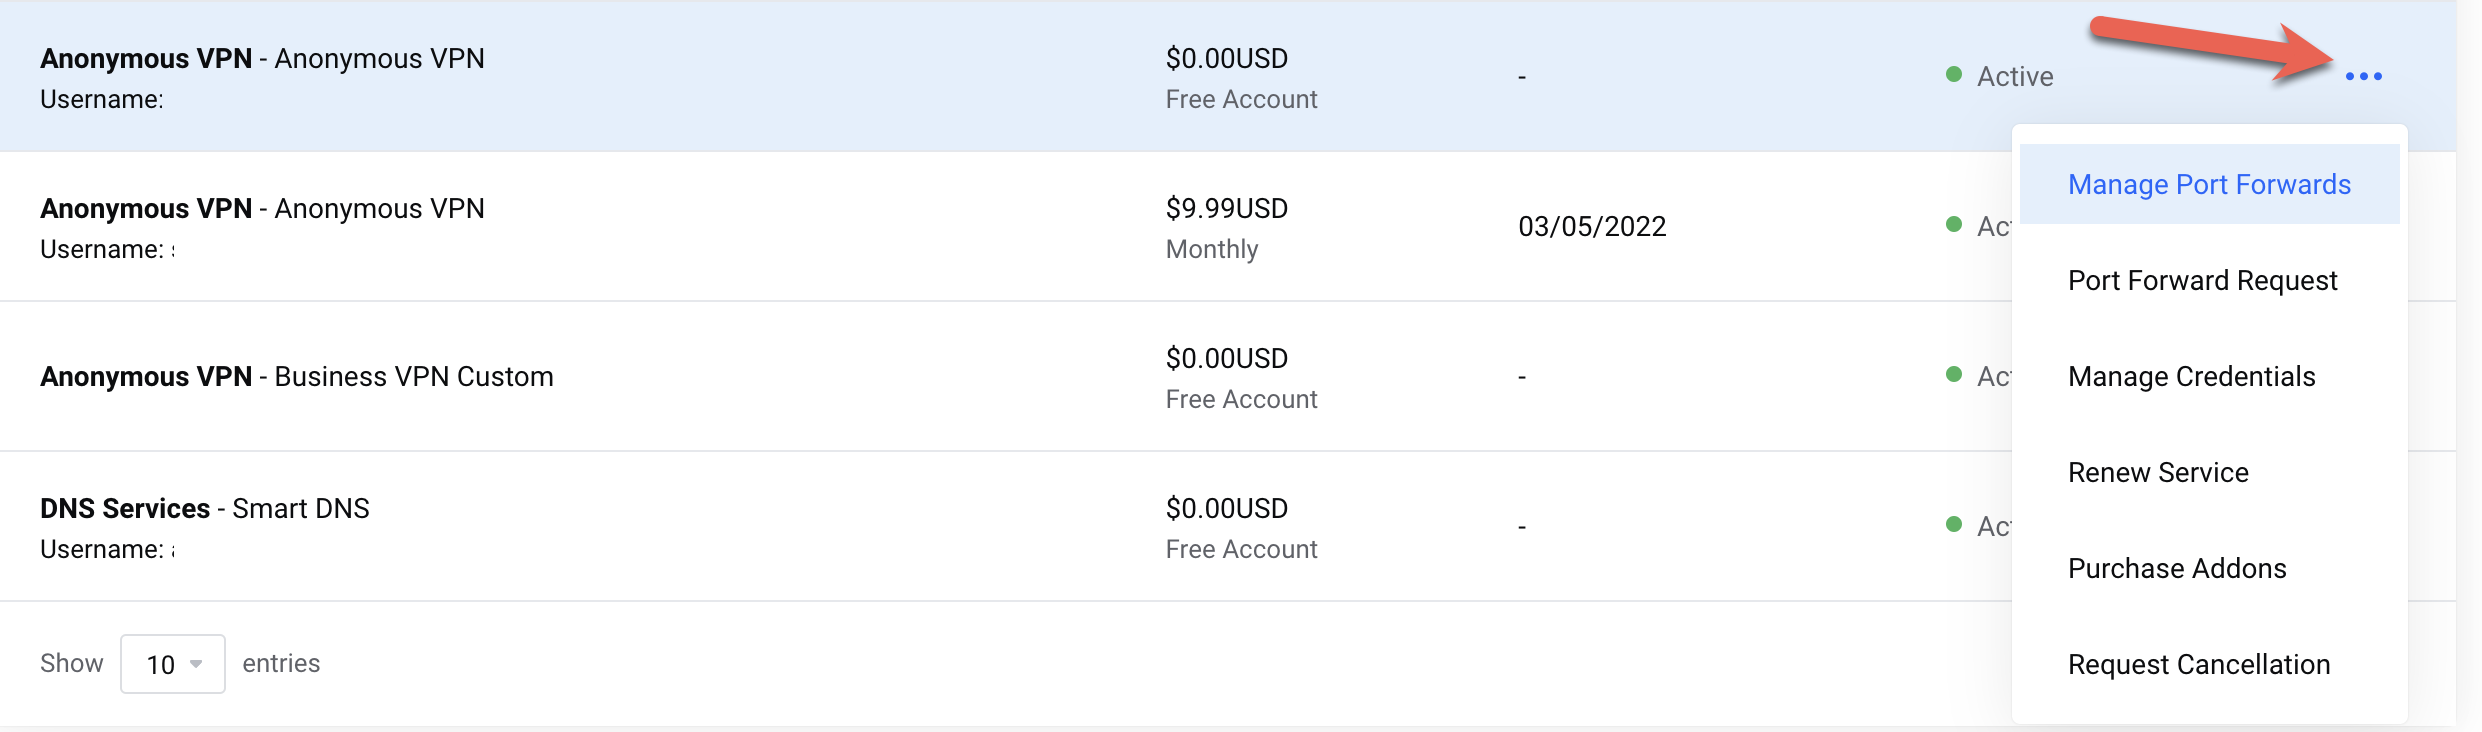
STEP 2:
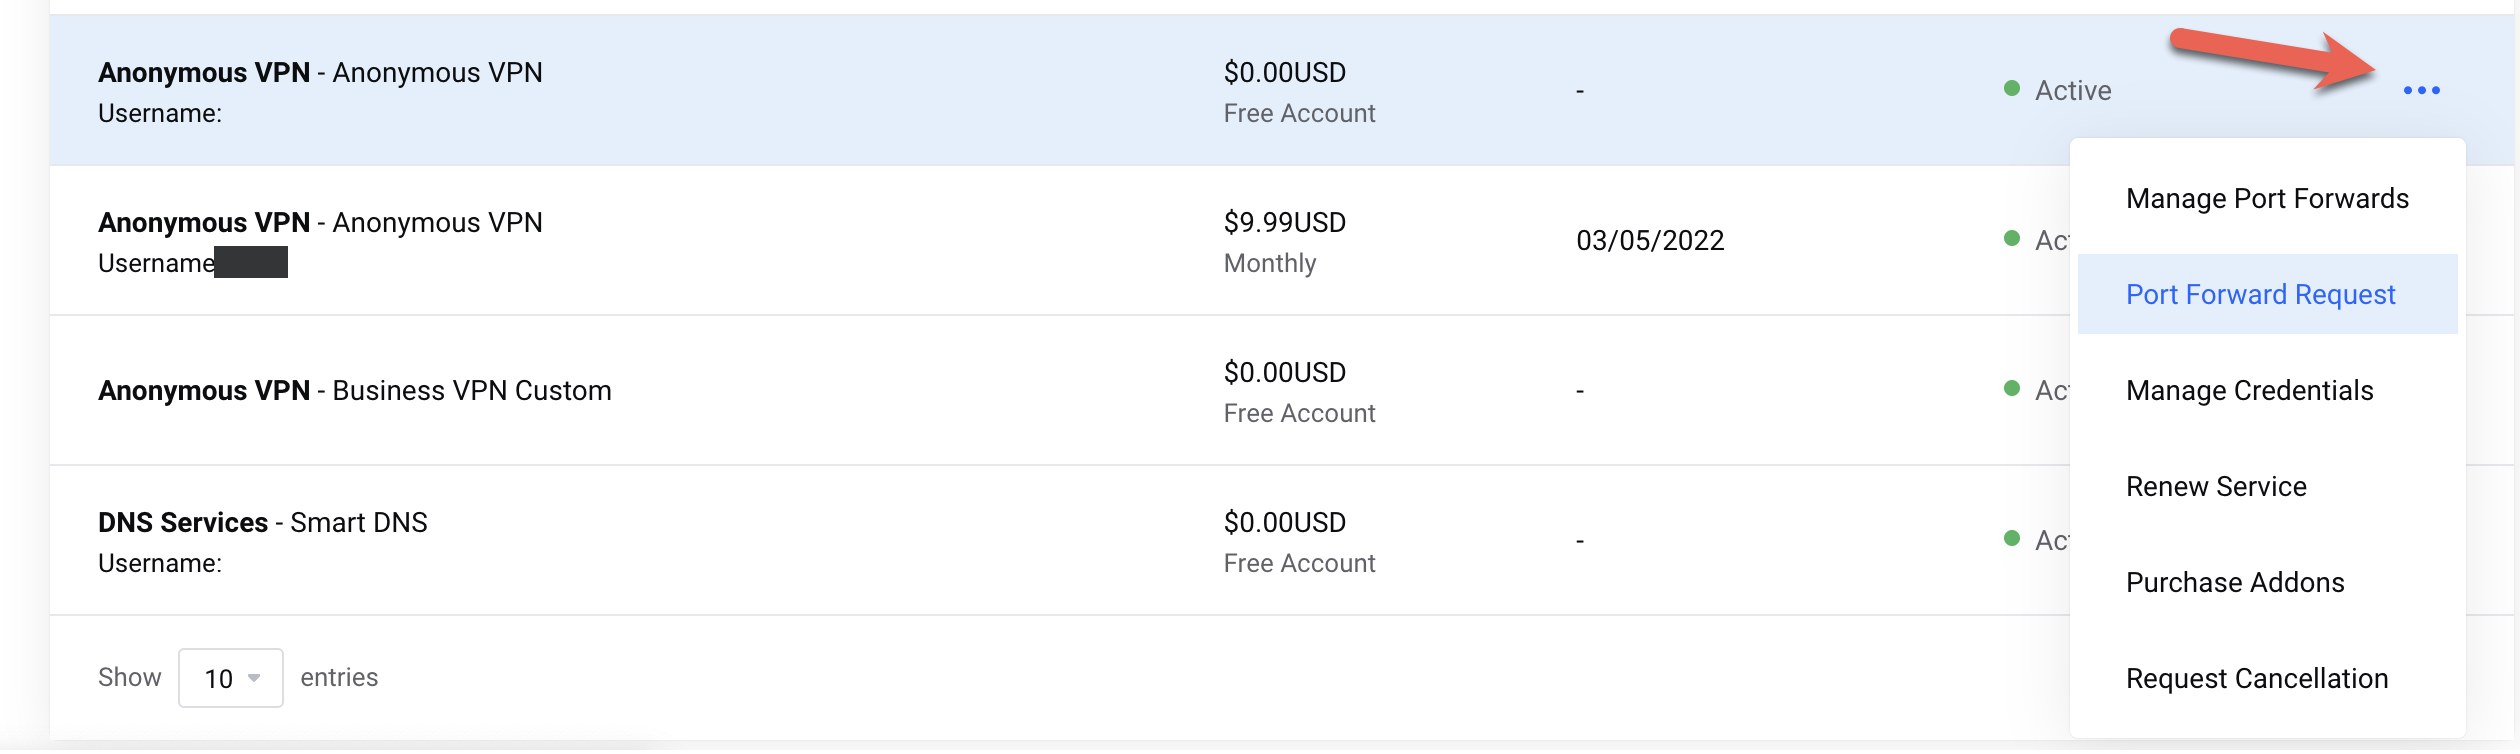
Now you have the IP. head then over to the client area and navigate to Services --> click the 3 little dots to the right of your service to open the menu ... --> then select "Port Forward Request".
STEP 3:
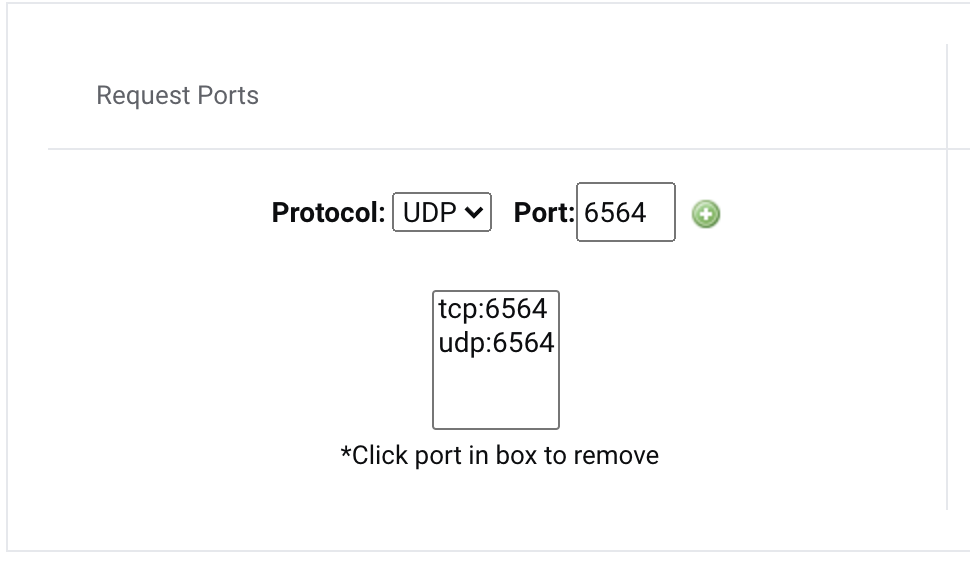
Under "Request Ports" you will add the ports you wish to open, whether those are TCP or UDP depends on the software your using but if you want to remotely access over the internet then TCP is required.
- Choose the protocol, TCP or UDP
- Enter the port number you require
- Click the plus sign to add this port
- Repeat for more ports
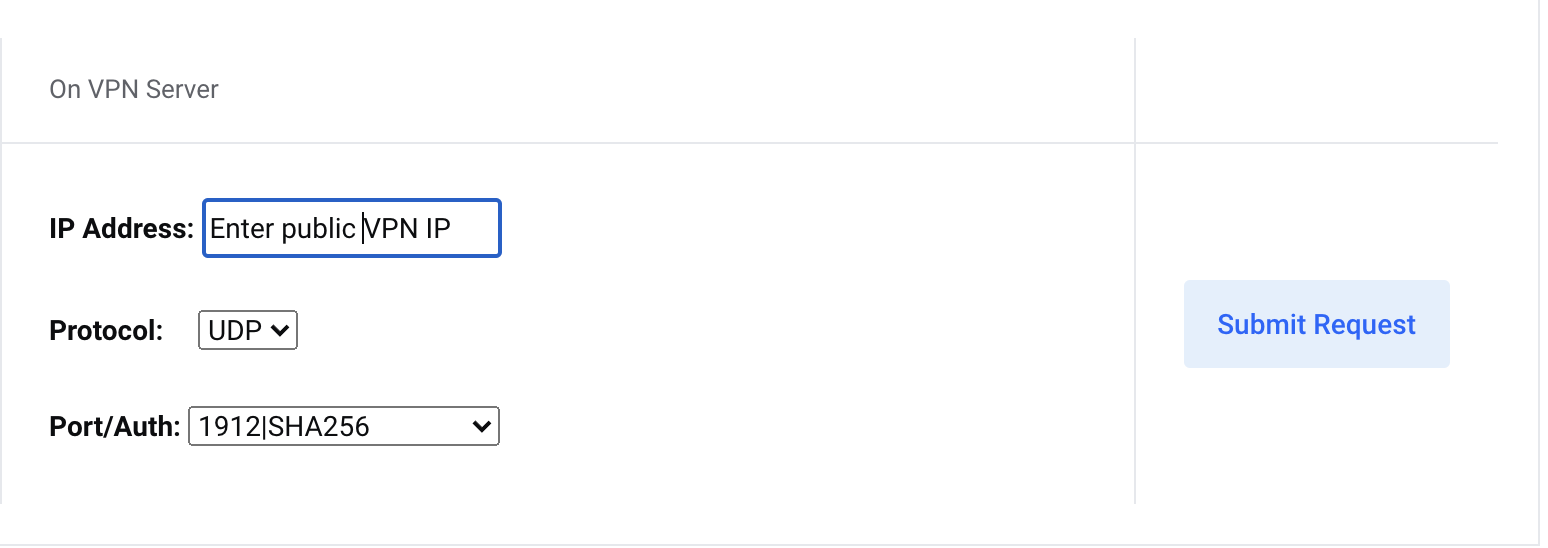
Now under "On VPN Server" Enter the public VPN IP you had taken from the TorGuard software - select a protocol and then select the VPN port or Tunneltype, by choosing openconnect or wireguard you will use that tunneltype for your port forward - now click "Submit Request".
Note that on occasion the request may need to be approved and may take a wee bit longer than normal to process. Once the request is approved you will receive a "Port Forward Activation Email" with instructions on how to use your IP.
STEP 4:
Once you have received your dedicated IP or your port forward IP requsts are processed - you can manage those ports on those servers within the client area under Services --> click the 3 little dots to the right of your service to open the menu ... --> then select "Manage Port Forwards".
Here you can add/remove ports on your port forward IP or your dedicated IP.
STEP 5:
Loading those IPs into the TorGuard desktop software is now extremely easy - if this is your first time logging into the torguard desktop software (version 4.8.8 +) all you have to do is login, this will pull all port forward IPs and Dedicated IPs assigned to your account straight to the top of your server selection list and even better they will be locked using the correct settings to prevent user error.
If you are already logged into the app, simply logout and re-login to fetch the new port forward or Dedicated IP.
.
You still however are required to add them manually to the iOS and Android apps for the time being.
STEP 6:
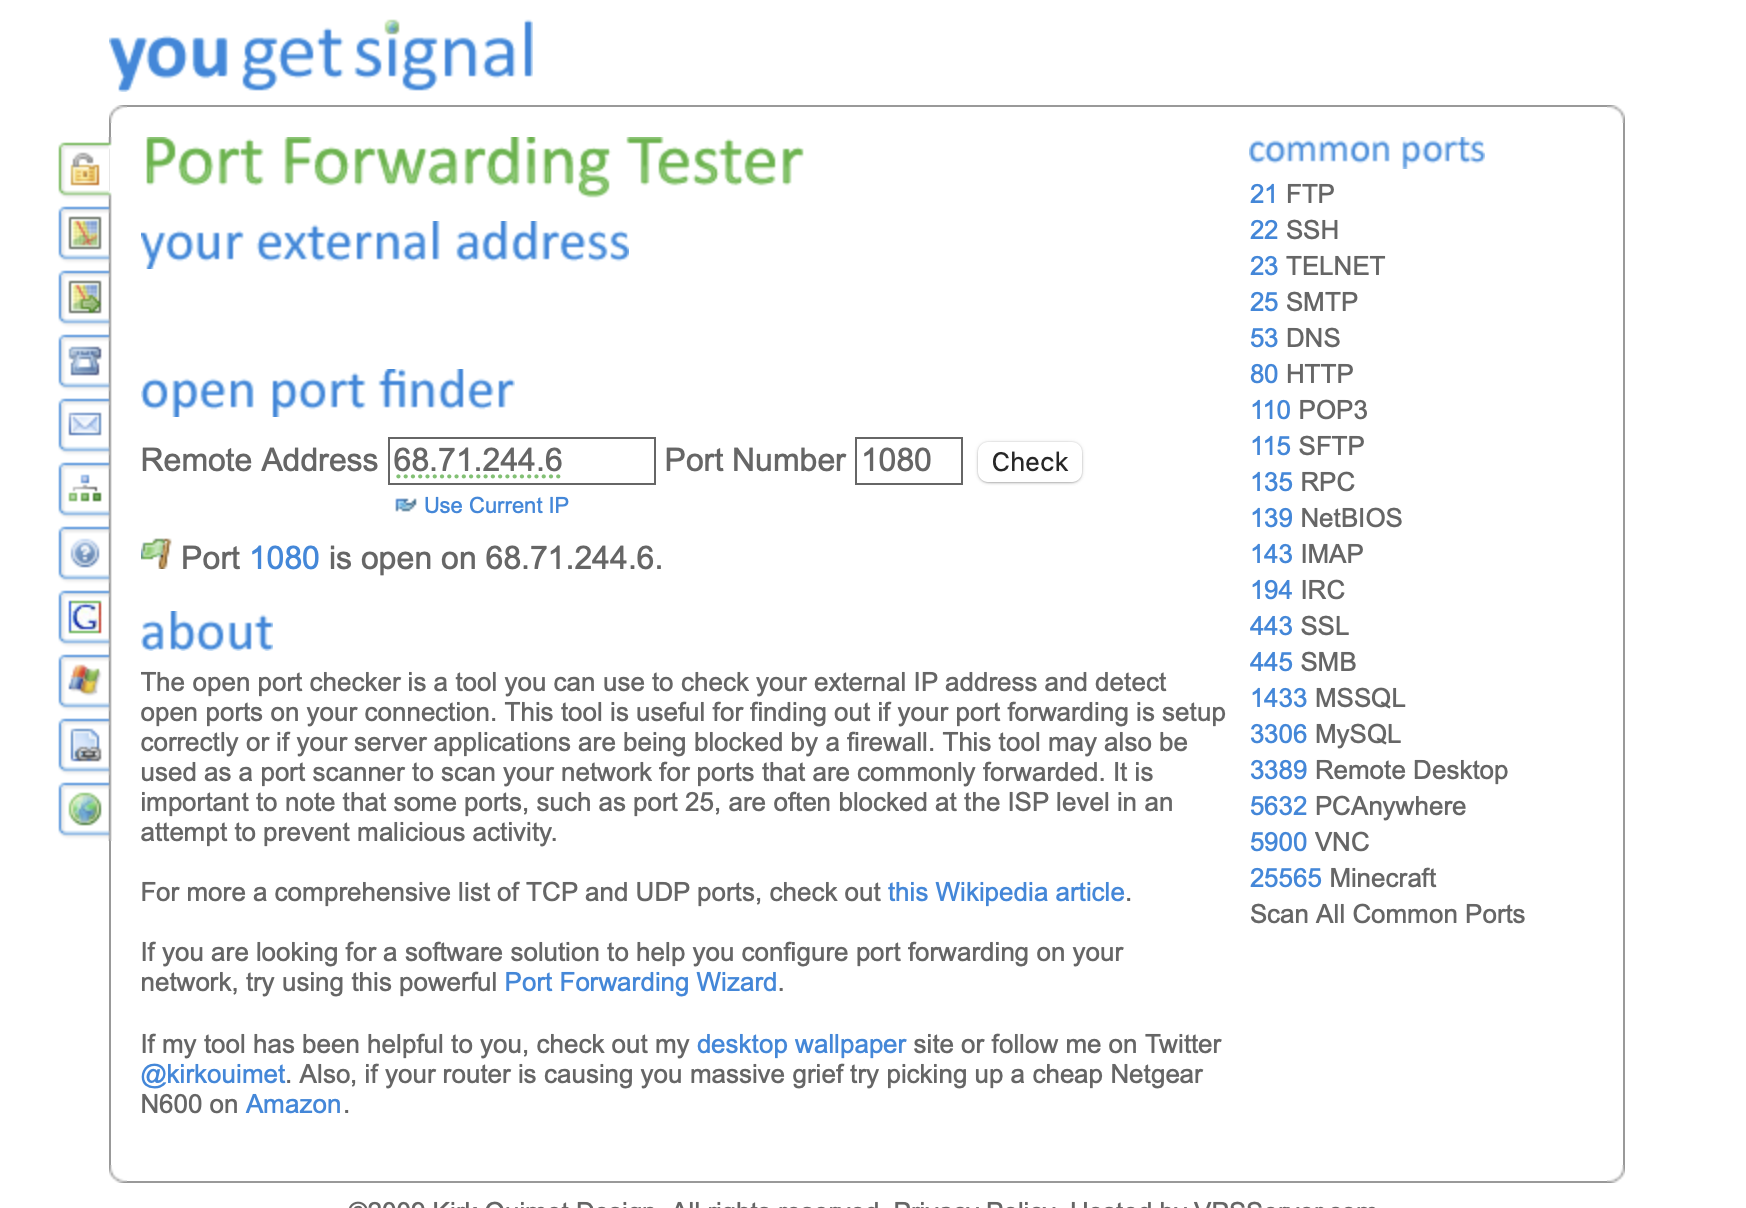
To test your ports, connect to your dedicated or port forward IP and then use a service such as yougetsignal.com to test the port is showing open - be sure that the application/service you look to have open to the internet is in running before doing the test.
The port should report open as in the image below:
MY PORT IS STILL SHOWING CLOSED:
- The port will not show open if the app or service intended for this port is not running while testing the port
- You may need to open the port in your firewall.
- You are connecting to the wrong settings for your IP - be sure to follow the activation email settings exactly or are using the latest TorGuard Desktop software 4.8.8 +
- Make sure the correct tunneltype, port and protocol is used when connecting to your IP.