STEP 1:
Download the TorGuard Installer located here
STEP 2:
Once you click to download the package a window will pop up and ask you to open with the "GDebi Package Installer" - click OK, on the next window choose to install.
STEP 3:
Locate the "TorGuard VPN Client" link under your start menu and double click to start the software.
STEP 4:
You will now be presented with a login window - please be sure to enter your VPN credentials - if you are not sure of those you can change them here, (top section).
.
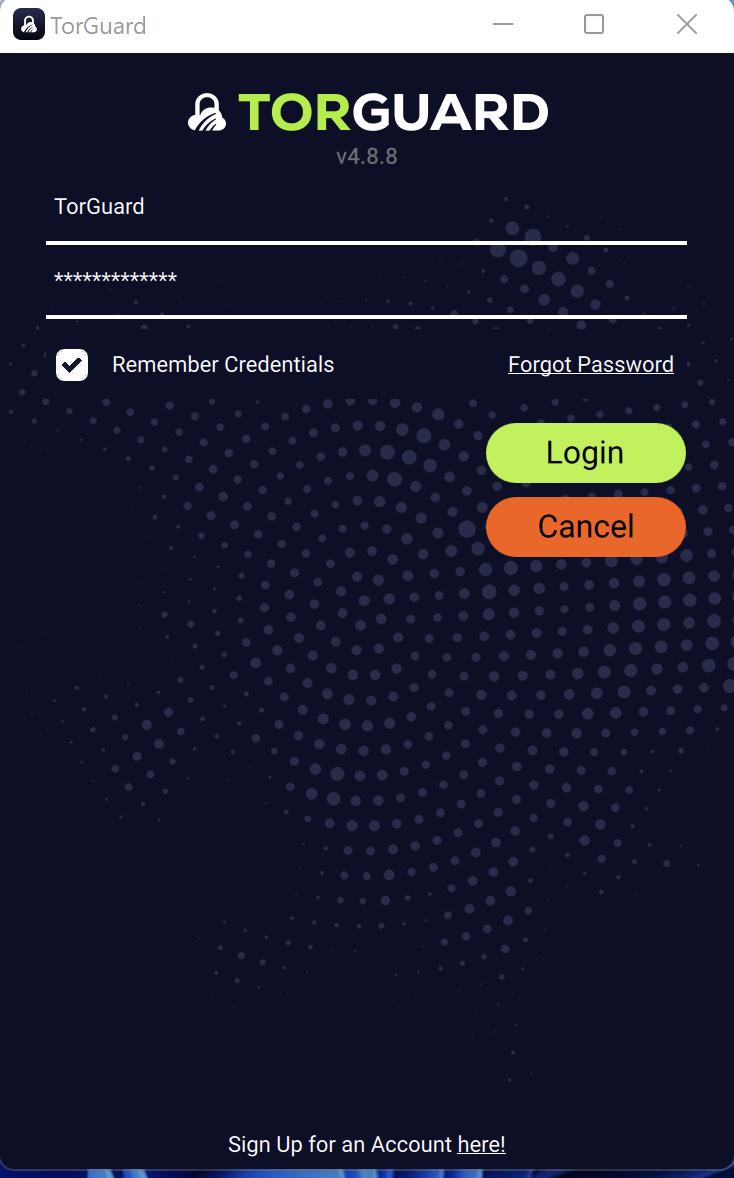
Be sure to check to remember your credentials
Now click Login.
STEP 5:
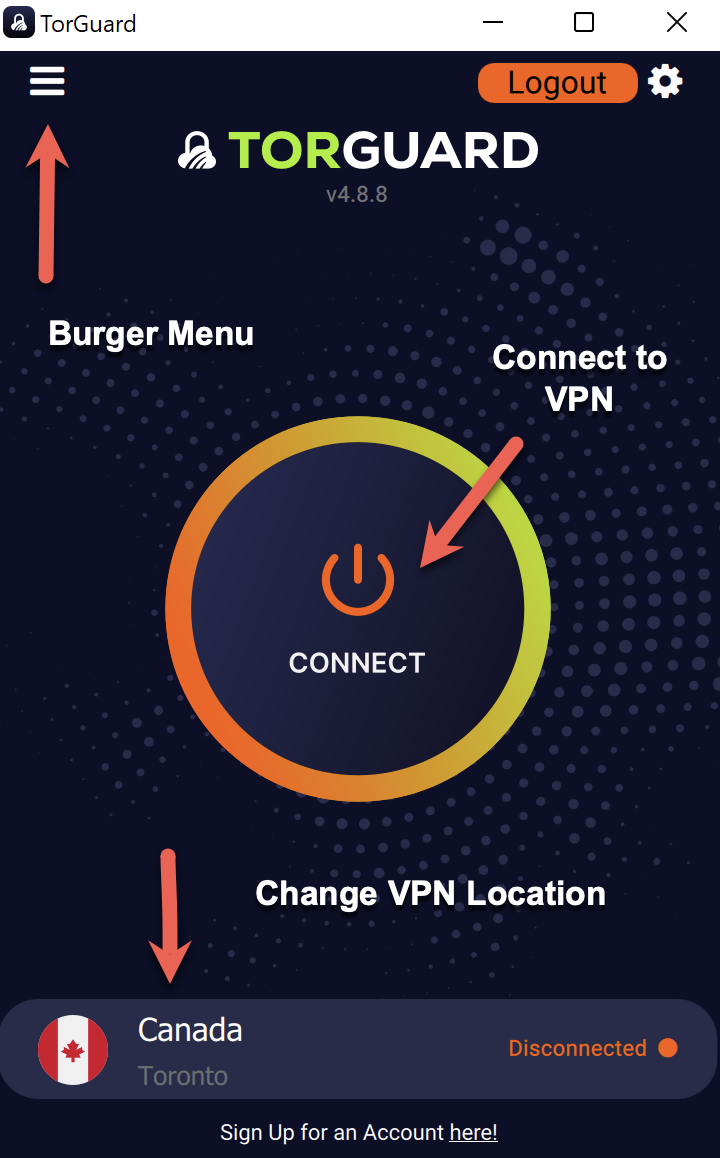
Now that you have logged into the app you can click connect to connect to the VPN.
- If you need to change your location click the country name on the bottom half of the application window and choose a new location.
- If you wish to change the tunnel settings, click the burger menu (top left) and change your tunnel type or protocol settings.
STEP 6:
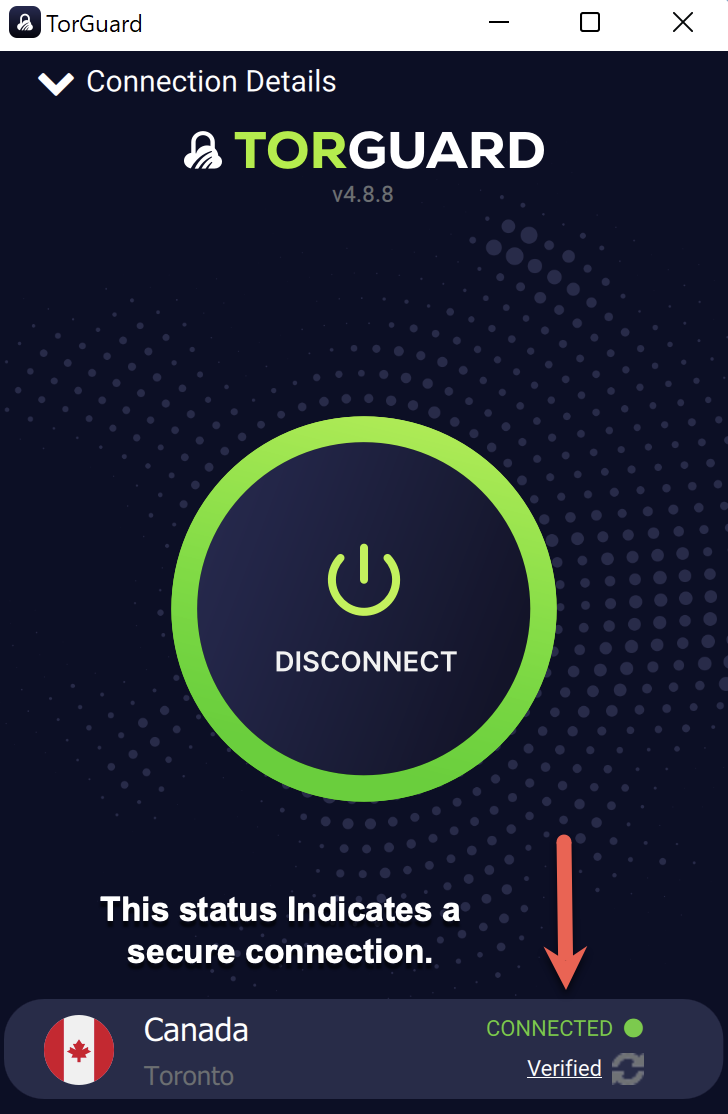
Once connected, the connection status will read “CONNECTED” and underneath “Verified”. This means you are securely connected to the VPN. Your traffic is now protected.
ALTERNATIVE INSTALLATION VIA TERMINAL:
STEP 1:
Open a terminal window and download the package to your device:
sudo wget https://torguard.net/downloads/new/torguard-latest-amd64.deb
STEP 2: Install the package:
sudo dpkg -i torguard-latest-amd64.deb
STEP 3: Run the TorGuard software:
sudo torguard
COMMON ISSUES:
Wireguard not installed - occasionally wireguard may need installed from the command line, open the terminal window and run the following command, install the packages and then retry the connection:
sudo apt-get install wireguard wireguard-tools