1. Press the Windows key + I to open Settings on your PC.
2. Select the Network & Internet option on the left pane.
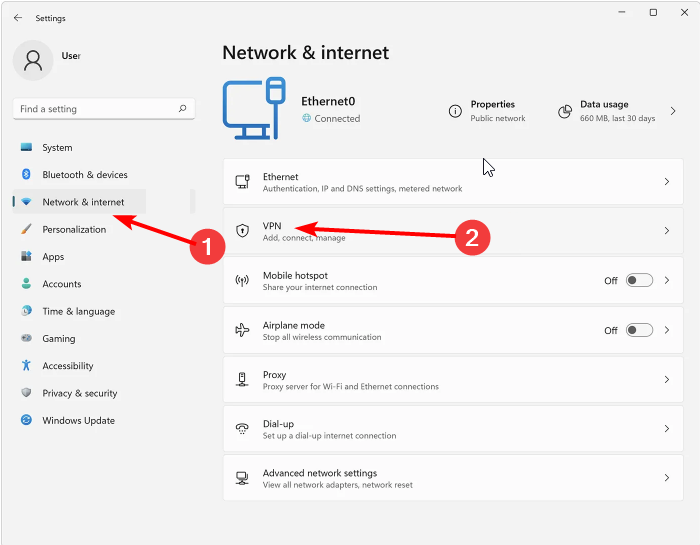
3. Select the VPN option.
4. Click the Add VPN button.

5. Choose Windows (built-in) as the VPN provider.
6. Enter a Connection name, this can be for example TorGuard VPN UK
7. Enter the Server name or address - this would be one of the hostnames found here
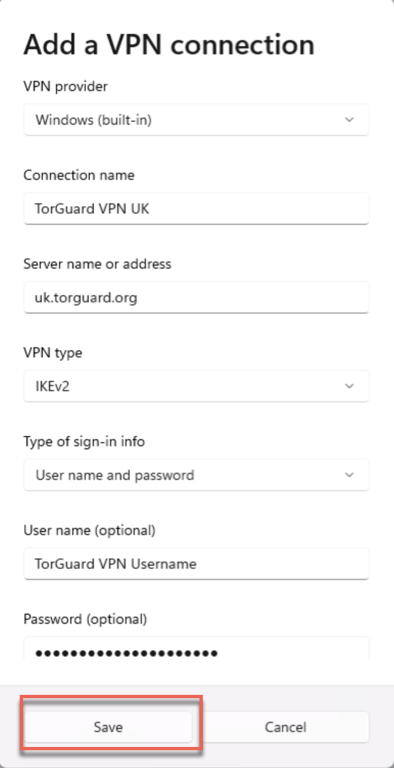
8. Set the VPN Type to IKEv2.
9. Now enter your TorGuard VPN Username and Password.
10. Lastly, check the Remember my sign-in info checkbox and click the save button to finish the setup.
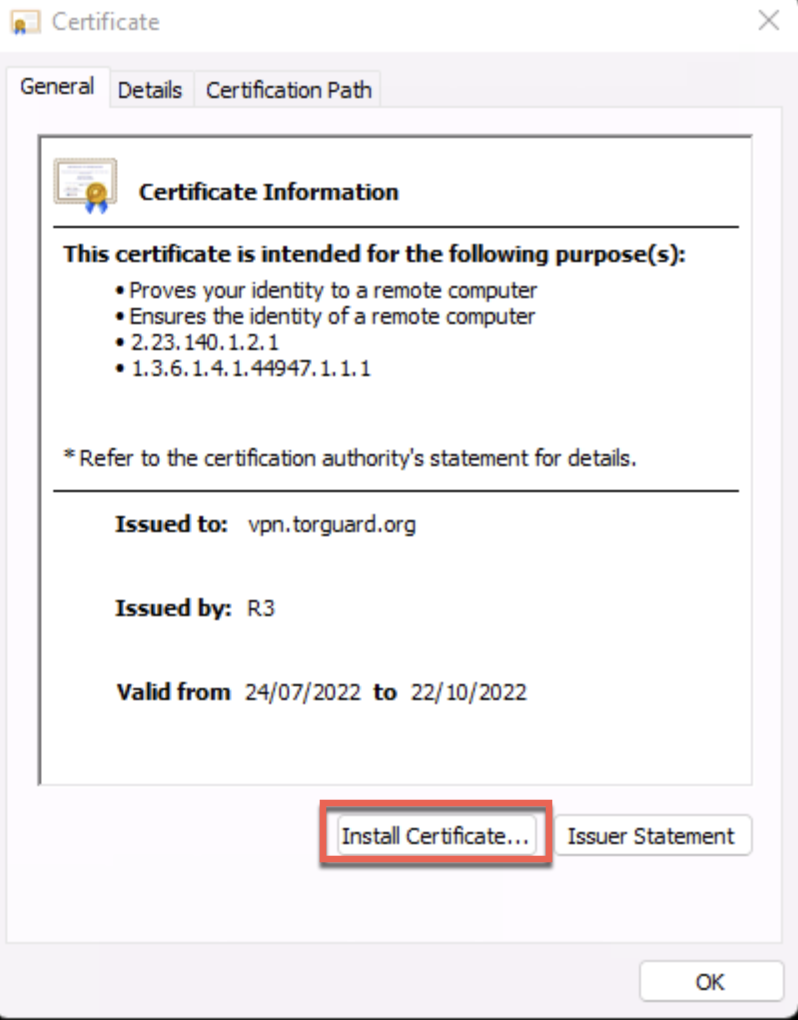
11. Download the IKEv2 certificate from our certificates page inside your client area located here - you want to scroll down and download the Lets Encrypt IKEv2 Certificate Chain - Windows certificate to your desktop.
12. Now double click the certificate file - you will see the following window, click Install Certificate
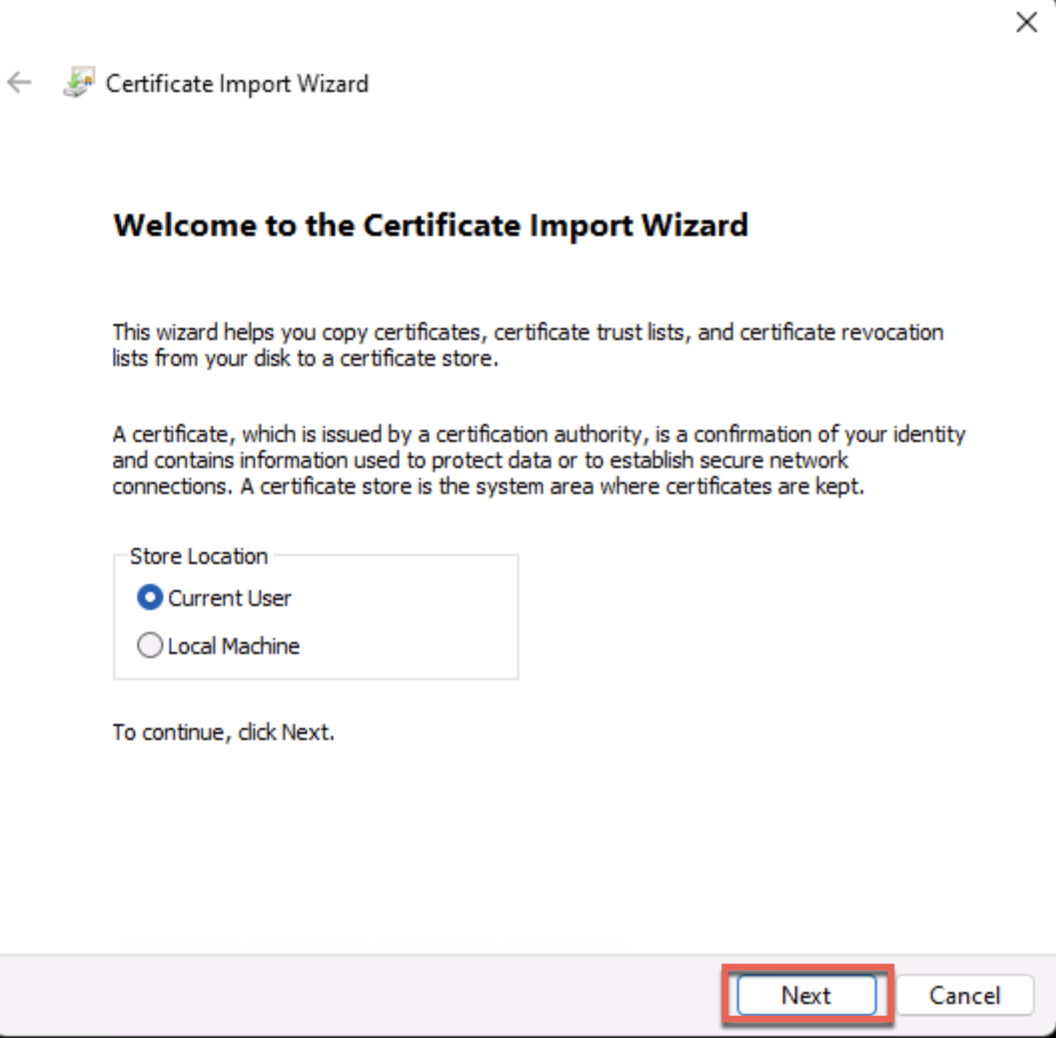
13. On the following window click Next
14. Click Next again

15. And once again, click Next to complete the certificate installation - you should see a little pop-up window confirming that it was successful.

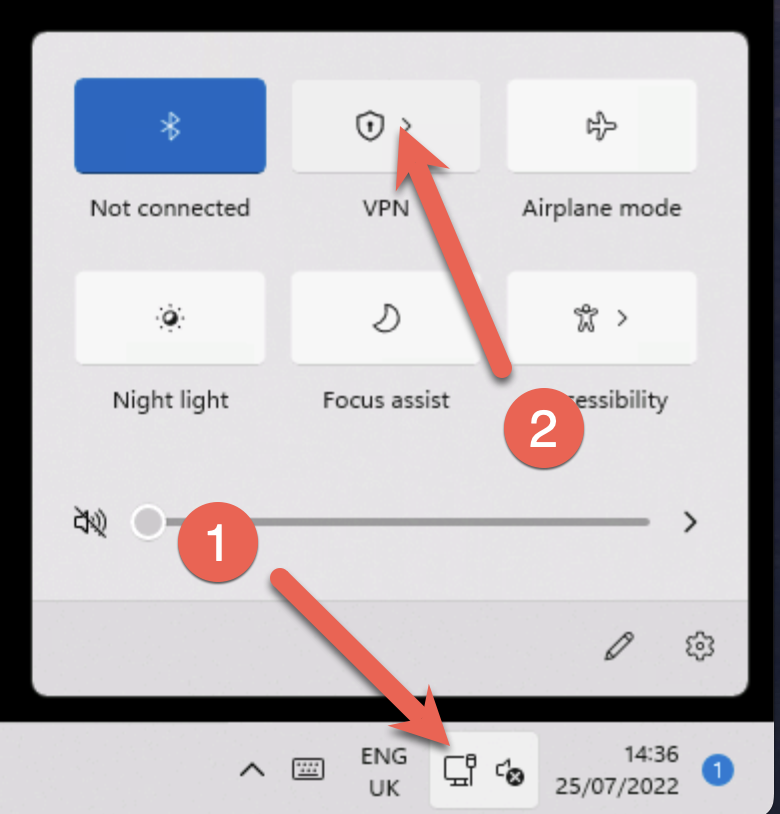
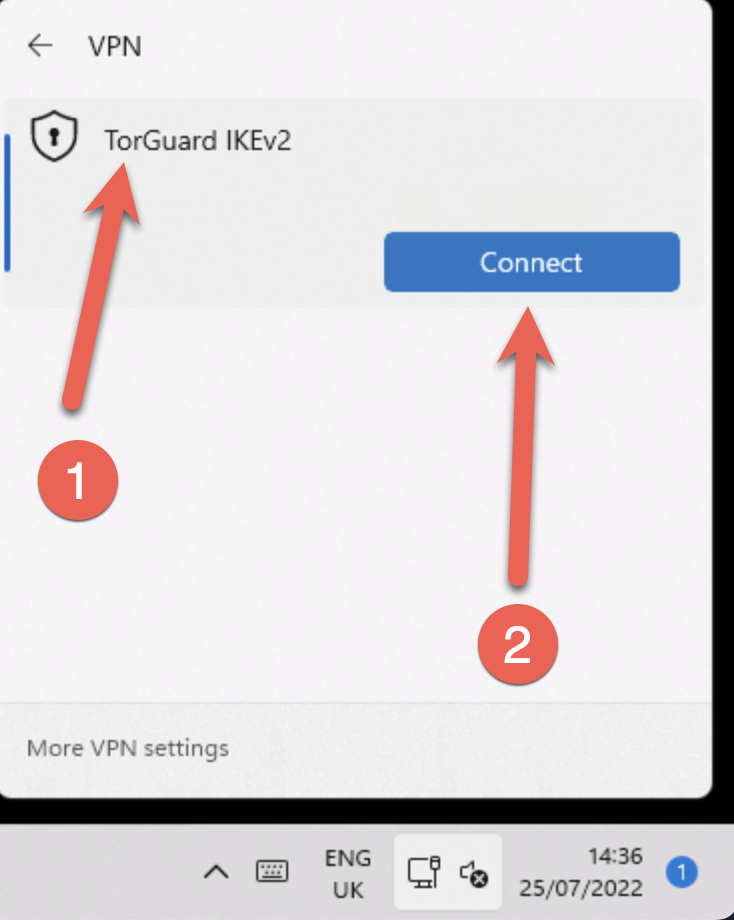
16. Now connect to your new IKEv2 VPN profile as per the screenshots below.
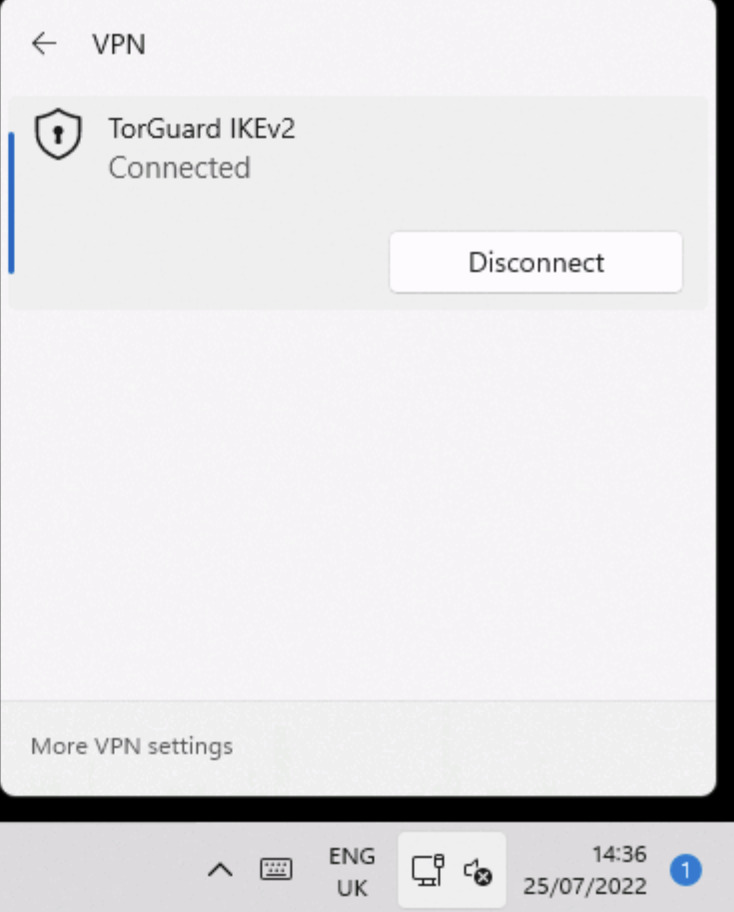
Your VPN should now be connected - if you still have problems, please don't hesitate to contact our support desk.