This tutorial will show you how to setup an SSTP VPN tunnel on Windows 11. This works very well with Windows built-in VPN support to bypass strict firewalls and is considered one of TorGuard's Stealth protocols.
What is SSTP (Stealth VPN)?
SSTP (Secure Socket Tunneling Protocol) is a Microsoft-developed VPN protocol that provides excellent firewall bypassing capabilities. Native to Windows, it offers:
Native Windows Support
Built directly into Windows 11, no third-party software needed
Firewall Evasion
Uses HTTPS port 443, appearing as regular web traffic
Strong Encryption
Military-grade AES-256 encryption with SSL/TLS
Reliable Performance
Stable connections even on restrictive networks
🚀 Why Use SSTP on Windows 11?
- No additional software installation required
- Seamless integration with Windows networking
- Excellent for corporate networks with strict firewalls
- Works in countries with heavy internet censorship
- Bypass network restrictions at hotels, airports, and schools
Prerequisites
Before you begin, ensure you have:
- Windows 11 (any edition)
- Active TorGuard VPN subscription
- TorGuard VPN username and password
- Administrator access to your computer
- Internet connection
⚠️ Port Requirements: SSTP uses port 443 by default. TorGuard's SSTP servers are configured to work on standard HTTPS port for maximum compatibility.
SSTP vs Other Windows VPN Options
| Feature | SSTP | OpenVPN | WireGuard | IKEv2 | L2TP/IPsec |
|---|---|---|---|---|---|
| Native Windows | ✅ Yes | ❌ No | ❌ No | ✅ Yes | ✅ Yes |
| Firewall Bypass | ✅ Excellent | ⚠️ Moderate | ❌ Poor | ⚠️ Moderate | ❌ Poor |
| Speed | ⚠️ Good | ⚠️ Good | ✅ Excellent | ✅ Very Good | ⚠️ Moderate |
| Security | ✅ Strong | ✅ Strong | ✅ Strong | ✅ Strong | ⚠️ Moderate |
| Setup Ease | ✅ Easy | ⚠️ Complex | ⚠️ Moderate | ✅ Easy | ✅ Easy |
Configuration Steps
Step 1: Open Windows Settings
First, access Windows settings menu by clicking Start and searching for "settings". Or use the keyboard shortcut Windows Key + I to open the Settings menu directly.

💡 Quick Access: You can also right-click the Start button and select "Settings" from the menu.
Step 2: Navigate to VPN Settings
In the search box, type "VPN" and press Enter.
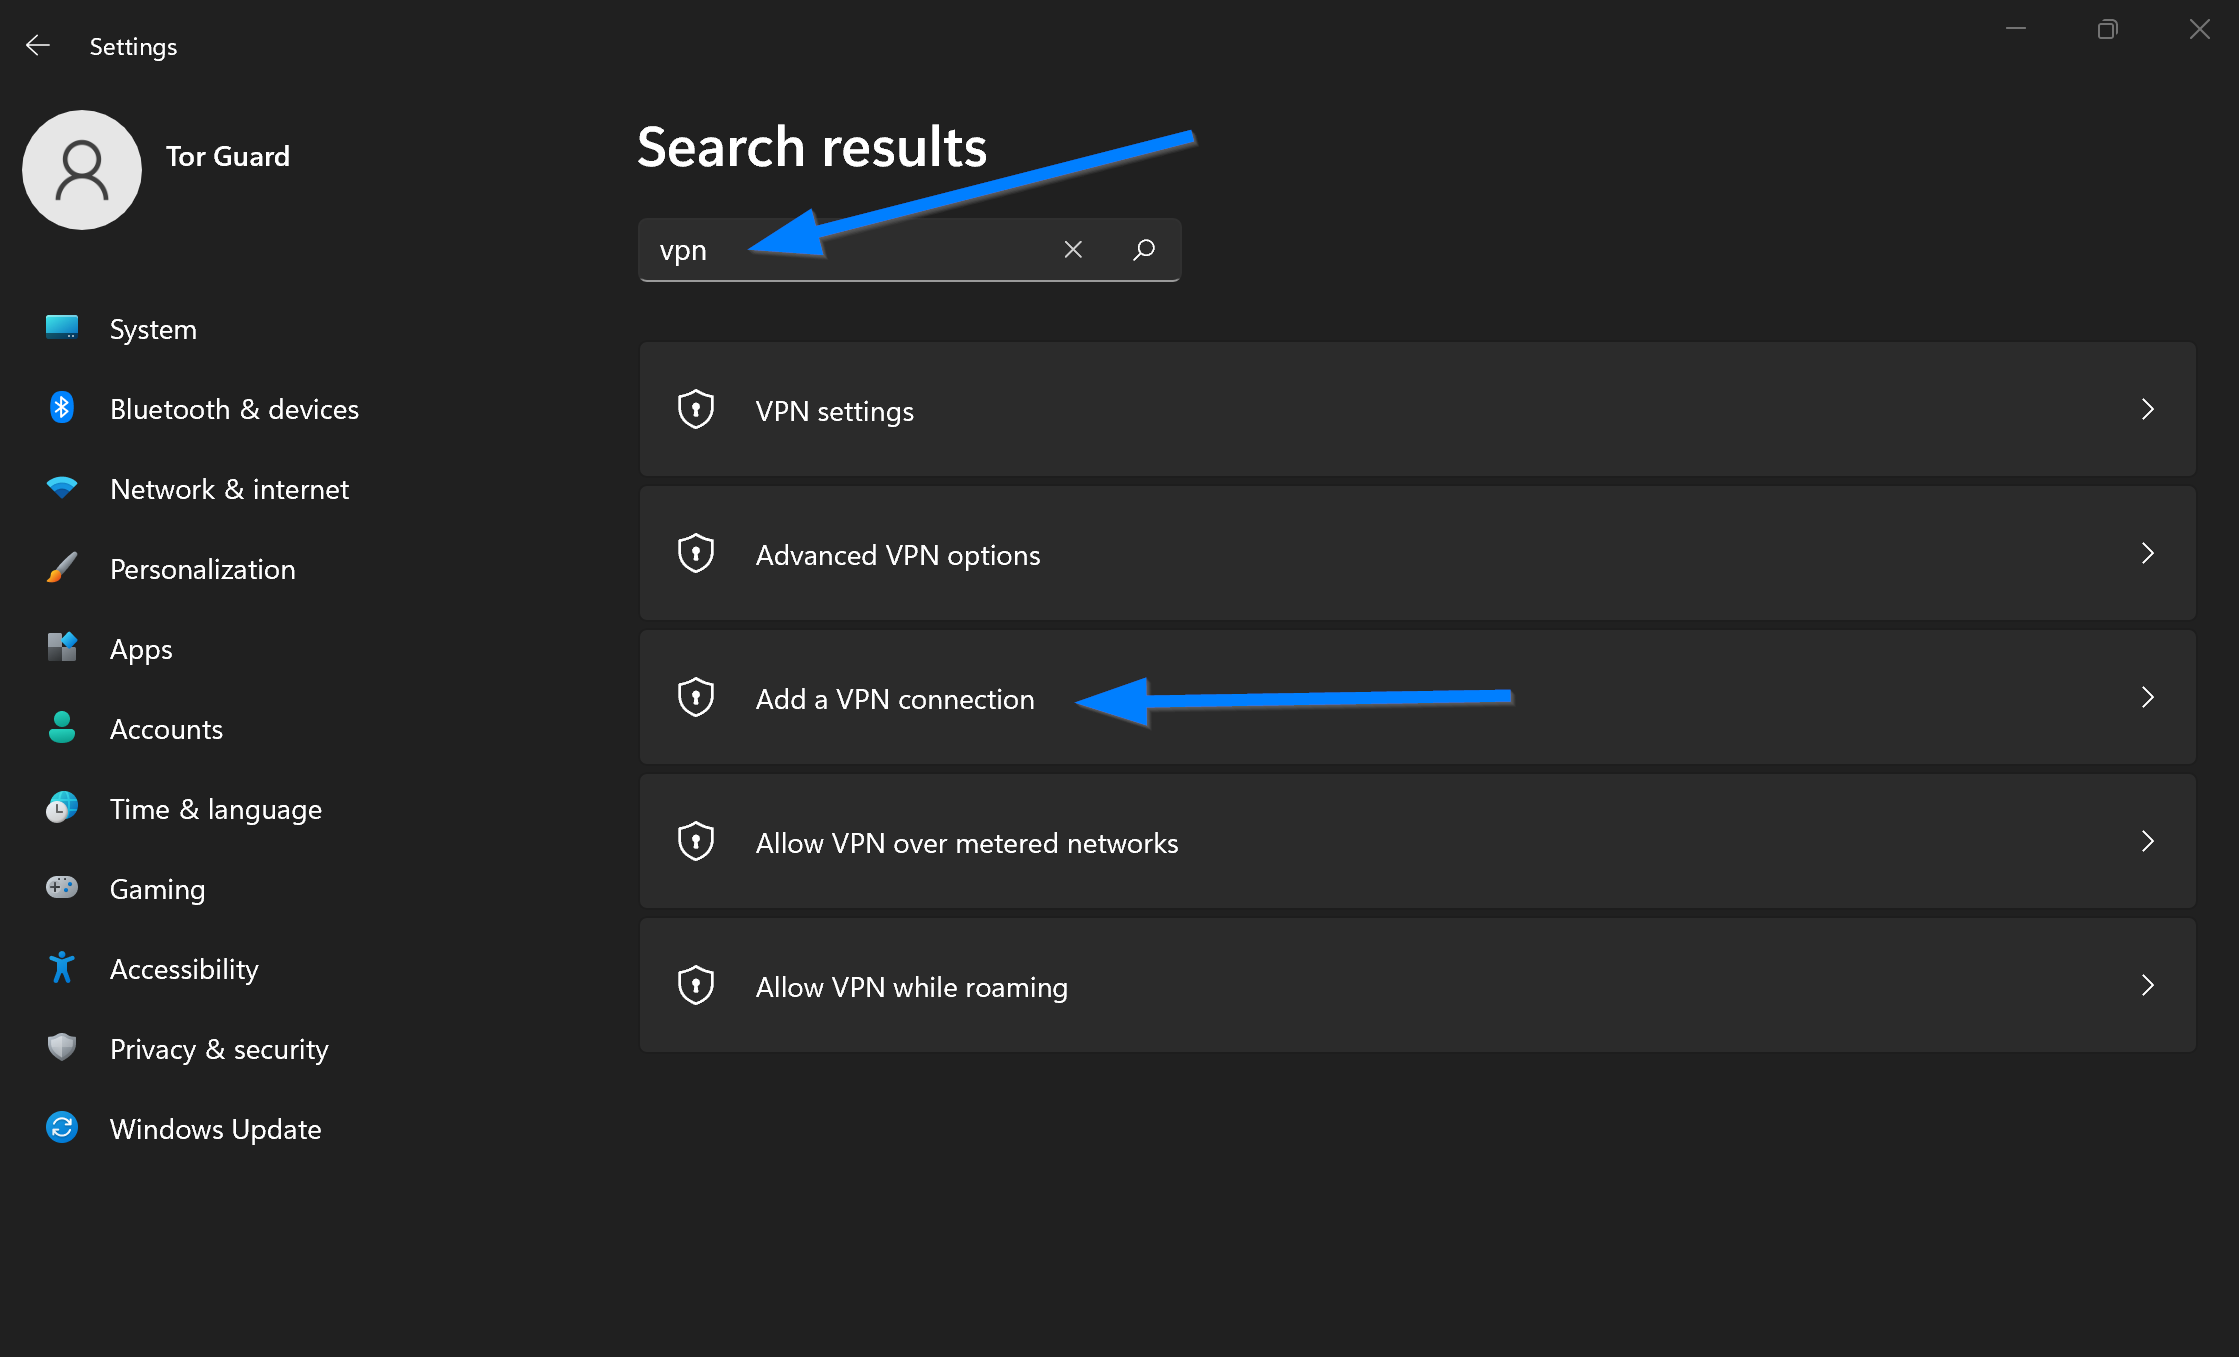
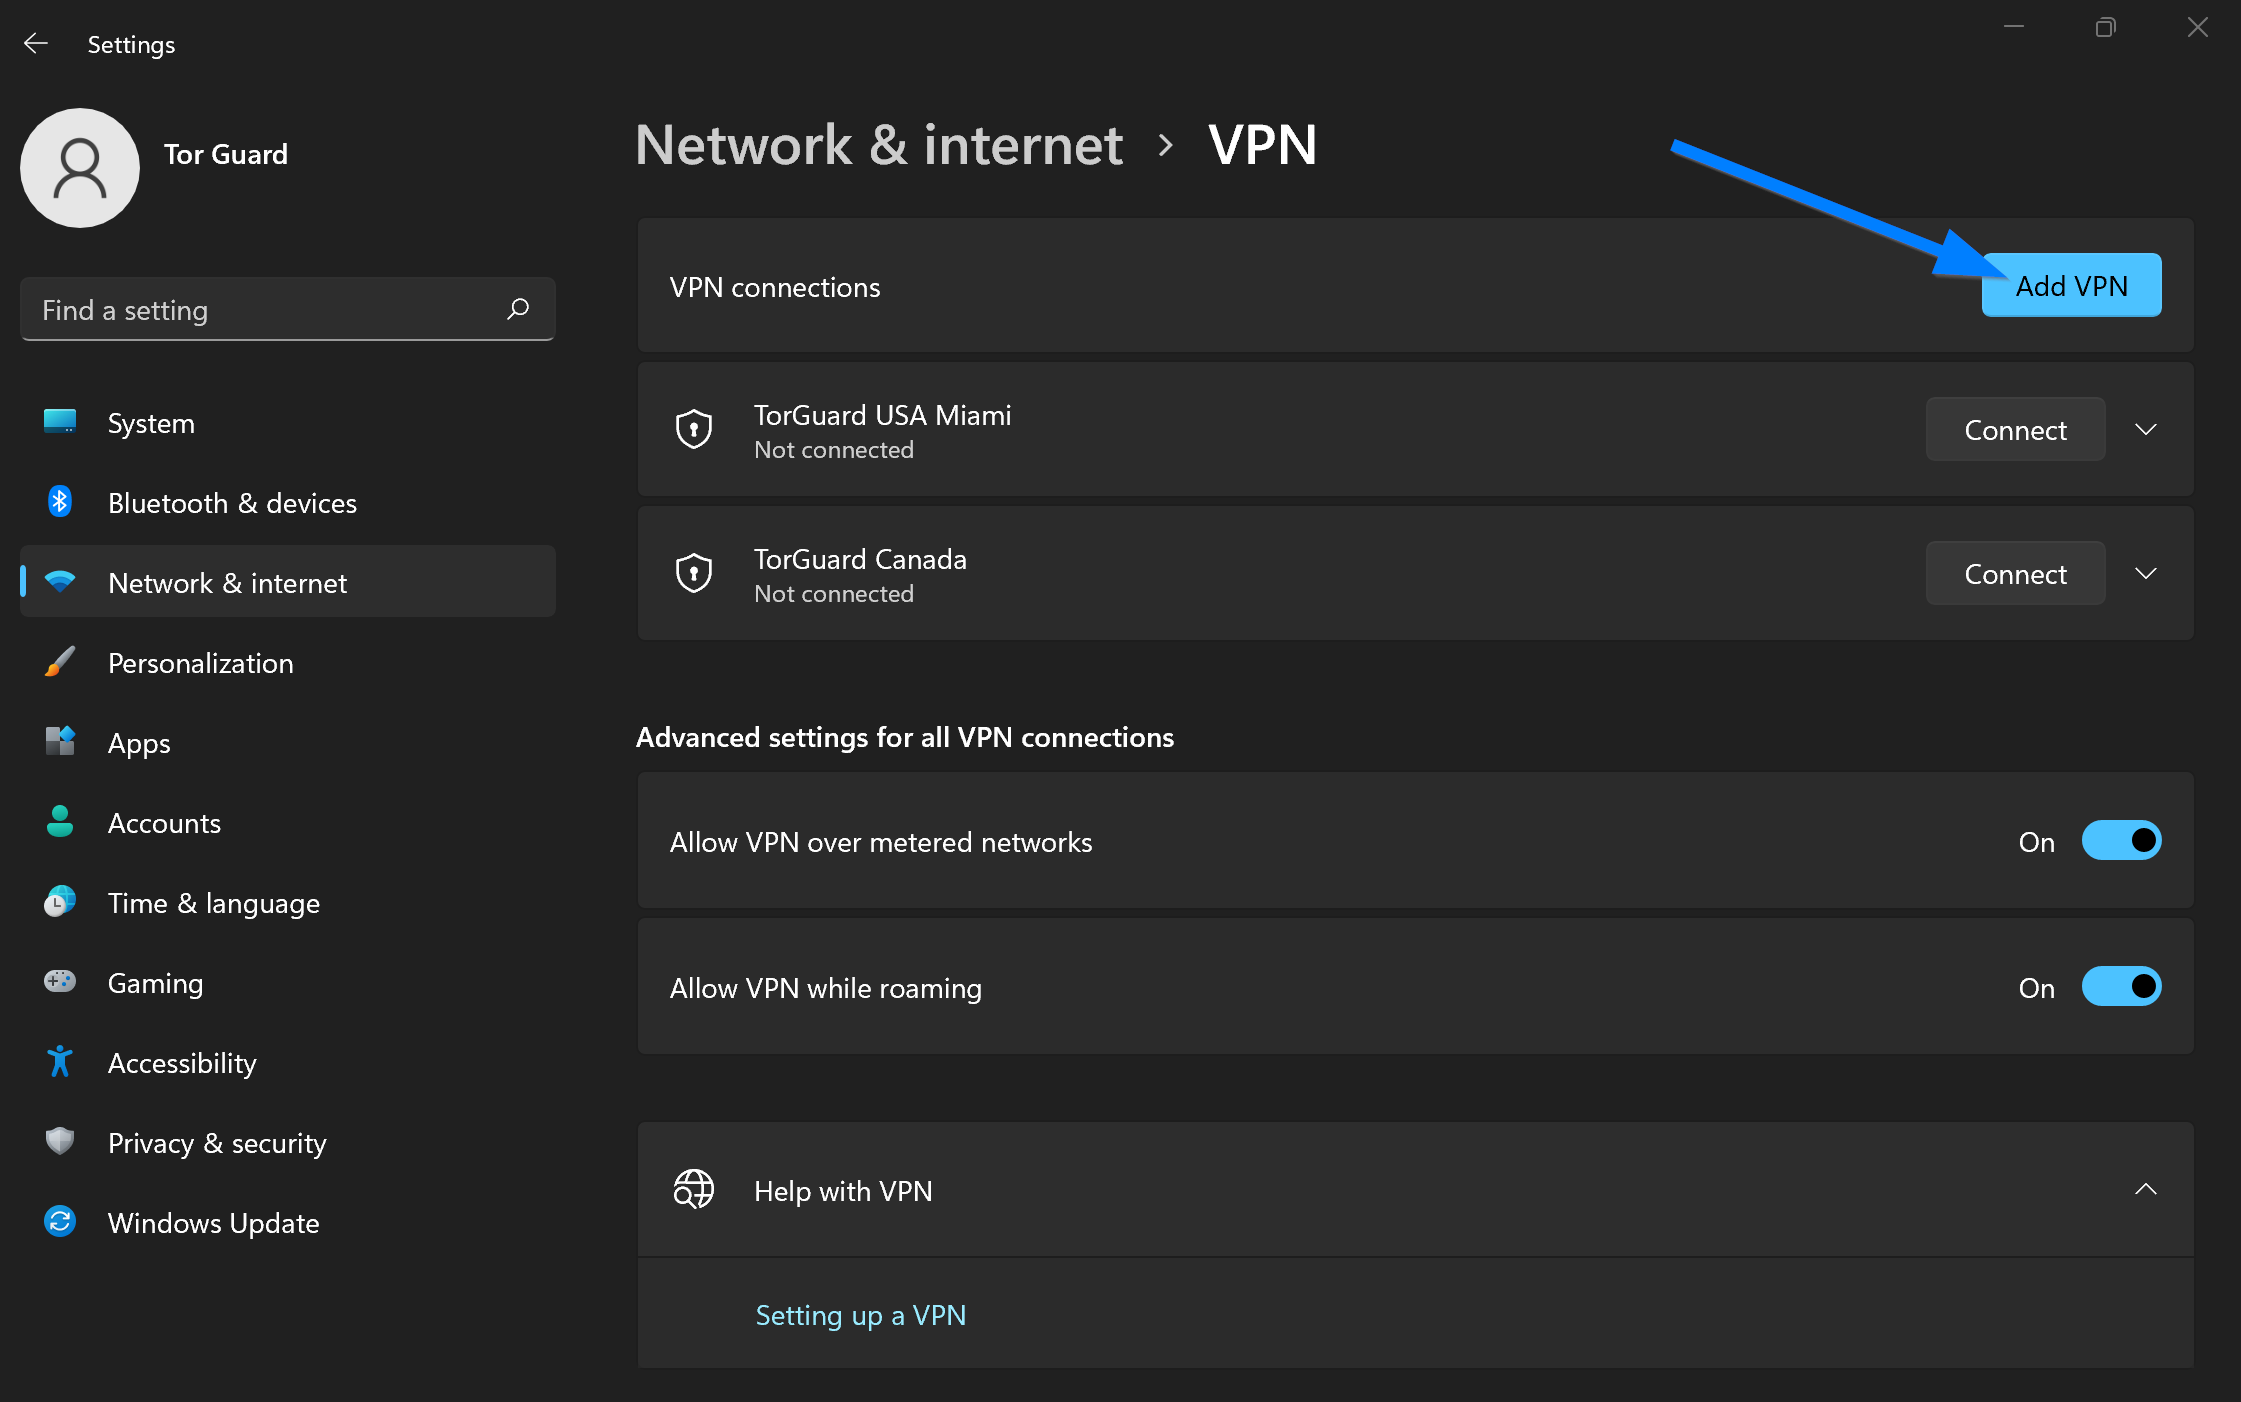
Step 3: Add VPN Connection
Under the VPN connections section, click the "Add VPN" button.
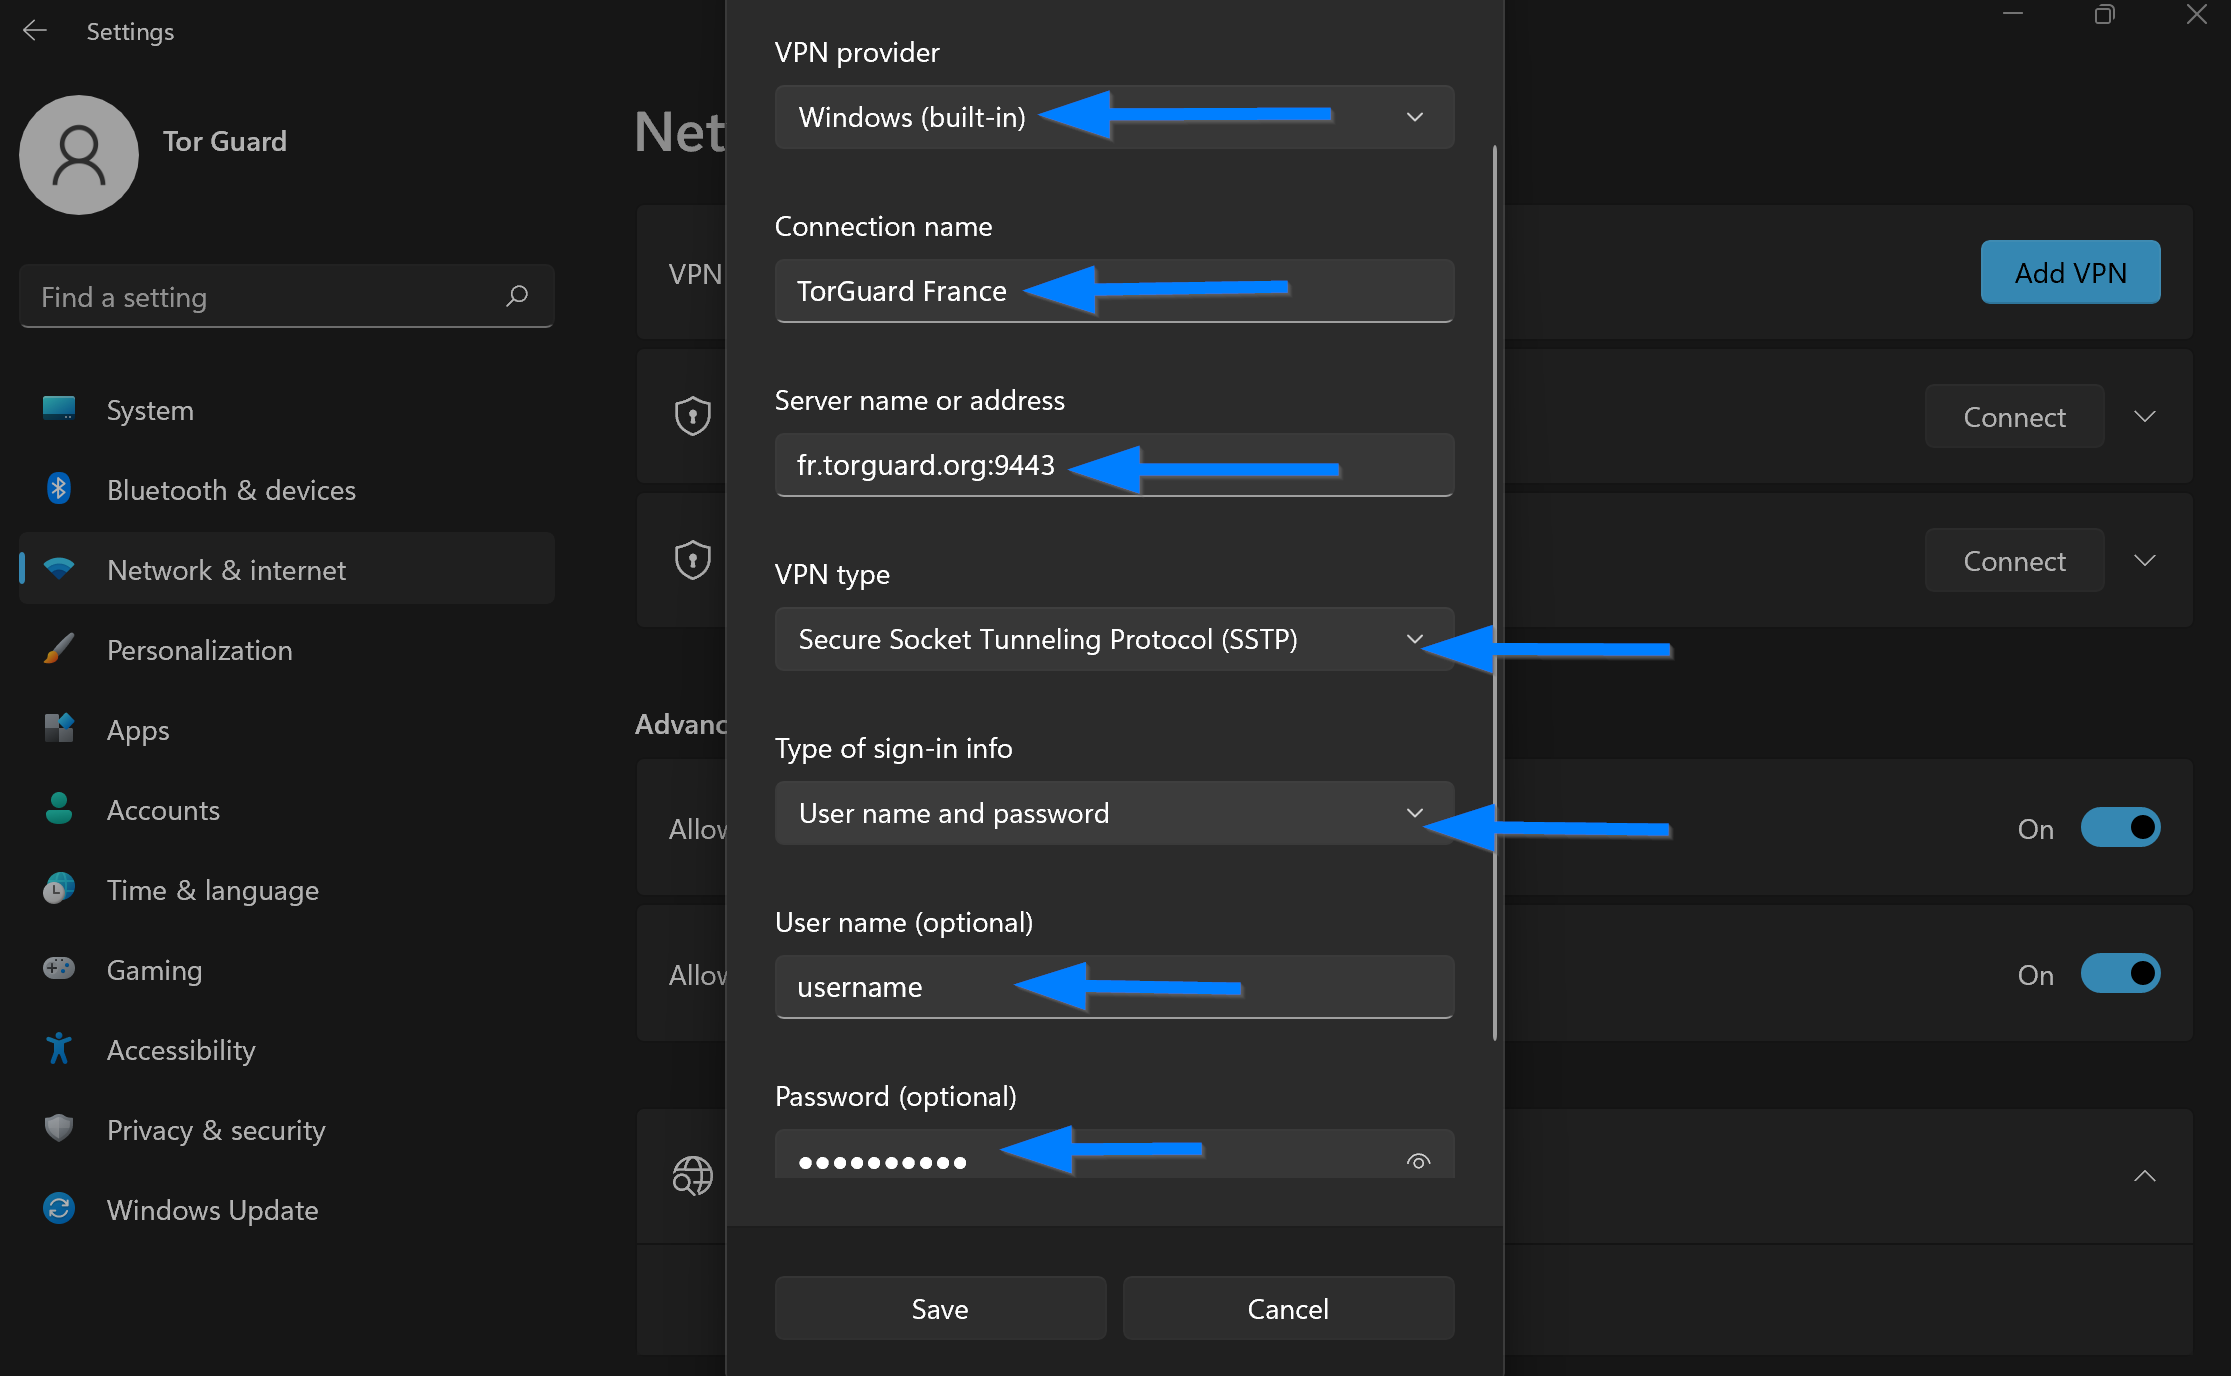
Step 4: Configure SSTP Connection
Fill in the VPN connection details:
- VPN provider: Windows (built-in)
- Connection name: TorGuard VPN server location (e.g., "TorGuard USA - New York")
- Server name or address: Copy from TorGuard VPN server network page
- VPN type: Secure Socket Tunneling Protocol (SSTP)
- Type of sign-in info: User name and password
- User name: Your TorGuard VPN username
- Password: Your TorGuard VPN password
📍 Server Selection Tips:
- Choose servers closest to your location for best speed
- Use dedicated IP servers for consistent connections
- Try different servers if one is blocked
- Save multiple server profiles for quick switching
Step 5: Connect to VPN
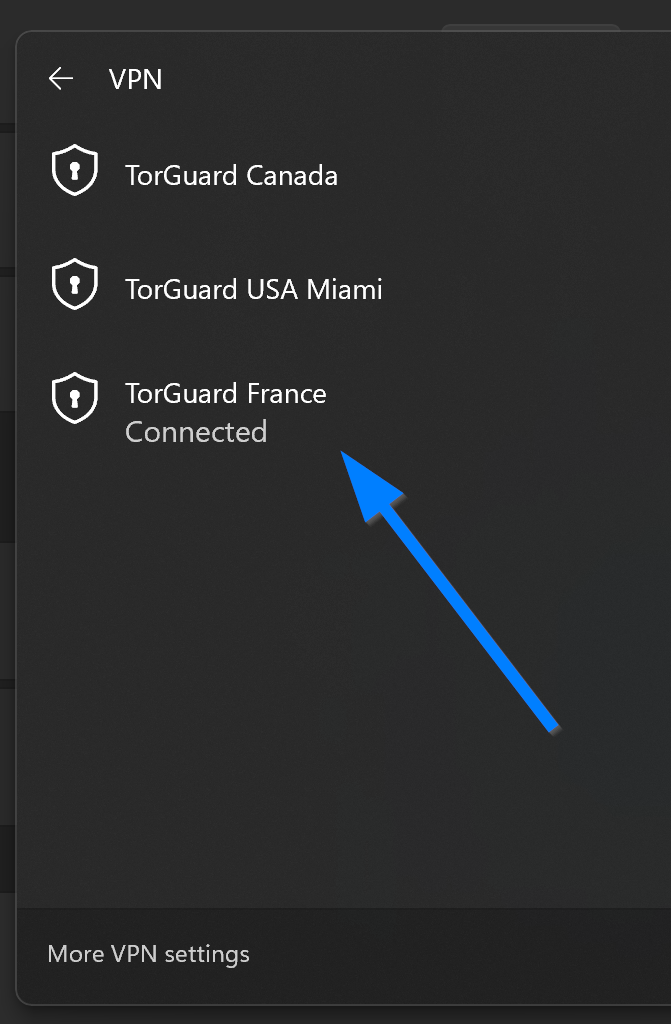
Click the Connect button next to the newly added VPN server profile.
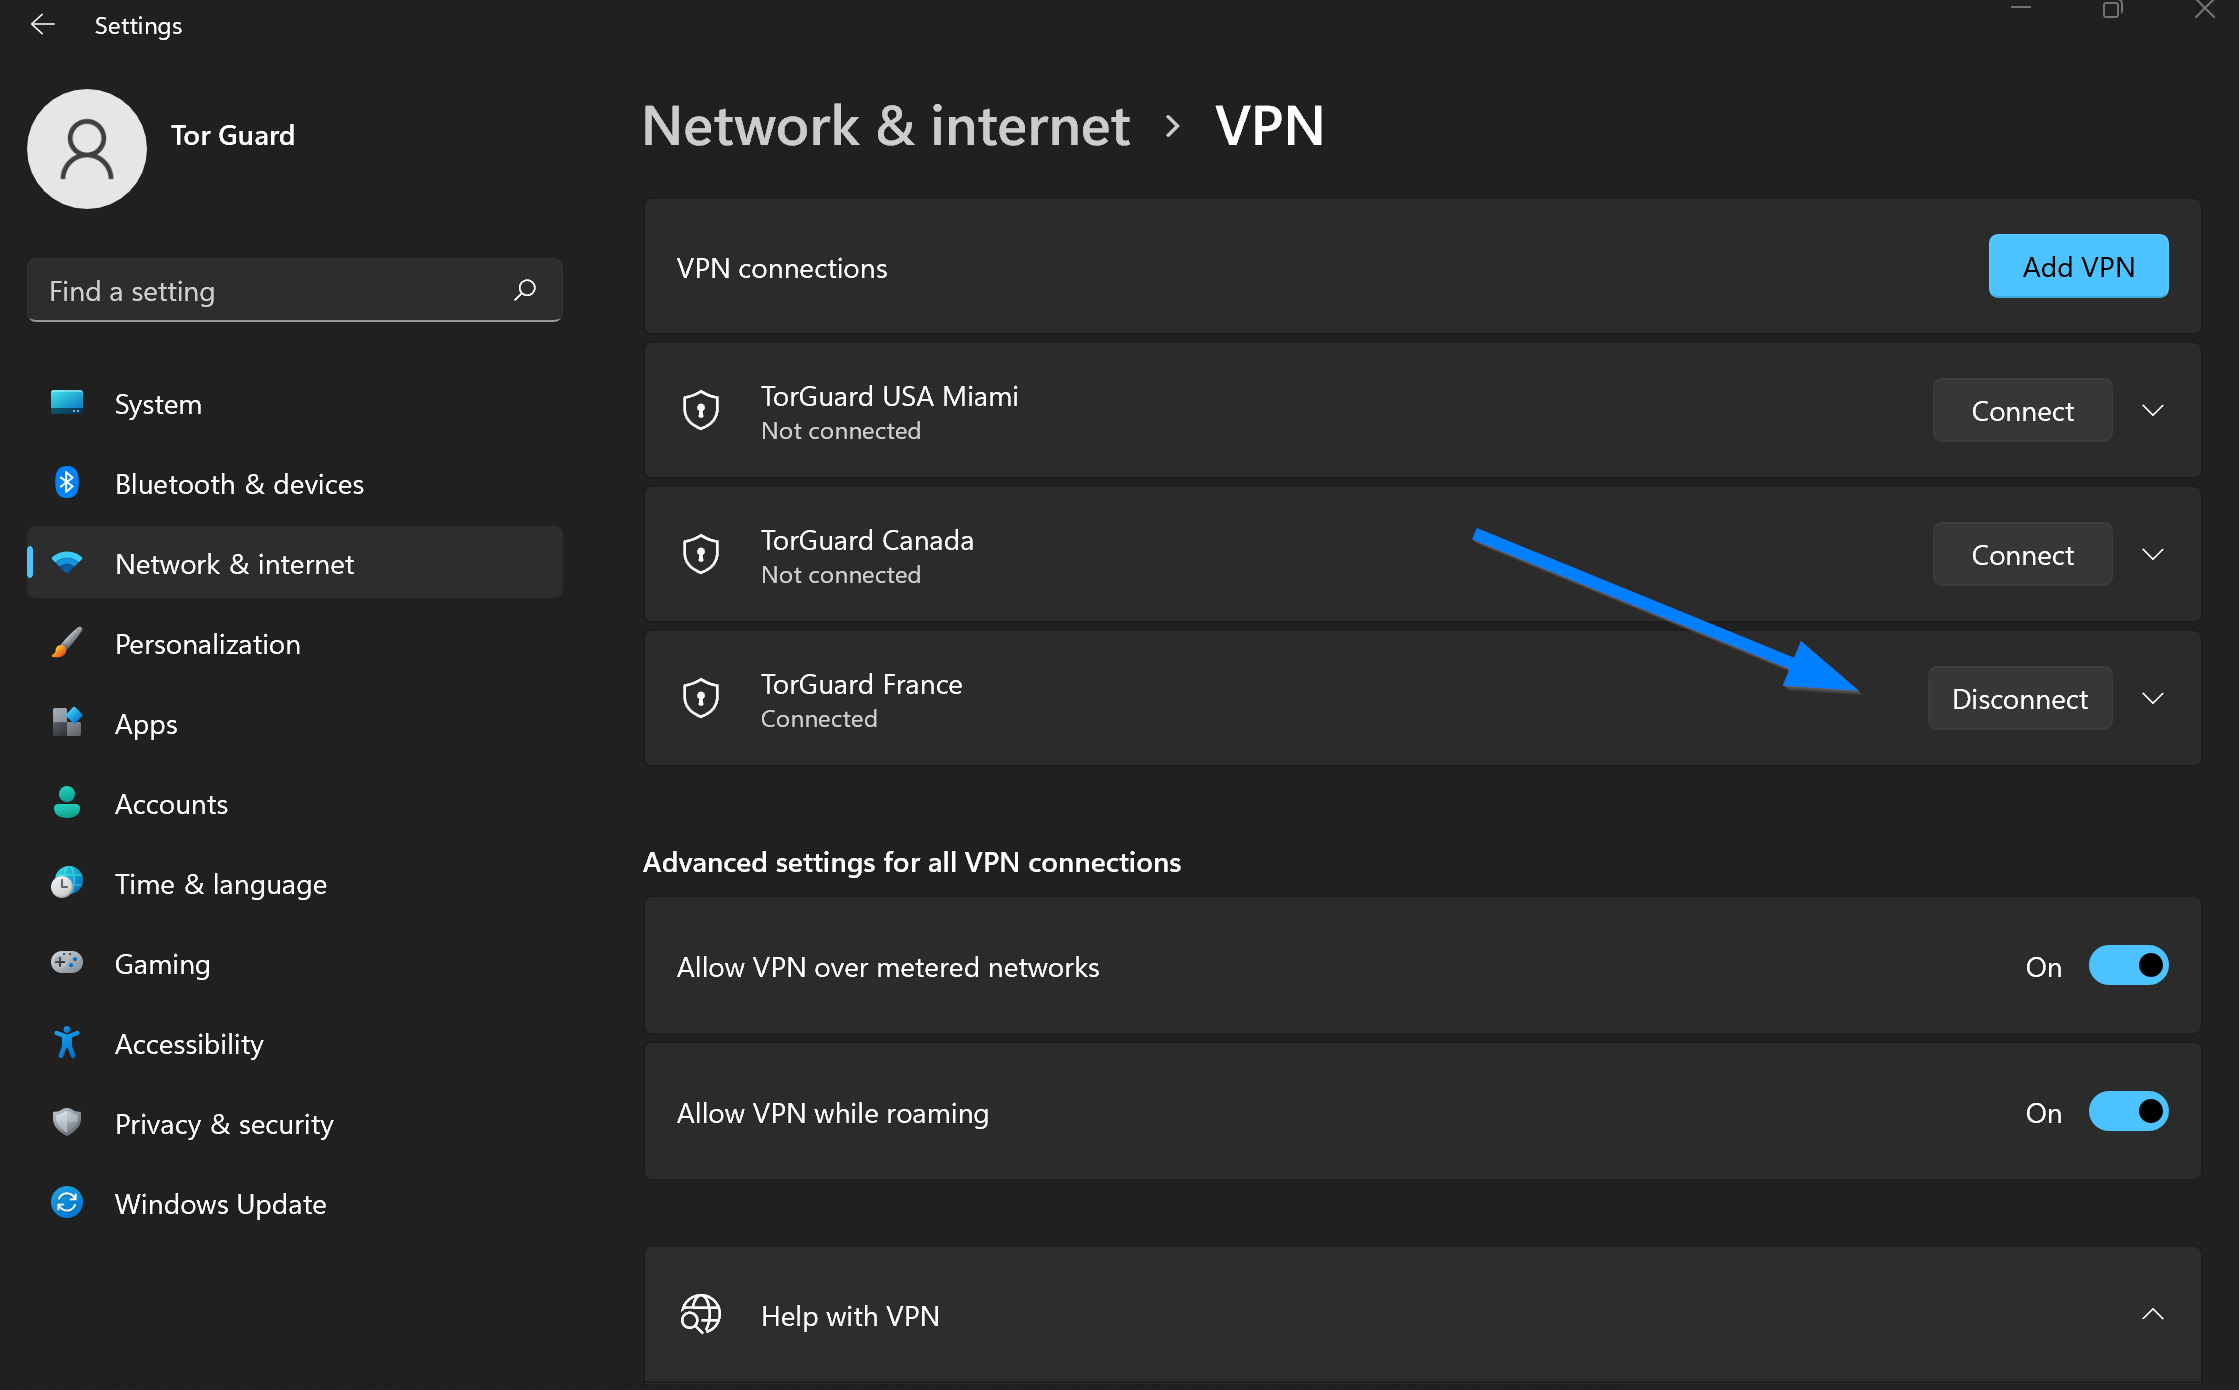
✅ Connection Status: When connected, you'll see "Connected" status and the duration of your connection.
Step 6: Quick Access from System Tray
You can now disconnect and connect by clicking the network icon in the bottom right system tray and selecting the VPN option. This will show all VPN profiles that you can connect to.
💡 Pro Tip: Pin the VPN quick settings to your taskbar for even faster access.
Advanced Configuration Options
🔧 Connection Properties
To access advanced settings:
- Go to Settings → Network & Internet → VPN
- Click on your VPN connection
- Select "Advanced options"
Available options:
- VPN proxy settings: Configure proxy for VPN connection
- Clear sign-in info: Remove saved credentials
- Edit connection properties: Modify server details
🌐 Split Tunneling
Windows 11 allows you to configure which apps use the VPN:
- Navigate to VPN advanced options
- Find "VPN apps" section
- Choose apps that should use VPN connection
- Other apps will use direct internet connection
🔒 Security Enhancements
- Use default gateway: Route all traffic through VPN
- Credential storage: Save login for automatic connection
- Authentication: MS-CHAPv2 (default for SSTP)
- Encryption: Maximum strength (256-bit)
Automation & Convenience Features
Auto-Connect on Startup
To connect automatically when Windows starts:
- Open Task Scheduler (search in Start menu)
- Create Basic Task → Name it "VPN Auto-Connect"
- Trigger: When computer starts
- Action: Start a program
- Program:
rasdial "Your VPN Name" username password
PowerShell Commands
# Connect to VPN
rasdial "TorGuard SSTP" username password

# Disconnect VPN
rasdial "TorGuard SSTP" /disconnect

# Check VPN status
Get-VpnConnection

# Add new VPN connection via PowerShell
Add-VpnConnection -Name "TorGuard SSTP" `
  -ServerAddress "server.torguard.net" `
  -TunnelType Sstp `
  -AuthenticationMethod MSChapv2 `
  -RememberCredential
Troubleshooting Common Issues
Error 0x800704CF: Network Location Cannot Be Reached
Solution:
- Check if port 443 is blocked by firewall
- Verify server address is correct
- Try different server location
- Temporarily disable Windows Firewall to test
- Check antivirus isn't blocking connection
Error 691: Authentication Failed
Solution:
- Verify username and password are correct
- Check account isn't locked in TorGuard panel
- Ensure you're using VPN credentials, not website login
- Try clearing saved credentials and re-entering
Connection Drops Frequently
Solution:
- Disable power saving for network adapters
- Update network drivers
- Try different server location
- Check for Windows updates
- Disable IPv6 if not needed
Slow Connection Speed
Solution:
- Try server closer to your location
- Check base internet speed without VPN
- Disable Windows Auto-Tuning:
netsh int tcp set global autotuninglevel=disabled - Update network adapter drivers
- Consider using WireGuard for better performance
Security Best Practices
🔐 Credential Security
- Use strong VPN password
- Don't save credentials on shared computers
- Enable 2FA on TorGuard account
- Regularly update passwords
🛡️ System Security
- Keep Windows 11 updated
- Use Windows Defender or antivirus
- Enable firewall
- Use BitLocker encryption
🌐 Connection Security
- Verify VPN is connected before browsing
- Check for DNS leaks at ipleak.net
- Use HTTPS websites
- Enable kill switch if available
📊 Privacy Settings
- Disable location services when not needed
- Review app permissions
- Use private browsing mode
- Clear cookies regularly
Performance Optimization
Network Adapter Settings
- Disable Large Send Offload
- Set Receive/Transmit buffers to maximum
- Disable power management for adapter
- Update to latest drivers
Windows Settings
- Disable Windows Update during VPN use
- Close bandwidth-heavy applications
- Disable background apps
- Use wired connection when possible
Summary
You've successfully configured SSTP Stealth VPN on Windows 11! This native setup provides:
- ✅ Effective firewall and censorship bypass
- ✅ Strong SSL/TLS encryption
- ✅ Native Windows integration
- ✅ No additional software required
- ✅ Quick access from system tray
- ✅ Stable connections through restrictive networks