PrivateRouter custom VPN routers provide an easy one-click method to deploy popular self-hosted apps directly on your router. When combined with TorGuard's Private VPN Cloud service, users can easily self-host applications securely behind WireGuard.
What is FileBrowser?
FileBrowser is a web-based file manager that provides a clean interface to browse, upload, download, and manage files on your server. It's perfect for:
- Creating your own cloud storage solution
- Managing files remotely without SSH
- Sharing files with family or team members
- Backing up important documents
Prerequisites
Before you begin, ensure you have:
- PrivateRouter with OpenWRT firmware
- Docker support enabled on your router
- Access to router's web interface
- (Optional) Domain name for external access
- (Optional) Nginx Proxy Manager installed for SSL
Installation Steps
Step 1: Deploy FileBrowser via Docker
Login to your PrivateRouter and click the System menu. Select Custom Commands then locate FileBrowser and click the RUN button.
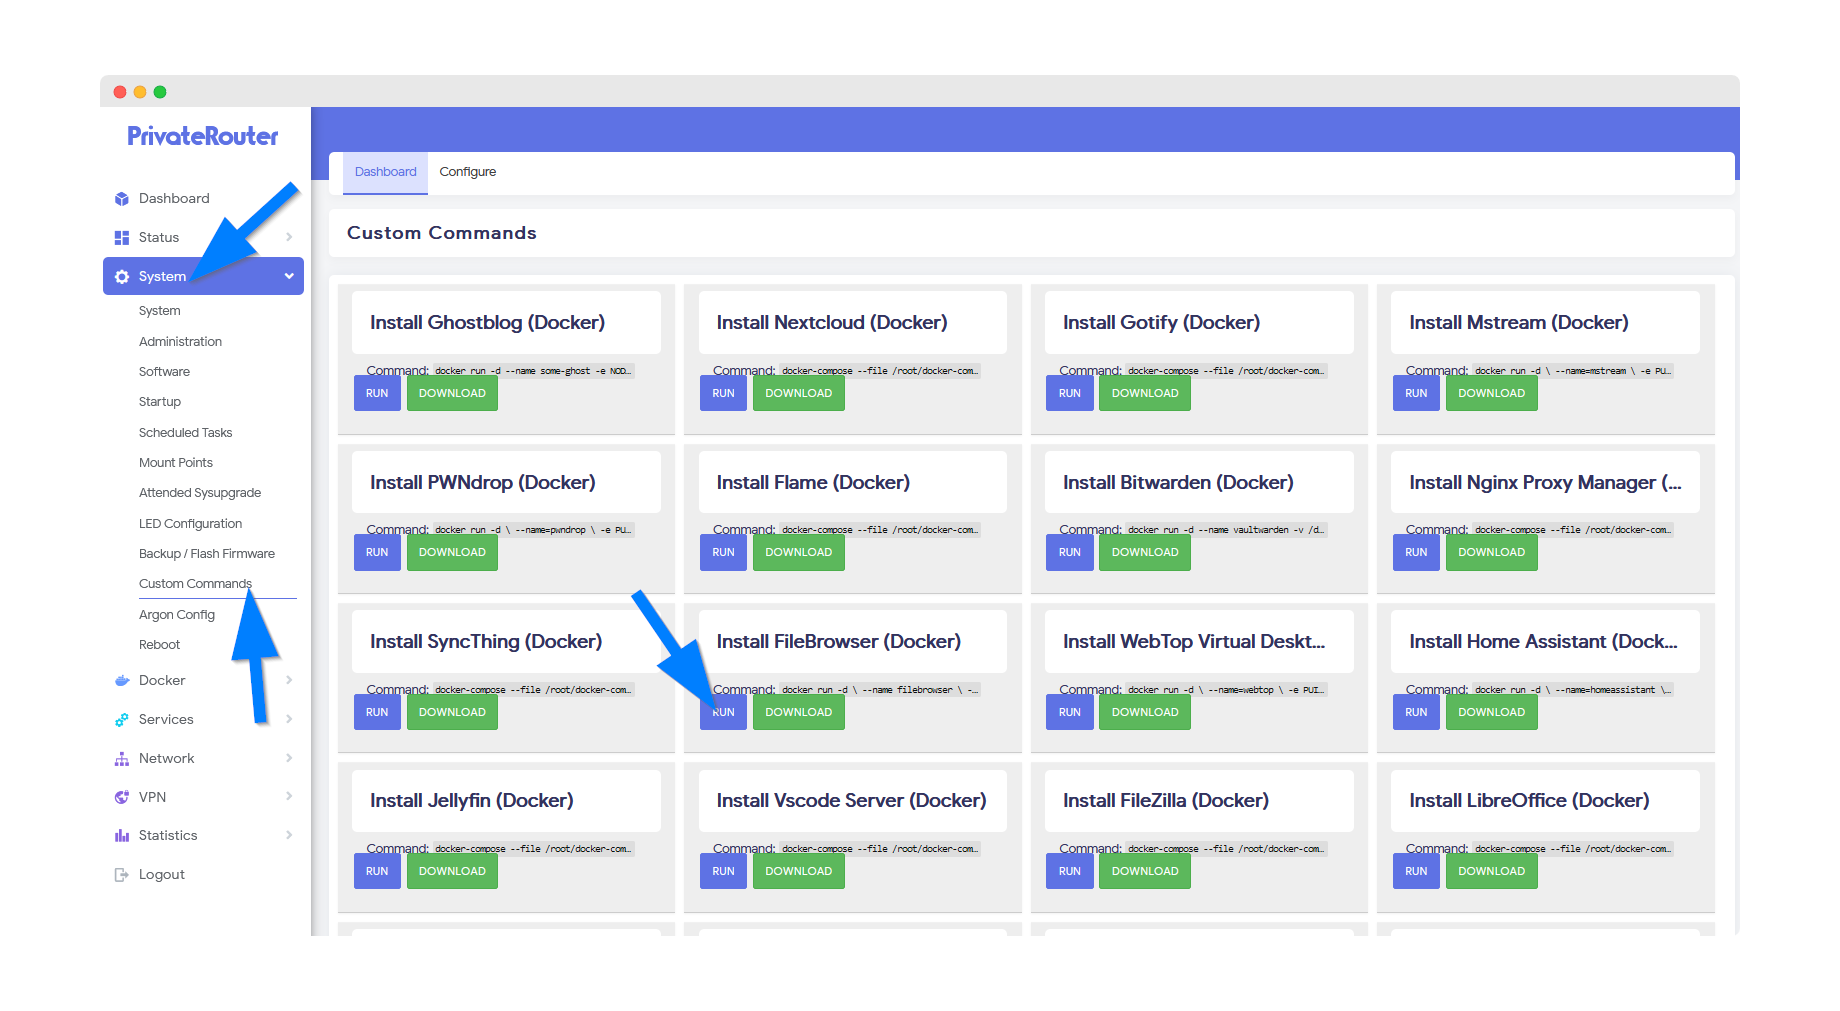
💡 Pro Tip: The installation process will download the FileBrowser Docker image and create necessary configurations automatically.
Step 2: Wait for Installation Completion
Wait a few minutes for Docker to complete the app install. Scroll to the bottom and you will see output similar to the commands below when the install has been completed.
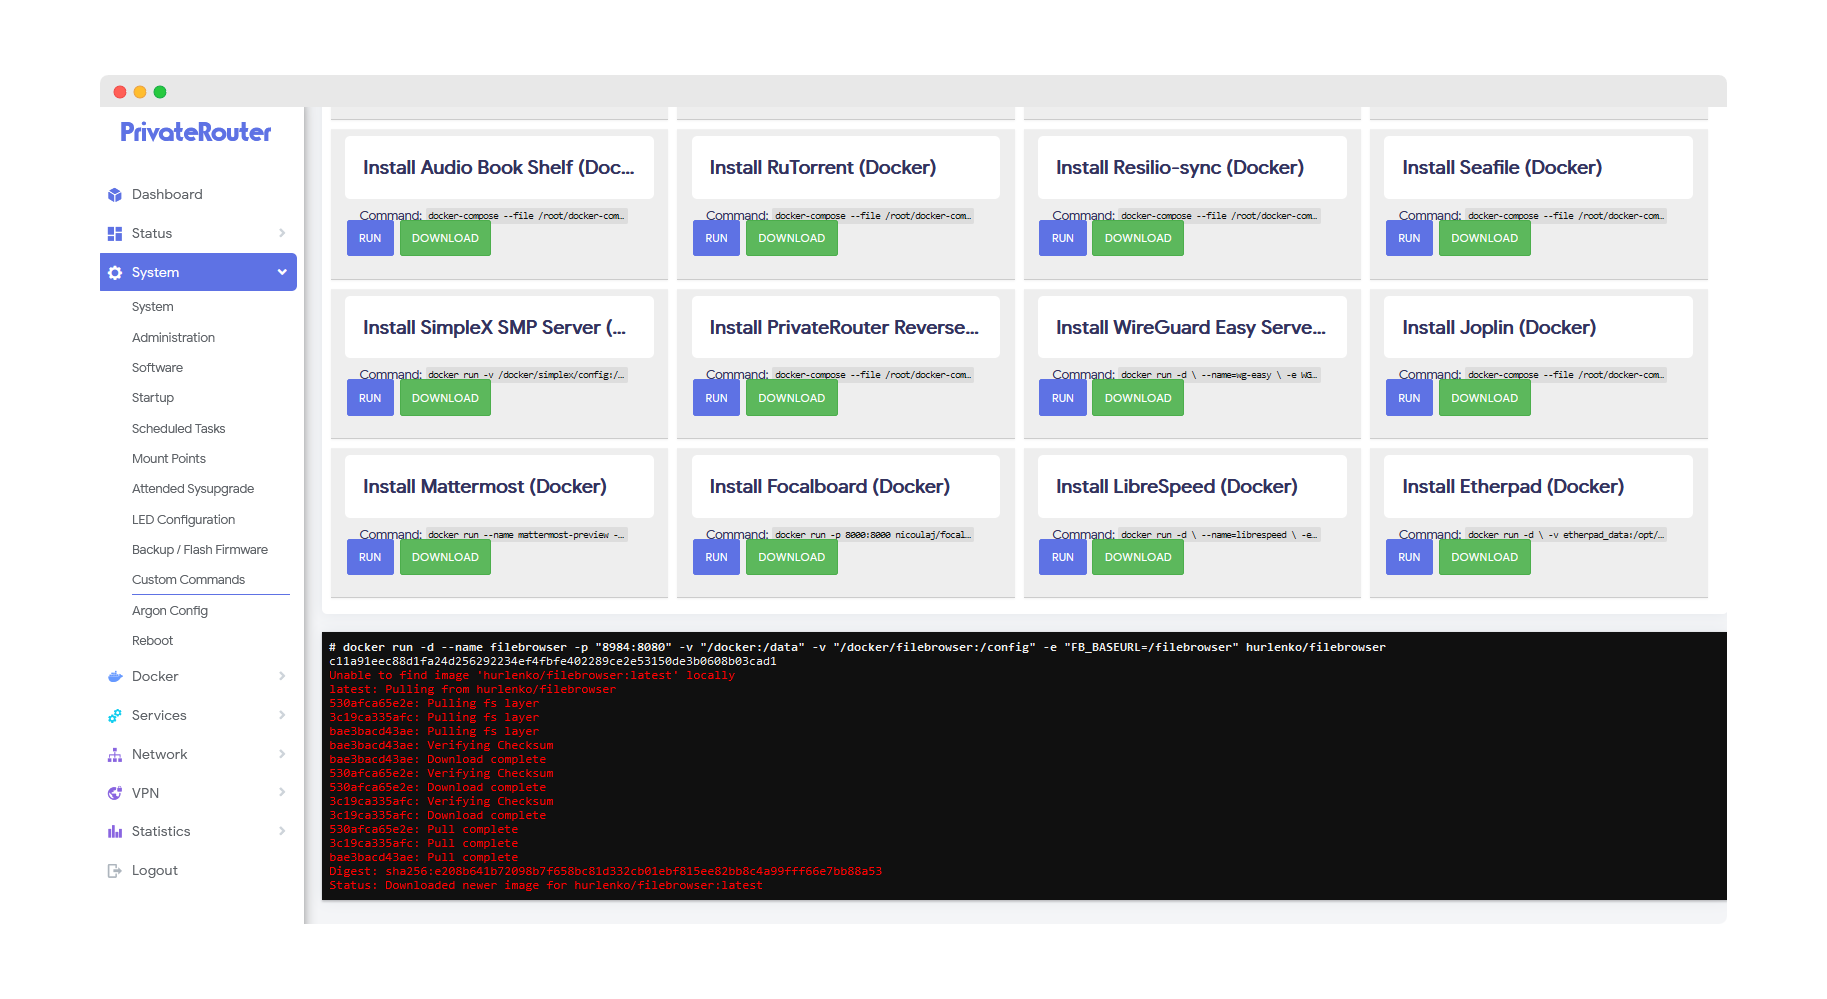
⚠️ Note: If you receive an error instead of docker output, this can happen if the install takes longer. The app will still be installed, so be patient and proceed to the next step.
Step 3: Access FileBrowser Locally
To access FileBrowser after it's been installed, click the Docker menu then select Containers. You should see the newly created FileBrowser container with a green UP status.

Click the port link to access FileBrowser via your local router IP address and port. With default settings, this will load at:
http://192.168.0.1:8984
Local Access Only? If you only want local access to FileBrowser and do not wish to access via domain name, then you are all set. Skip to the login section below.
Step 4: Initial Login
FileBrowser will load with the login screen. The first time you can login with the default credentials:
Username: admin
Password: admin
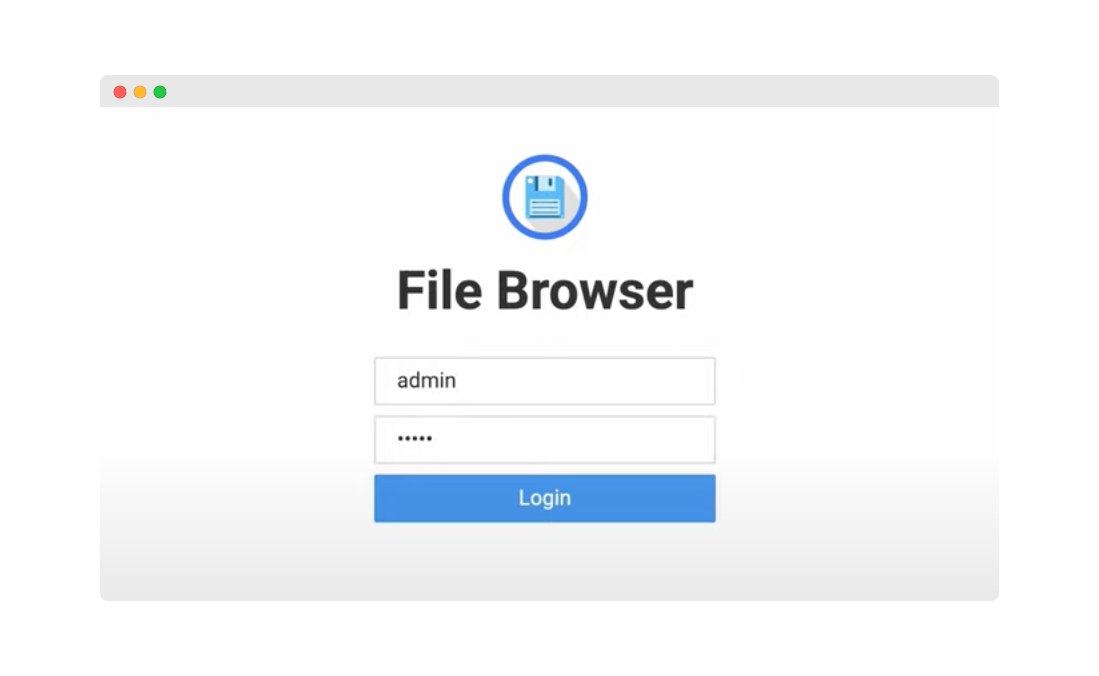
🔒 Security Alert: Change the default password immediately after your first login!
Setting Up Domain Access (Optional)
Step 5: Configure Nginx Proxy Manager
For this step, you must have already installed the Nginx Proxy Manager app to handle domain and SSL. If you have not yet installed Nginx Proxy Manager, please follow the tutorial here to complete the install.
Login to Nginx Proxy Manager at http://192.168.0.1:81. If you have not setup a password, the default credentials are:
Username: [email protected]
Password: changeme
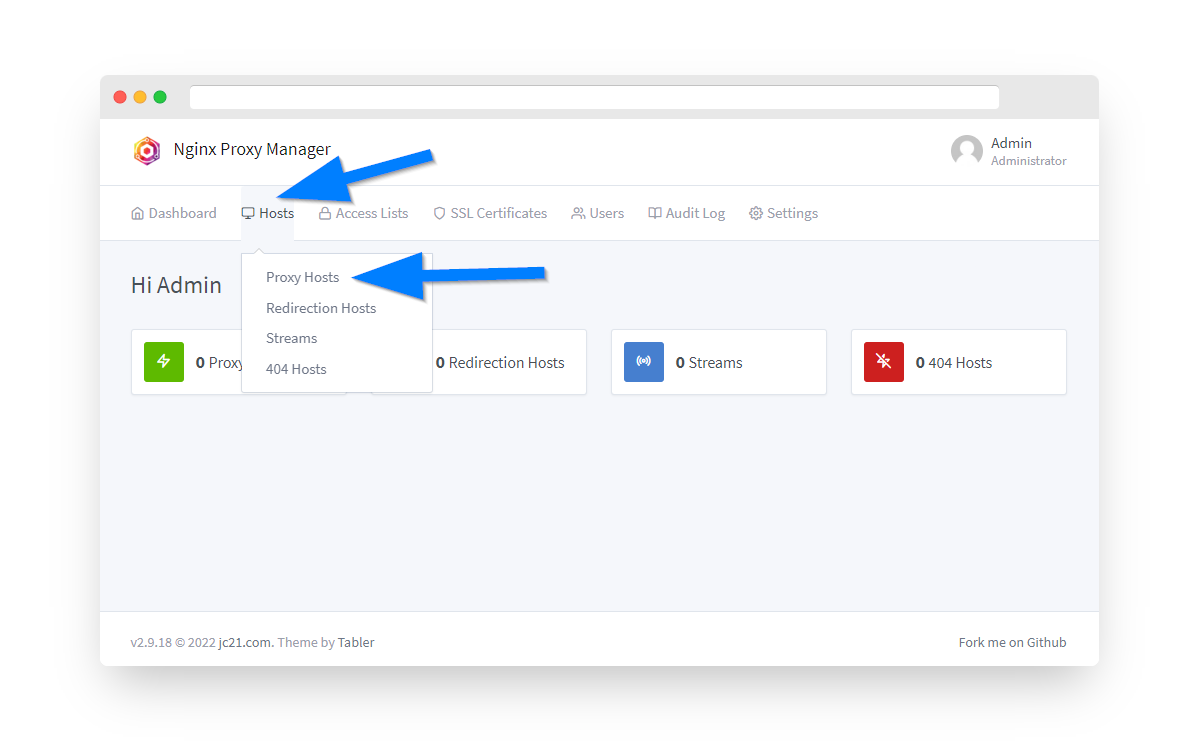
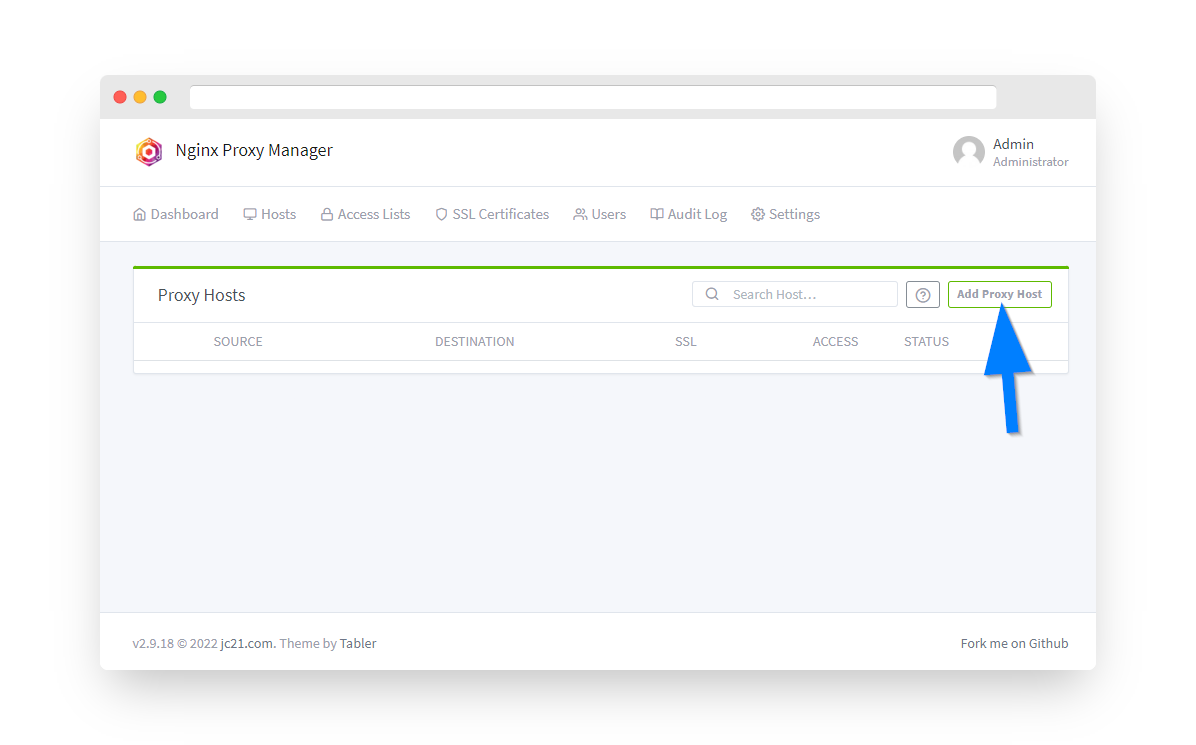
Once logged in, click the Hosts menu option then select "Proxy Hosts".
Step 6: Add Proxy Host
Click the Add Proxy Host button.
Step 7: Configure Domain Settings
⚠️ Prerequisites: Before proceeding, ensure you have:
- Pointed an A record or A Wildcard record with your domain's registrar at your Private VPN Cloud VPN IP address
- Set up external/internal port forwarding 80/8080 and 443/4443
Configure the following settings:
- Domain Names: Enter your domain/subdomain (e.g., files.yourdomain.com)
- Scheme: Select "https"
- Forward Hostname/IP: Enter your Router's IP address (192.168.0.1)
- Forward Port: Enter FileBrowser's port number 8984
⚡ Important: For FileBrowser, make sure to set the Websockets Support switch to ON

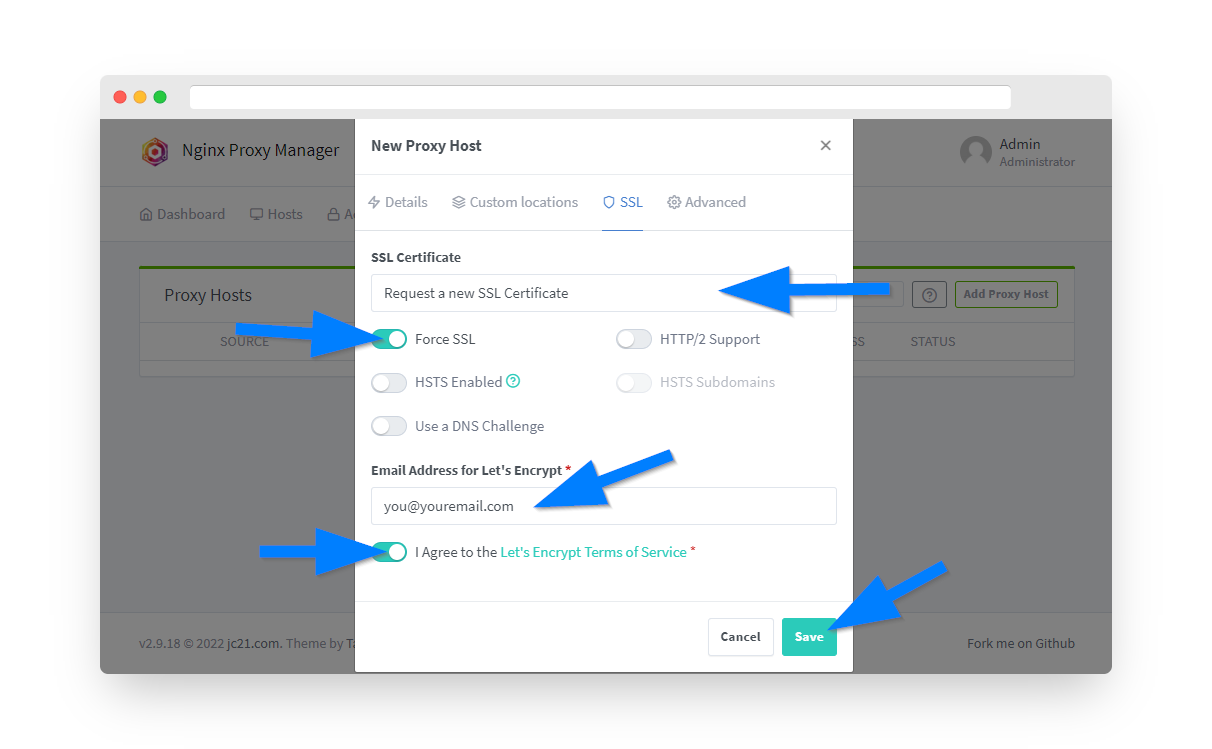
Step 8: Configure SSL Certificate
Under the SSL tab, proceed with obtaining a free Let's Encrypt SSL certificate:
- Under SSL Certificate dropdown, select "Request a new SSL Certificate with Let's Encrypt"
- Enable the "Force SSL" option switch
- Enter an email address for Let's Encrypt registration
- Click the "I Agree" switch for Let's Encrypt Terms and Conditions
- Click the Save button
After a few moments, you should see your new proxy host on the Nginx Proxy Manager dashboard with a green "online" status. To verify things are working, open a new browser window and enter your domain name. You should see FileBrowser loading through your domain instead of the local IP address.
Security Best Practices
🔐 Change Default Credentials
Immediately change the default admin password after first login
👥 Create User Accounts
Create individual user accounts with appropriate permissions
🛡️ Use HTTPS Only
Always access FileBrowser via HTTPS when using external domain
📁 Limit File Access
Configure FileBrowser to only access specific directories
FileBrowser Features & Customization
📤 File Management
- Upload/download files and folders
- Create, rename, and delete files
- Bulk operations support
- Archive creation (zip, tar)
🔍 Search & Preview
- Full-text file search
- Image thumbnails
- Video/audio streaming
- Text file editing
🔗 Sharing Options
- Generate shareable links
- Set expiration dates
- Password protection
- Download limits
⚙️ Administration
- User management
- Permission control
- Storage quotas
- Activity logs
Troubleshooting Common Issues
Container Won't Start
Solution:
- Check Docker service status:
service docker status - View container logs:
docker logs filebrowser - Ensure port 8984 is not in use:
netstat -tulpn | grep 8984 - Restart Docker service:
service docker restart
Cannot Access via Domain
Solution:
- Verify DNS A record is properly configured
- Check port forwarding rules (80/8080, 443/4443)
- Ensure Nginx Proxy Manager container is running
- Verify WebSocket support is enabled in proxy settings
Upload/Download Issues
Solution:
- Check available storage space on router
- Verify file size limits in FileBrowser settings
- Ensure WebSocket support is enabled for large files
- Check user permissions for the target directory
Useful Docker Commands
# View FileBrowser logs
docker logs -f filebrowser

# Restart FileBrowser container
docker restart filebrowser

# Stop FileBrowser
docker stop filebrowser

# Start FileBrowser
docker start filebrowser

# Update FileBrowser to latest version
docker pull filebrowser/filebrowser:latest
docker stop filebrowser
docker rm filebrowser
# Then re-run installation from Custom Commands

# Check container resource usage
docker stats filebrowser
Summary
You've successfully installed FileBrowser on your PrivateRouter OpenWRT system! This powerful file management solution provides:
- ✅ Web-based file management interface
- ✅ Secure access via HTTPS with SSL
- ✅ Multi-user support with permissions
- ✅ File sharing capabilities
- ✅ Integration with Private VPN Cloud for secure remote access