PrivateRouter custom VPN routers provide an easy one-click method to deploy popular self-hosted apps directly on your router. When combined with TorGuard's Private VPN Cloud service, users can easily self-host applications securely behind WireGuard.
What is Nextcloud?
Nextcloud is a powerful self-hosted cloud storage platform that puts you in complete control of your data. It's a full-featured alternative to services like Google Drive, Dropbox, and Microsoft 365, offering:
File Storage & Sync
Store, sync, and share files across all devices
Calendar & Contacts
Manage calendars and contacts with CardDAV/CalDAV
Talk & Collaboration
Built-in chat, video calls, and screen sharing
Office Suite
Edit documents, spreadsheets, and presentations
Prerequisites
Before you begin, ensure you have:
- PrivateRouter with OpenWRT firmware
- Docker support enabled on your router
- At least 2GB available storage (more recommended)
- FileBrowser installed (for config editing)
- Nginx Proxy Manager installed (for domain access)
- (Optional) Domain name for external access
⚠️ Storage Considerations: Nextcloud can consume significant storage space. Consider attaching external USB storage to your router or using a NAS mount for data storage.
Installation Steps
Step 1: Deploy Nextcloud via Docker
Login to your PrivateRouter and click the System menu. Select Custom Commands then locate Nextcloud and click the RUN button.
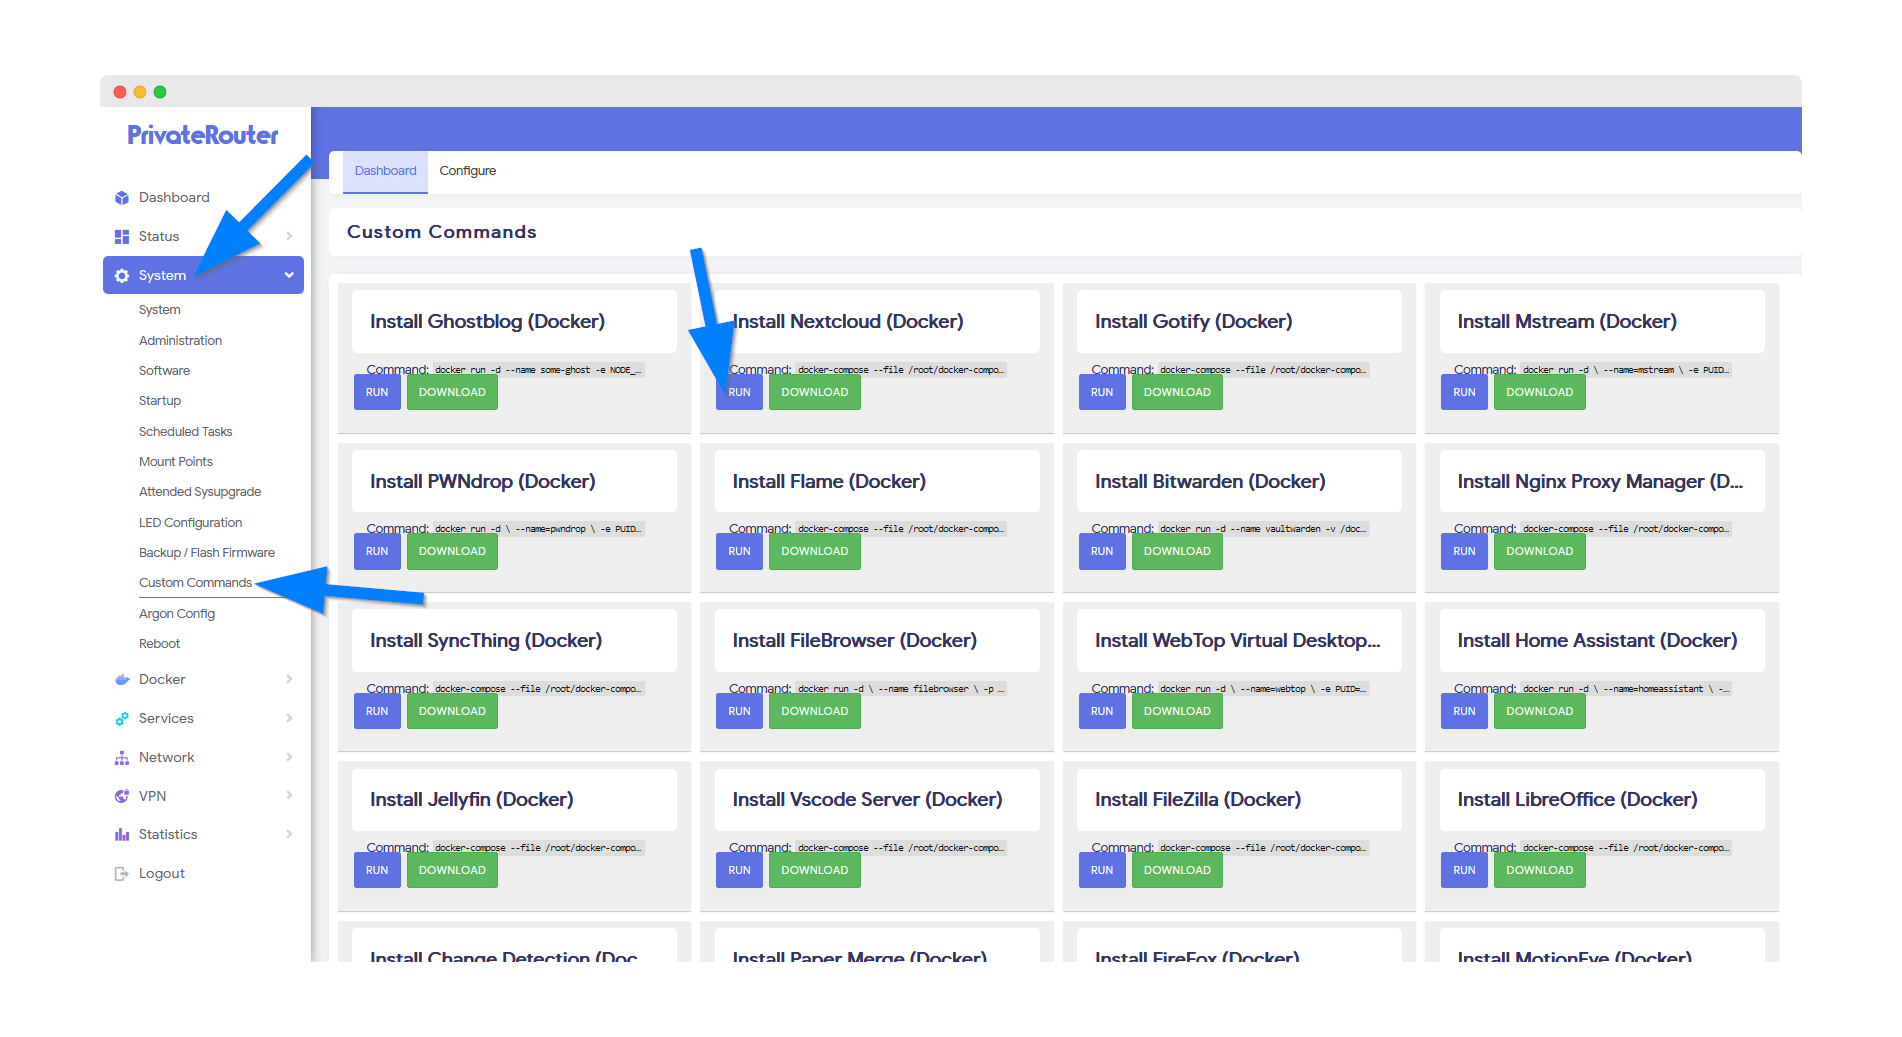
💡 Pro Tip: The installation will deploy both Nextcloud and a MariaDB database container for optimal performance.
Step 2: Wait for Installation Completion
Wait a few minutes for Docker to complete the app install. Scroll to the bottom and you will see output similar to the commands below when the install has been completed.
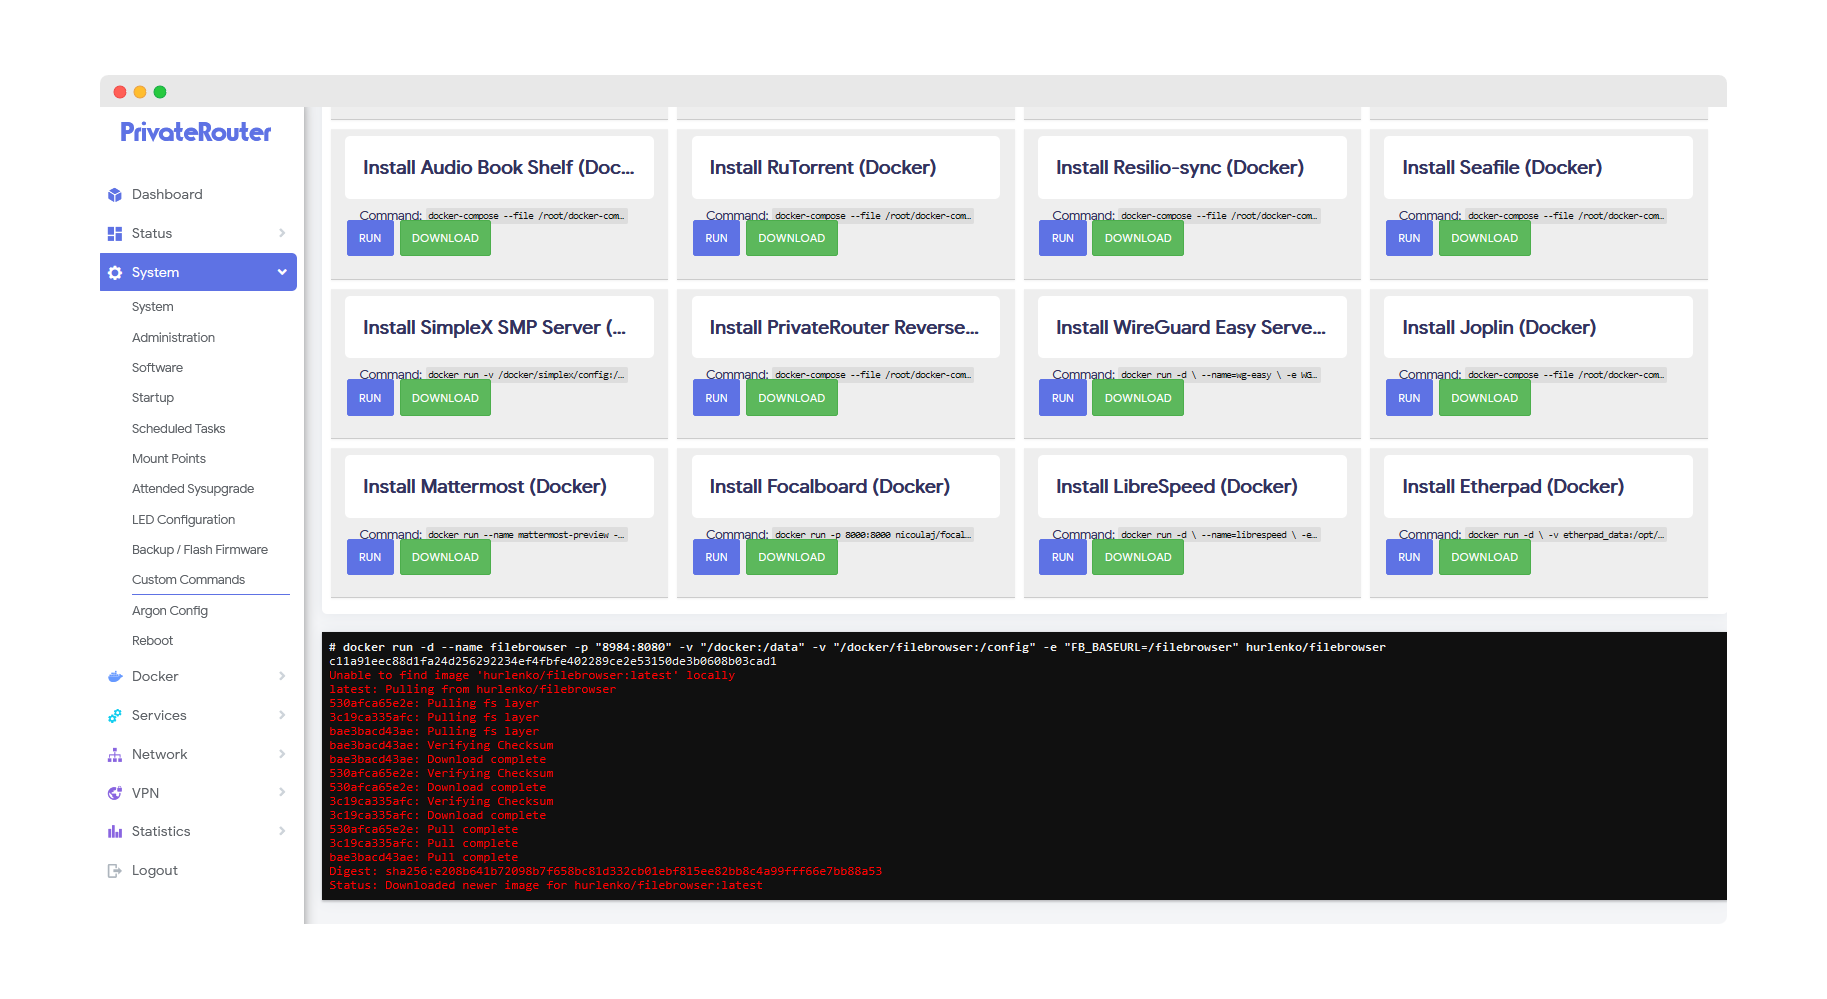
⚠️ Note: If you receive an error instead of docker output, this can happen if the install takes longer. The app will still be installed, so be patient and proceed to the next step.
Step 3: Access Nextcloud Interface
To access Nextcloud after it's been installed, click the Docker menu then select Containers. You should see the newly created Nextcloud container with a green UP status.
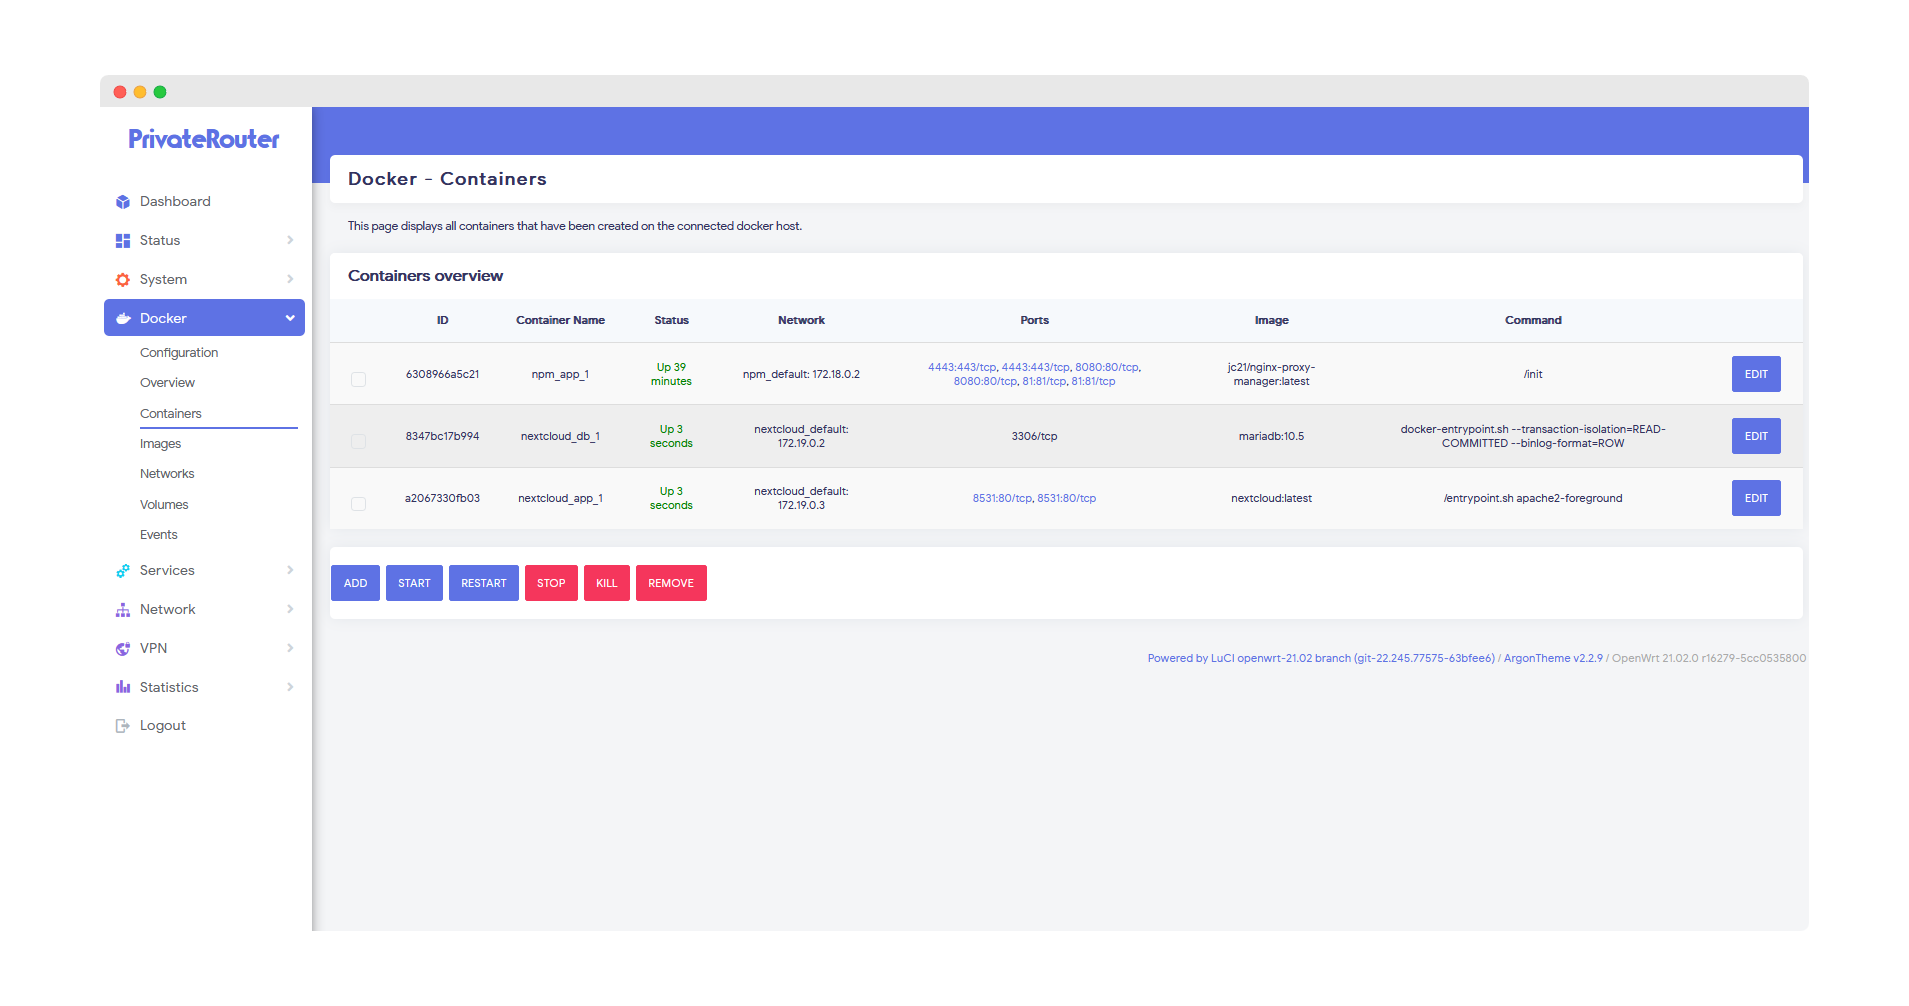
Click the port link by "Nextcloud_app" to access Nextcloud via your local router IP address and port. With default settings, this will load at:
http://192.168.0.1:8531
Step 4: Create Admin Account
Enter your desired admin username and password for access to your Nextcloud instance and click the Install button.
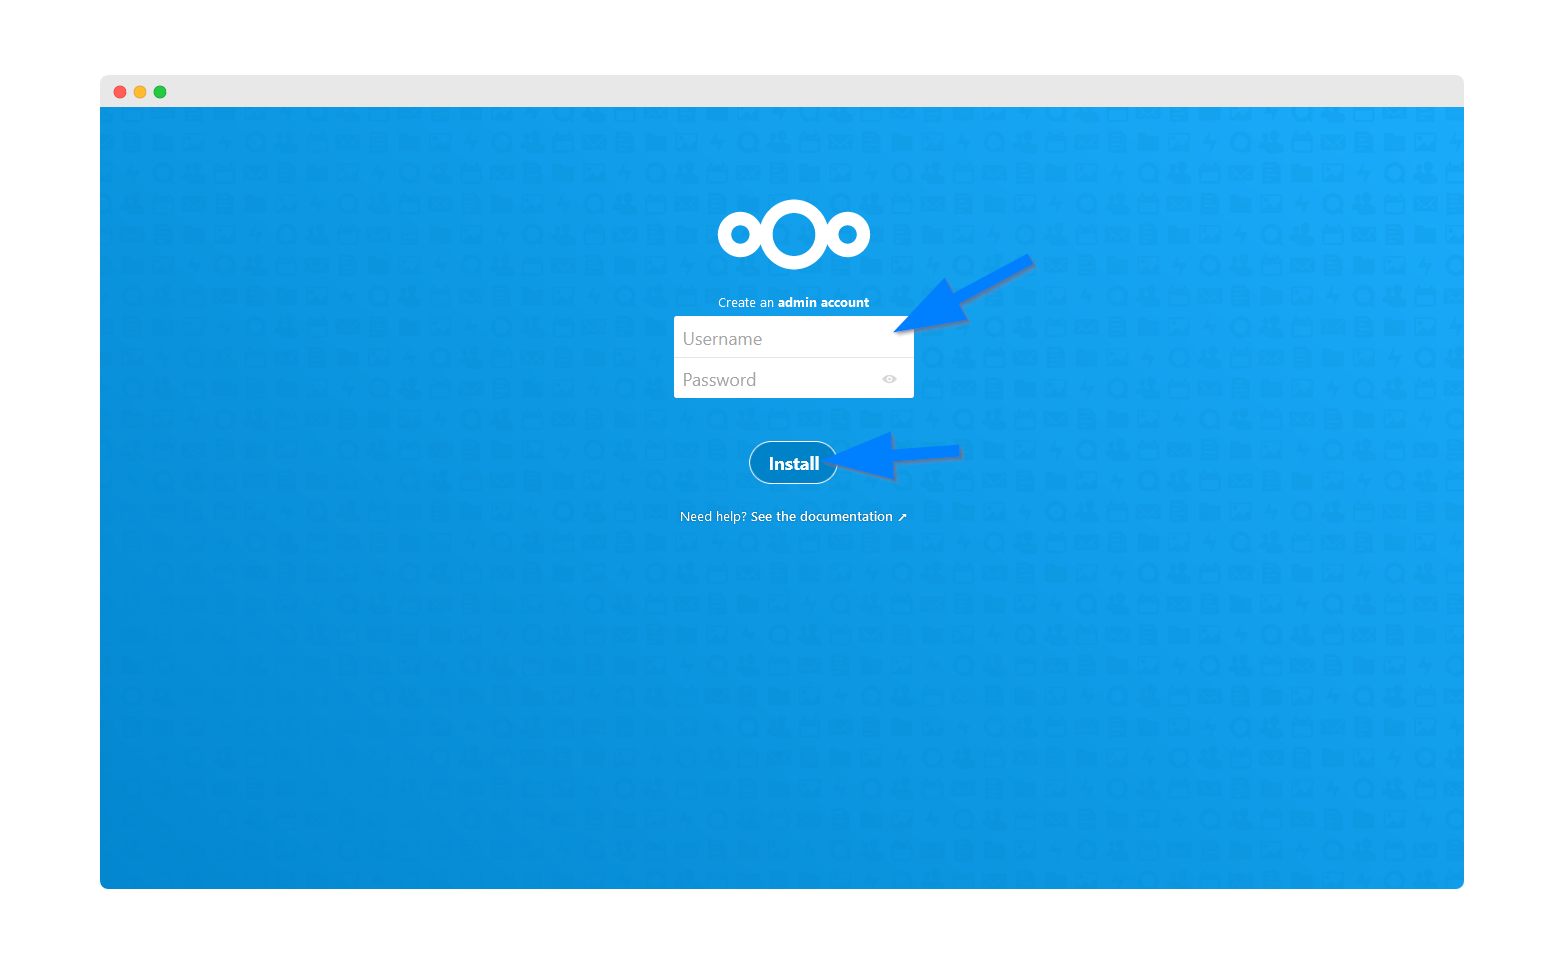
🔒 Security Tip: Use a strong password! This admin account has full control over your Nextcloud instance.
Step 5: Install Recommended Apps
Nextcloud comes with many extra features. Click the install button to take advantage of them.
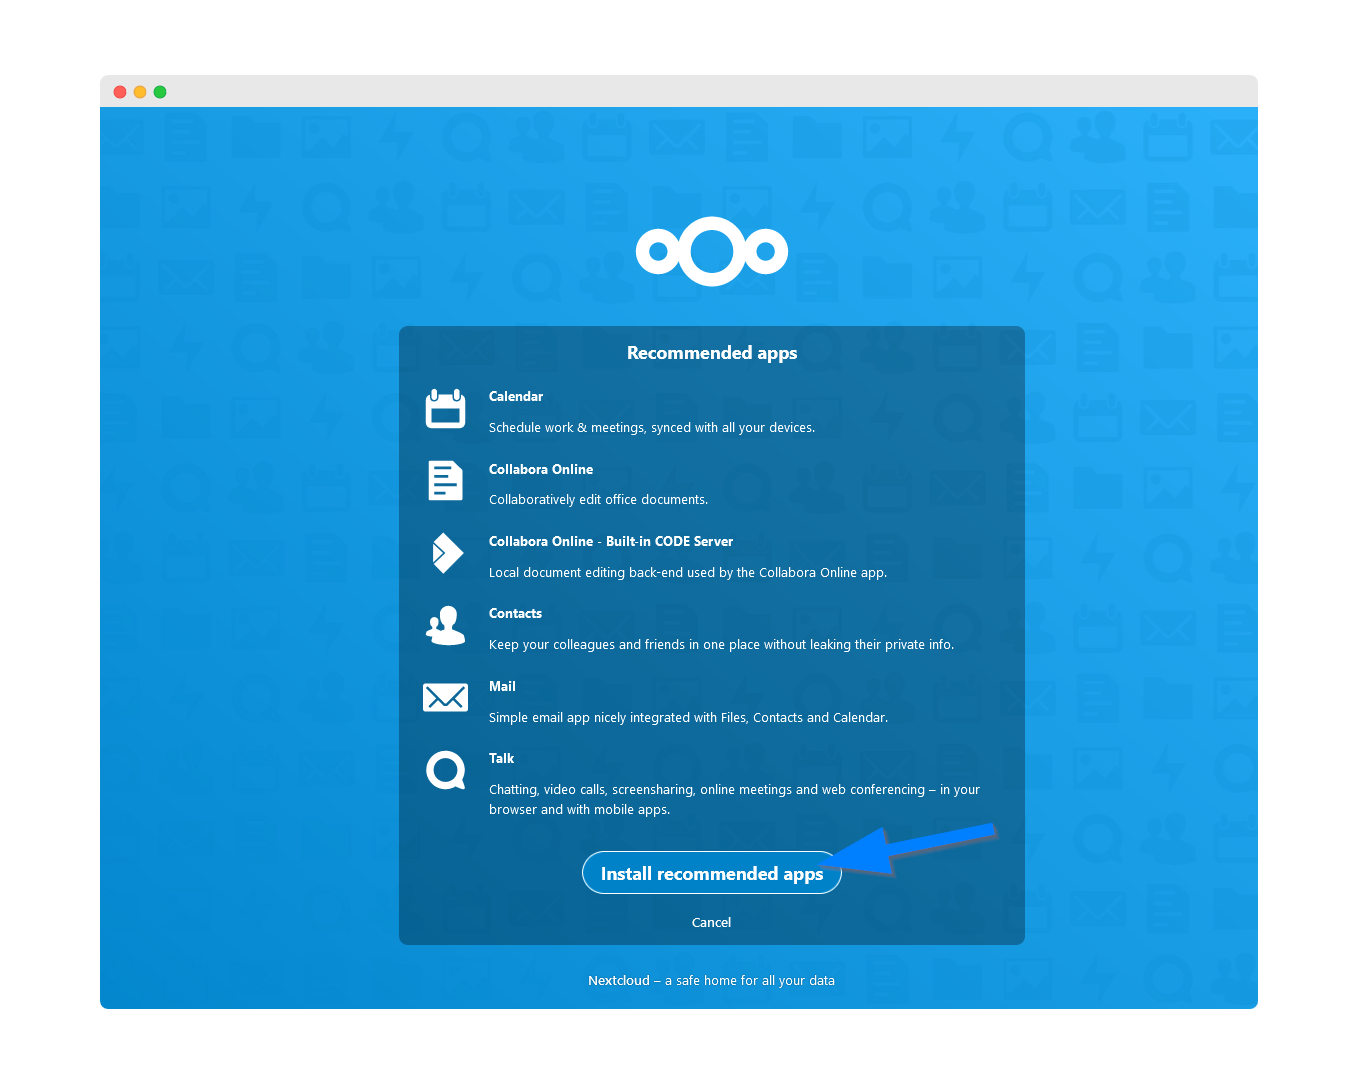
Recommended Apps Include:
- Calendar - Full-featured calendar with sharing
- Contacts - Address book management
- Talk - Chat and video conferencing
- Mail - Email client integration
- Deck - Kanban-style project management
Step 6: Nextcloud Dashboard
Your Nextcloud instance is now installed and ready to use via local IP:port.
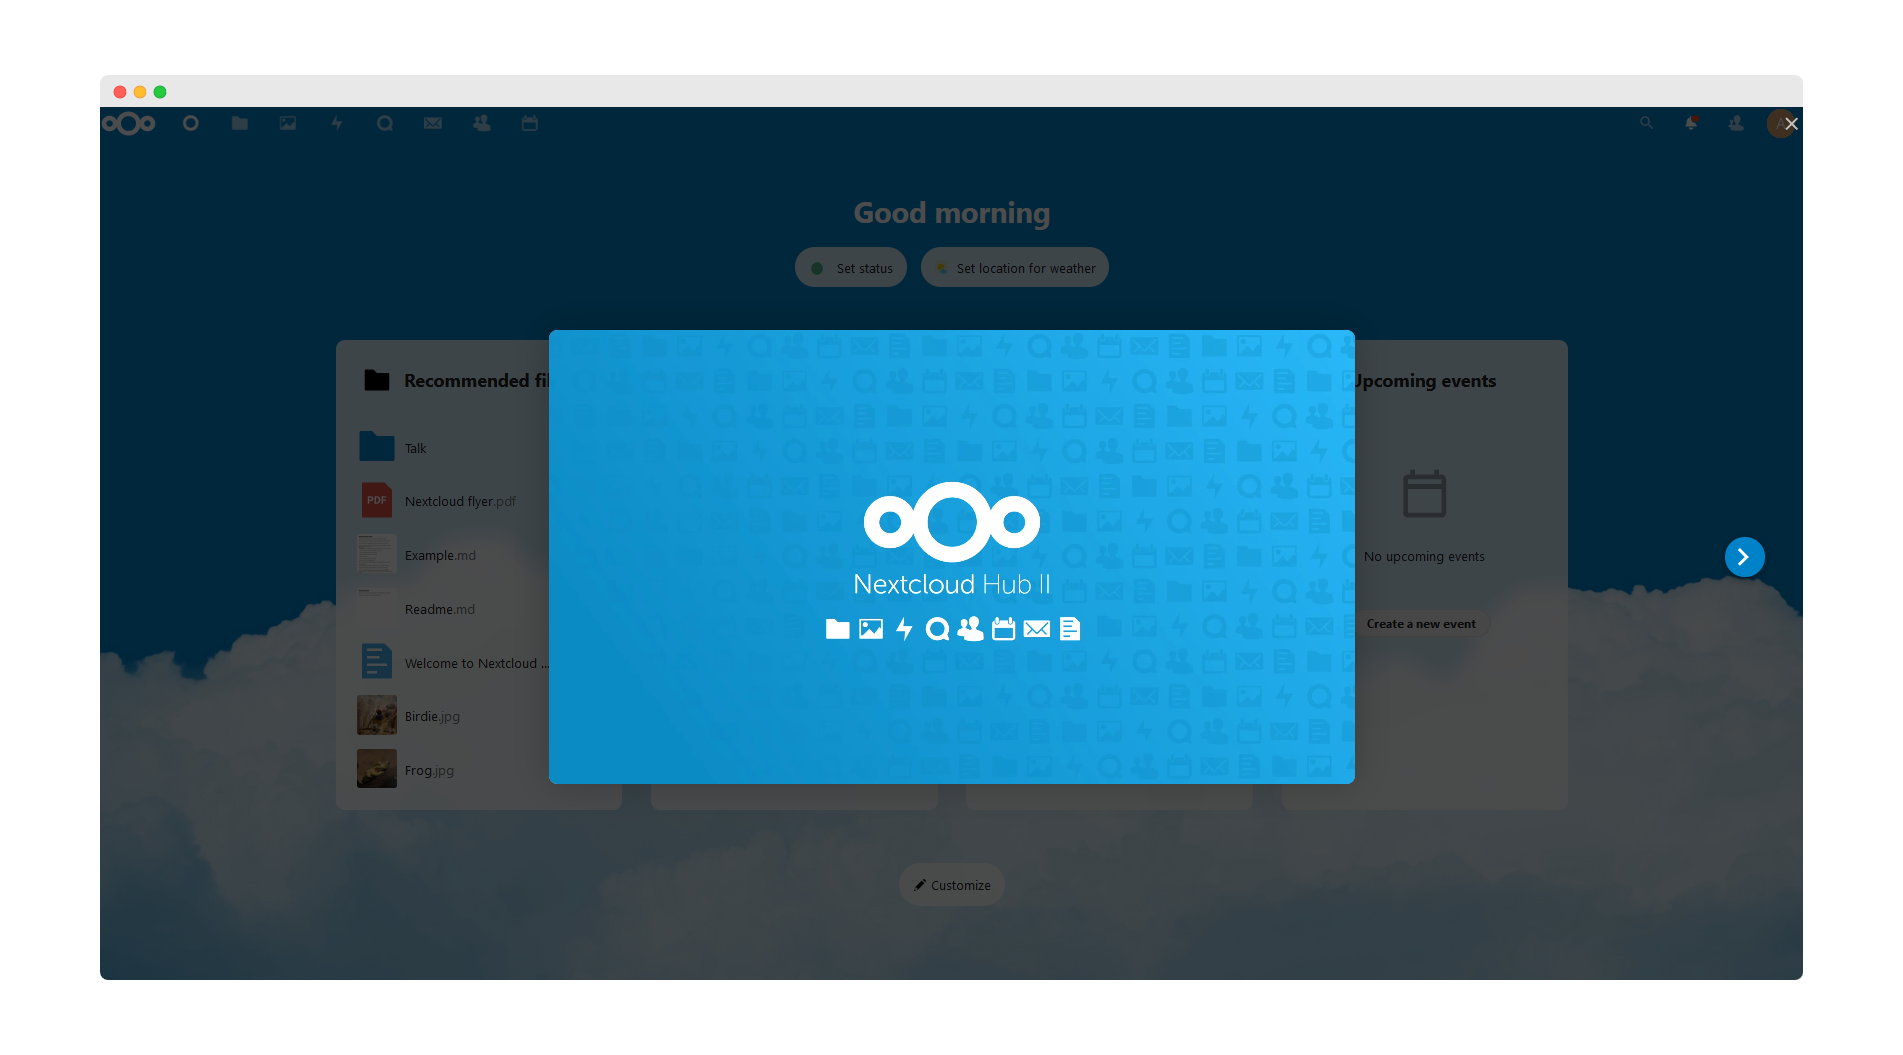
Local Access Only? If you only want local access to Nextcloud and do not wish to access via domain name, then you are all set. Skip to the Features section below.
Setting Up Domain Access
⚠️ Important: To use Nextcloud via domain name, we must update the Nextcloud config file to add your domain as a trusted domain.
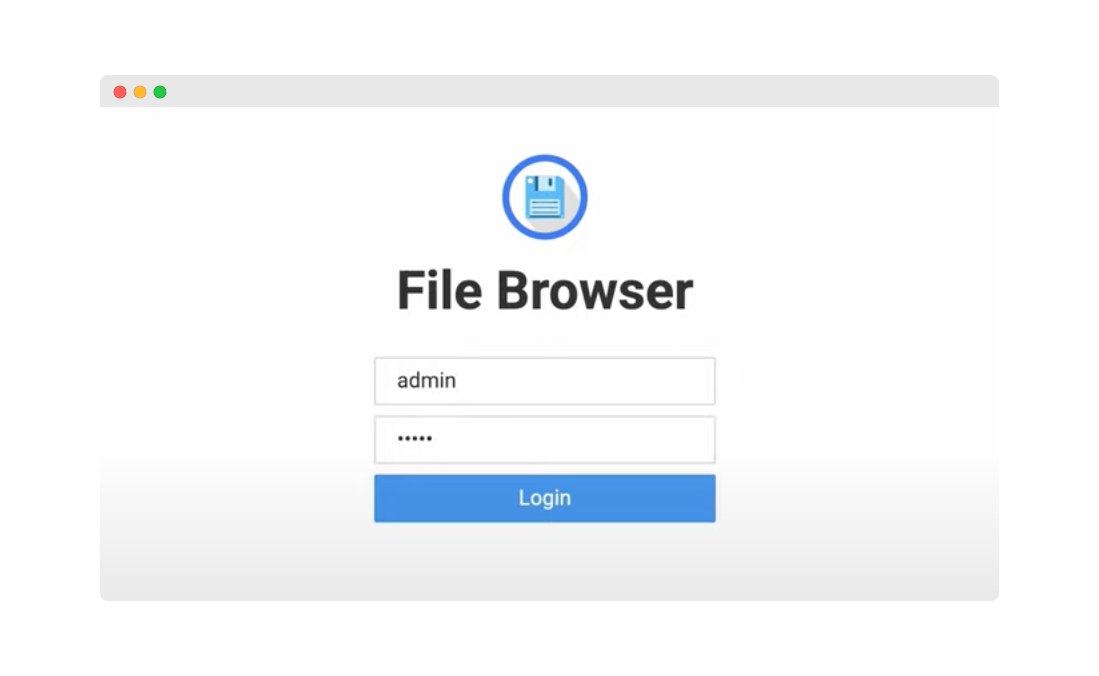
Step 7: Access FileBrowser
The fastest way to update the Nextcloud config file is through the FileBrowser app as FileBrowser is mapped to the PrivateRouter docker folder. If you have not yet installed FileBrowser, you can install it with this tutorial.
First login to FileBrowser:
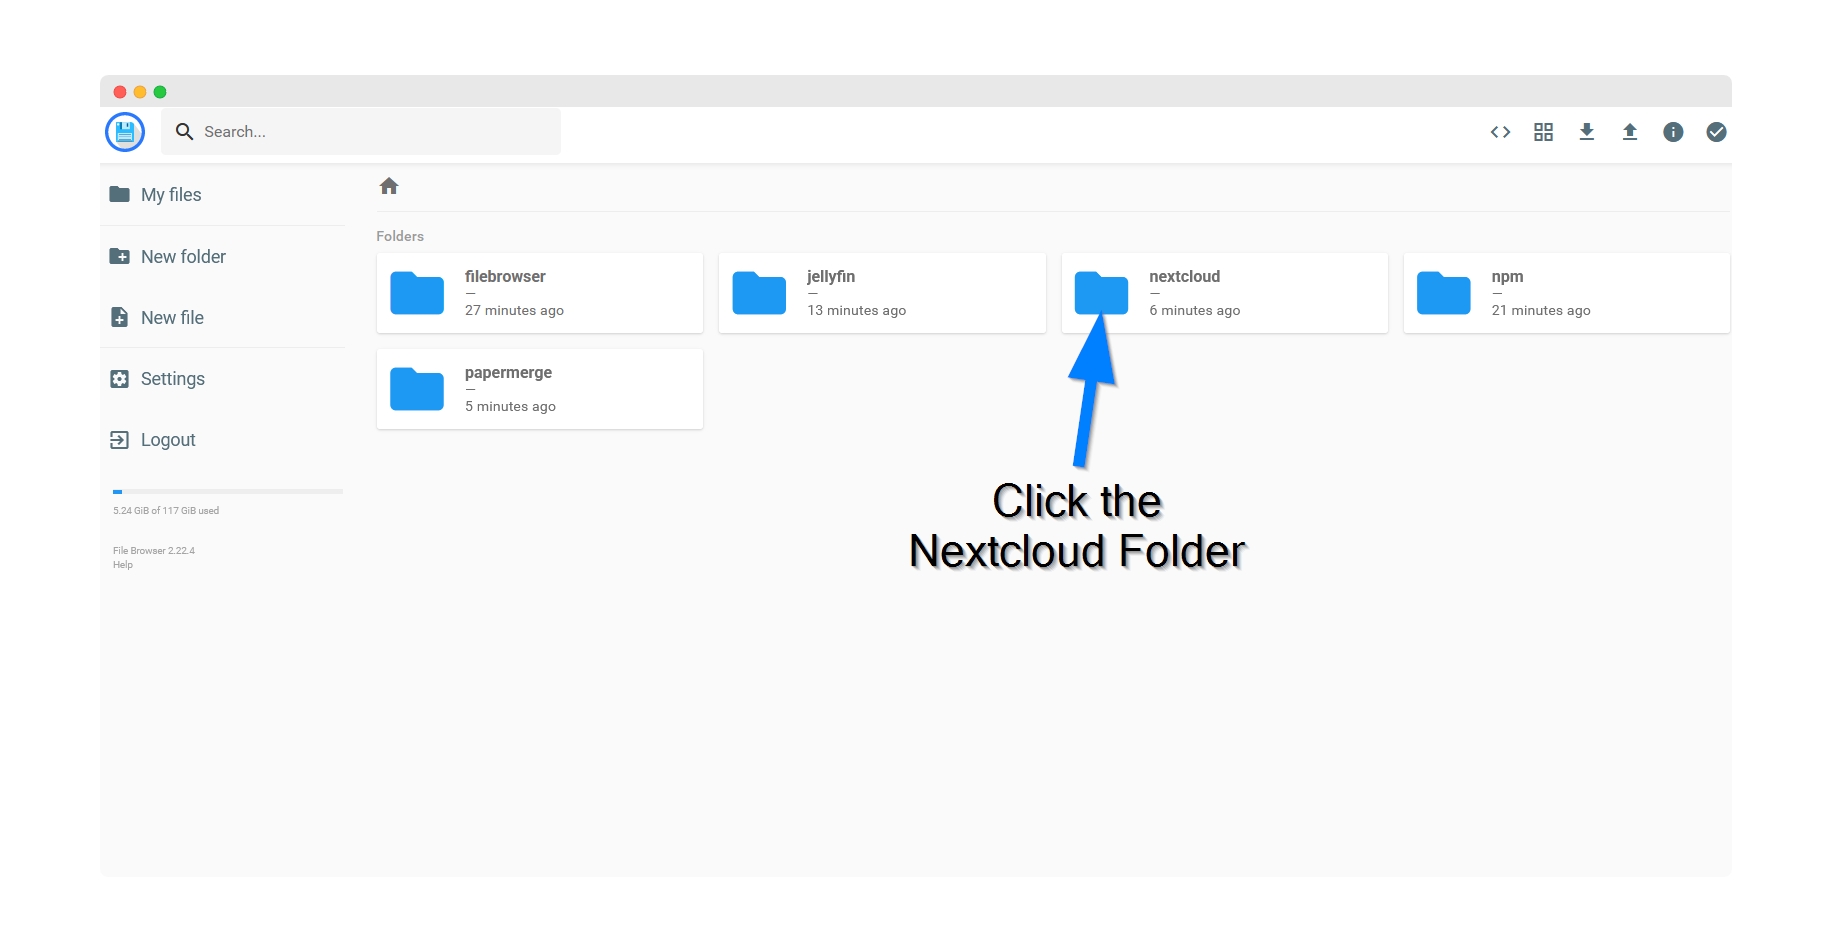
Step 8: Navigate to Nextcloud Config
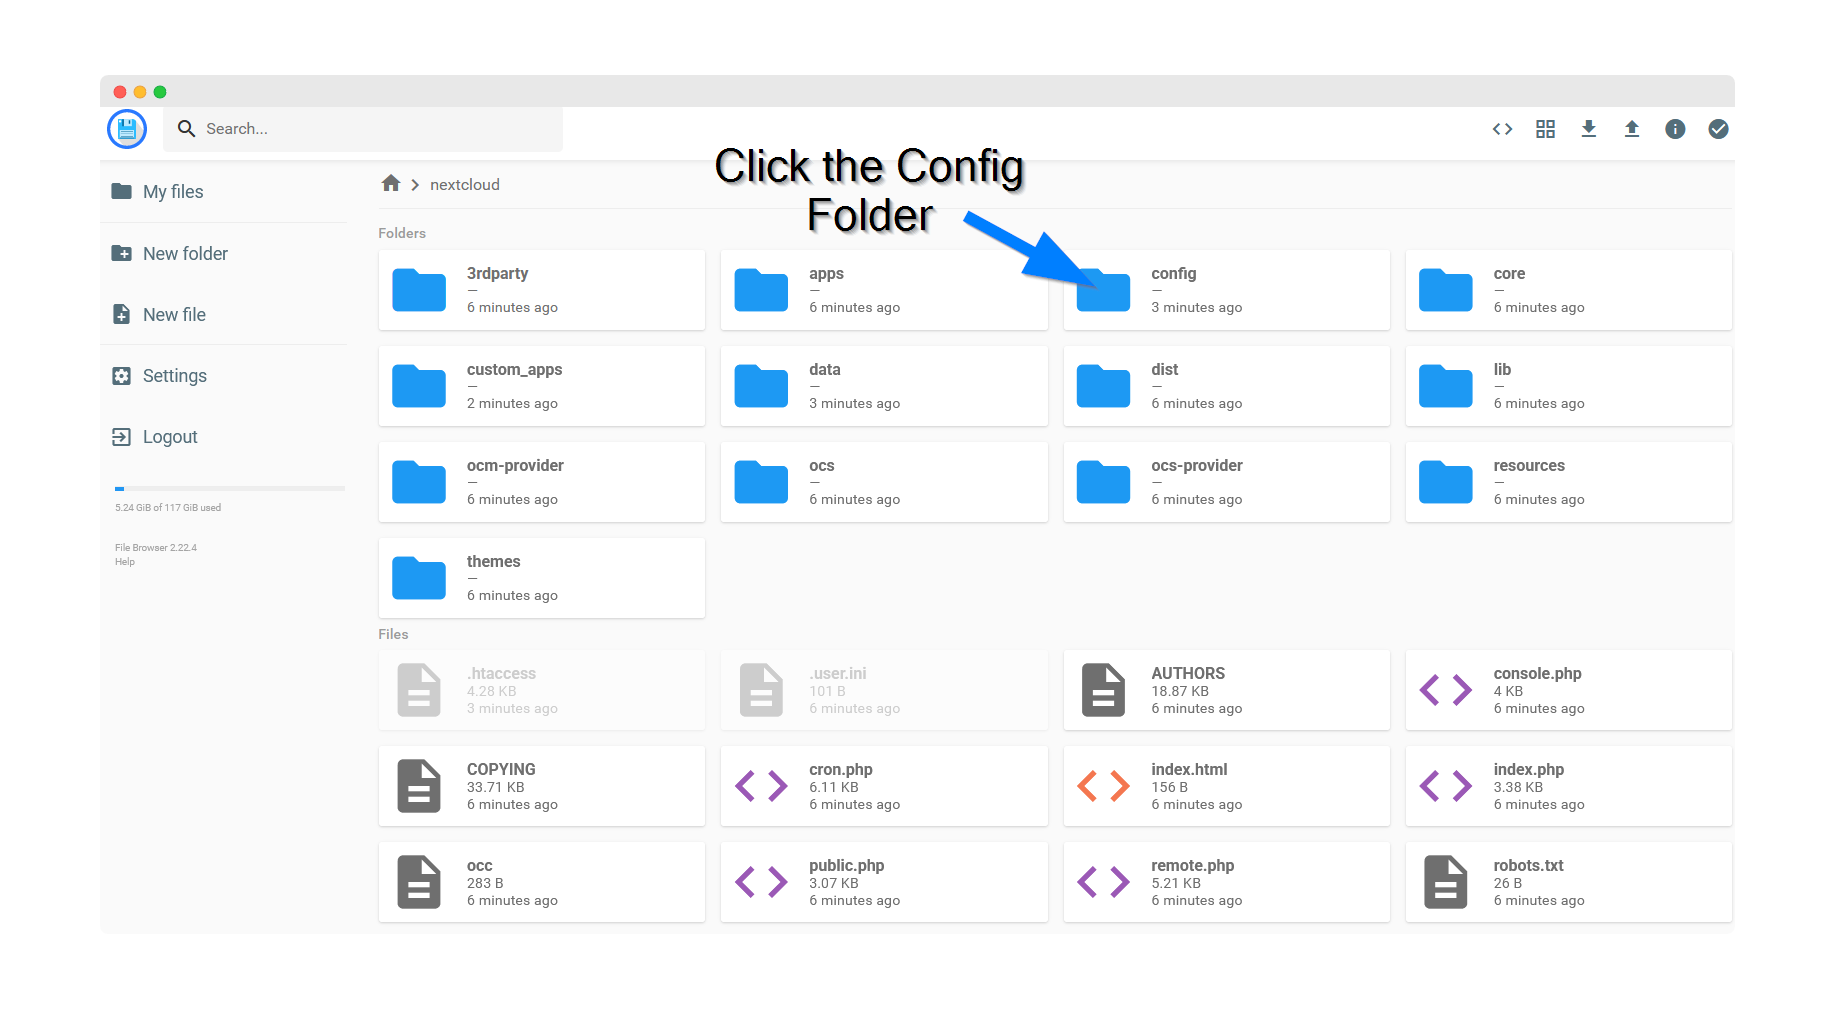
Click the Nextcloud folder:
Next, click the config folder:
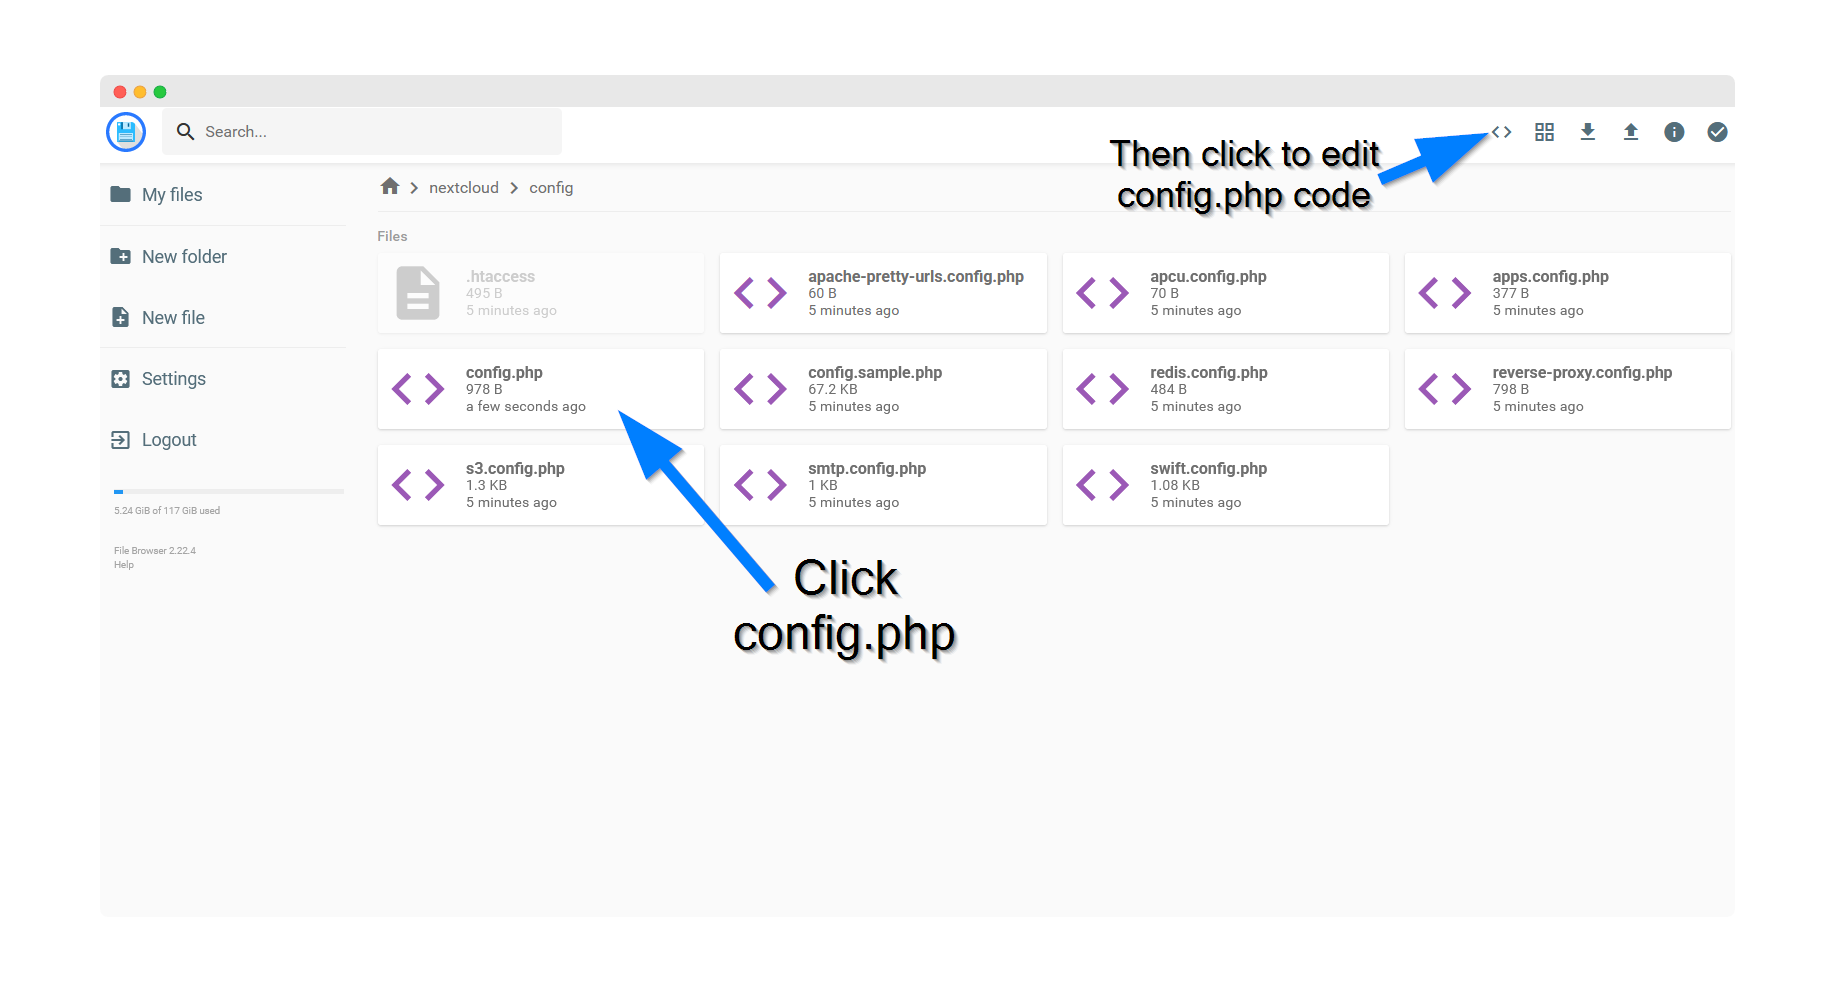
Step 9: Edit config.php
Click the config.php file and select the code editor icon in the top right corner:
Step 10: Add Trusted Domain
Locate the local Nextcloud IP address 192.168.0.1:8531 in the trusted domains array and add your desired Nextcloud domain name (example: cloud.yourdomain.com).
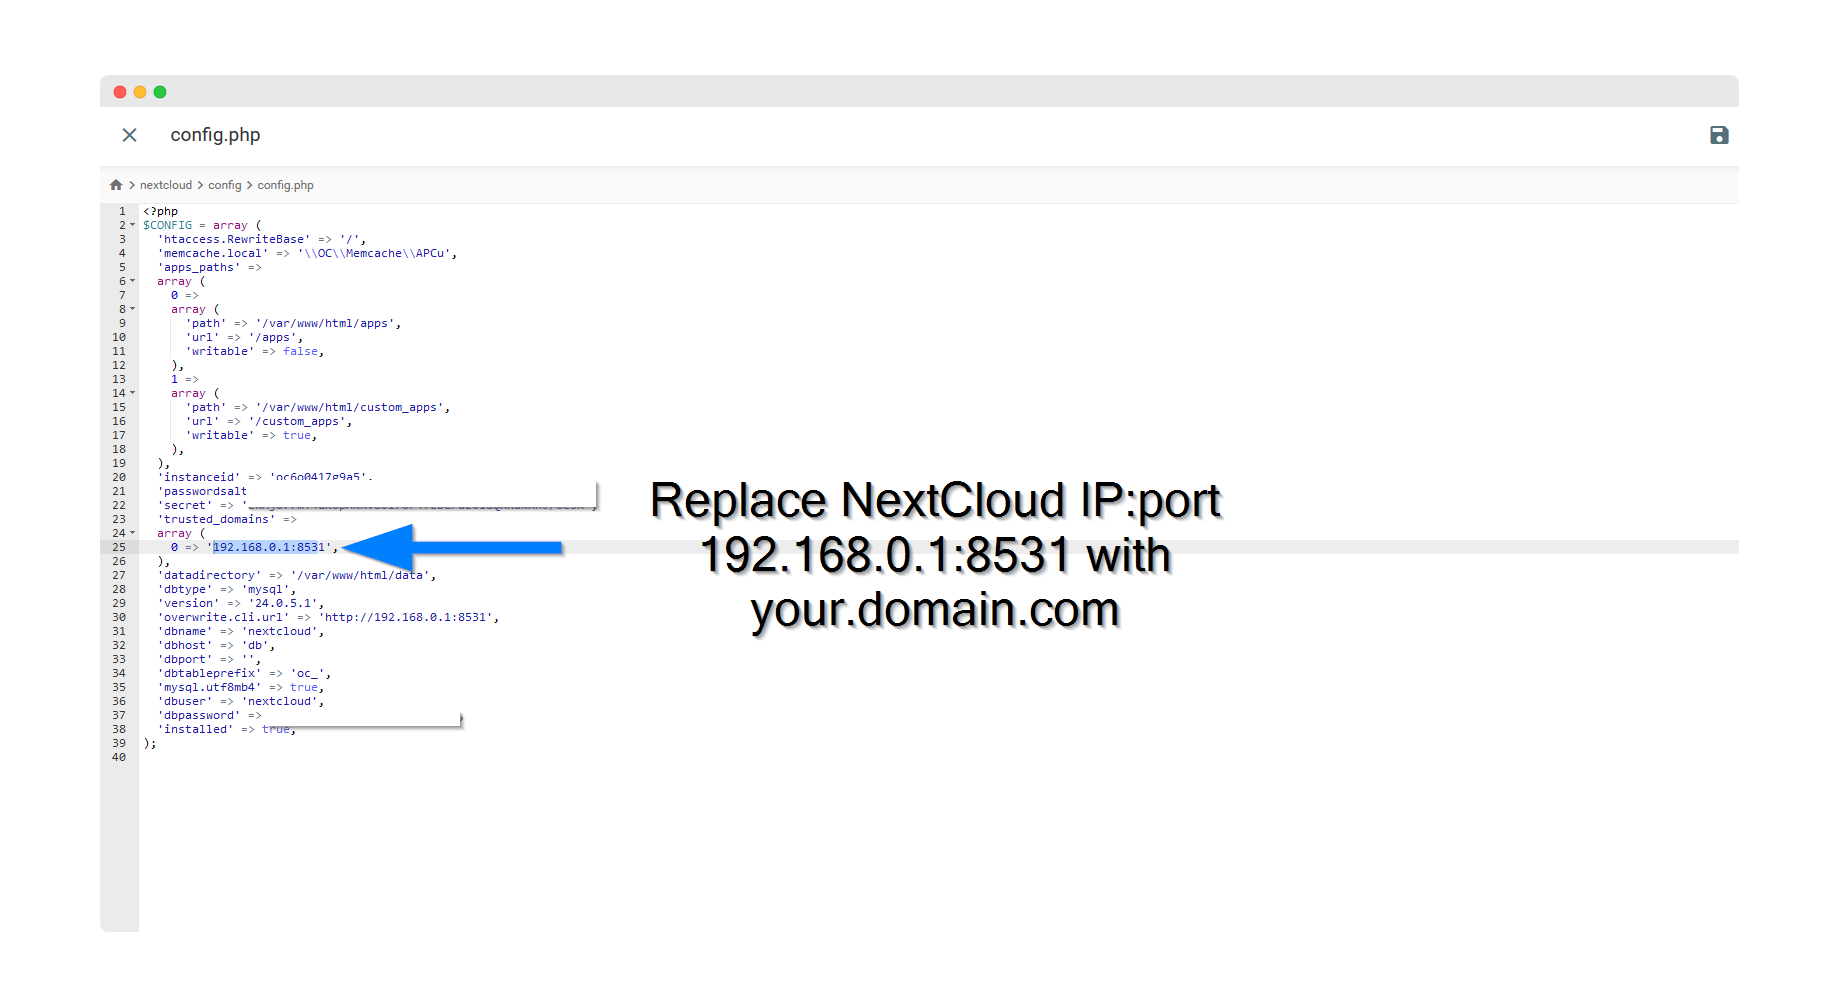
Click the save icon in the top right corner.
'trusted_domains' =>
array (
  0 => '192.168.0.1:8531',
  1 => 'cloud.yourdomain.com',
),
Step 11: Configure Nginx Proxy Manager
For this step you must have already installed the Nginx Proxy Manager app. If not, please follow the tutorial here.
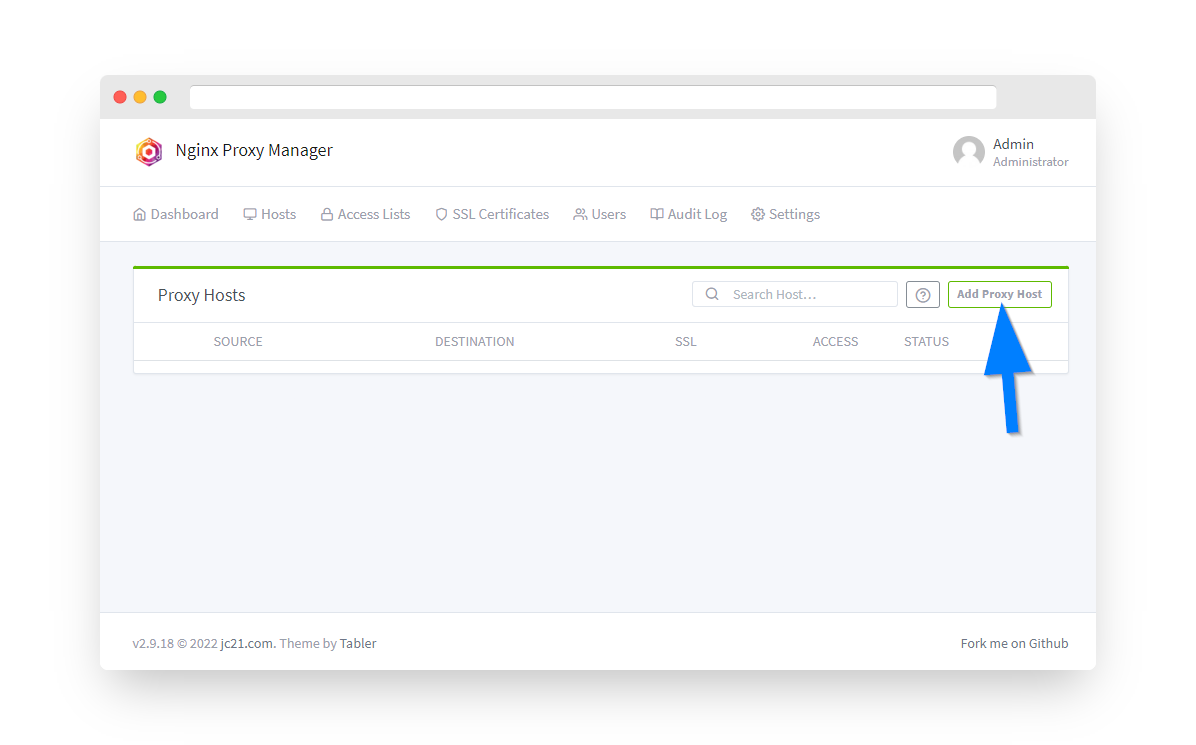
Login to Nginx Proxy Manager at http://192.168.0.1:81 and navigate to Hosts → Proxy Hosts.
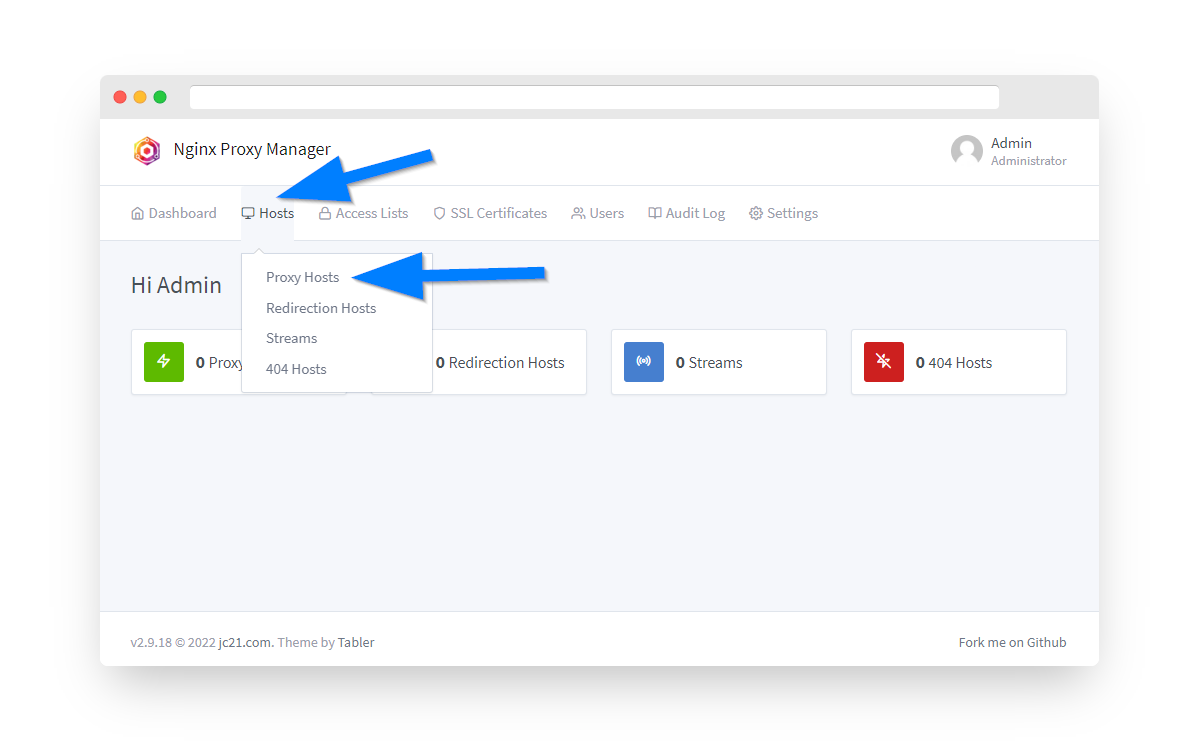
Step 12: Add Proxy Host for Nextcloud
Click the Add Proxy Host button.
Configure the following settings:
- Domain Names: cloud.yourdomain.com
- Scheme: http
- Forward Hostname/IP: 192.168.0.1
- Forward Port: 8531
- Websockets Support: ON ✓

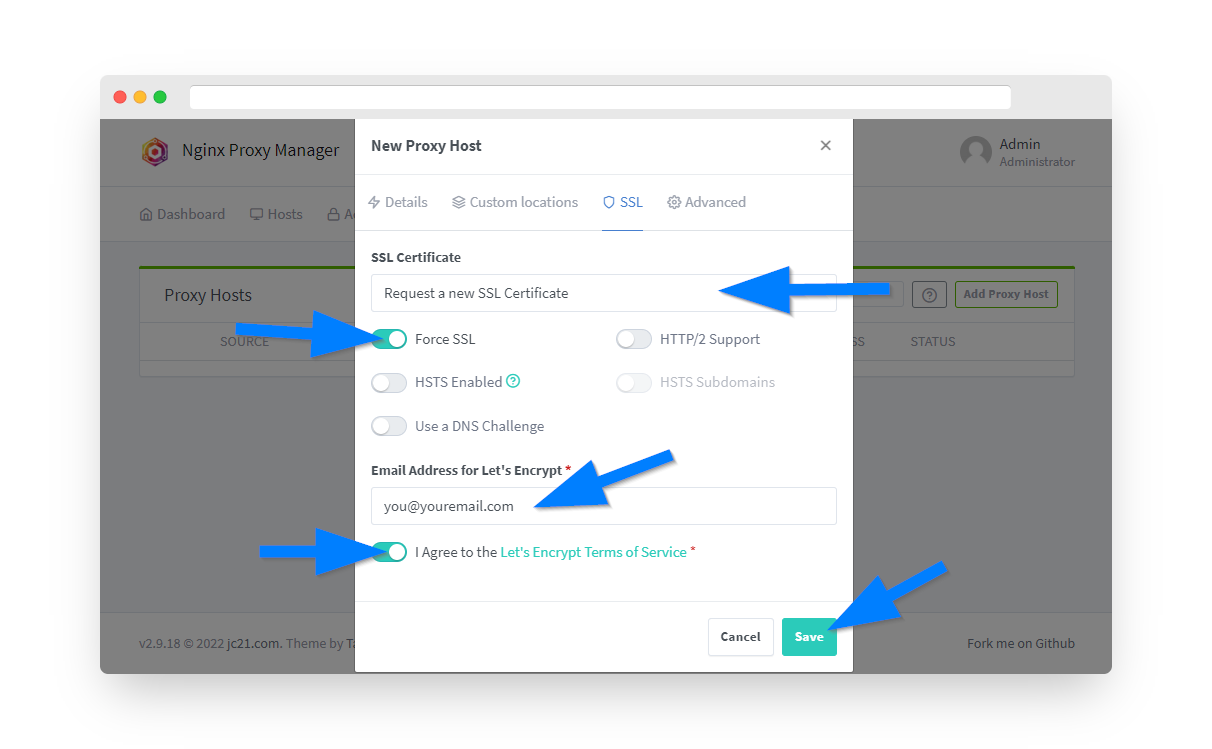
Step 13: Configure SSL Certificate
Under the SSL tab, configure Let's Encrypt certificate as shown in previous tutorials, then save.
Essential Nextcloud Configuration
🔧 config.php Customizations
For optimal performance and security, add these settings to your config.php:
# Memory limit for large file uploads
'memory_limit' => '512M',

# Default phone region
'default_phone_region' => 'US',

# Enable maintenance window
'maintenance' => false,
'maintenance_window_start' => 1,

# Improve performance
'enable_previews' => true,
'preview_max_x' => 1024,
'preview_max_y' => 768,

# Security headers
'overwriteprotocol' => 'https',
'overwrite.cli.url' => 'https://cloud.yourdomain.com',
📁 External Storage
To add external storage (USB drive or network share):
- Install "External storage support" app from Nextcloud app store
- Go to Settings → External Storage
- Add local folder:
/mnt/usb/nextcloud-data - Or add SMB/CIFS share for network storage
Nextcloud Features & Apps
📱 Mobile & Desktop Sync
- iOS and Android apps
- Desktop clients for Windows/Mac/Linux
- Automatic photo backup
- Selective sync options
🗂️ File Management
- Version control
- File sharing with passwords
- Expiration dates for shares
- Comments and tags
👥 Collaboration
- Real-time document editing
- Video conferencing
- Screen sharing
- Team folders
🔐 Security Features
- End-to-end encryption
- Two-factor authentication
- Brute force protection
- File access control
Performance Optimization
Enable Redis Cache
Add Redis for better performance:
# Add to config.php
'memcache.local' => '\OC\Memcache\APCu',
'memcache.distributed' => '\OC\Memcache\Redis',
'memcache.locking' => '\OC\Memcache\Redis',
'redis' => [
    'host' => 'localhost',
    'port' => 6379,
],
Background Jobs
Set up cron for background jobs instead of AJAX:
- SSH into router
- Add cron job:
*/5 * * * * docker exec -u www-data nextcloud_app php cron.php - In Nextcloud settings, select "Cron" for background jobs
Troubleshooting Common Issues
Untrusted Domain Error
Solution:
- Add domain to trusted_domains in config.php
- Clear browser cache
- Restart Nextcloud container:
docker restart nextcloud_app
Large File Upload Fails
Solution:
- Increase PHP limits in Nextcloud container
- Add to config.php:
'chunking_enabled' => true - Increase Nginx client_max_body_size in NPM
- Check available storage space
Slow Performance
Solution:
- Enable Redis caching (see optimization section)
- Switch to cron for background jobs
- Disable unnecessary apps
- Check router CPU/memory usage
- Consider external database on more powerful hardware
Calendar/Contacts Sync Issues
Solution:
- Use correct DAV URLs:
- CalDAV:
https://cloud.yourdomain.com/remote.php/dav/ - CardDAV:
https://cloud.yourdomain.com/remote.php/dav/ - Check .htaccess file exists
- Verify WebDAV module is enabled
Useful Docker Commands
# View Nextcloud logs
docker logs -f nextcloud_app

# Access Nextcloud container shell
docker exec -it nextcloud_app bash

# Run Nextcloud occ commands
docker exec -u www-data nextcloud_app php occ status
docker exec -u www-data nextcloud_app php occ maintenance:mode --on
docker exec -u www-data nextcloud_app php occ maintenance:mode --off

# Scan files after manual upload
docker exec -u www-data nextcloud_app php occ files:scan --all

# Update Nextcloud
docker exec -u www-data nextcloud_app php occ upgrade

# Check Nextcloud integrity
docker exec -u www-data nextcloud_app php occ integrity:check-core

# Database maintenance
docker exec nextcloud_db mysqldump -u root -p nextcloud > nextcloud-backup.sql
Mobile App Configuration
iOS/Android Setup:
- Download Nextcloud app from App Store/Play Store
- Enter server address:
https://cloud.yourdomain.com - Login with your username and password
- Grant permissions for photo/file access
- Enable automatic photo upload (optional)
💡 Tip: Use app passwords for mobile devices. Go to Settings → Security → Devices & sessions → Create new app password.
Summary
You've successfully installed Nextcloud on your PrivateRouter OpenWRT system! This powerful platform provides:
- ✅ Complete control over your data
- ✅ File sync across all devices
- ✅ Calendar, contacts, and email integration
- ✅ Document collaboration features
- ✅ Video conferencing and chat
- ✅ Secure access via your own domain