PrivateRouter custom VPN routers provide an easy one-click method to deploy popular self-hosted apps directly on your router. When combined with TorGuard's Private VPN Cloud service, users can easily self-host applications securely behind WireGuard.
What is Nginx Proxy Manager?
Nginx Proxy Manager (NPM) is an essential tool that provides a beautiful web interface for managing Nginx reverse proxy hosts with free SSL certificates from Let's Encrypt. It's perfect for:
- Managing multiple domains and subdomains
- Automatic SSL certificate generation and renewal
- Reverse proxy configuration without command line
- Access control and authentication
- Stream and redirect management
⚡ Why You Need This: Nginx Proxy Manager is a prerequisite for most self-hosted applications on PrivateRouter. It handles domain routing and SSL certificates, making your apps accessible via secure HTTPS connections.
Prerequisites
Before you begin, ensure you have:
- PrivateRouter with OpenWRT firmware
- Docker support enabled on your router
- Access to router's web interface
- A domain name (for external access)
- Access to your domain's DNS settings
- Private VPN Cloud service (for secure external access)
Installation Steps
Step 1: Deploy Nginx Proxy Manager via Docker
Login to your PrivateRouter and click the System menu. Select Custom Commands then locate Nginx Proxy Manager and click the RUN button.
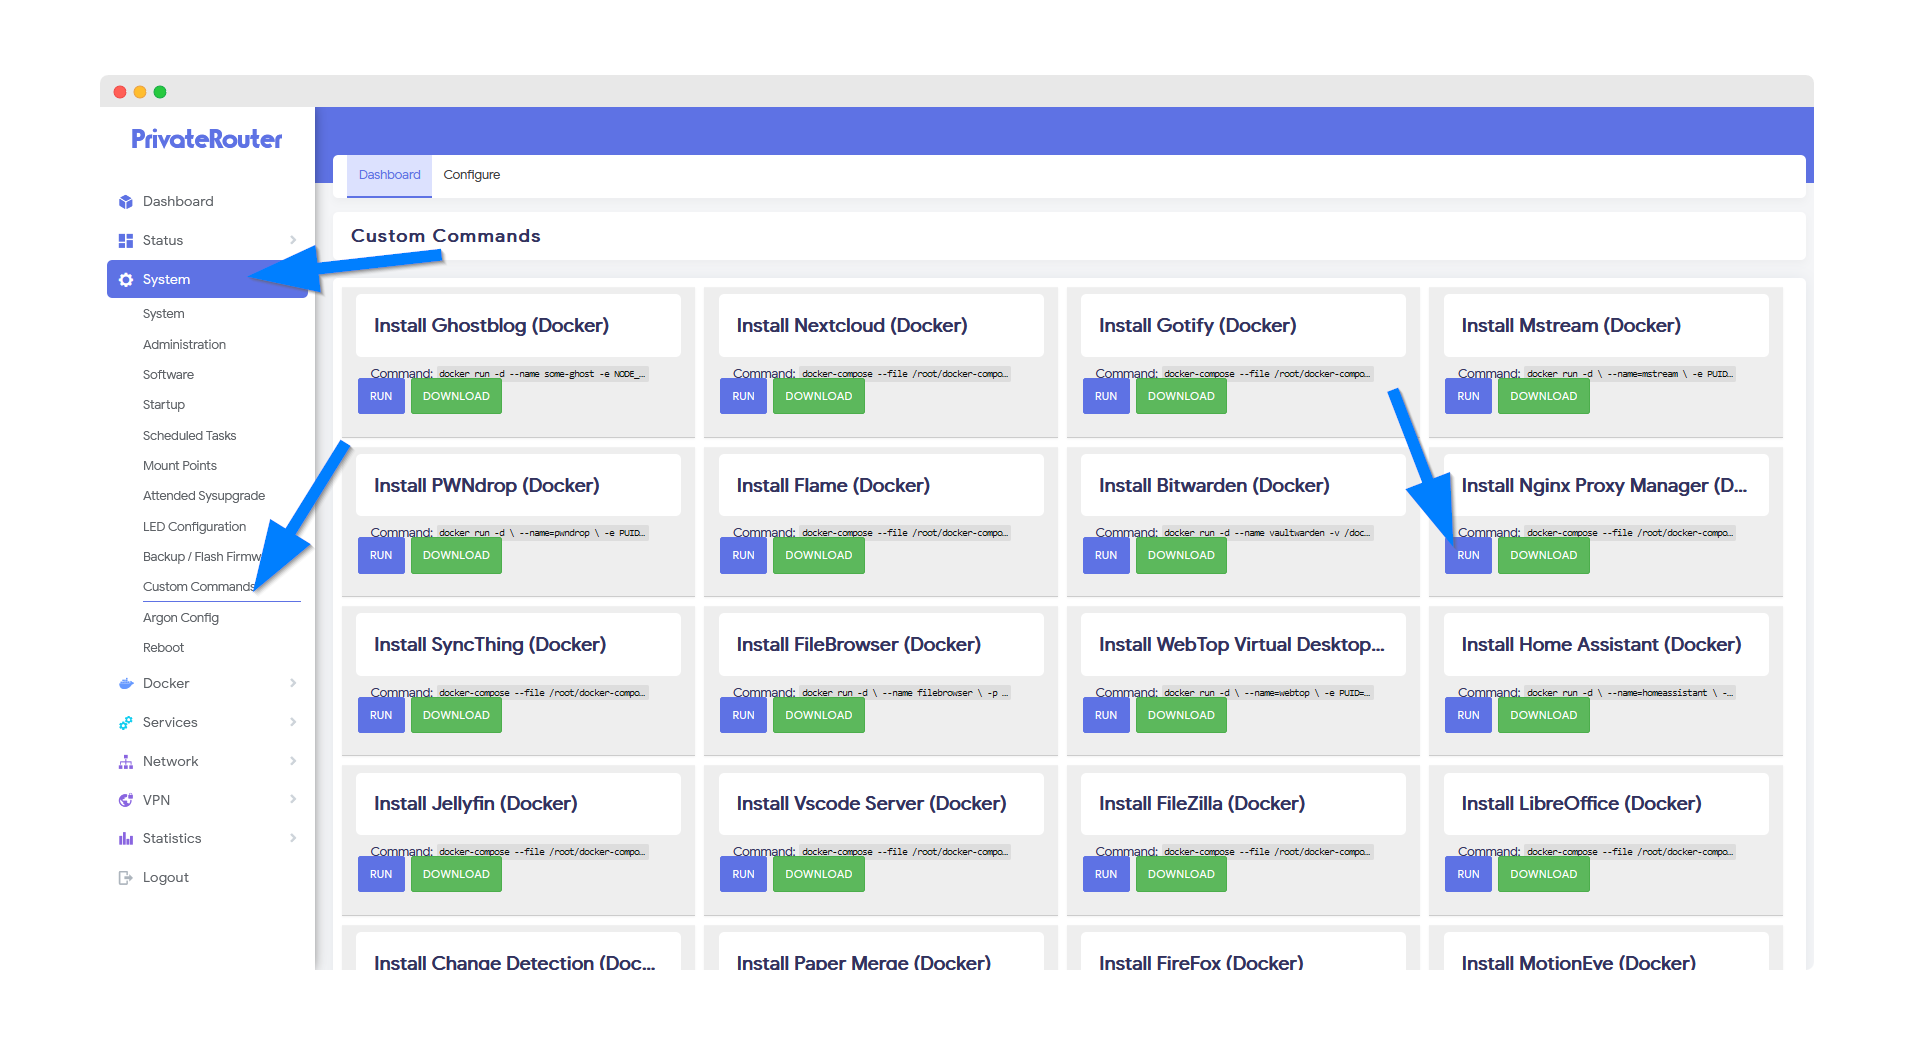
💡 Pro Tip: This installation will set up three services: the Nginx Proxy Manager web interface (port 81), HTTP traffic (port 8080), and HTTPS traffic (port 4443).
Step 2: Wait for Installation Completion
Wait a few minutes for Docker to complete the app install. Scroll to the bottom and you will see output similar to the commands below when the install has been completed.
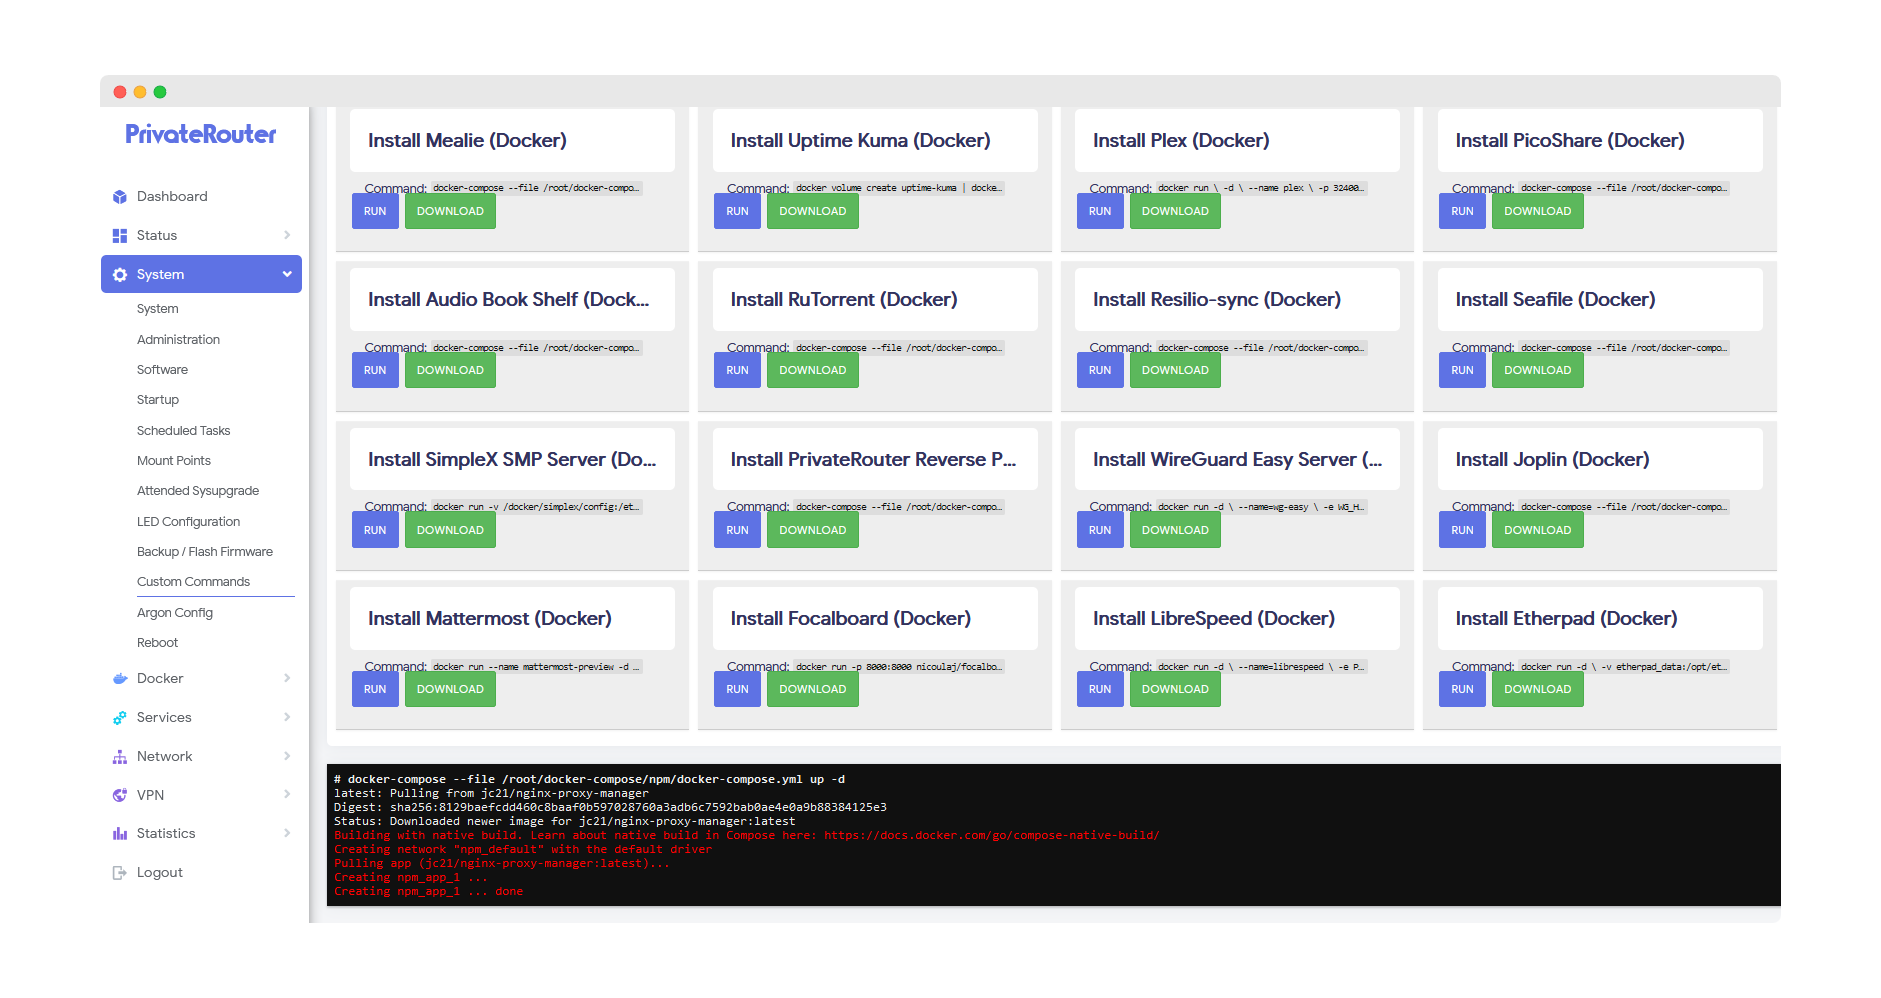
⚠️ Note: If you receive an error instead of docker output, this can happen if the install takes longer. Nginx Proxy Manager will still be installed, so be patient and proceed to the next step.
Step 3: Access Nginx Proxy Manager Interface
To access Nginx Proxy Manager after it's been installed, click the Docker menu then select Containers. You should see the newly created Nginx Proxy Manager (npm) container with a green UP status.
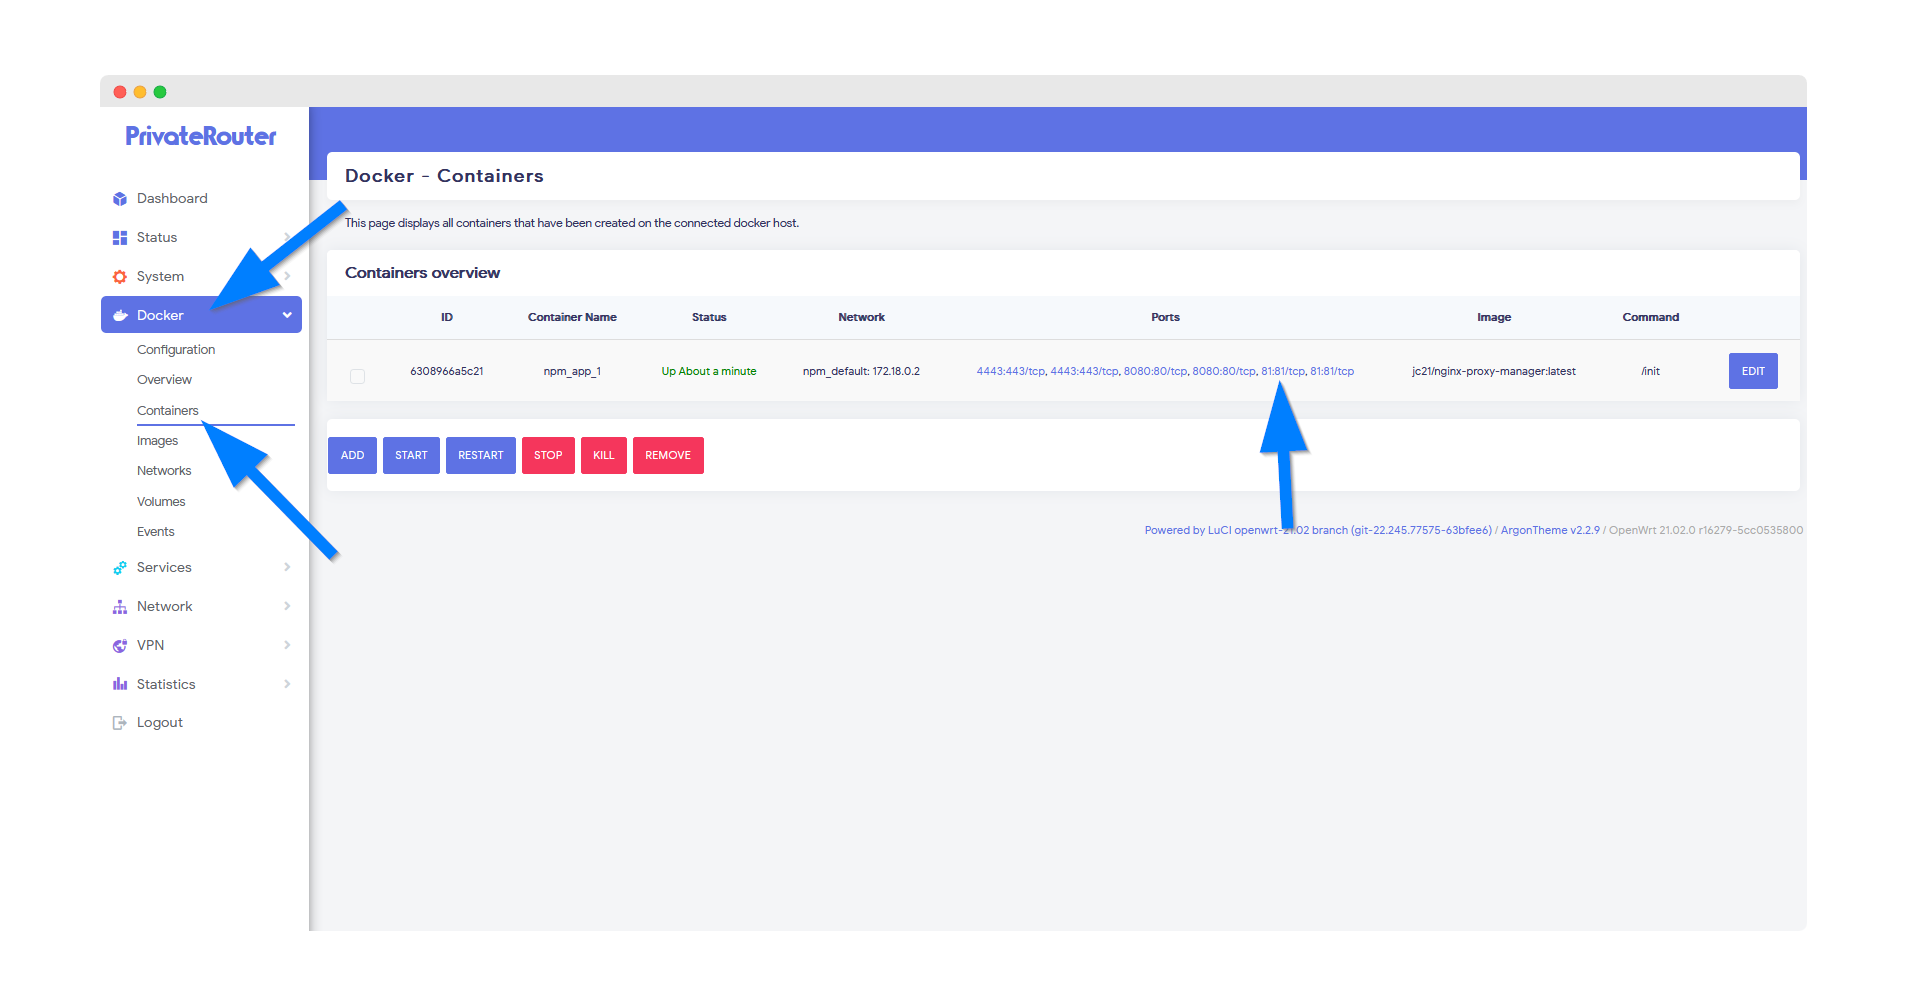
Click the port link to access Nginx Proxy Manager via your local router IP address and port. With default settings, this will load at:
http://192.168.0.1:81
Step 4: Initial Login
Nginx Proxy Manager will load with the login screen. The first time you can login with the default credentials:
Username: [email protected]
Password: changeme
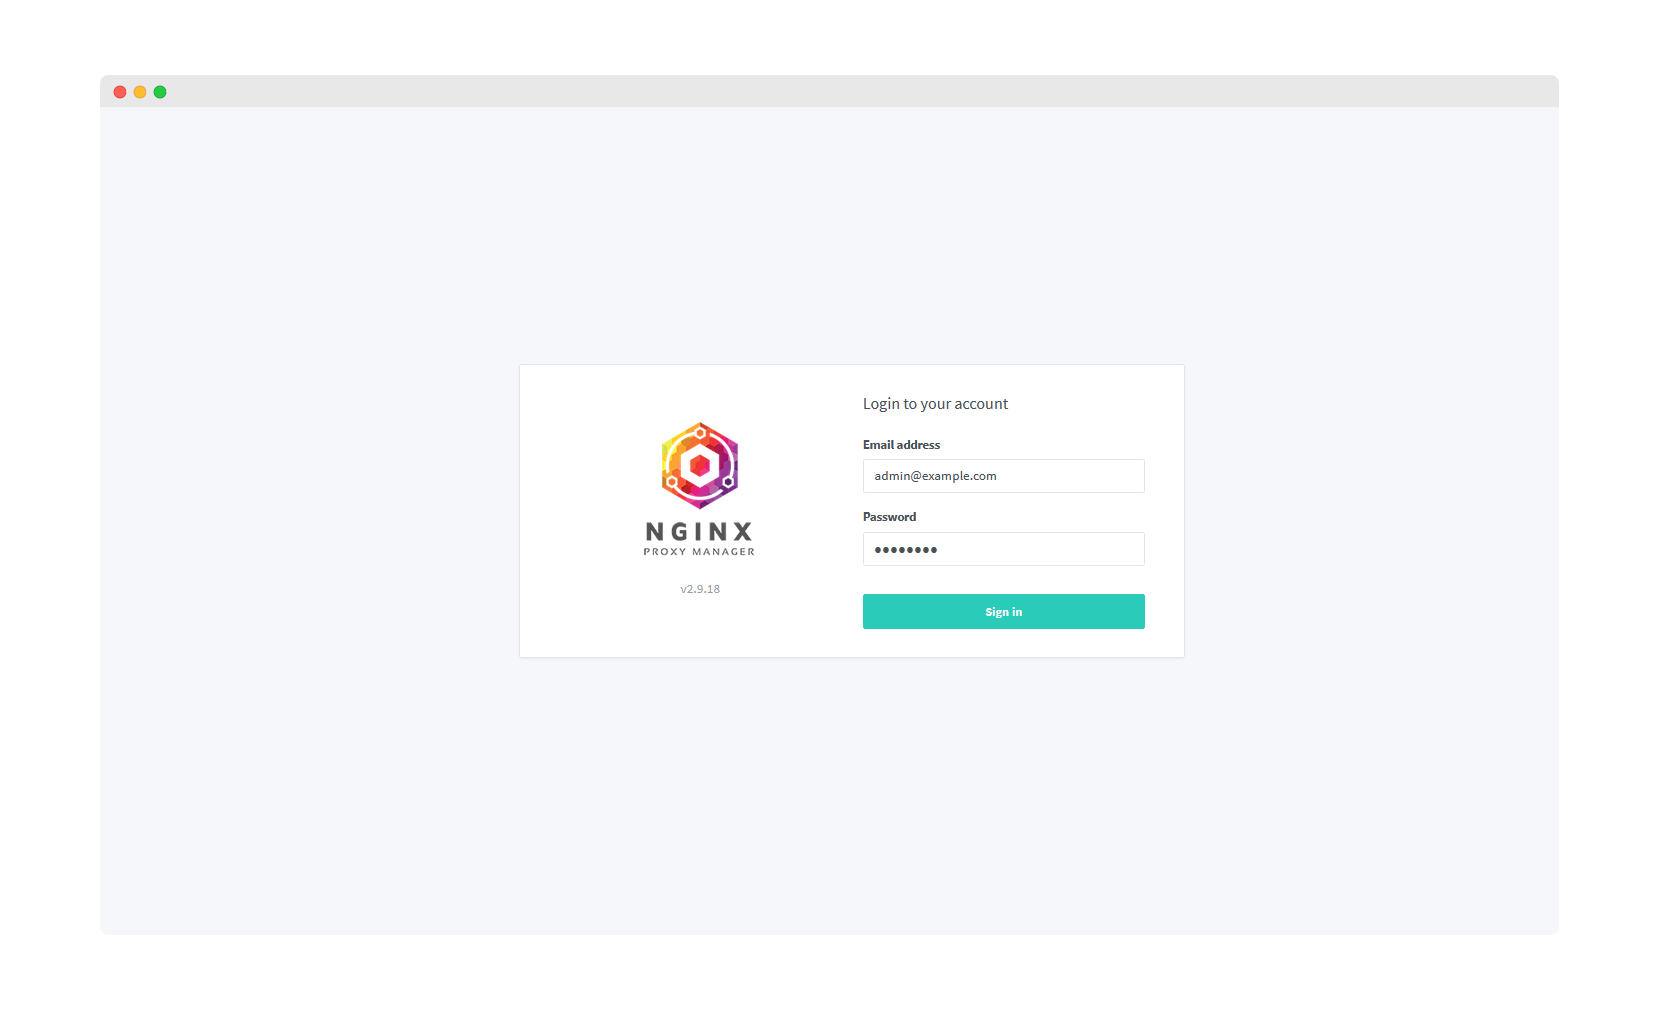
🔒 Security Alert: You will be forced to change these credentials on first login!
Step 5: Complete Initial Setup
Enter your name and email address so Let's Encrypt can notify you about free SSL cert renewals, then proceed to change the default password.
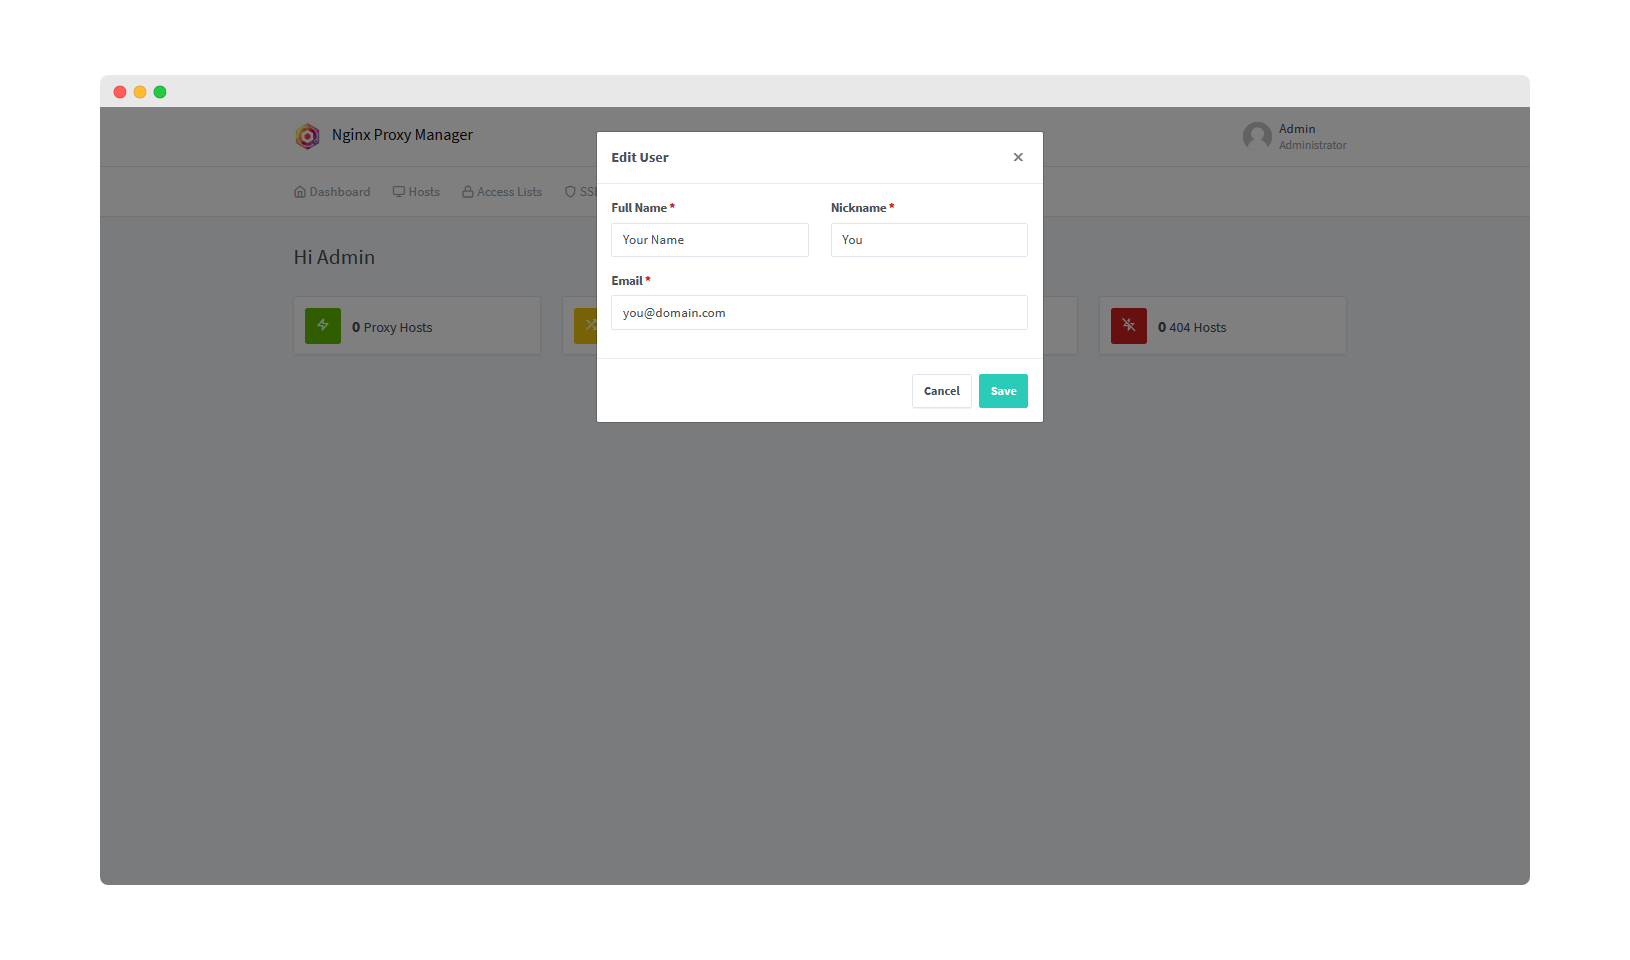
Password Requirements:
- Minimum 8 characters
- Use a strong, unique password
- Store it securely - you'll need it for all future access
Adding Your First Proxy Host
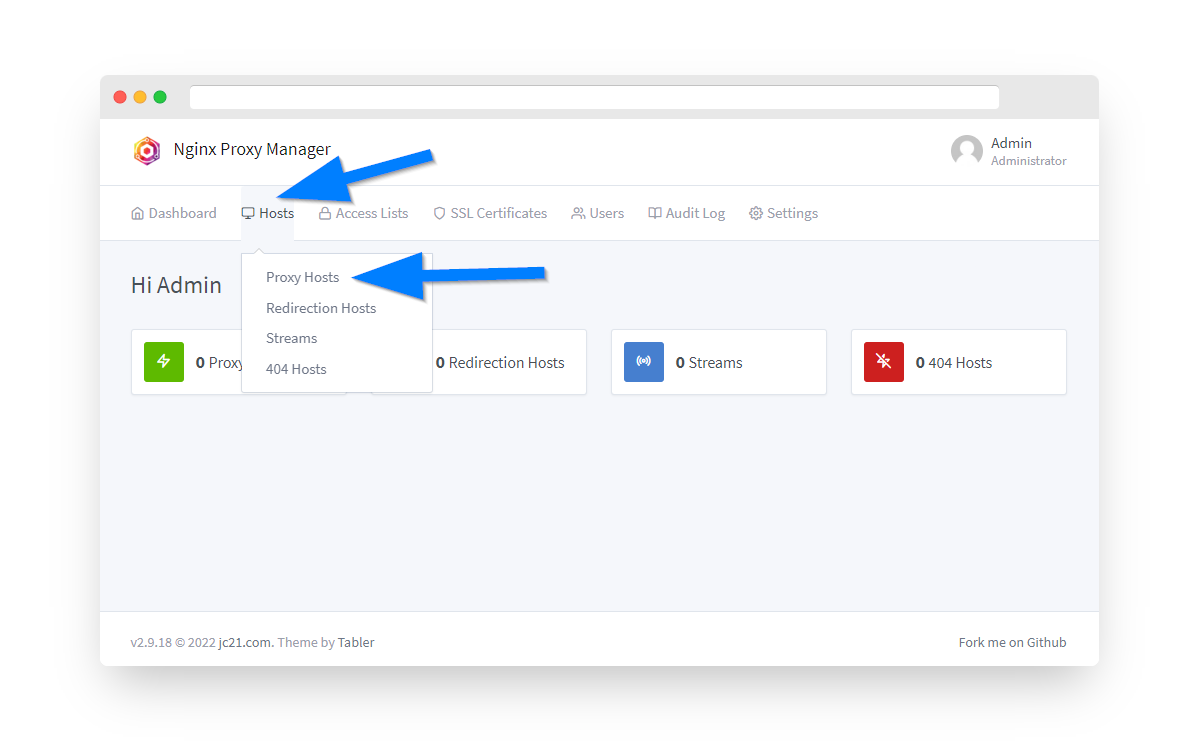
Step 6: Navigate to Proxy Hosts
Once logged in, click the Hosts menu option then select "Proxy Hosts".
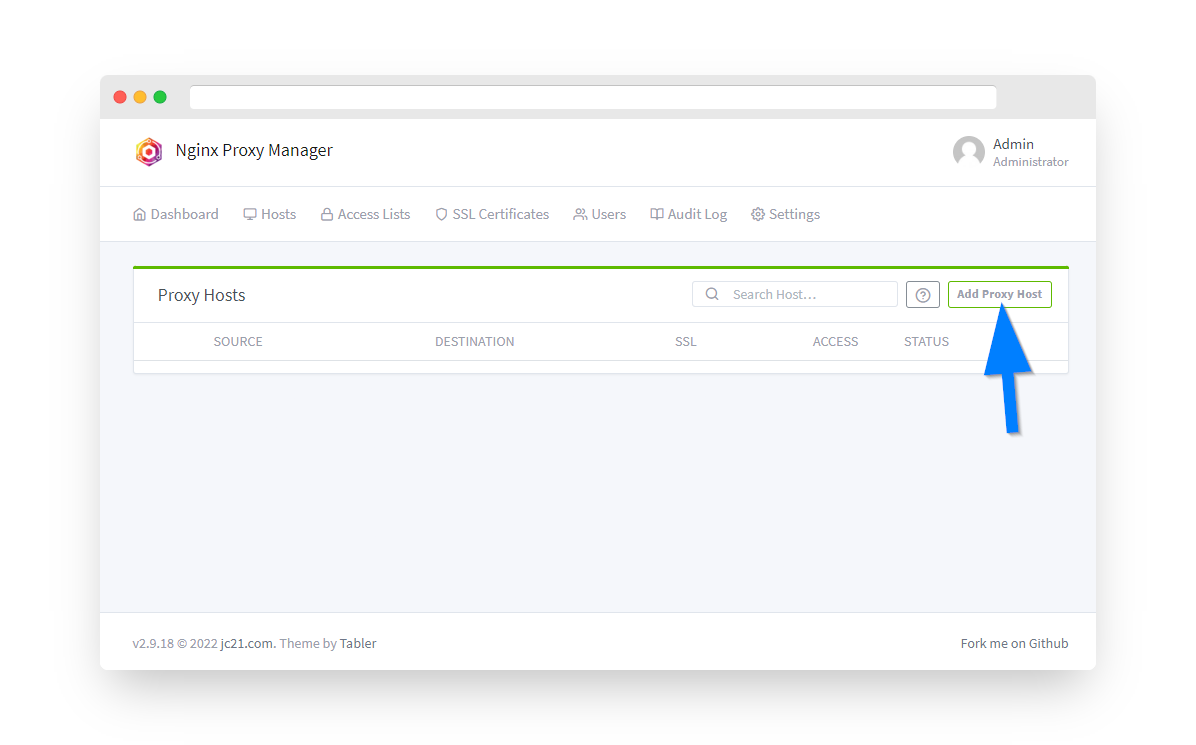
Step 7: Add New Proxy Host
Click the Add Proxy Host button.
Step 8: Configure Domain and Backend
⚠️ Prerequisites: Before proceeding, ensure you have:
- Pointed an A record or A Wildcard record with your domain's registrar at your Private VPN Cloud VPN IP address
- Set up external/internal port forwarding 80/8080 and 443/4443
Configure the following settings:
- Domain Names: Enter your domain/subdomain (e.g., app.yourdomain.com)
- Scheme: Select "http" or "https" based on your backend app
- Forward Hostname/IP: Enter your Router's IP address (192.168.0.1)
- Forward Port: Enter the web app's port number (e.g., 8984)
⚡ Important: For most apps, make sure to set the Websockets Support switch to ON

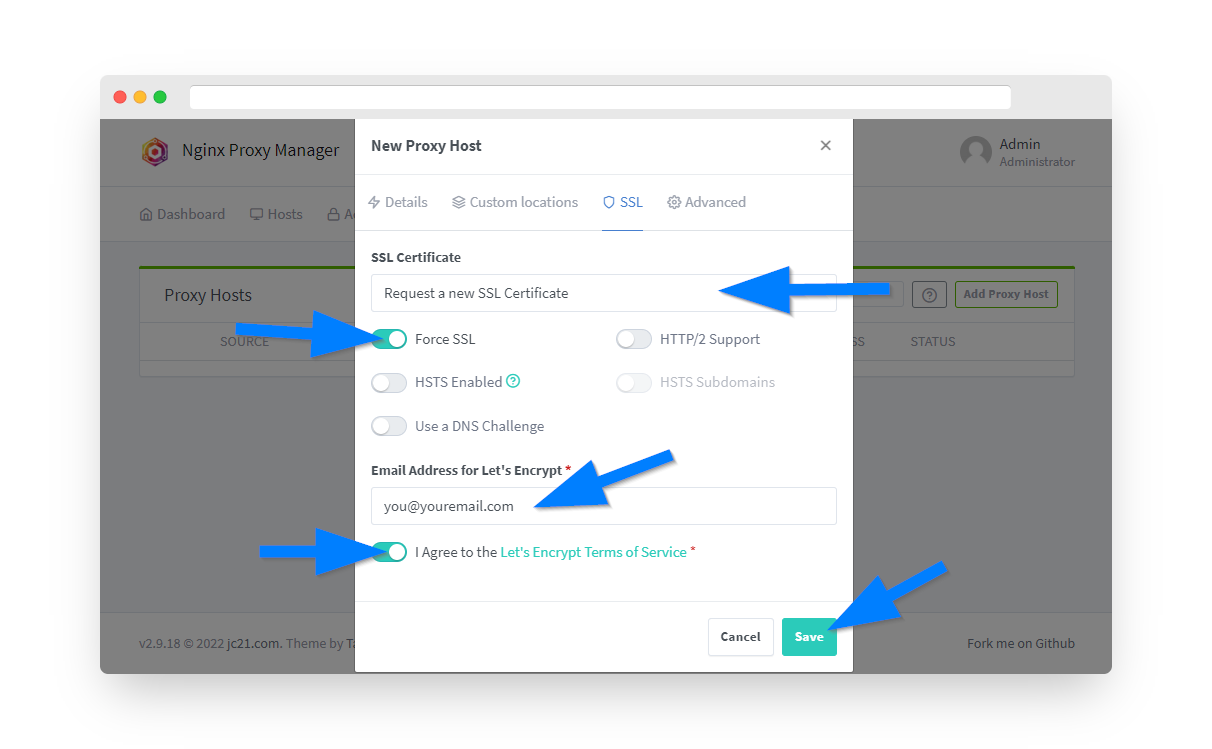
Step 9: Configure SSL Certificate
Under the SSL tab, proceed with obtaining a free Let's Encrypt SSL certificate:
- Under SSL Certificate dropdown, select "Request a new SSL Certificate with Let's Encrypt"
- Enable the "Force SSL" option switch
- Enter an email address for Let's Encrypt registration
- Click the "I Agree" switch for Let's Encrypt Terms and Conditions
- Click the Save button
After a few moments, you should see your new proxy host on the Nginx Proxy Manager dashboard with a green "online" status. To verify things are working, open a new browser window and enter your domain name. You should see your web app loading through your domain instead of the local IP address.
Port Forwarding Configuration
Essential Port Mappings for Nginx Proxy Manager:
| External Port | Internal Port | Purpose | Protocol |
|---|---|---|---|
| 80 | 8080 | HTTP Traffic | TCP |
| 443 | 4443 | HTTPS Traffic | TCP |
| 81 | 81 | NPM Admin Interface | TCP |
💡 Note: The non-standard internal ports (8080, 4443) are used to avoid conflicts with other services on your router.
Nginx Proxy Manager Features
🌐 Domain Management
- Multiple domain support
- Subdomain routing
- Wildcard certificates
- Custom locations
🔒 SSL/Security
- Let's Encrypt integration
- Custom SSL certificates
- Force SSL redirects
- HSTS support
🔐 Access Control
- Basic authentication
- Access lists (IP whitelisting)
- Custom Nginx directives
- Block common exploits
⚙️ Advanced Features
- WebSocket support
- Stream support (TCP/UDP)
- 404 error pages
- Redirection rules
Best Practices & Tips
🔒 Security Recommendations
- Always use SSL for external access
- Enable "Block Common Exploits" for all hosts
- Use access lists to restrict admin panel access
- Regularly update Nginx Proxy Manager
- Monitor access logs for suspicious activity
🌐 Domain Configuration
- Use wildcard certificates (*.yourdomain.com) for flexibility
- Set up catch-all proxy host for undefined subdomains
- Use descriptive subdomain names (nextcloud.domain.com)
- Configure custom 404 pages for professional appearance
⚡ Performance Optimization
- Enable caching headers where appropriate
- Use gzip compression
- Configure appropriate proxy timeouts
- Monitor resource usage via Docker stats
Troubleshooting Common Issues
Cannot Access NPM Interface
Solution:
- Verify container is running:
docker ps | grep npm - Check port 81 is not blocked by firewall
- Try accessing via IP instead of hostname
- Check Docker logs:
docker logs npm-app-1
SSL Certificate Generation Fails
Solution:
- Verify DNS A record points to correct IP
- Ensure ports 80/443 are forwarded correctly
- Check domain propagation:
nslookup yourdomain.com - Try using DNS challenge instead of HTTP challenge
- Check Let's Encrypt rate limits (5 per week per domain)
502 Bad Gateway Errors
Solution:
- Verify backend service is running
- Check correct internal IP and port
- Enable WebSocket support if needed
- Increase proxy timeout values
- Check backend service logs
Cannot Login After Password Change
Solution:
- Clear browser cache and cookies
- Try incognito/private browsing mode
- Reset database if needed:
docker exec -it npm-db-1 mysql -u root -p - As last resort, reinstall NPM (backup configs first)
Useful Docker Commands
# View NPM logs
docker logs -f npm-app-1

# Restart NPM containers
docker restart npm-app-1 npm-db-1

# Check container status
docker ps | grep npm

# View resource usage
docker stats npm-app-1 npm-db-1

# Backup NPM data
docker exec npm-db-1 mysqldump -u root -p npm > npm-backup.sql

# Access NPM shell
docker exec -it npm-app-1 /bin/bash

# Update NPM to latest version
docker pull jc21/nginx-proxy-manager:latest
docker-compose down
docker-compose up -d
Advanced Configuration
Custom Nginx Configuration
You can add custom Nginx directives in the Advanced tab of each proxy host:
# Example: Large file upload support
client_max_body_size 100M;

# Example: Custom headers
add_header X-Frame-Options "SAMEORIGIN";
add_header X-Content-Type-Options "nosniff";

# Example: Rate limiting
limit_req_zone $binary_remote_addr zone=one:10m rate=10r/s;
limit_req zone=one burst=10;
Stream Support (TCP/UDP Proxy)
NPM can also proxy non-HTTP services like SSH, MySQL, game servers:
- Go to Streams section in NPM
- Add incoming port (e.g., 2222 for SSH)
- Set forwarding host and port
- Choose TCP or UDP protocol
Summary
You've successfully installed Nginx Proxy Manager on your PrivateRouter OpenWRT system! This powerful tool provides:
- ✅ Easy web-based reverse proxy management
- ✅ Automatic SSL certificate generation and renewal
- ✅ Domain and subdomain routing
- ✅ Access control and security features
- ✅ Integration with self-hosted applications