PrivateRouter custom VPN routers provide an easy one-click method to deploy popular self-hosted apps directly on your router. When combined with TorGuard's Private VPN Cloud service, users can easily self-host applications securely behind WireGuard VPN.
What is Jellyfin?
Jellyfin is a free and open-source media streaming server that puts you in complete control of your media. It's the privacy-focused alternative to Plex, offering:
Movies & TV Shows
Stream your video collection with metadata, posters, and subtitles
Music Library
Organize and stream your music with album art and lyrics
Photo Gallery
Browse and share your photo collections
Live TV & DVR
Watch and record live TV with supported tuners
Why Choose Jellyfin?
| Feature | Jellyfin | Plex | Emby |
|---|---|---|---|
| Cost | ✅ Free Forever | ❌ Freemium | ❌ Freemium |
| Open Source | ✅ Yes | ❌ No | ❌ No |
| No Account Required | ✅ Yes | ❌ No | ❌ No |
| Privacy Focused | ✅ Yes | ⚠️ Limited | ⚠️ Limited |
| Hardware Transcoding | ✅ Free | 💰 Paid | 💰 Paid |
Prerequisites
Before you begin, ensure you have:
- PrivateRouter with OpenWRT firmware
- Docker support enabled on your router
- At least 4GB available storage (more for media)
- Media files to stream (movies, TV shows, music)
- FileBrowser installed (for media upload)
- Nginx Proxy Manager installed (for domain access)
⚠️ Hardware Requirements: Video transcoding can be CPU-intensive. For best performance with 4K content, ensure your router has adequate processing power or use direct play compatible formats.
Installation Steps
Step 1: Deploy Jellyfin via Docker
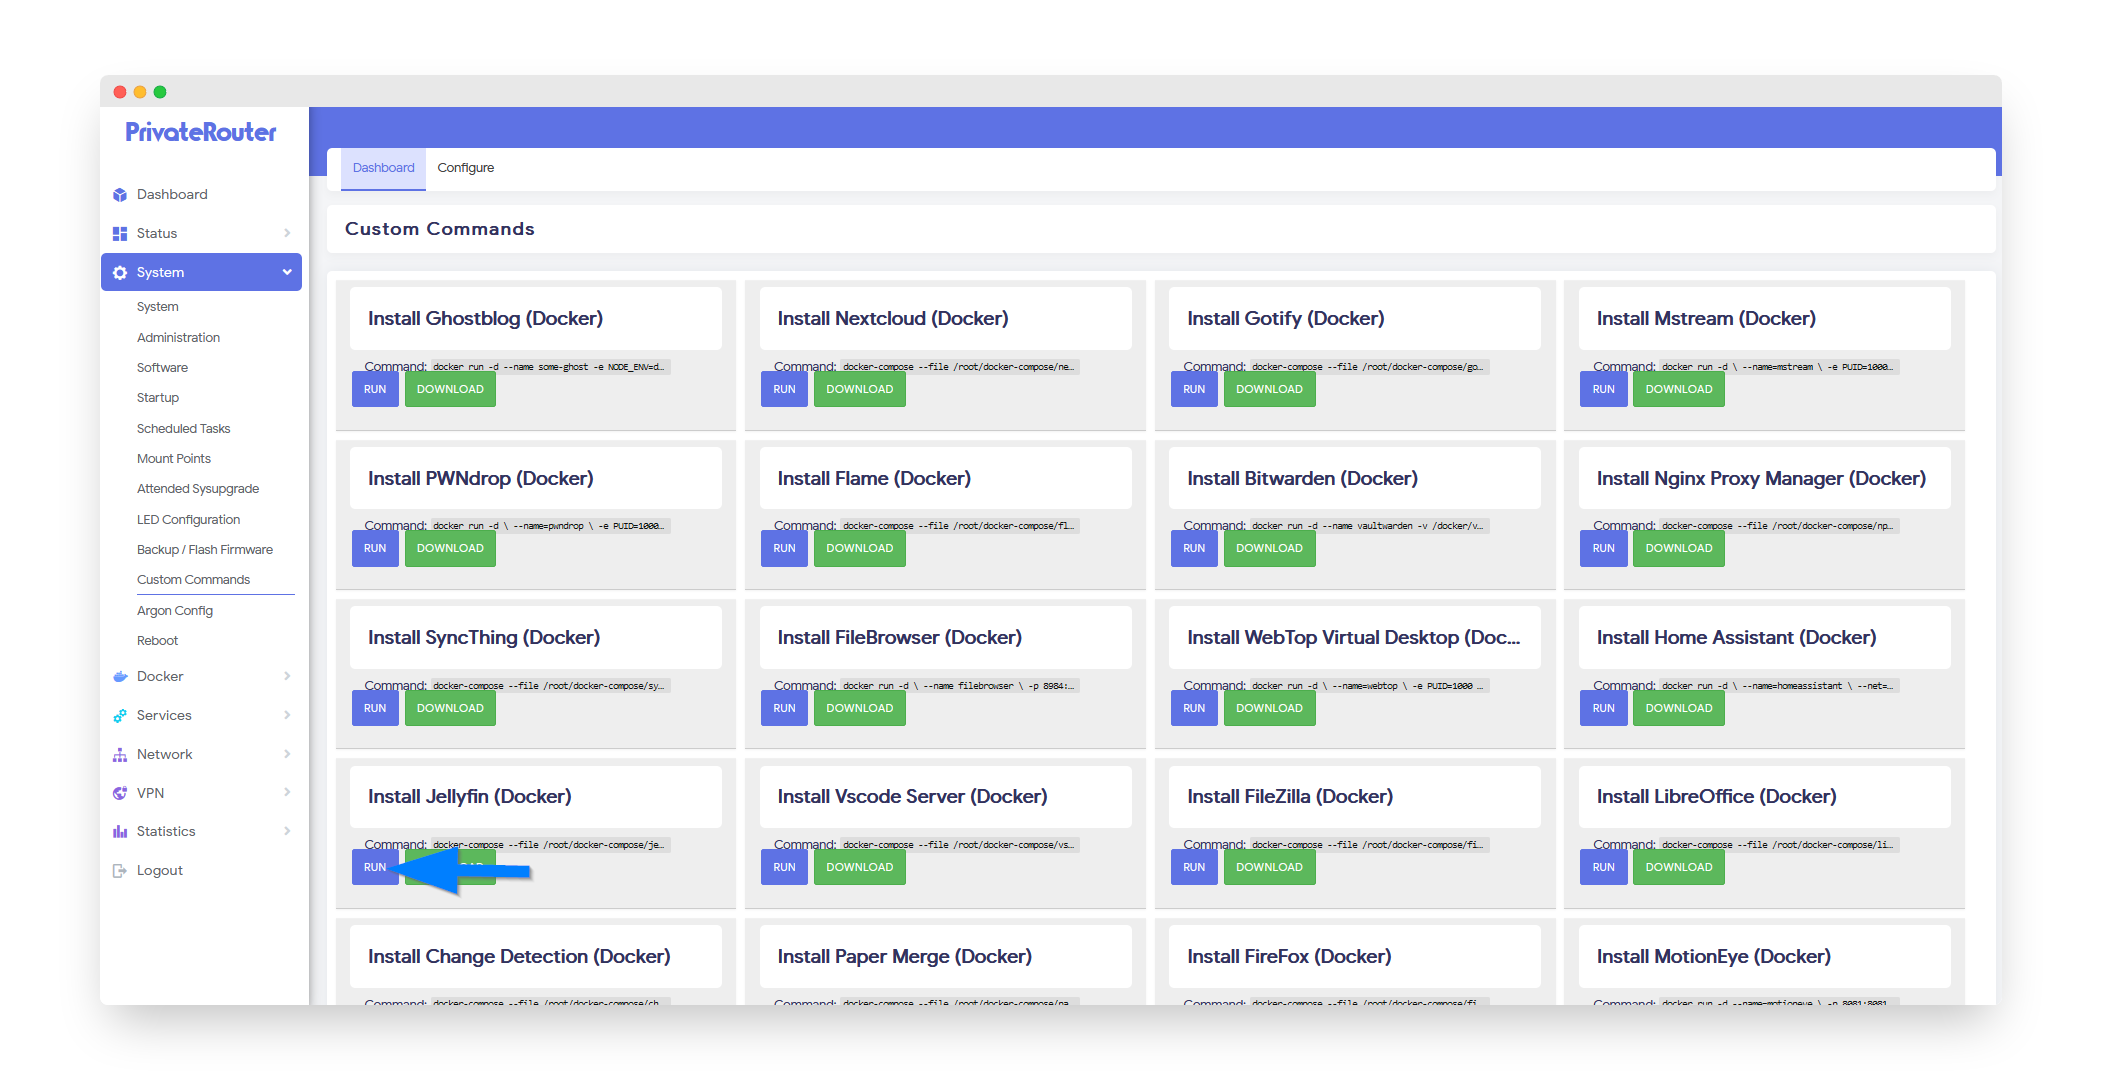
Login to your PrivateRouter and click the System menu. Select Custom Commands then locate Jellyfin and click the RUN button.
💡 Pro Tip: The installation will set up Jellyfin with proper volume mappings for configuration and media storage.
Step 2: Access Jellyfin Web Interface
Wait a few minutes for the Jellyfin install to complete, then click the Docker menu and select Containers. Locate the newly installed Jellyfin app and click the port link (8096) to open Jellyfin in a new window.
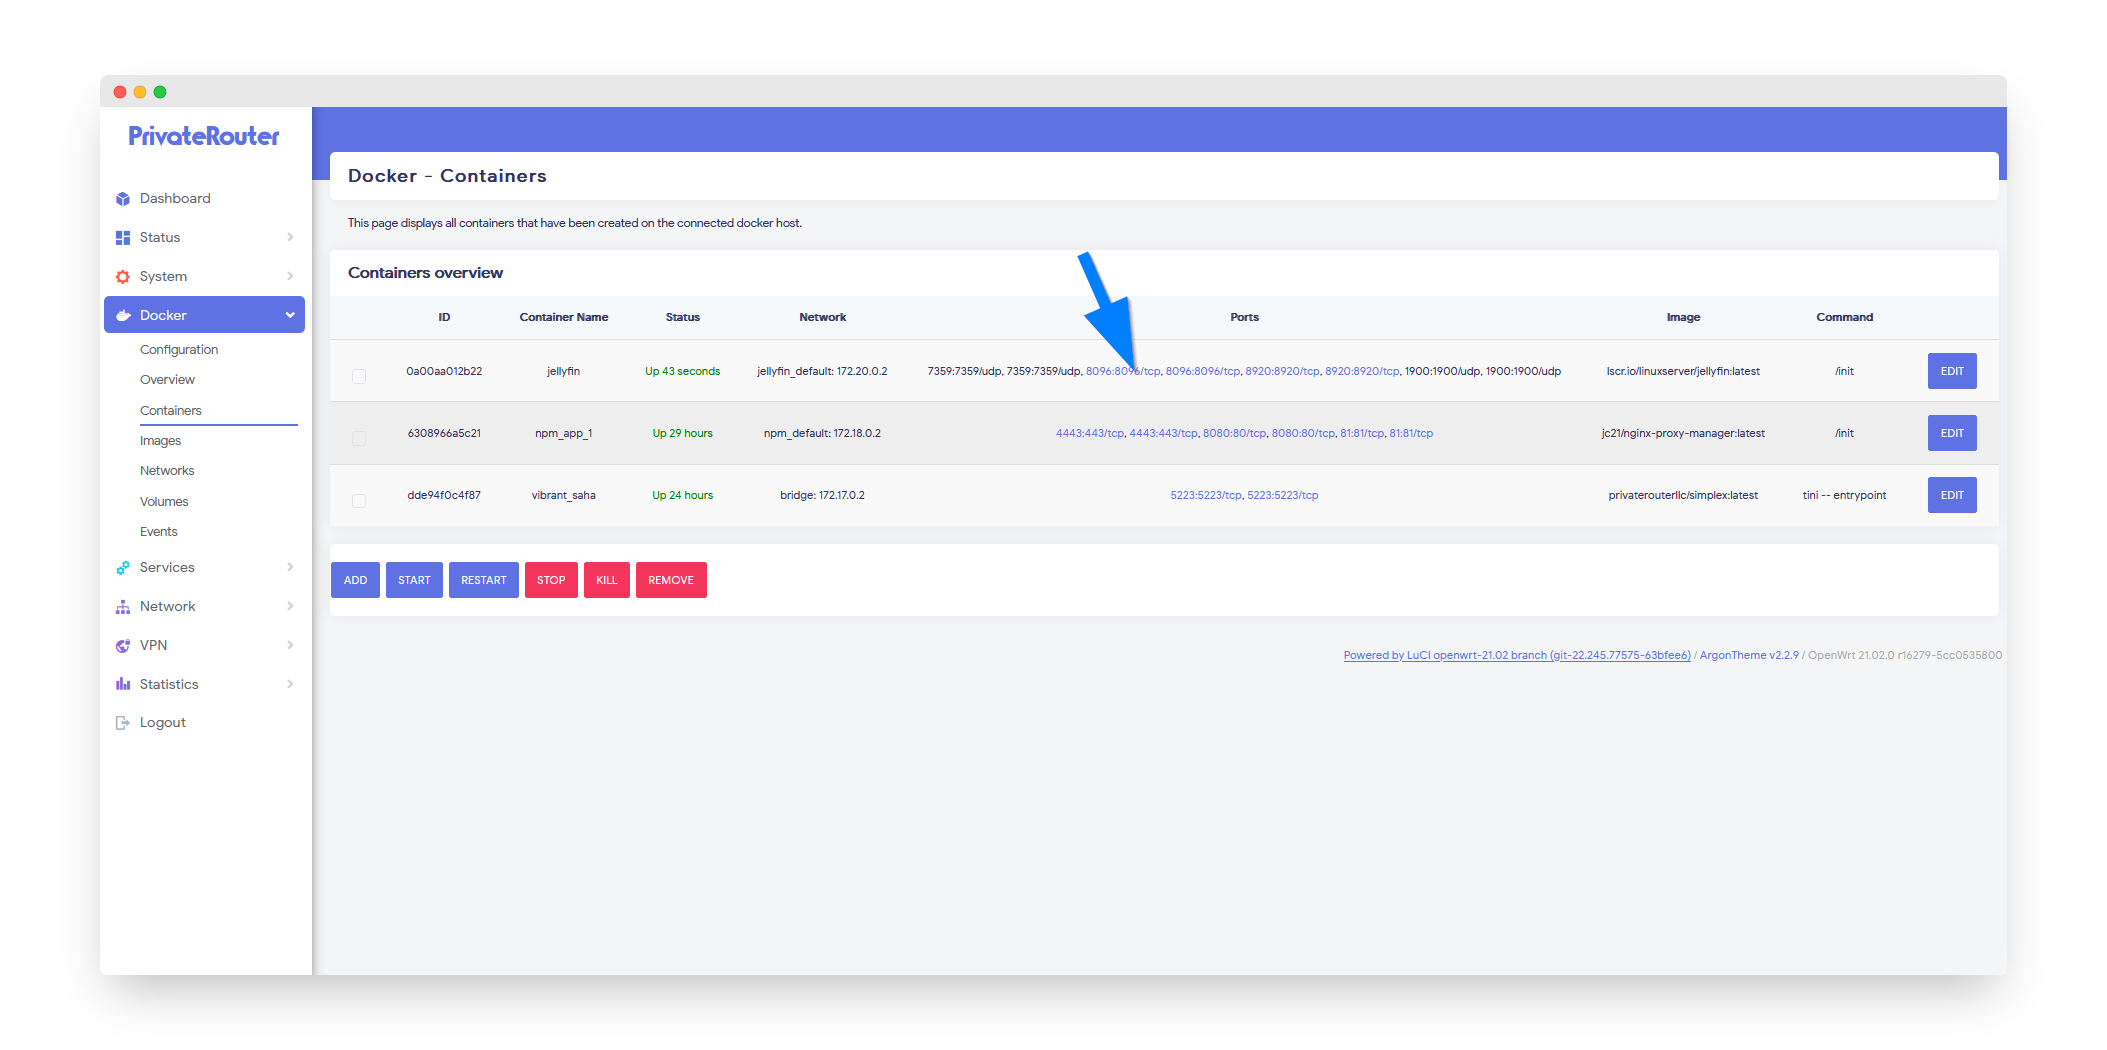
http://192.168.0.1:8096
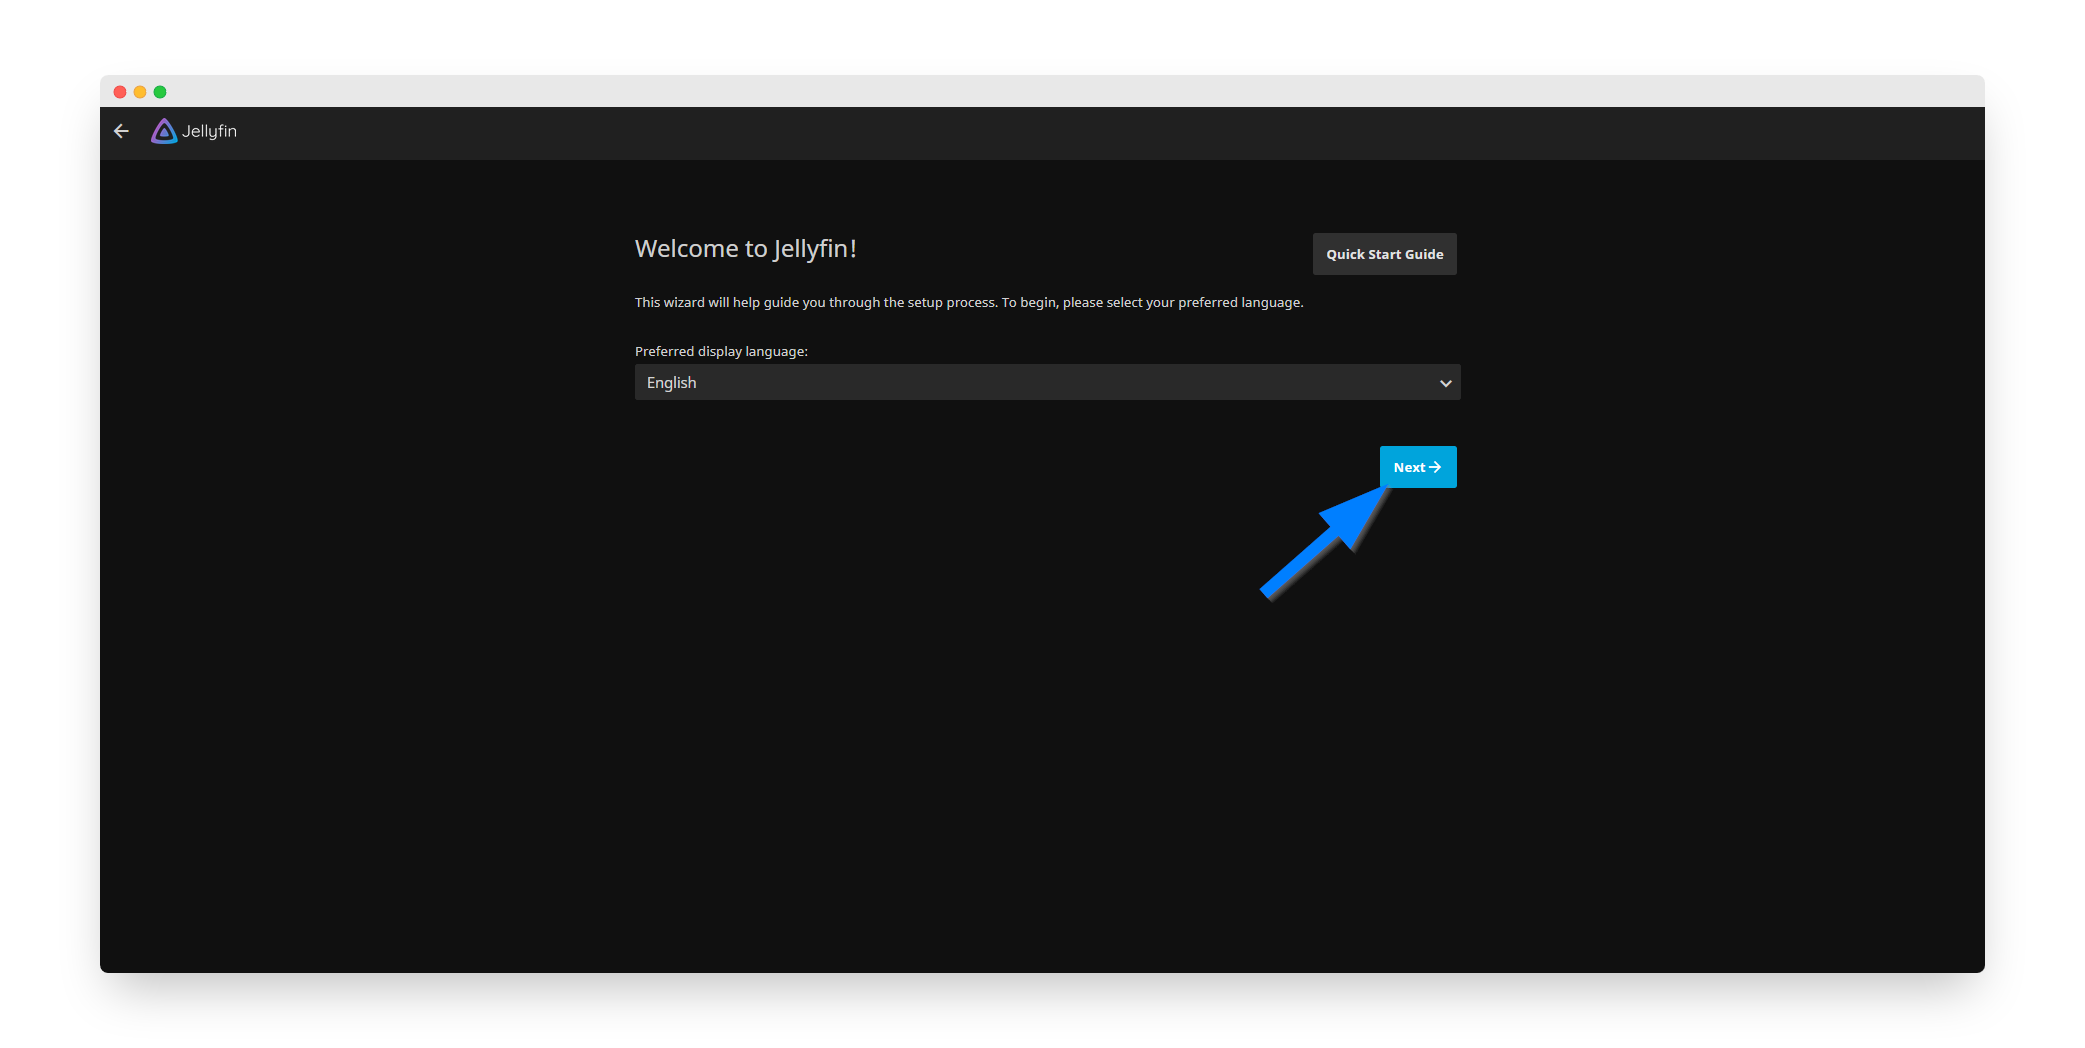
Step 3: Initial Setup - Language Selection
Select your language and click next to proceed with the Jellyfin installation.
Step 4: Create Admin Account
Choose a secure username and password then click the Next button.
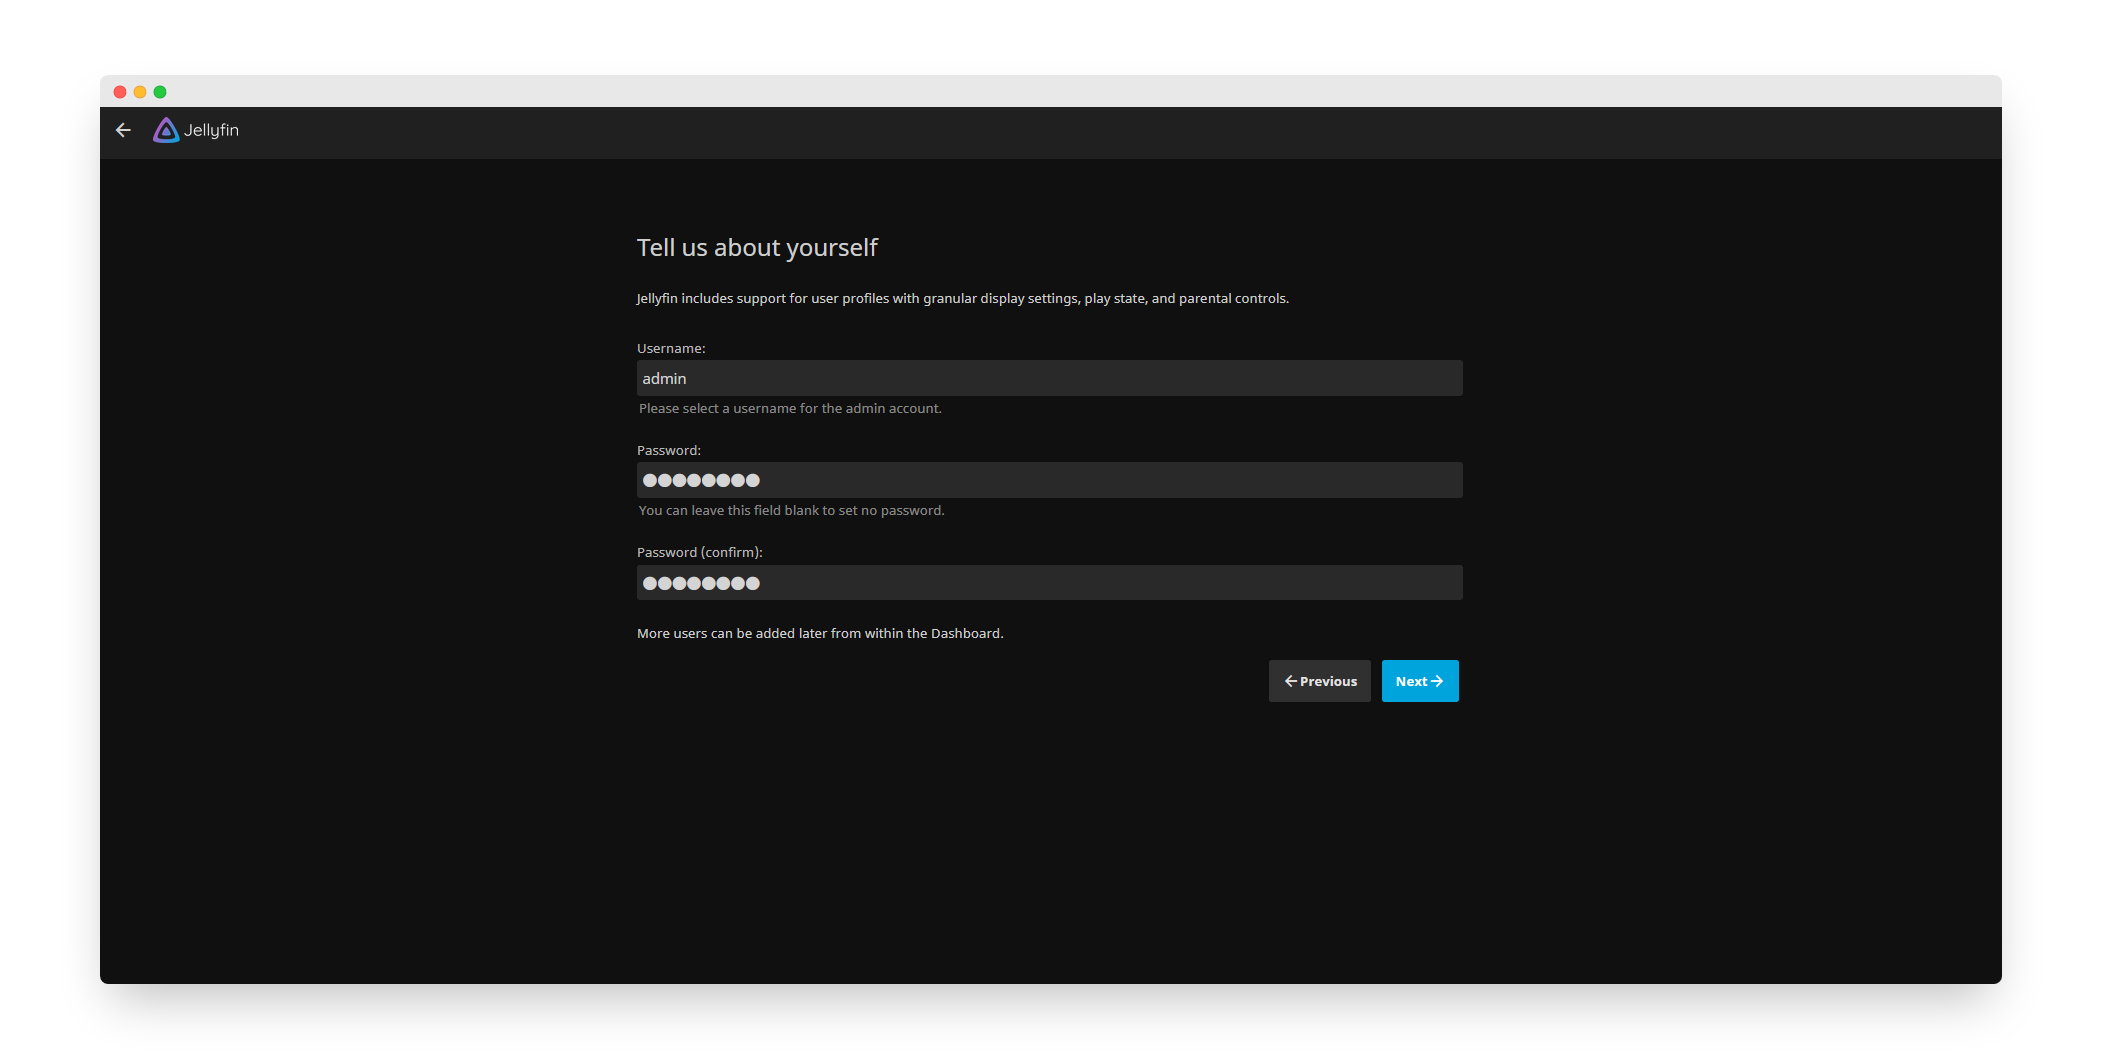
🔒 Security Tip: Use a strong password! This admin account has full control over your media server and user management.
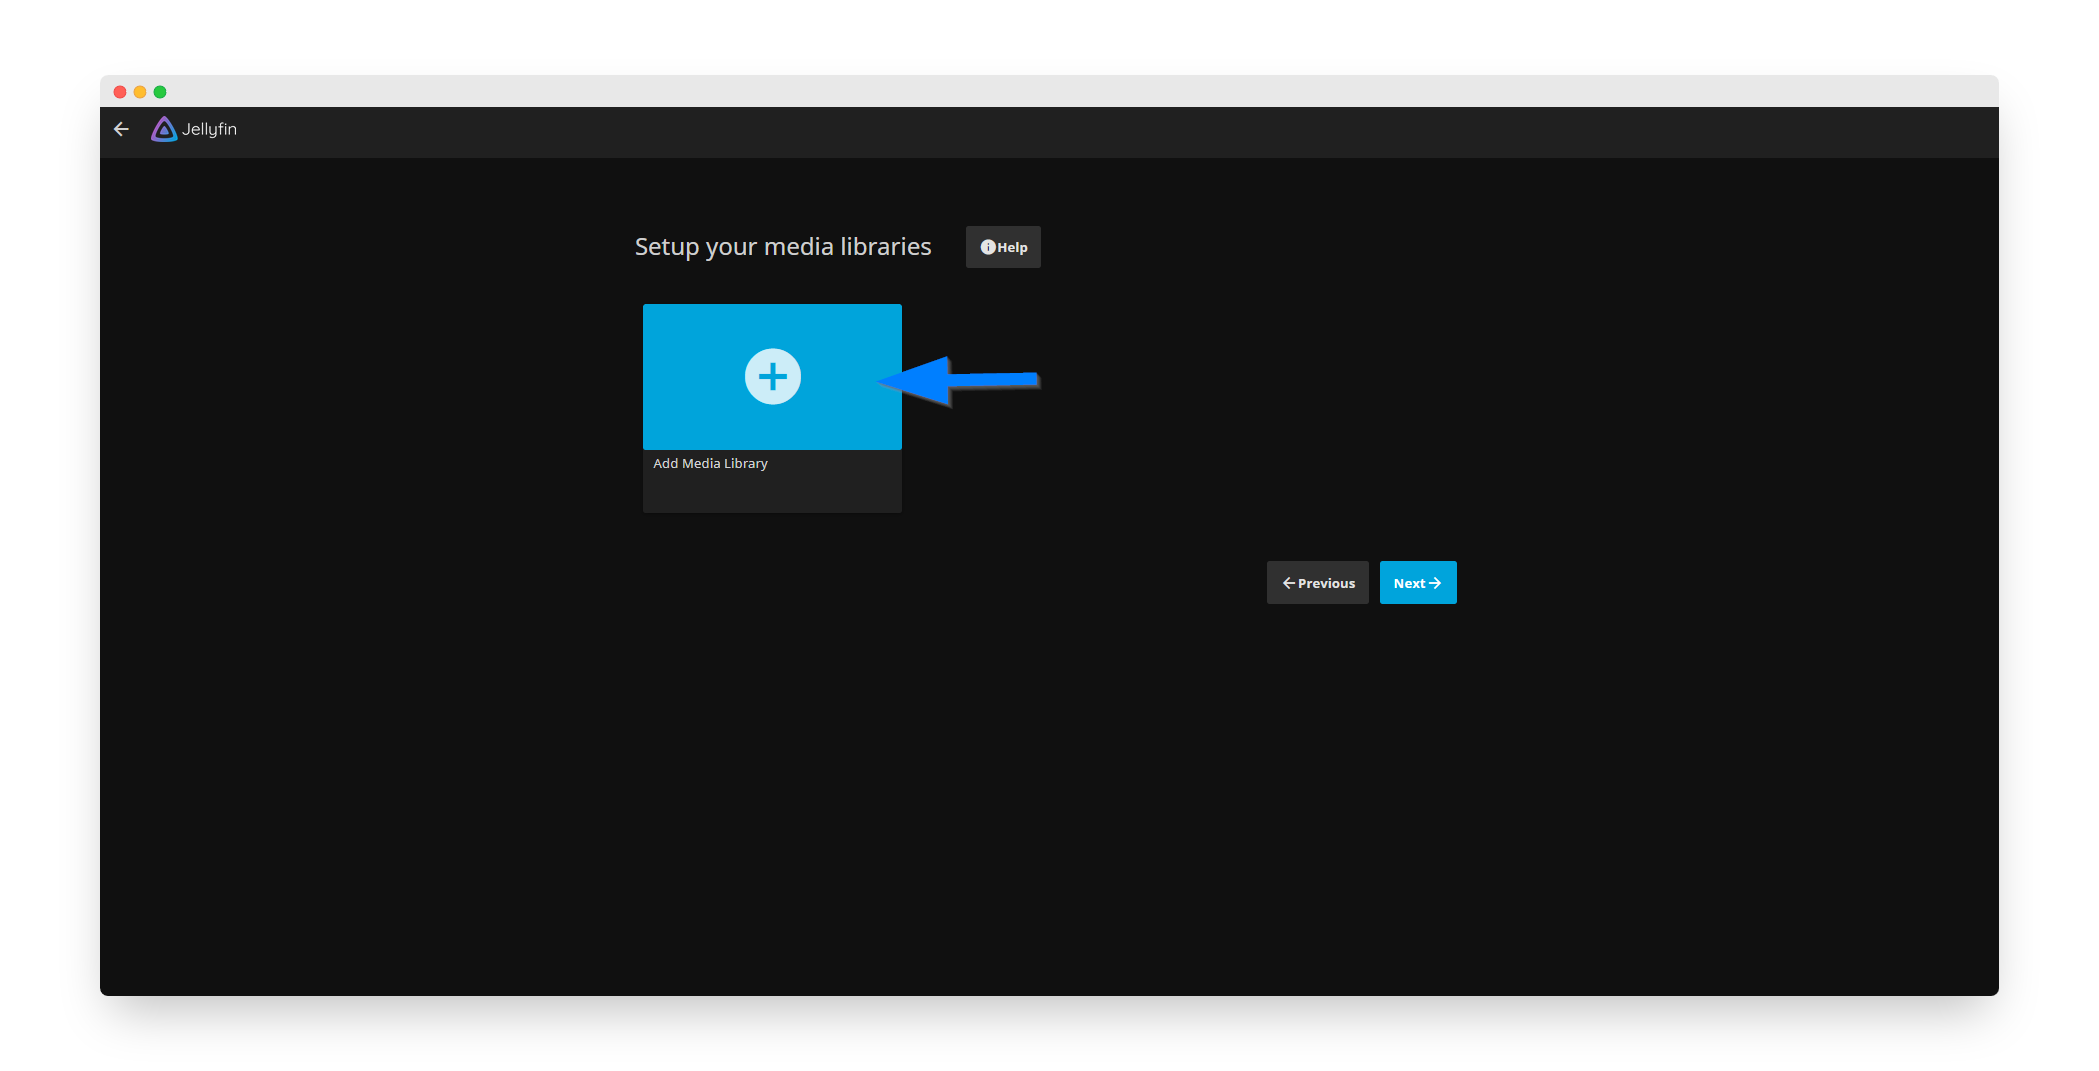
Step 5: Add Media Library
Click the + button to add a new Media Library.
Step 6: Configure Library Type
Select the content type, in this example - Movies. Click the + button to link a folder to the Movie library.

Available Library Types:
- Movies - For film collections
- TV Shows - For series with seasons/episodes
- Music - For audio collections
- Books - For audiobooks and ebooks
- Photos - For image galleries
Step 7: Select Media Folder
In the folder dropdown select /data/movies and click the OK button.
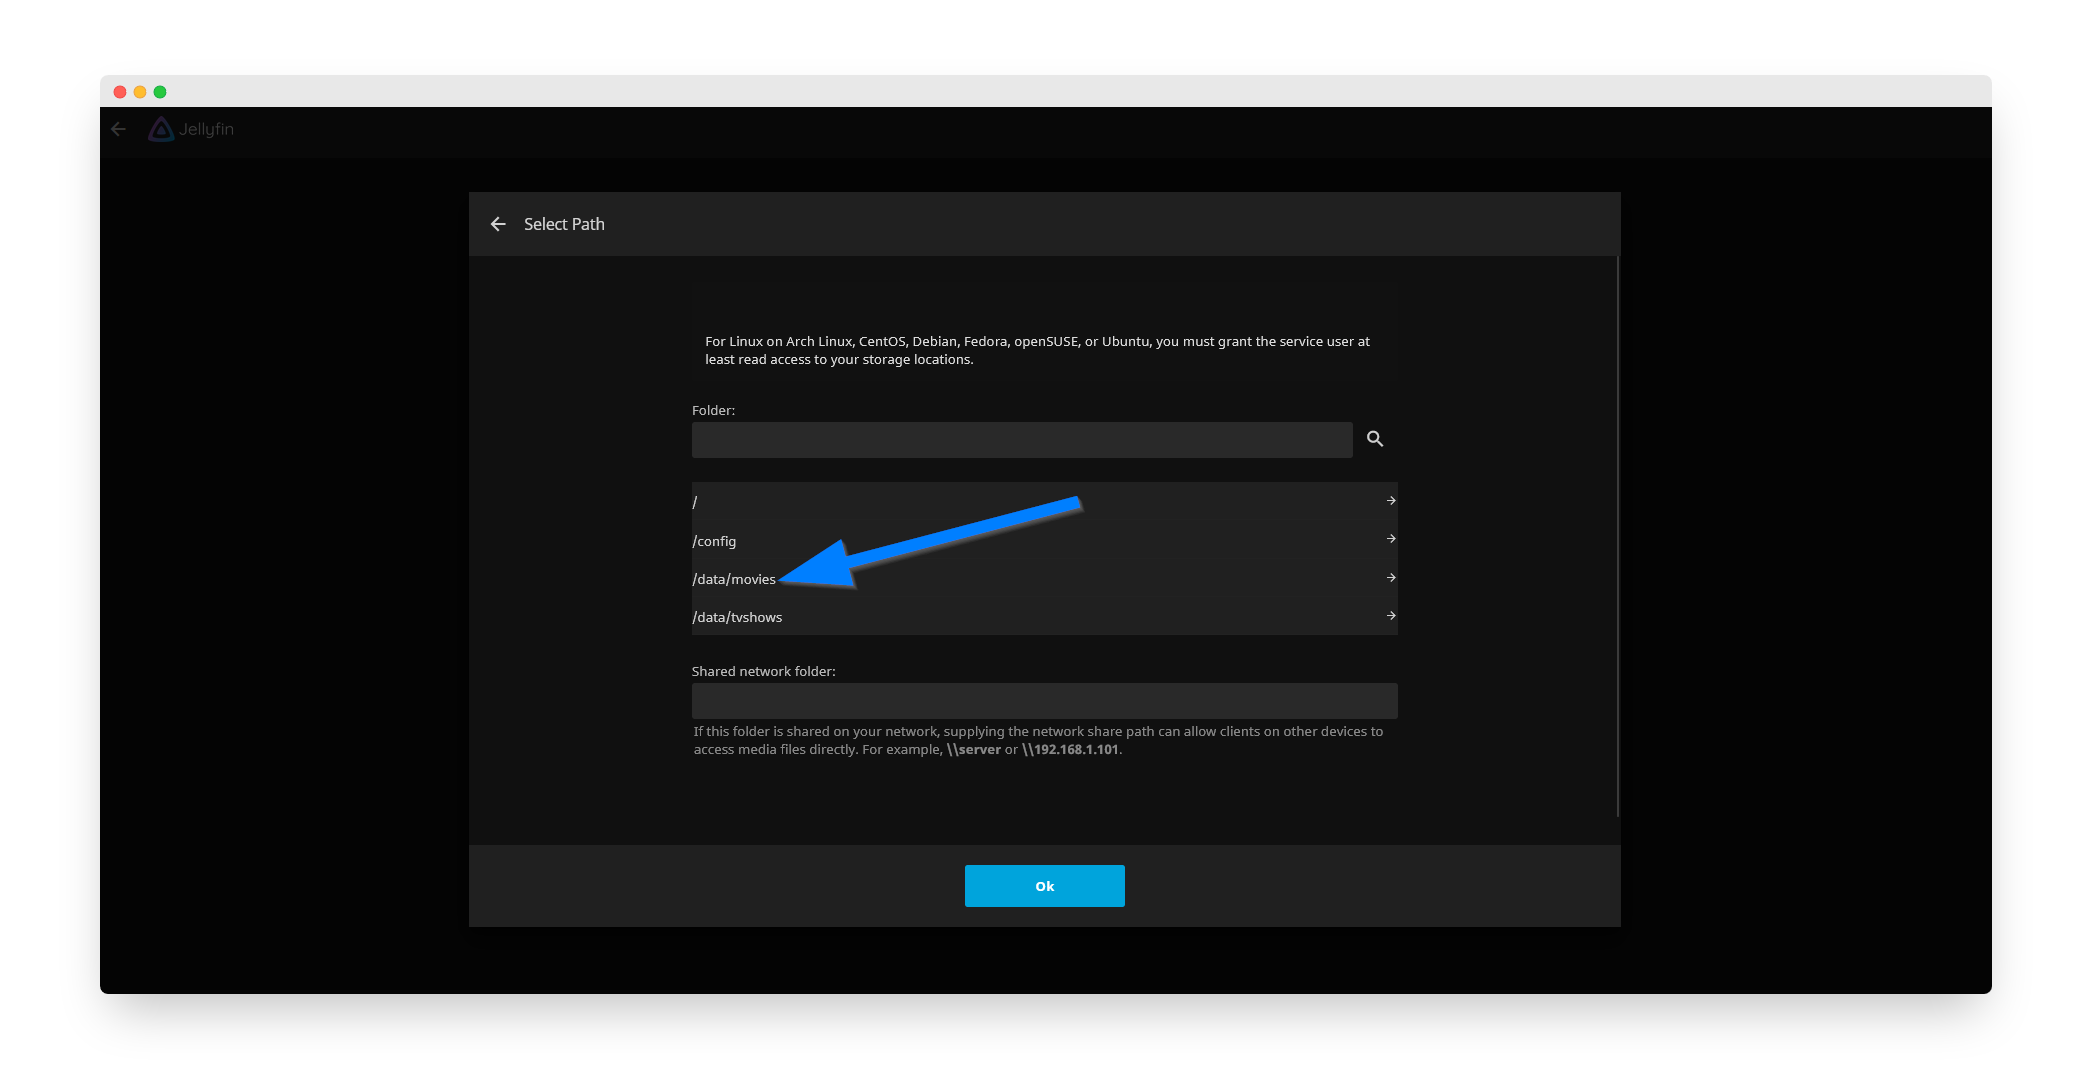
📁 Default Folder Structure:
/data/movies- Movie files/data/tvshows- TV series/data/music- Music files/data/photos- Image files
Uploading Media Content
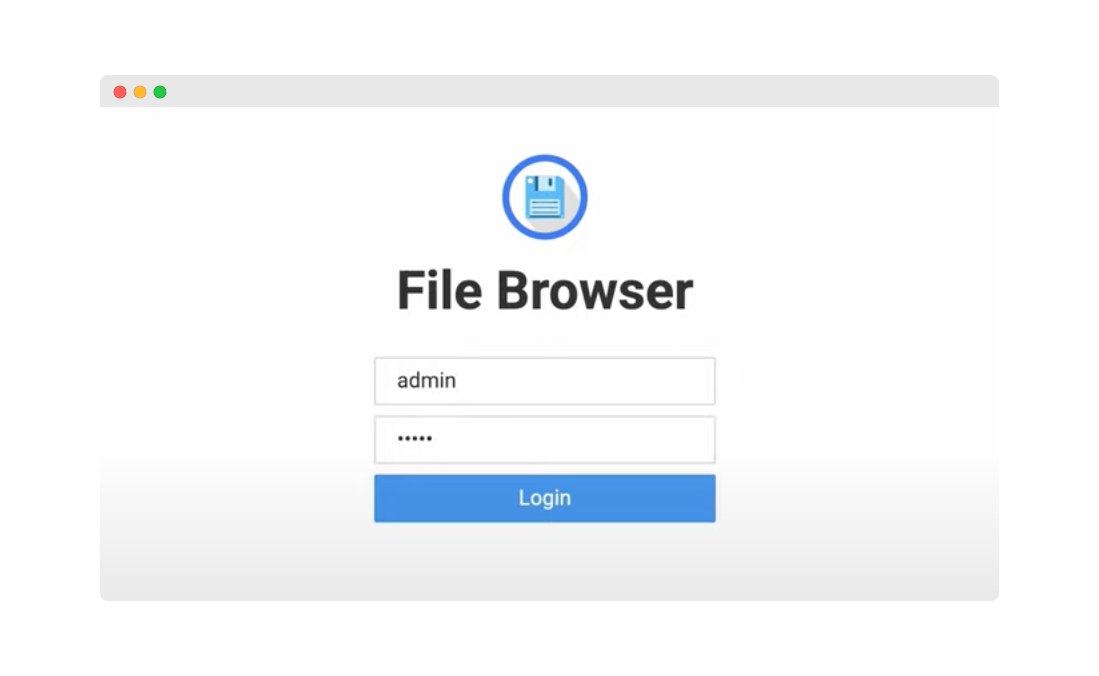
Step 8: Access FileBrowser
The fastest way to upload file content to Jellyfin is through the FileBrowser app as FileBrowser is mapped to the PrivateRouter docker folder. If you have not yet installed FileBrowser, you can install it with this tutorial.
First login to FileBrowser:
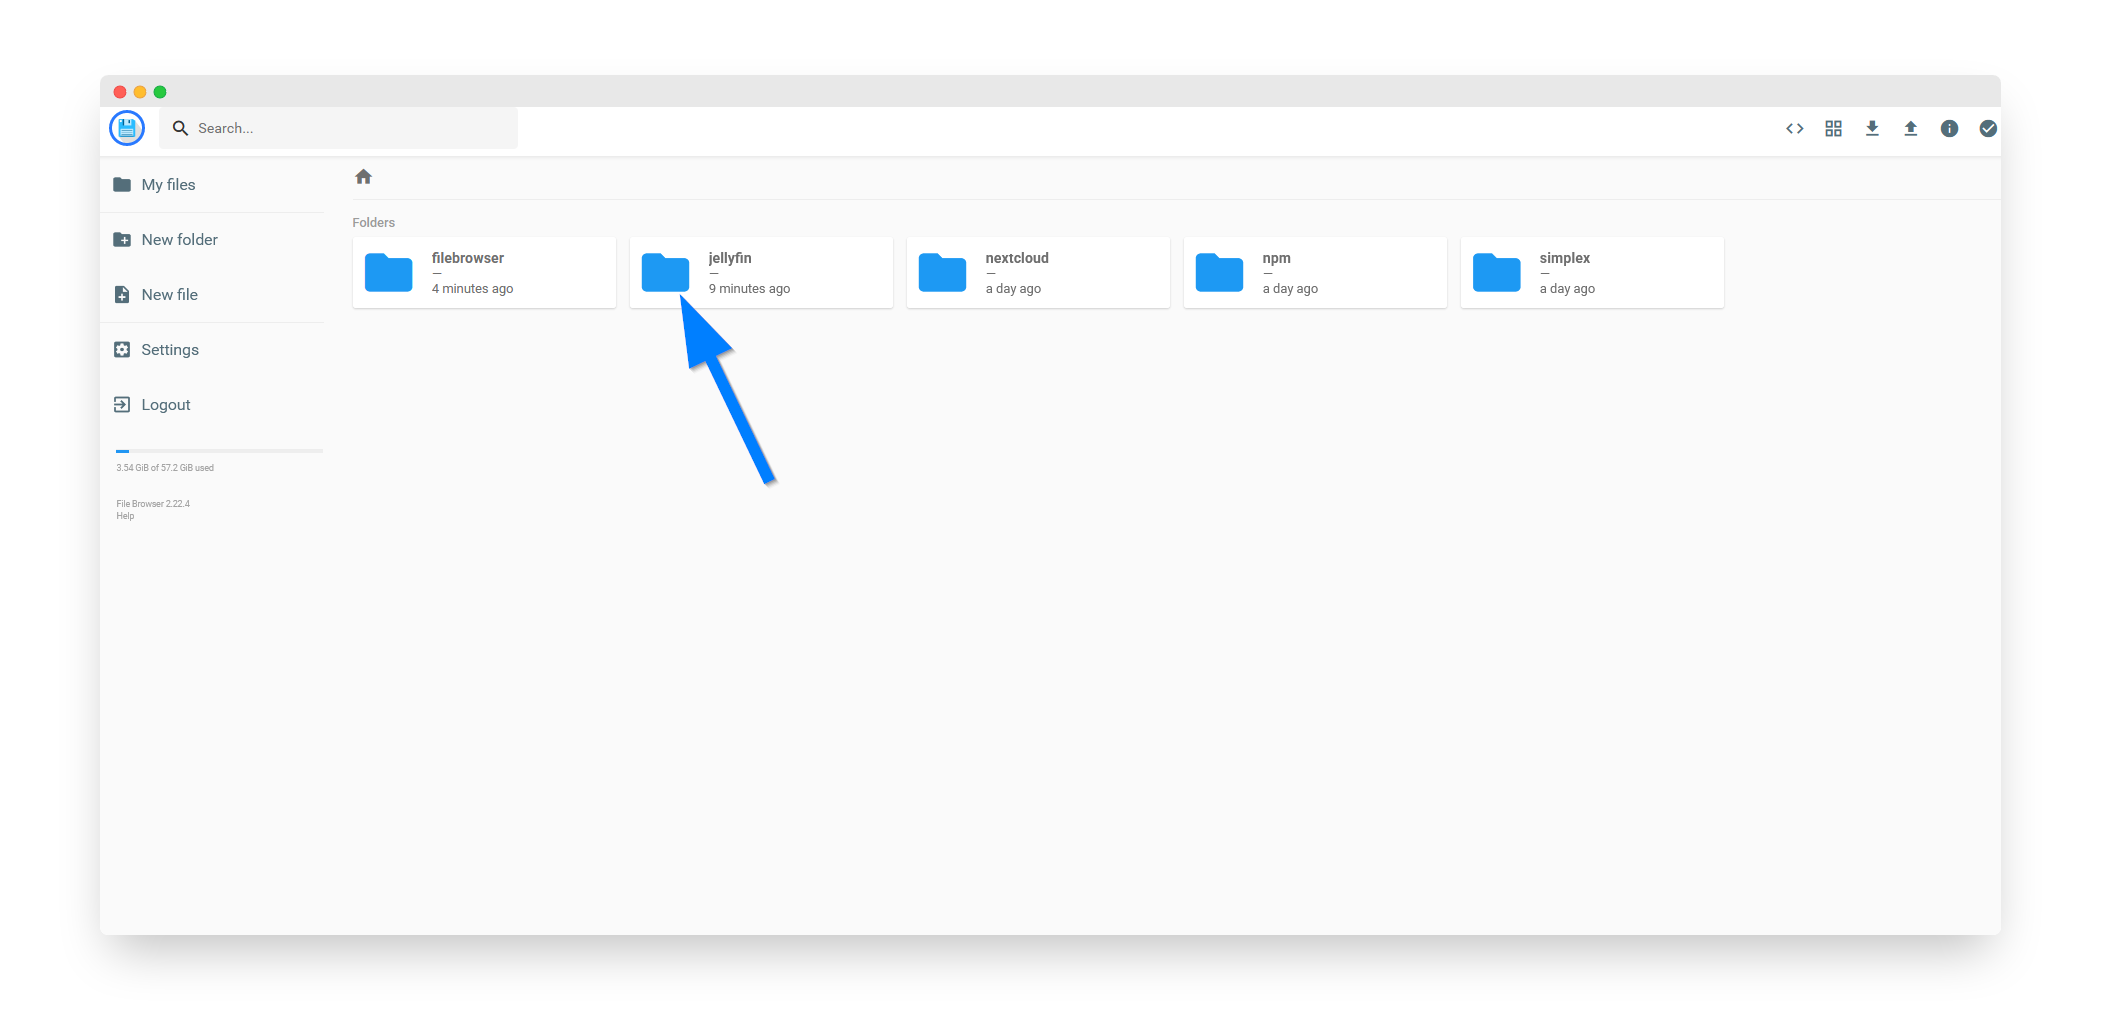
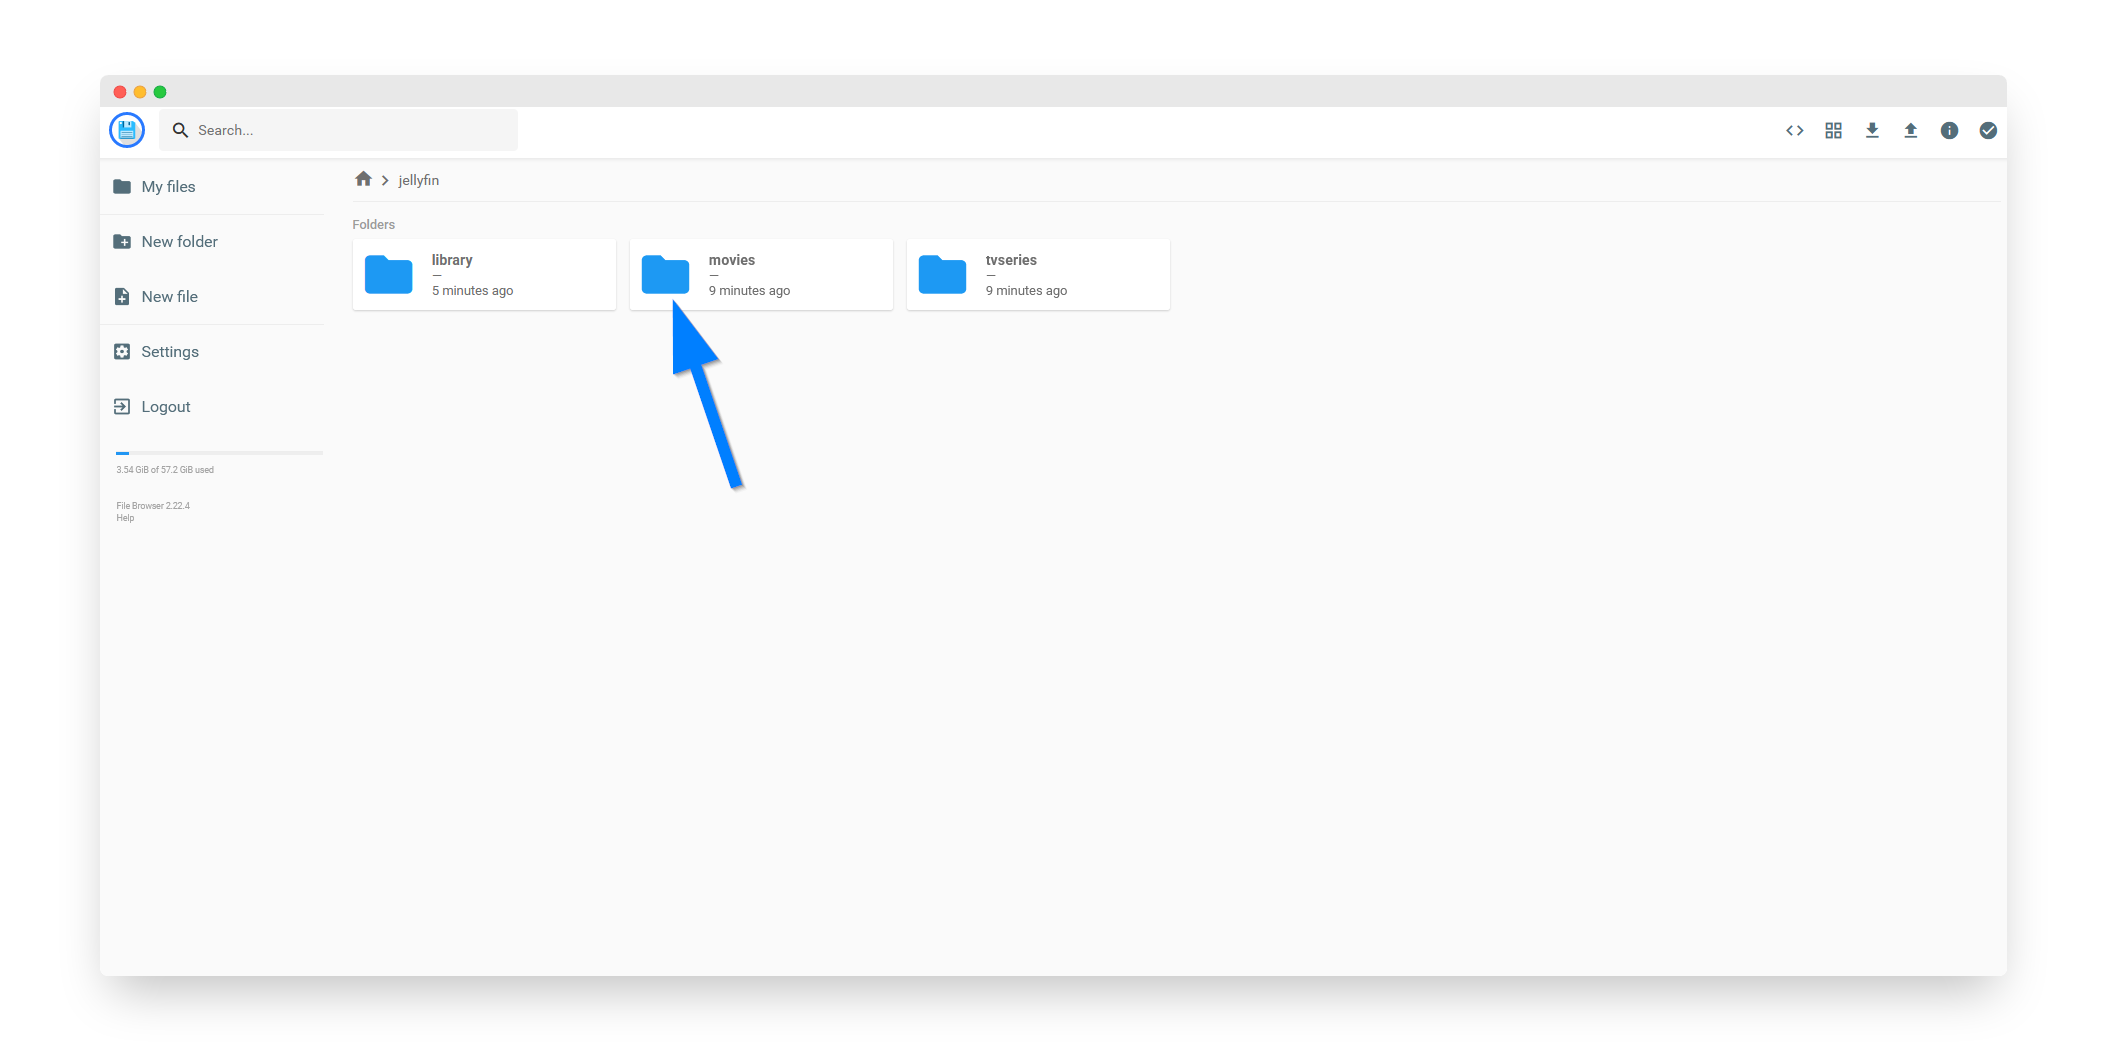
Step 9: Navigate to Jellyfin Folder
Click the Jellyfin folder:
Step 10: Upload Media Files
Click the Movies folder that was linked in the previous step. You can now upload video media content to this folder and Jellyfin will update the library. Simply click and drag files from your local computer into the FileBrowser window.
📽️ Recommended File Organization:
Movies/
├── Movie Name (Year)/
│   ├── Movie Name (Year).mkv
│   ├── Movie Name (Year).srt
│   └── poster.jpg
└── Another Movie (Year)/
    └── Another Movie (Year).mp4

TV Shows/
├── Show Name/
│   ├── Season 01/
│   │   ├── S01E01 - Episode Title.mkv
│   │   └── S01E02 - Episode Title.mkv
│   └── Season 02/
│       └── S02E01 - Episode Title.mkv
Setting Up Domain Access (Optional)
Local Access Only? If you only want local access to Jellyfin and do not wish to access via domain name, then you are all set. Skip to the Features section below.
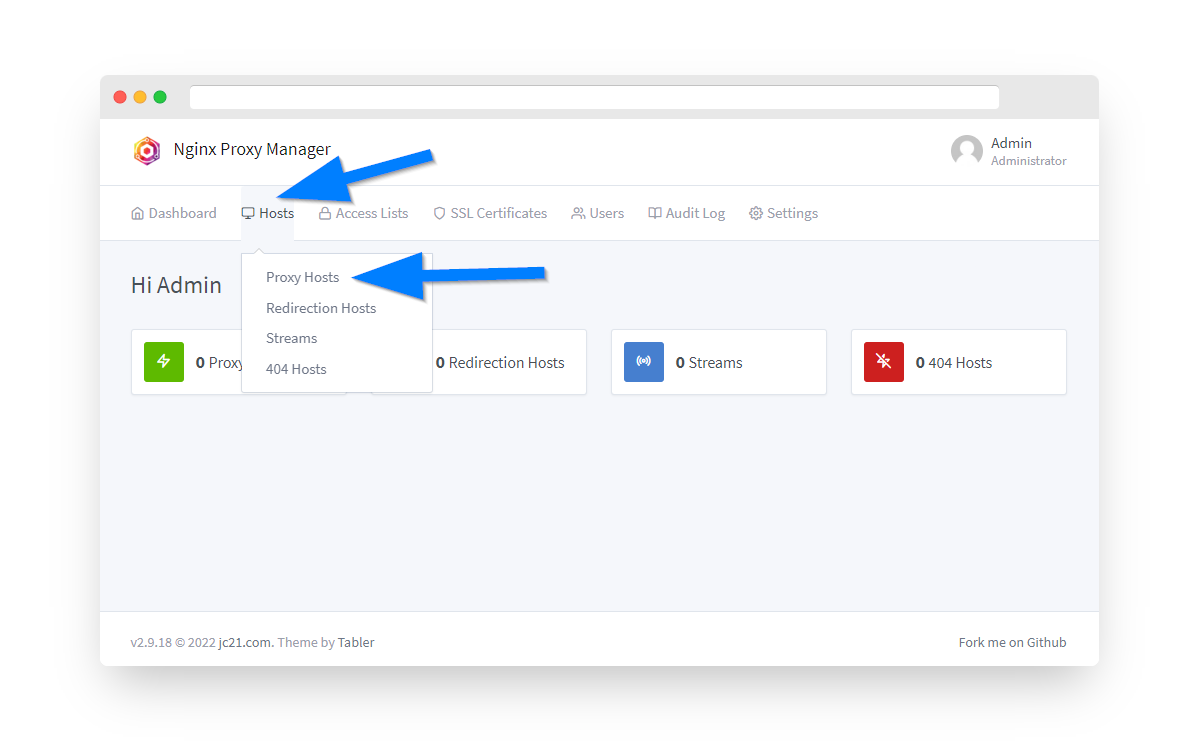
Step 11: Configure Nginx Proxy Manager
For this step you must have already installed the Nginx Proxy Manager app. If not, please follow the tutorial here.
Login to Nginx Proxy Manager at http://192.168.0.1:81 and navigate to Hosts → Proxy Hosts.
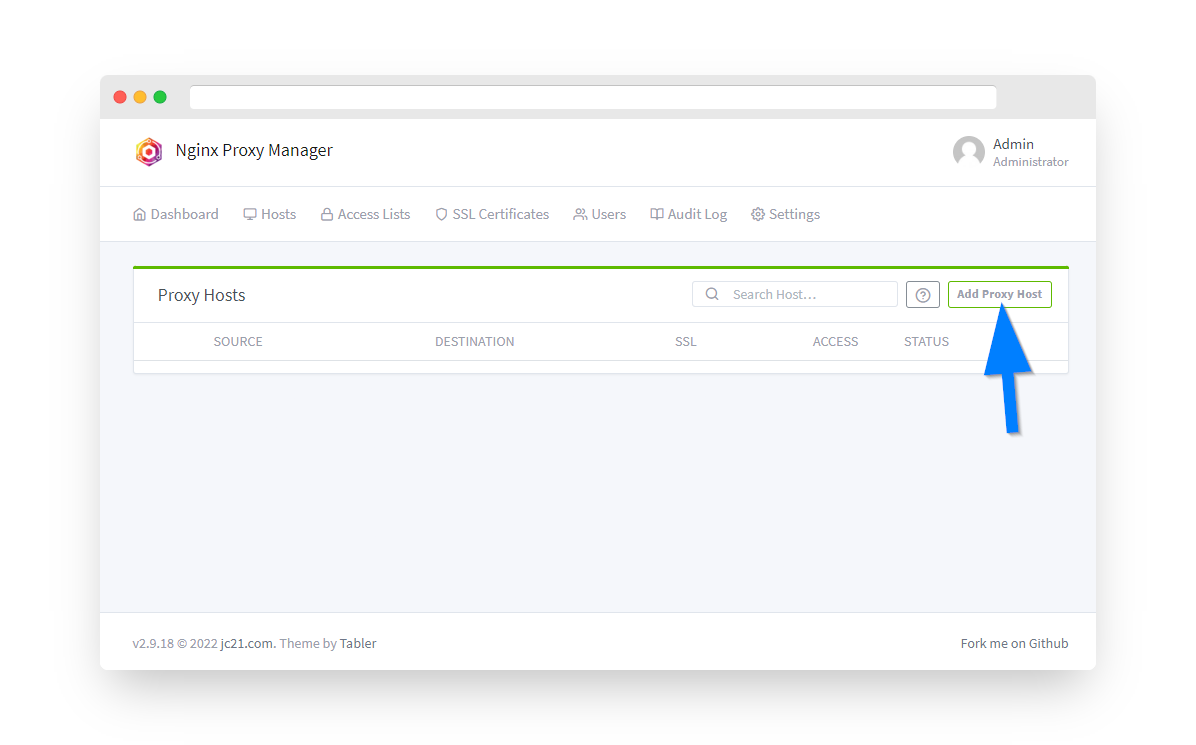
Step 12: Add Proxy Host for Jellyfin
Click the Add Proxy Host button.
Configure the following settings:
- Domain Names: jelly.yourdomain.com
- Scheme: http
- Forward Hostname/IP: 192.168.0.1
- Forward Port: 8096
- Websockets Support: ON ✓
⚡ Important: For Jellyfin, make sure to set the Websockets Support switch to ON for live playback features.

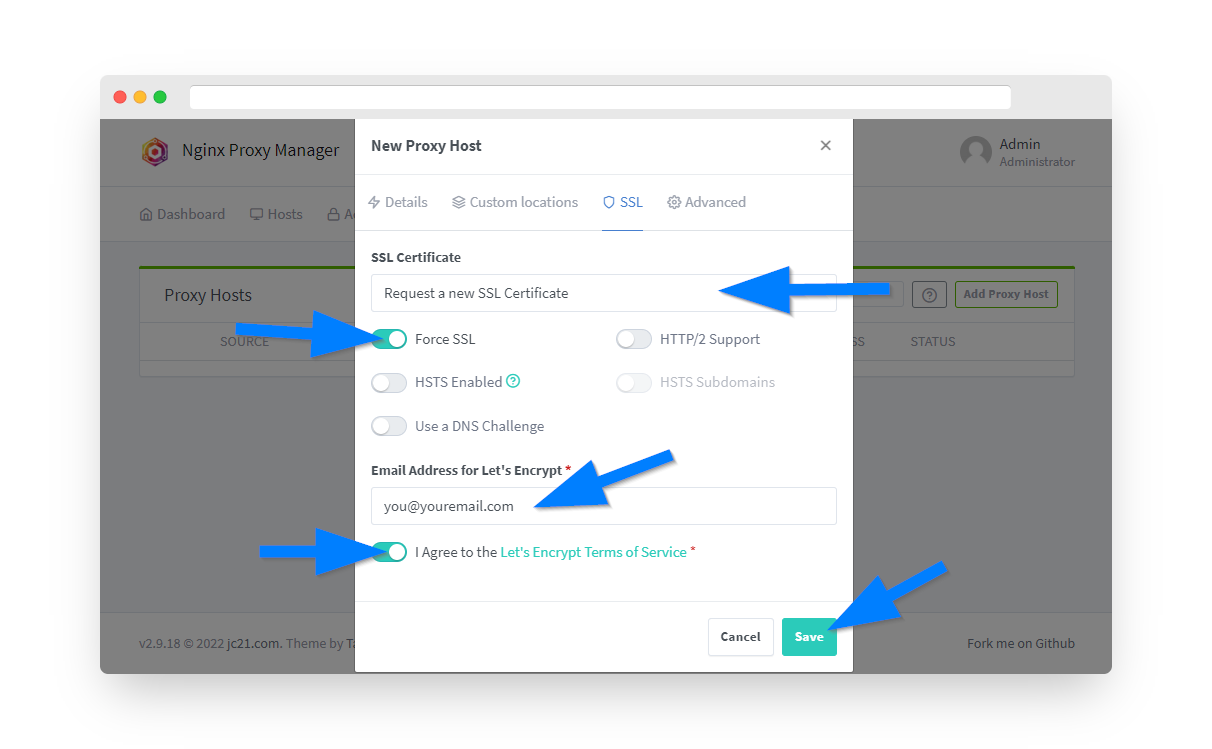
Step 13: Configure SSL Certificate
Under the SSL tab, configure Let's Encrypt certificate and save. Your Jellyfin instance will now be accessible via HTTPS at your domain.
Jellyfin Features & Capabilities
🎬 Media Management
- Automatic metadata fetching
- Custom collections
- Multi-language support
- Subtitle management
📱 Client Support
- Web browser interface
- iOS/Android apps
- Smart TV apps
- Kodi integration
🔄 Transcoding
- Hardware acceleration
- On-the-fly conversion
- Bandwidth optimization
- Multiple quality options
👥 User Management
- Multiple user profiles
- Parental controls
- Watch history
- Library permissions
Performance Optimization
Enable Hardware Acceleration
If your router supports it, enable hardware transcoding:
- Go to Dashboard → Playback
- Enable "Hardware acceleration"
- Select appropriate method (VAAPI, Quick Sync, etc.)
- Save settings and restart Jellyfin
Optimize Media Formats
For best performance without transcoding:
- Video Codec: H.264 (most compatible)
- Audio Codec: AAC or AC3
- Container: MP4 or MKV
- Subtitles: SRT format (external)
Troubleshooting Common Issues
Media Not Showing in Library
Solution:
- Ensure proper file naming convention
- Manually scan library: Settings → Libraries → Scan
- Check file permissions:
docker exec jellyfin ls -la /data/movies - Verify correct folder mapping in Docker
Playback Stuttering or Buffering
Solution:
- Check if transcoding is occurring (Dashboard)
- Reduce quality settings in client app
- Enable hardware acceleration if available
- Use direct play compatible formats
- Check network bandwidth between client and server
Cannot Connect Remotely
Solution:
- Verify port 8096 is accessible
- Check Nginx Proxy Manager configuration
- Ensure domain DNS is resolving correctly
- Test with local IP first, then domain
- Check Jellyfin network settings
Subtitles Not Working
Solution:
- Enable subtitle downloading in settings
- Configure OpenSubtitles plugin
- Place .srt files in same folder as video
- Name subtitle file same as video file
- Check subtitle burn-in settings for transcoding
Useful Docker Commands
# View Jellyfin logs
docker logs -f jellyfin

# Restart Jellyfin container
docker restart jellyfin

# Check container status
docker ps | grep jellyfin

# View resource usage
docker stats jellyfin

# Access Jellyfin shell
docker exec -it jellyfin bash

# Scan media library manually
docker exec jellyfin /usr/lib/jellyfin/bin/jellyfin --scan

# Backup Jellyfin configuration
docker cp jellyfin:/config ./jellyfin-backup

# Update Jellyfin to latest version
docker pull jellyfin/jellyfin:latest
docker stop jellyfin
docker rm jellyfin
# Then re-run installation
Essential Jellyfin Plugins
🎭 Metadata Providers
- TMDb - Movie metadata
- TVDb - TV show information
- MusicBrainz - Music metadata
- Open Subtitles - Subtitle downloads
🎨 Customization
- Themes - Custom UI skins
- Intro Skipper - Skip TV intros
- Reports - Usage statistics
- Webhook - Notifications
Security Best Practices
🔐 Access Control
- Use strong admin password
- Create limited user accounts
- Enable brute force protection
- Restrict library access per user
🌐 Remote Access
- Always use HTTPS via NPM
- Consider VPN-only access
- Disable DLNA if not needed
- Monitor access logs regularly
Summary
You've successfully installed Jellyfin on your PrivateRouter OpenWRT system! This powerful media server provides:
- ✅ Complete control over your media library
- ✅ No subscription fees or accounts required
- ✅ Privacy-focused media streaming
- ✅ Support for all major platforms
- ✅ Hardware transcoding capabilities
- ✅ Multi-user support with parental controls