PrivateRouter custom VPN routers provide an easy one-click method to deploy popular self-hosted apps directly on your router. When combined with TorGuard's Private VPN Cloud service, users can easily self-host applications securely behind WireGuard.
What is MotionEye?
MotionEye is a powerful self-hosted video surveillance solution that allows you to control and view any IP camera connected to your network. It's perfect for home security, baby monitoring, or business surveillance, offering:
Multi-Camera Support
Monitor multiple IP cameras from a single interface
Motion Detection
Smart alerts with customizable sensitivity zones
Flexible Storage
Local, network, or cloud storage options
Privacy Focused
Keep your footage on your own servers
Why Choose MotionEye?
| Feature | MotionEye | Cloud Services | NVR Systems |
|---|---|---|---|
| Monthly Fees | ✅ None | ❌ Required | ✅ None |
| Privacy | ✅ Full Control | ❌ Third-party | ✅ Local |
| Camera Compatibility | ✅ Universal | ⚠️ Limited | ⚠️ Brand-specific |
| Remote Access | ✅ Self-hosted | ✅ Included | ⚠️ Complex |
| Cost | ✅ Free | 💰 Subscription | 💰 Hardware |
Prerequisites
Before you begin, ensure you have:
- PrivateRouter with OpenWRT firmware
- Docker support enabled on your router
- IP camera(s) connected to your network
- Camera's IP address and credentials
- Nginx Proxy Manager installed (for remote access)
- Adequate storage for recordings
⚠️ Storage Considerations: Video recordings consume significant storage. Consider attaching external USB storage or network storage to your router for recordings.
Installation Steps
Step 1: Deploy MotionEye via Docker
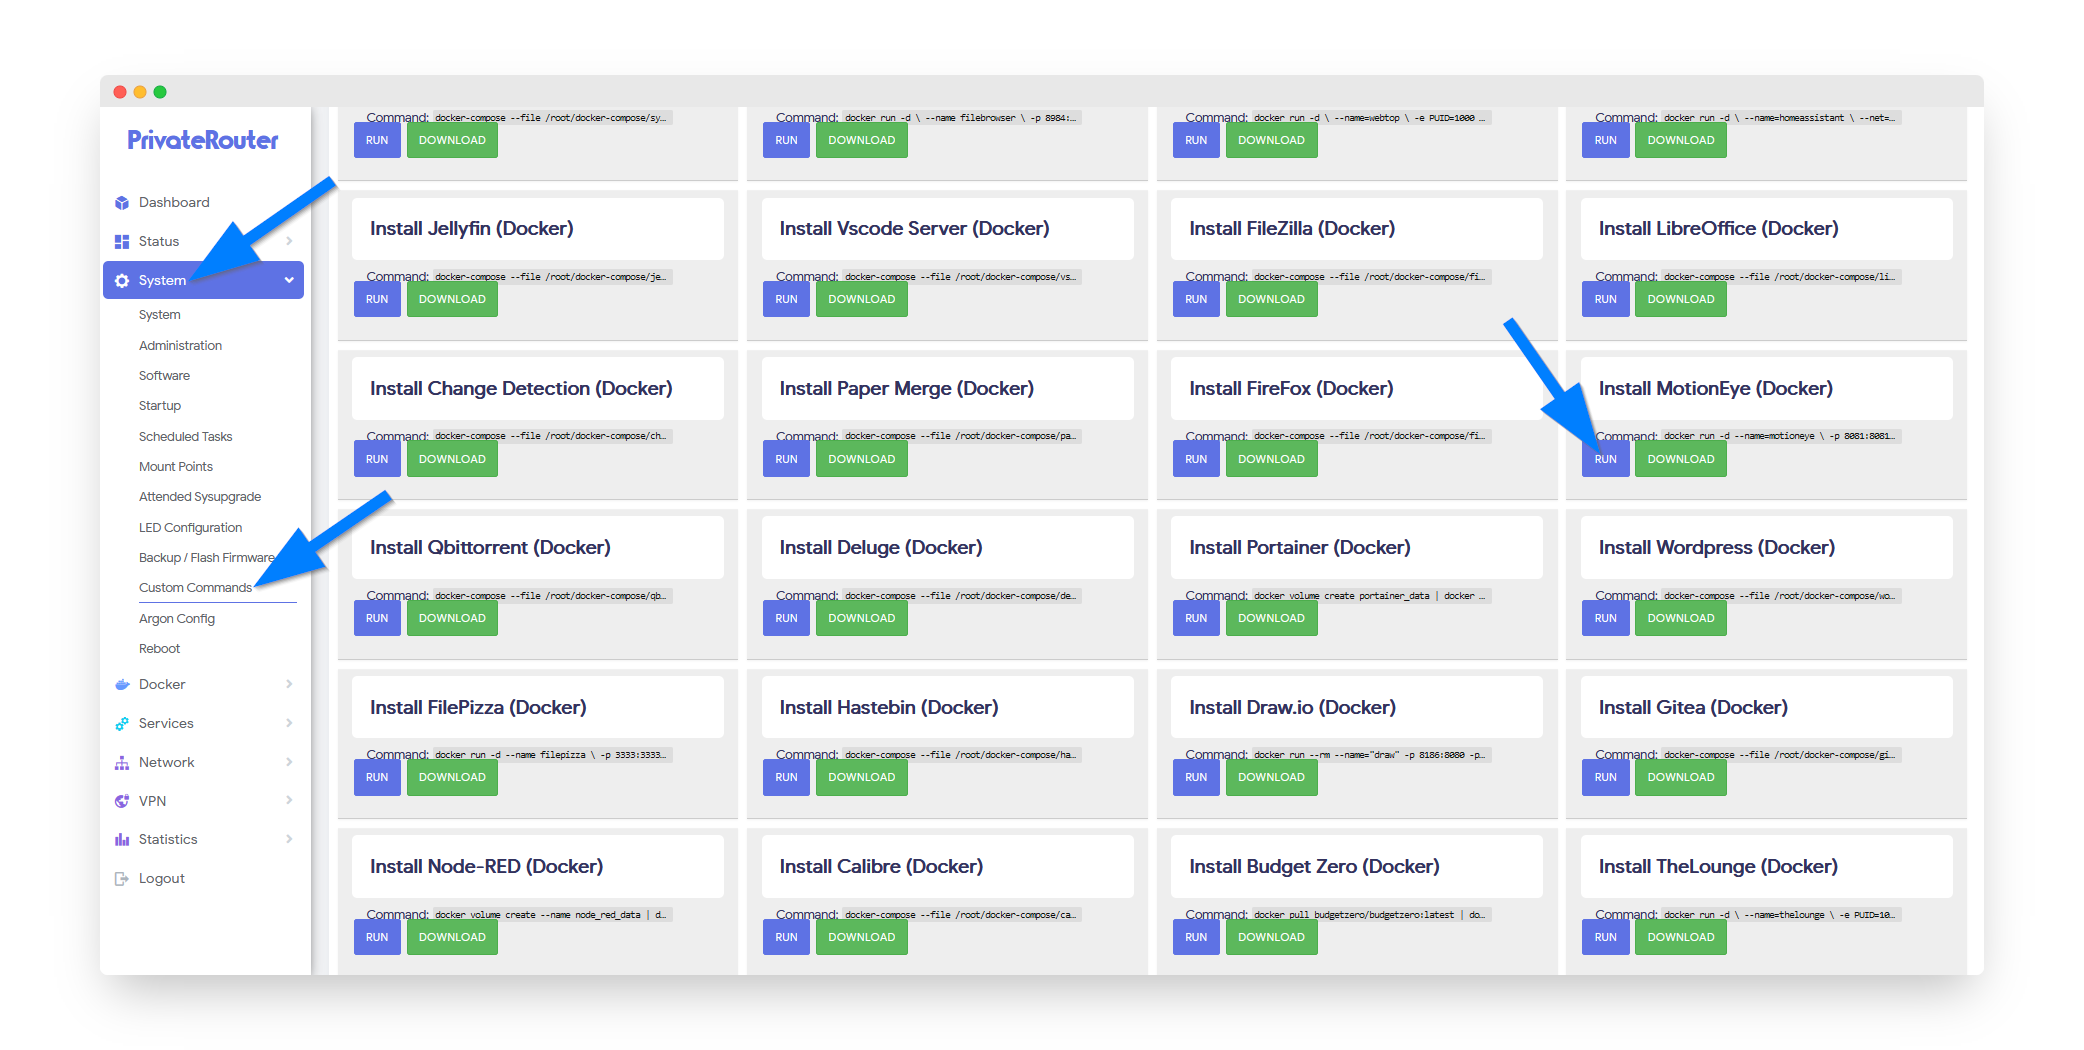
Login to your PrivateRouter and click the System menu. Select Custom Commands then locate MotionEye and click the RUN button.
💡 Pro Tip: The installation will configure MotionEye with proper permissions for camera access and storage management.
Step 2: Access MotionEye Interface
Wait a few minutes for MotionEye to install, then click the Docker menu and select Containers. Click the MotionEye web port 8081 to open MotionEye in a new window.
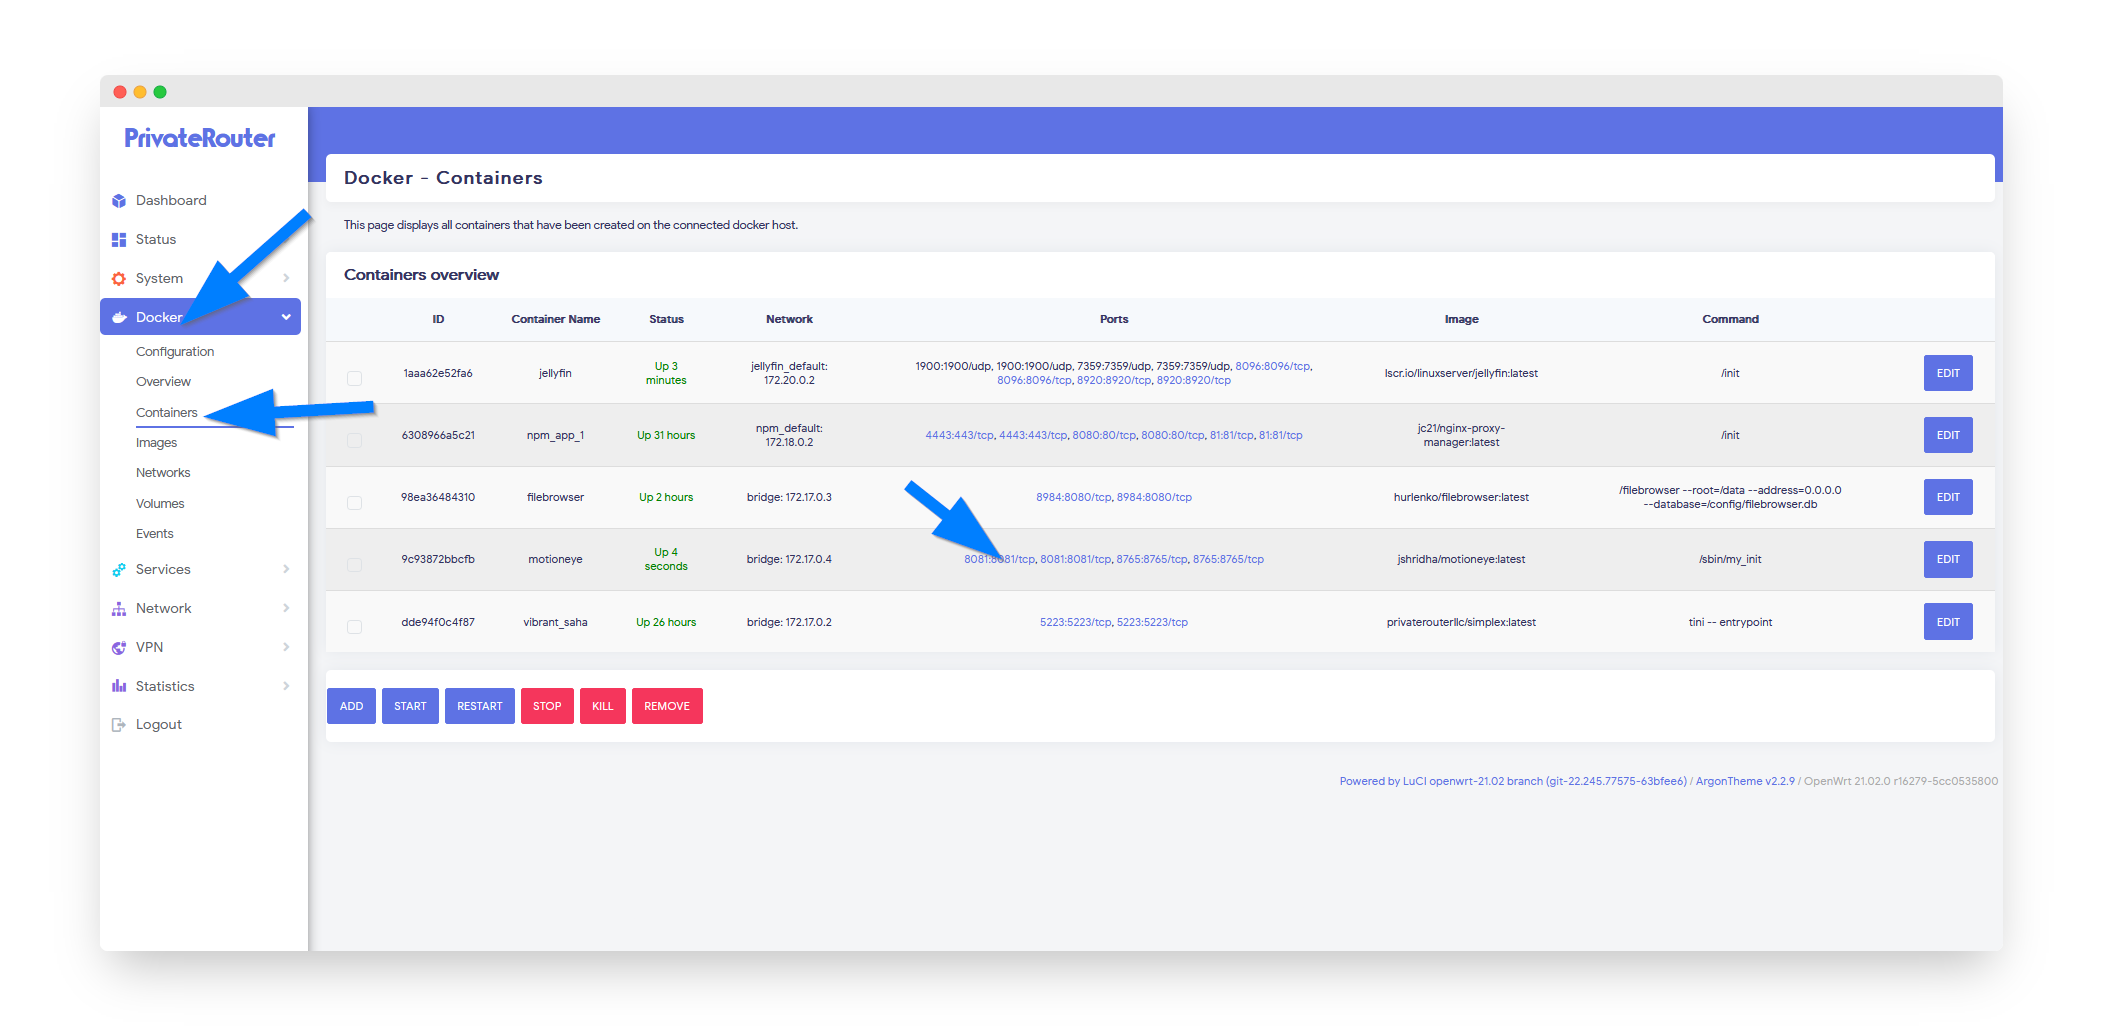
http://192.168.0.1:8081
Step 3: Initial Login
Login to MotionEye with the default credentials:
Username: admin
Password: (leave blank)
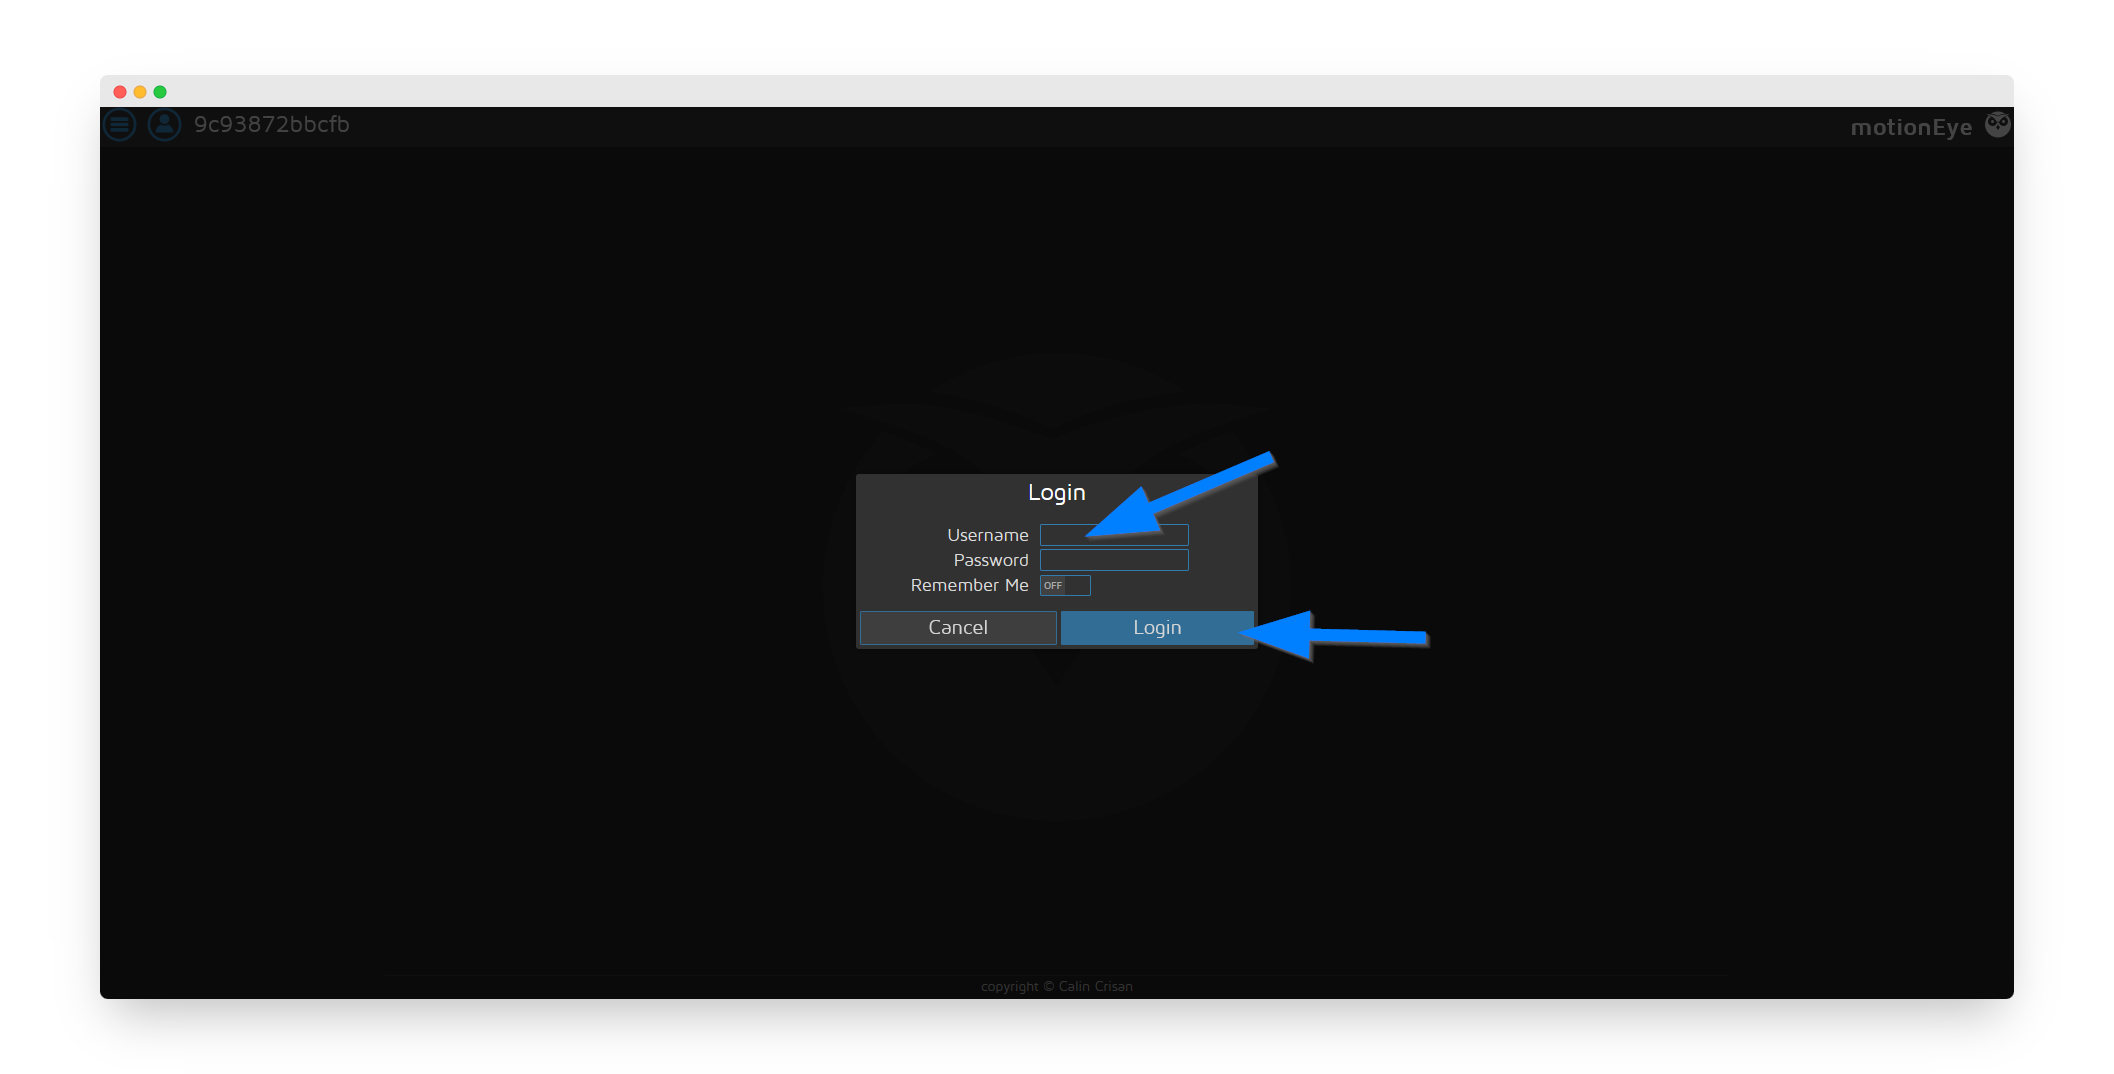
🔒 Security Alert: Change the default password immediately after first login!
Step 4: Secure Your Installation
To change the default MotionEye password, click the menu icon in the top left and change both the admin and user passwords. Click the Apply button.
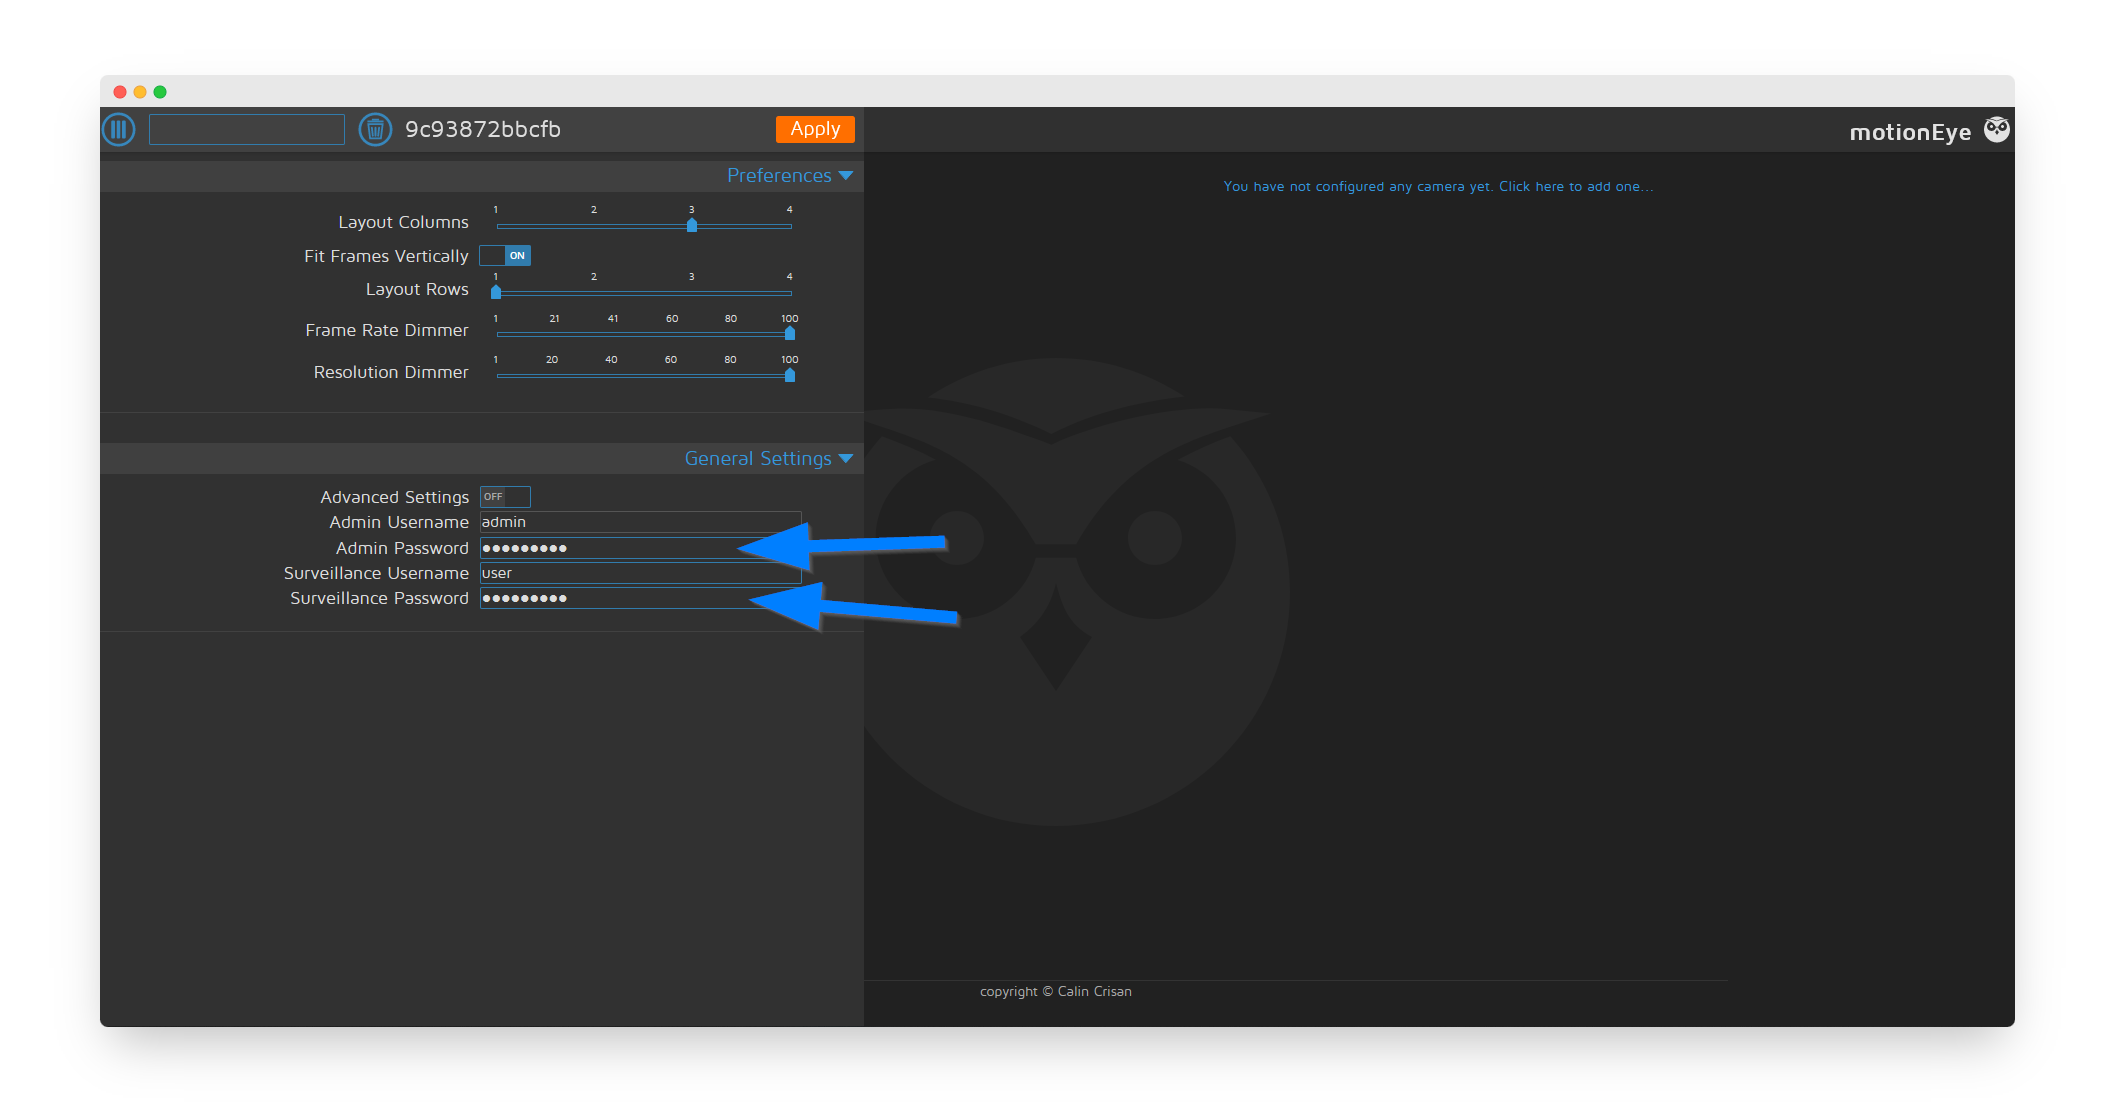
User Roles:
- Admin: Full access to all settings and cameras
- User: View-only access to cameras
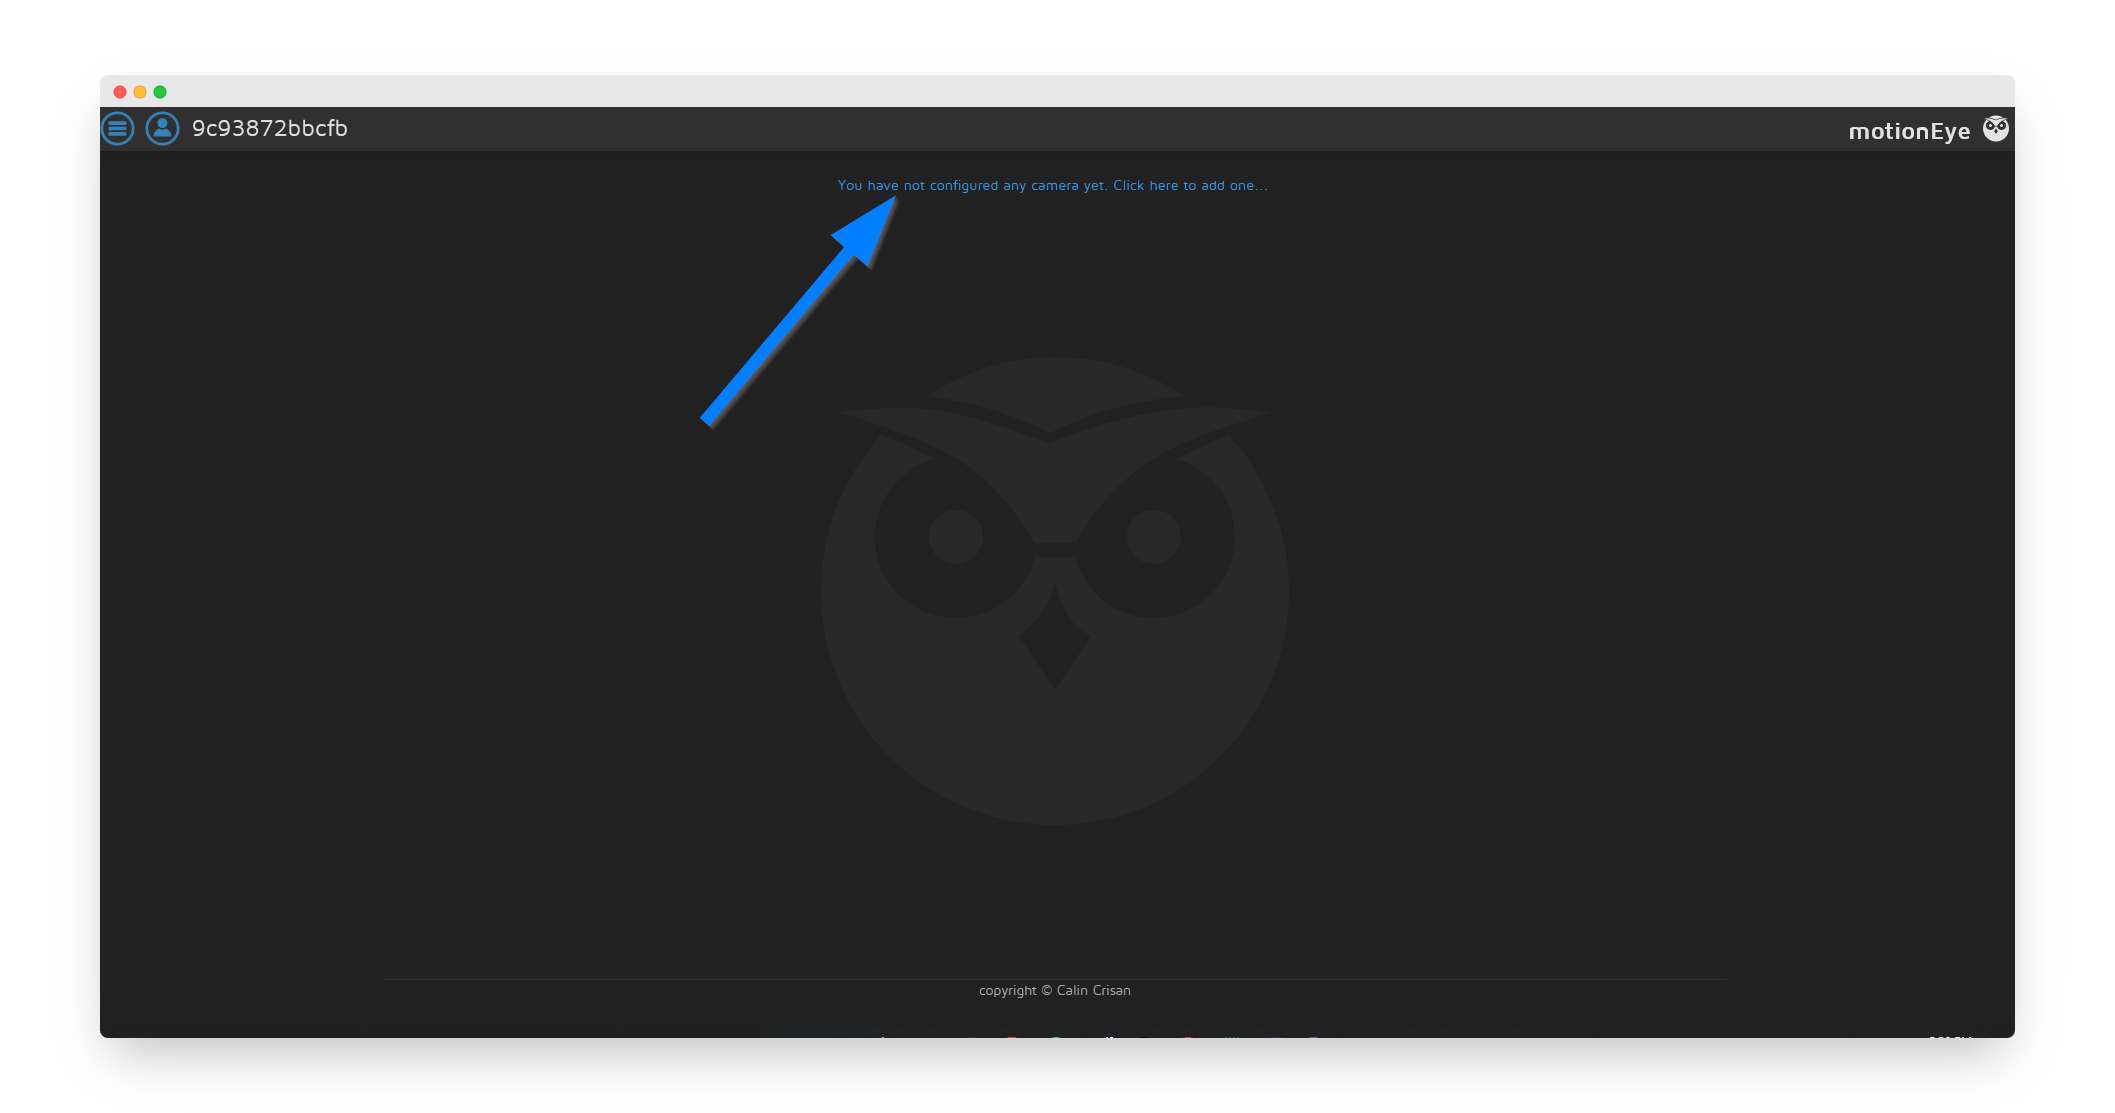
Step 5: Add Your First Camera
If you already have an IP camera connected to your WiFi router, take note of the IP address and click the "configure camera" text link on the main screen.
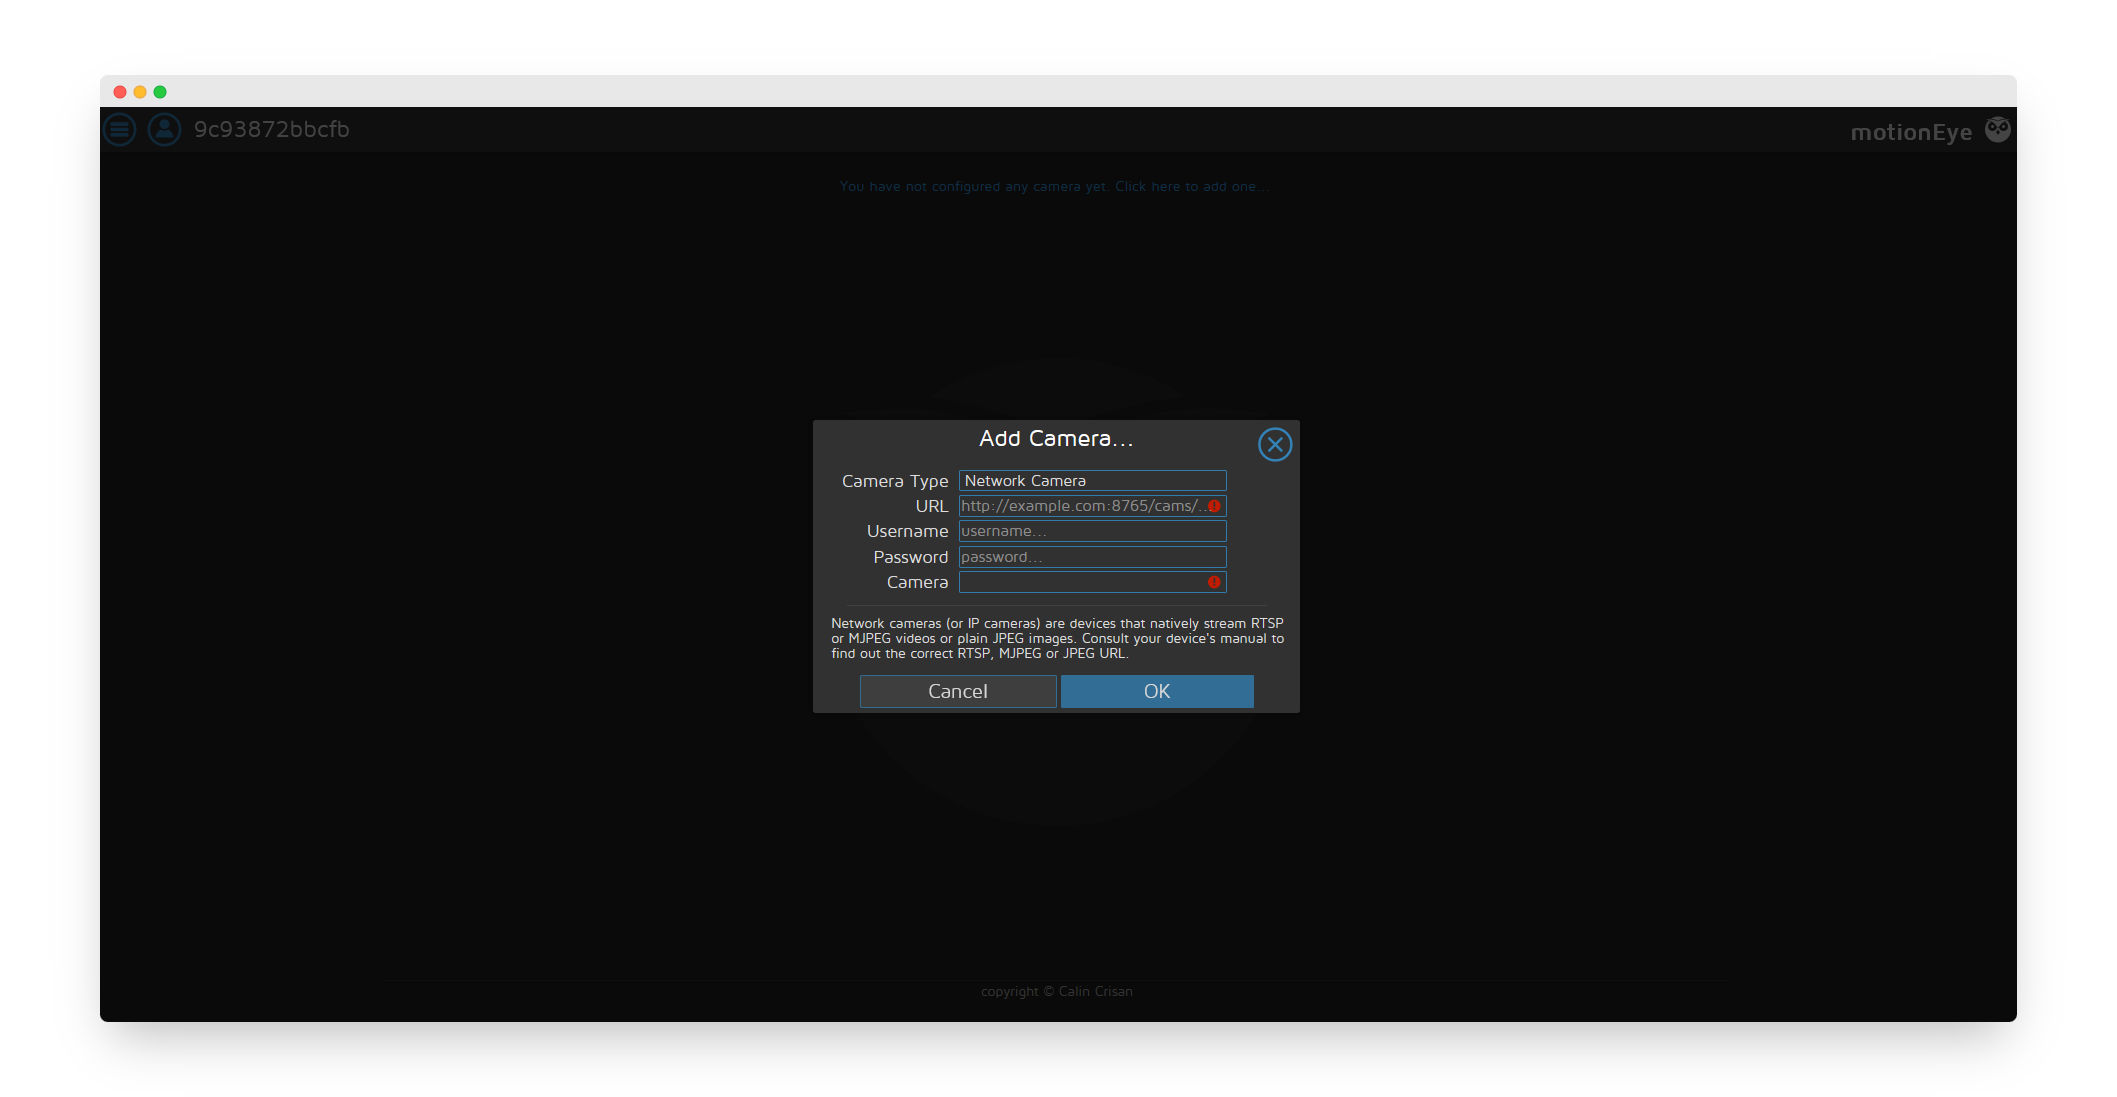
Step 6: Configure Camera Connection
Select Network Camera (for most IP cameras) and enter the camera details:
- Camera Type: Network Camera
- URL: Your camera's RTSP stream URL
- Username: Camera username (if required)
- Password: Camera password (if required)
# Common RTSP URL formats:

# Generic RTSP format:
rtsp://username:password@ip_address:554/stream

# Examples by brand:
# Hikvision:
rtsp://admin:[email protected]:554/Streaming/Channels/101

# Dahua:
rtsp://admin:[email protected]:554/cam/realmonitor?channel=1&subtype=0

# Foscam:
rtsp://admin:[email protected]:88/videoMain

# Amcrest:
rtsp://admin:[email protected]:554/cam/realmonitor?channel=1&subtype=0
Finding Your Camera's RTSP URL:
- Check camera documentation
- Login to camera's web interface
- Look for "RTSP" or "Stream URL" settings
- Use ONVIF tools to discover URL
Setting Up Remote Access (Optional)
Local Access Only? If you only wish to access your cameras locally or via VPN, you can skip this section.
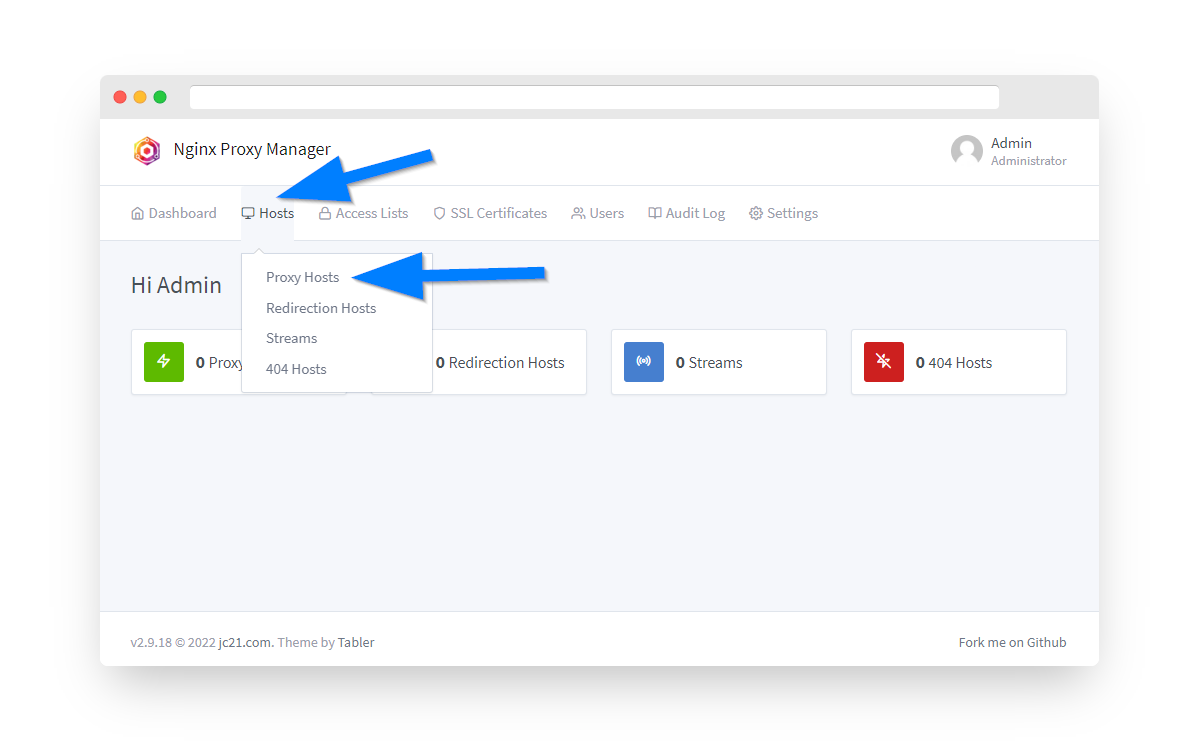
Step 7: Configure Nginx Proxy Manager
For remote access, you must have already installed the Nginx Proxy Manager app. If not, please follow the tutorial here.
Login to Nginx Proxy Manager at http://192.168.0.1:81 and navigate to Hosts → Proxy Hosts.
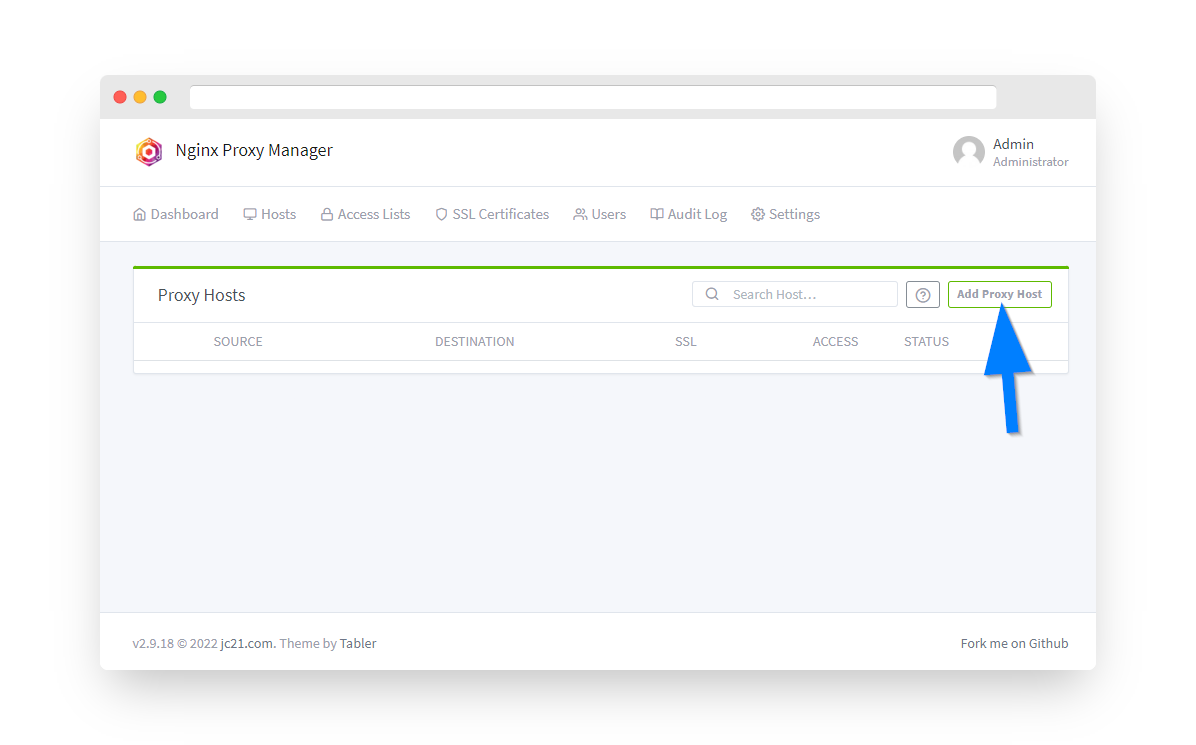
Step 8: Add Proxy Host for MotionEye
Click the Add Proxy Host button and configure:
- Domain Names: cameras.yourdomain.com
- Scheme: http
- Forward Hostname/IP: 192.168.0.1
- Forward Port: 8081
- Websockets Support: ON ✓
⚡ Important: Enable WebSocket support for live streaming functionality.

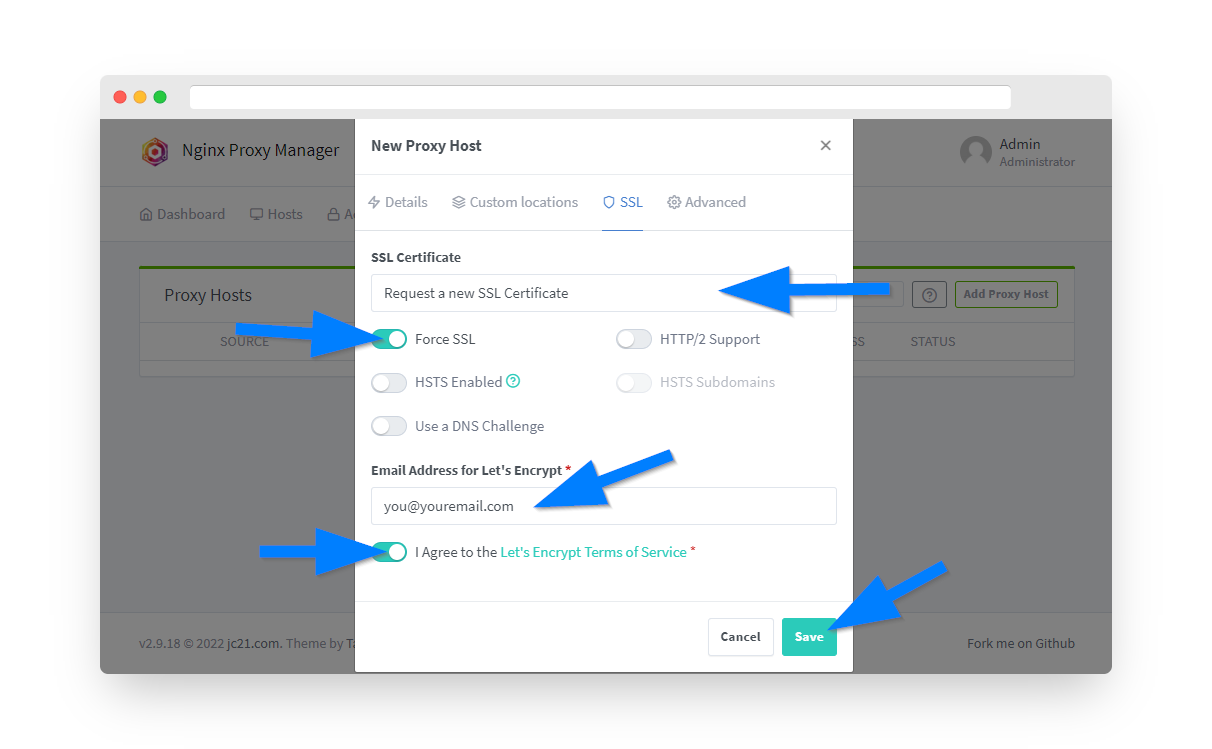
Step 9: Configure SSL Certificate
Under the SSL tab, configure Let's Encrypt certificate for secure remote access.
Camera Configuration & Features
📹 Supported Camera Types
- Network Cameras: Any camera with RTSP/HTTP stream
- USB Cameras: Webcams connected to router
- MJPEG Streams: Simple HTTP cameras
- ONVIF Cameras: Auto-discovery support
🎯 Motion Detection Settings
# Key Motion Detection Parameters:

Frame Change Threshold: 1-99% (default: 1%)
- Lower = more sensitive
- Higher = less sensitive

Minimum Motion Frames: 1-1000
- Number of frames to trigger detection

Motion Gap: 1-86400 seconds
- Time between motion events

Mask Areas: Define zones to ignore
- Draw rectangles to exclude areas
💾 Storage Options
- Local Storage: Router's internal/USB storage
- Network Storage: SMB/CIFS shares
- FTP Upload: Remote FTP servers
- Cloud Storage: Google Drive, Dropbox via scripts
MotionEye Advanced Features
📧 Notifications
- Email alerts with snapshots
- Webhook notifications
- Telegram integration
- Custom scripts on motion
📅 Scheduling
- Motion detection schedules
- Recording schedules
- Working/sleeping modes
- Weekend configurations
🎬 Recording Options
- Continuous recording
- Motion-triggered only
- Timelapse creation
- Snapshot intervals
🔧 Customization
- Custom overlays
- Text/timestamp overlay
- Privacy masks
- Image controls
Security Best Practices
🔐 Access Control
- Use strong passwords for all accounts
- Enable HTTPS for remote access only
- Restrict access by IP if possible
- Regular password rotation
📹 Camera Security
- Change default camera passwords
- Disable UPnP on cameras
- Isolate cameras on VLAN
- Block camera internet access
🌐 Network Security
- Use VPN for remote viewing
- Enable firewall rules
- Monitor access logs
- Regular security updates
💾 Data Protection
- Encrypt stored footage
- Regular backup schedule
- Retention policy setup
- Secure deletion practices
Troubleshooting Common Issues
Camera Won't Connect
Solution:
- Verify camera is on same network
- Test RTSP URL with VLC:
vlc rtsp://... - Check camera username/password
- Try different stream URLs (main/sub)
- Disable camera's authentication temporarily
High CPU Usage
Solution:
- Reduce camera resolution
- Lower frame rate (10-15 fps is usually enough)
- Disable motion detection on some cameras
- Use substream instead of mainstream
- Check Docker resource limits
Motion Detection Not Working
Solution:
- Adjust sensitivity threshold
- Check mask areas aren't blocking detection
- Verify motion detection is enabled
- Test with manual trigger
- Review motion detection logs
Storage Full
Solution:
- Set up automatic cleanup
- Configure retention period
- Add external USB storage
- Use network storage (NAS)
- Enable motion-only recording
Useful Docker Commands
# View MotionEye logs
docker logs -f motioneye

# Restart MotionEye container
docker restart motioneye

# Check container status
docker ps | grep motioneye

# View resource usage
docker stats motioneye

# Access container shell
docker exec -it motioneye /bin/bash

# Backup MotionEye configuration
docker cp motioneye:/etc/motioneye ./motioneye-backup

# Check available storage
docker exec motioneye df -h

# Update MotionEye
docker pull ccrisan/motioneye:master-amd64
docker stop motioneye
docker rm motioneye
# Then re-run installation
Performance Optimization
Router Performance Tips
- Limit cameras to 3-4 for basic routers
- Use 720p resolution for better performance
- Set frame rate to 10-15 fps
- Enable hardware acceleration if available
- Monitor CPU and memory usage regularly
Network Optimization
- Use wired connections for cameras when possible
- Separate camera traffic with VLANs
- Configure QoS for camera streams
- Use local DNS for camera hostnames
Summary
You've successfully installed MotionEye on your PrivateRouter OpenWRT system! This powerful surveillance platform provides:
- ✅ Complete control over your security cameras
- ✅ No monthly fees or cloud dependencies
- ✅ Privacy-focused local storage
- ✅ Advanced motion detection capabilities
- ✅ Multi-camera support
- ✅ Flexible notification options