In this tutorial, we’ll show you how easy it is to set up a TorGuard anonymous proxy with the popular Firefox plugin FoxyProxy if you prefer this over our very own browser extensions.
Foxy Proxy is a very easy and effective way to tunnel Firefox web browsing traffic through an anonymous TorGuard web proxy. This can provide faster browsing speeds than the VPN service and doesn’t require any special VPN software installation.
STEP 1)
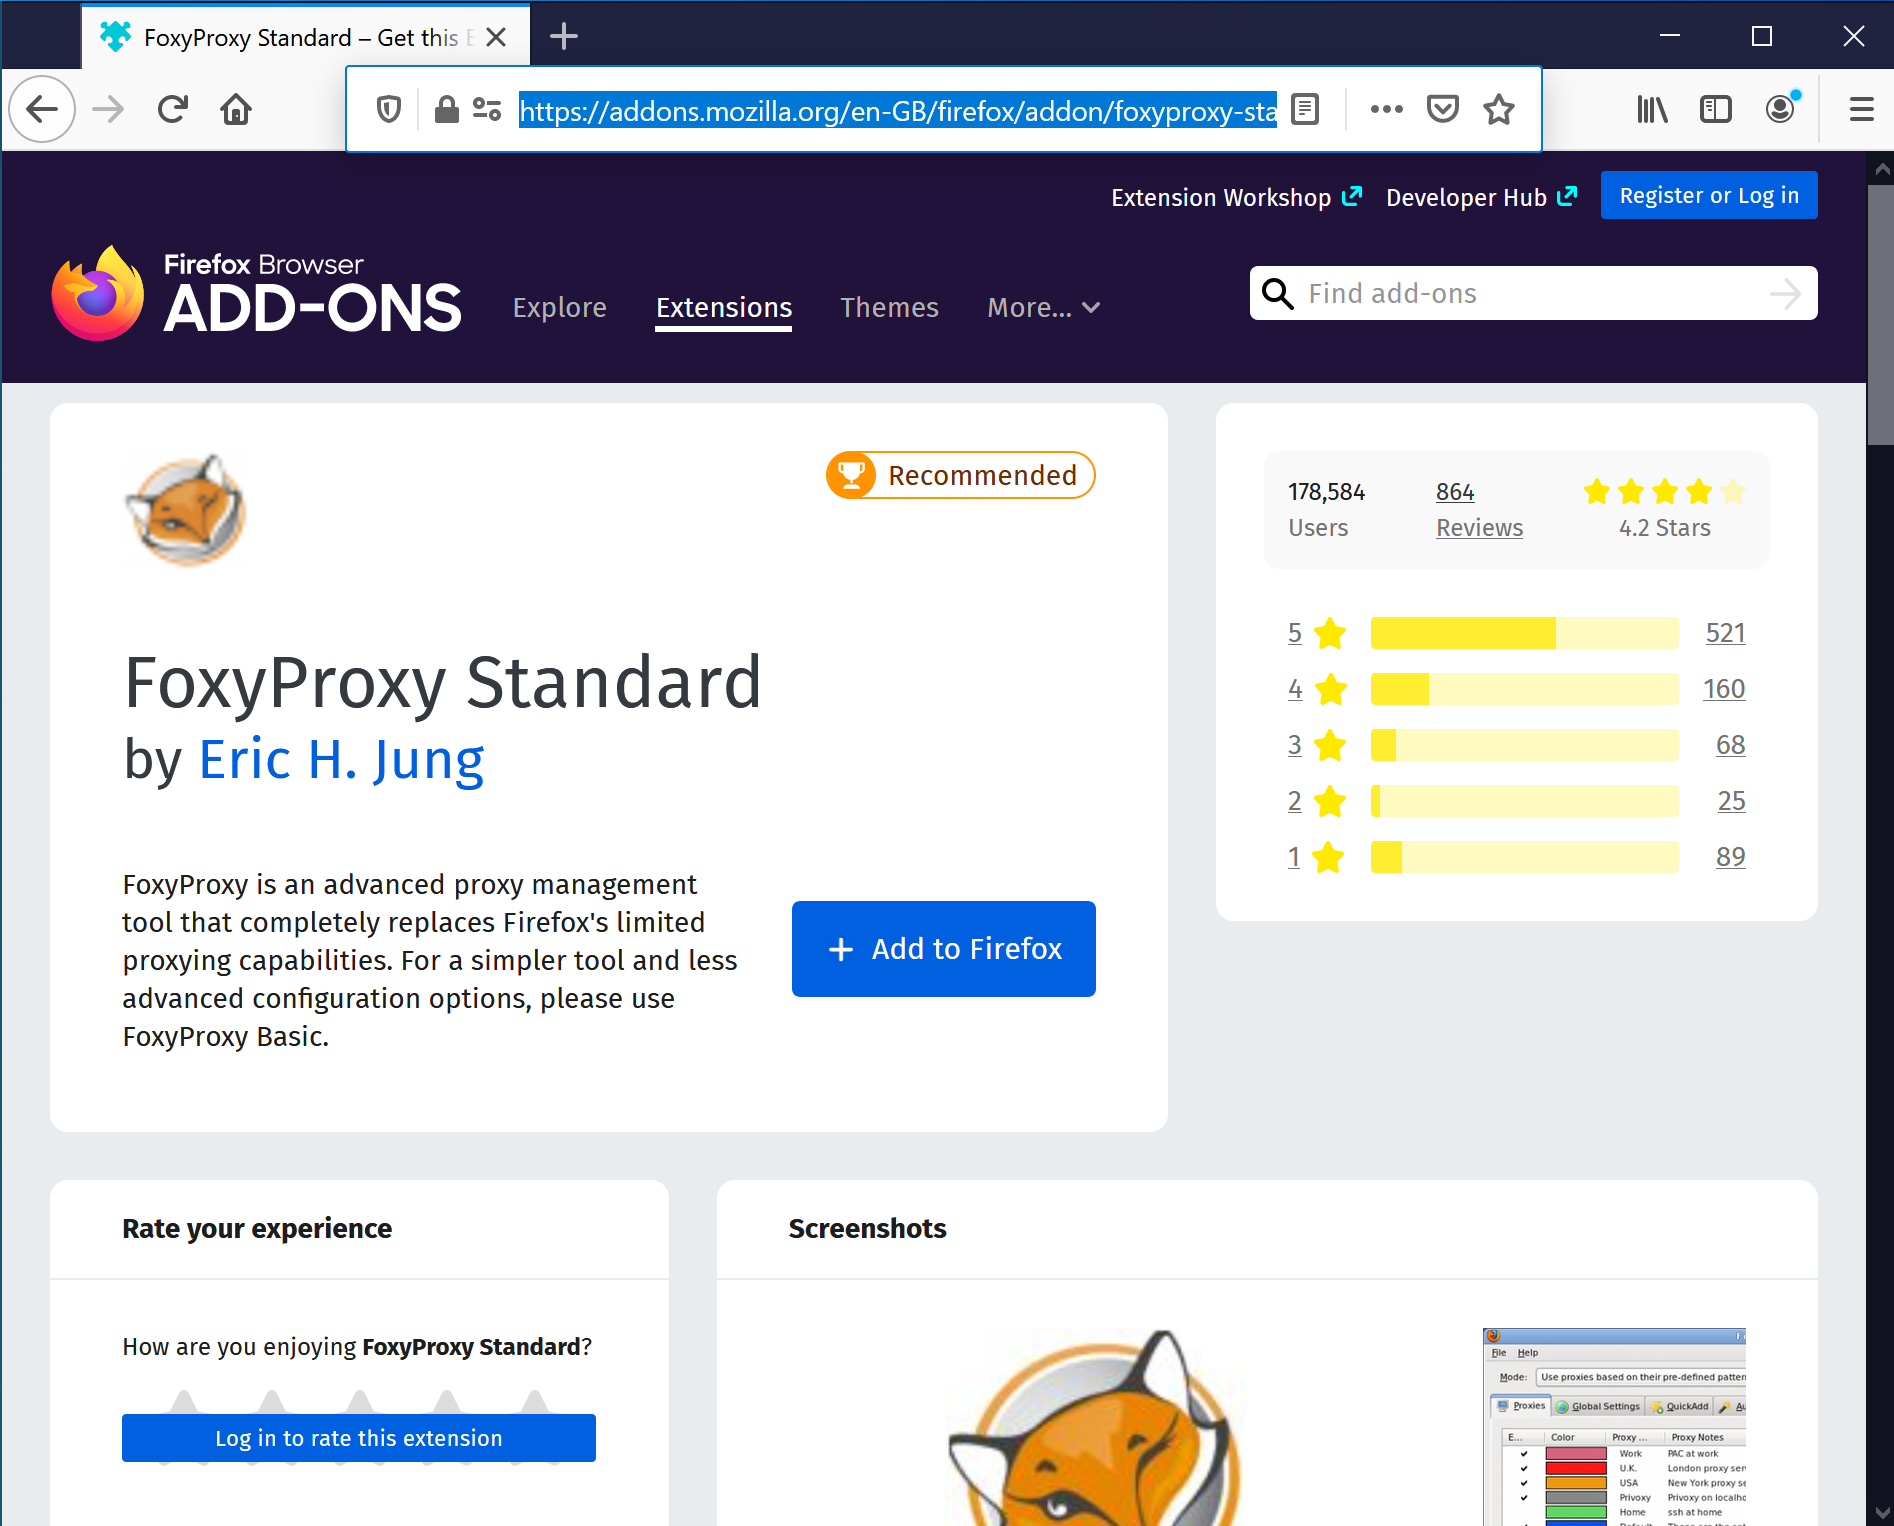
Visit the FoxyProxy plugin page and download FoxyProxy to your Firefox web browser: here and install it by clicking the "Add to Firefox" button.
STEP 2)
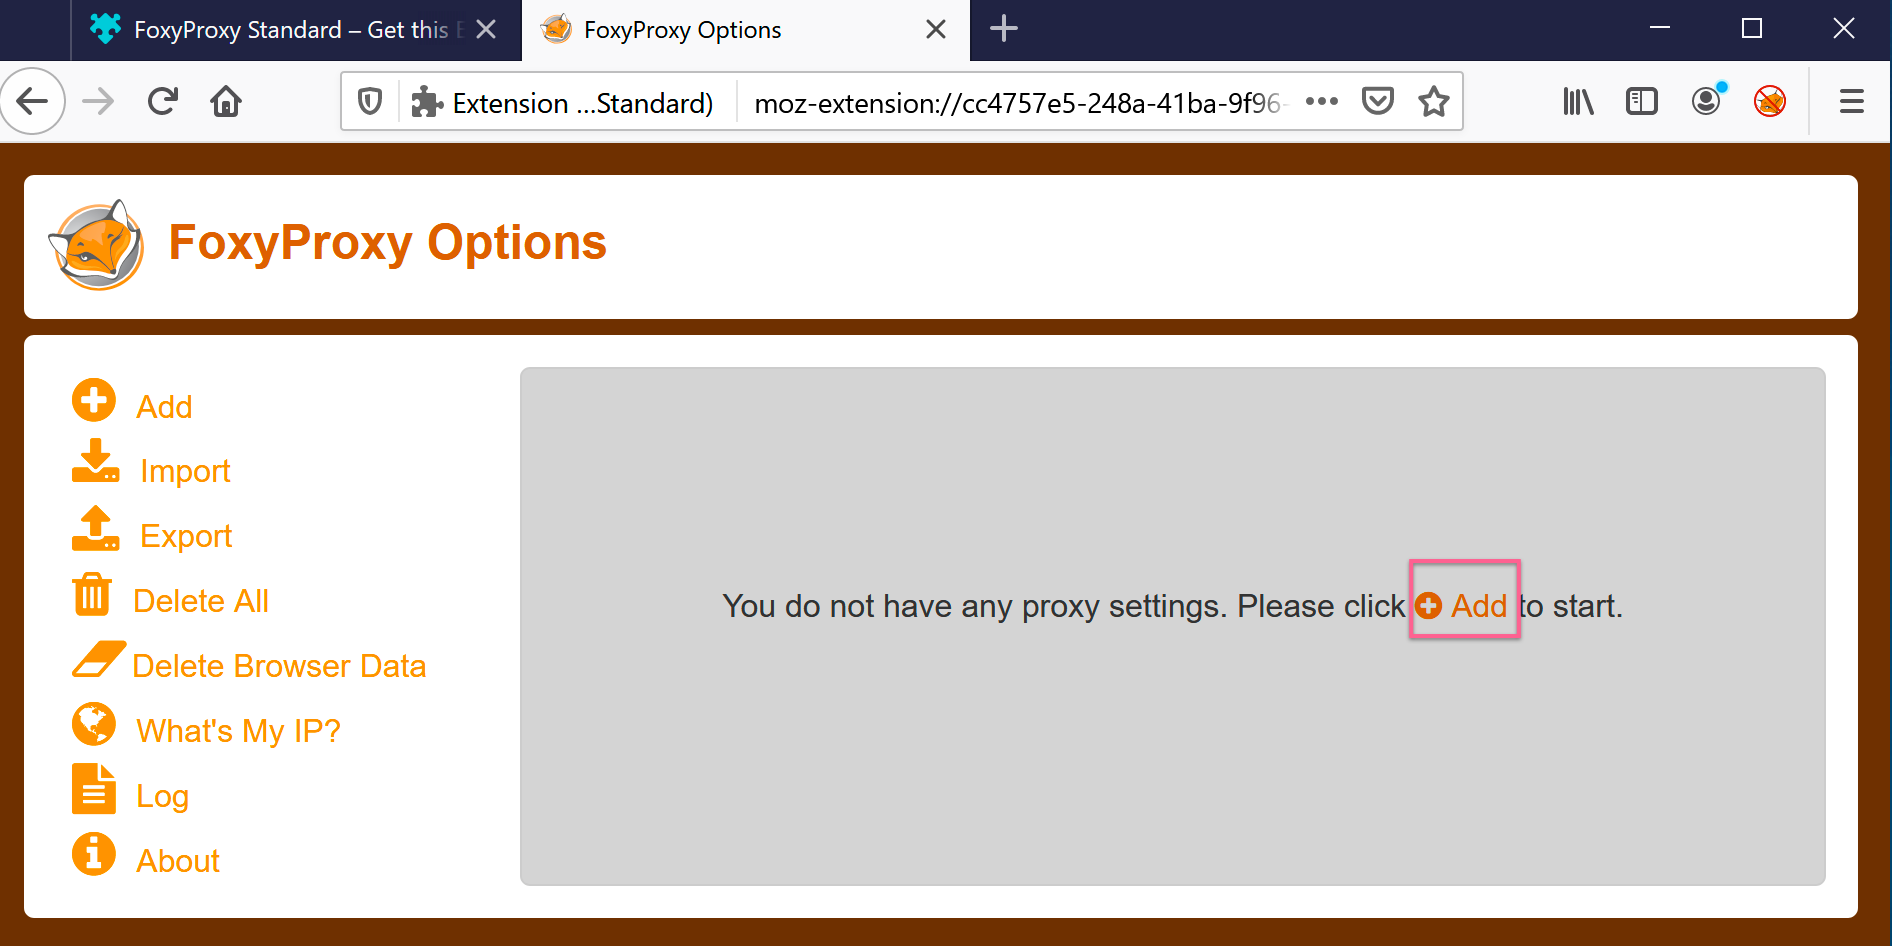
After the install, you can access its functions by clicking the little foxy icon in the address bar and then clicking options.

STEP 3)
Now click Add where it says "Please click add to start".
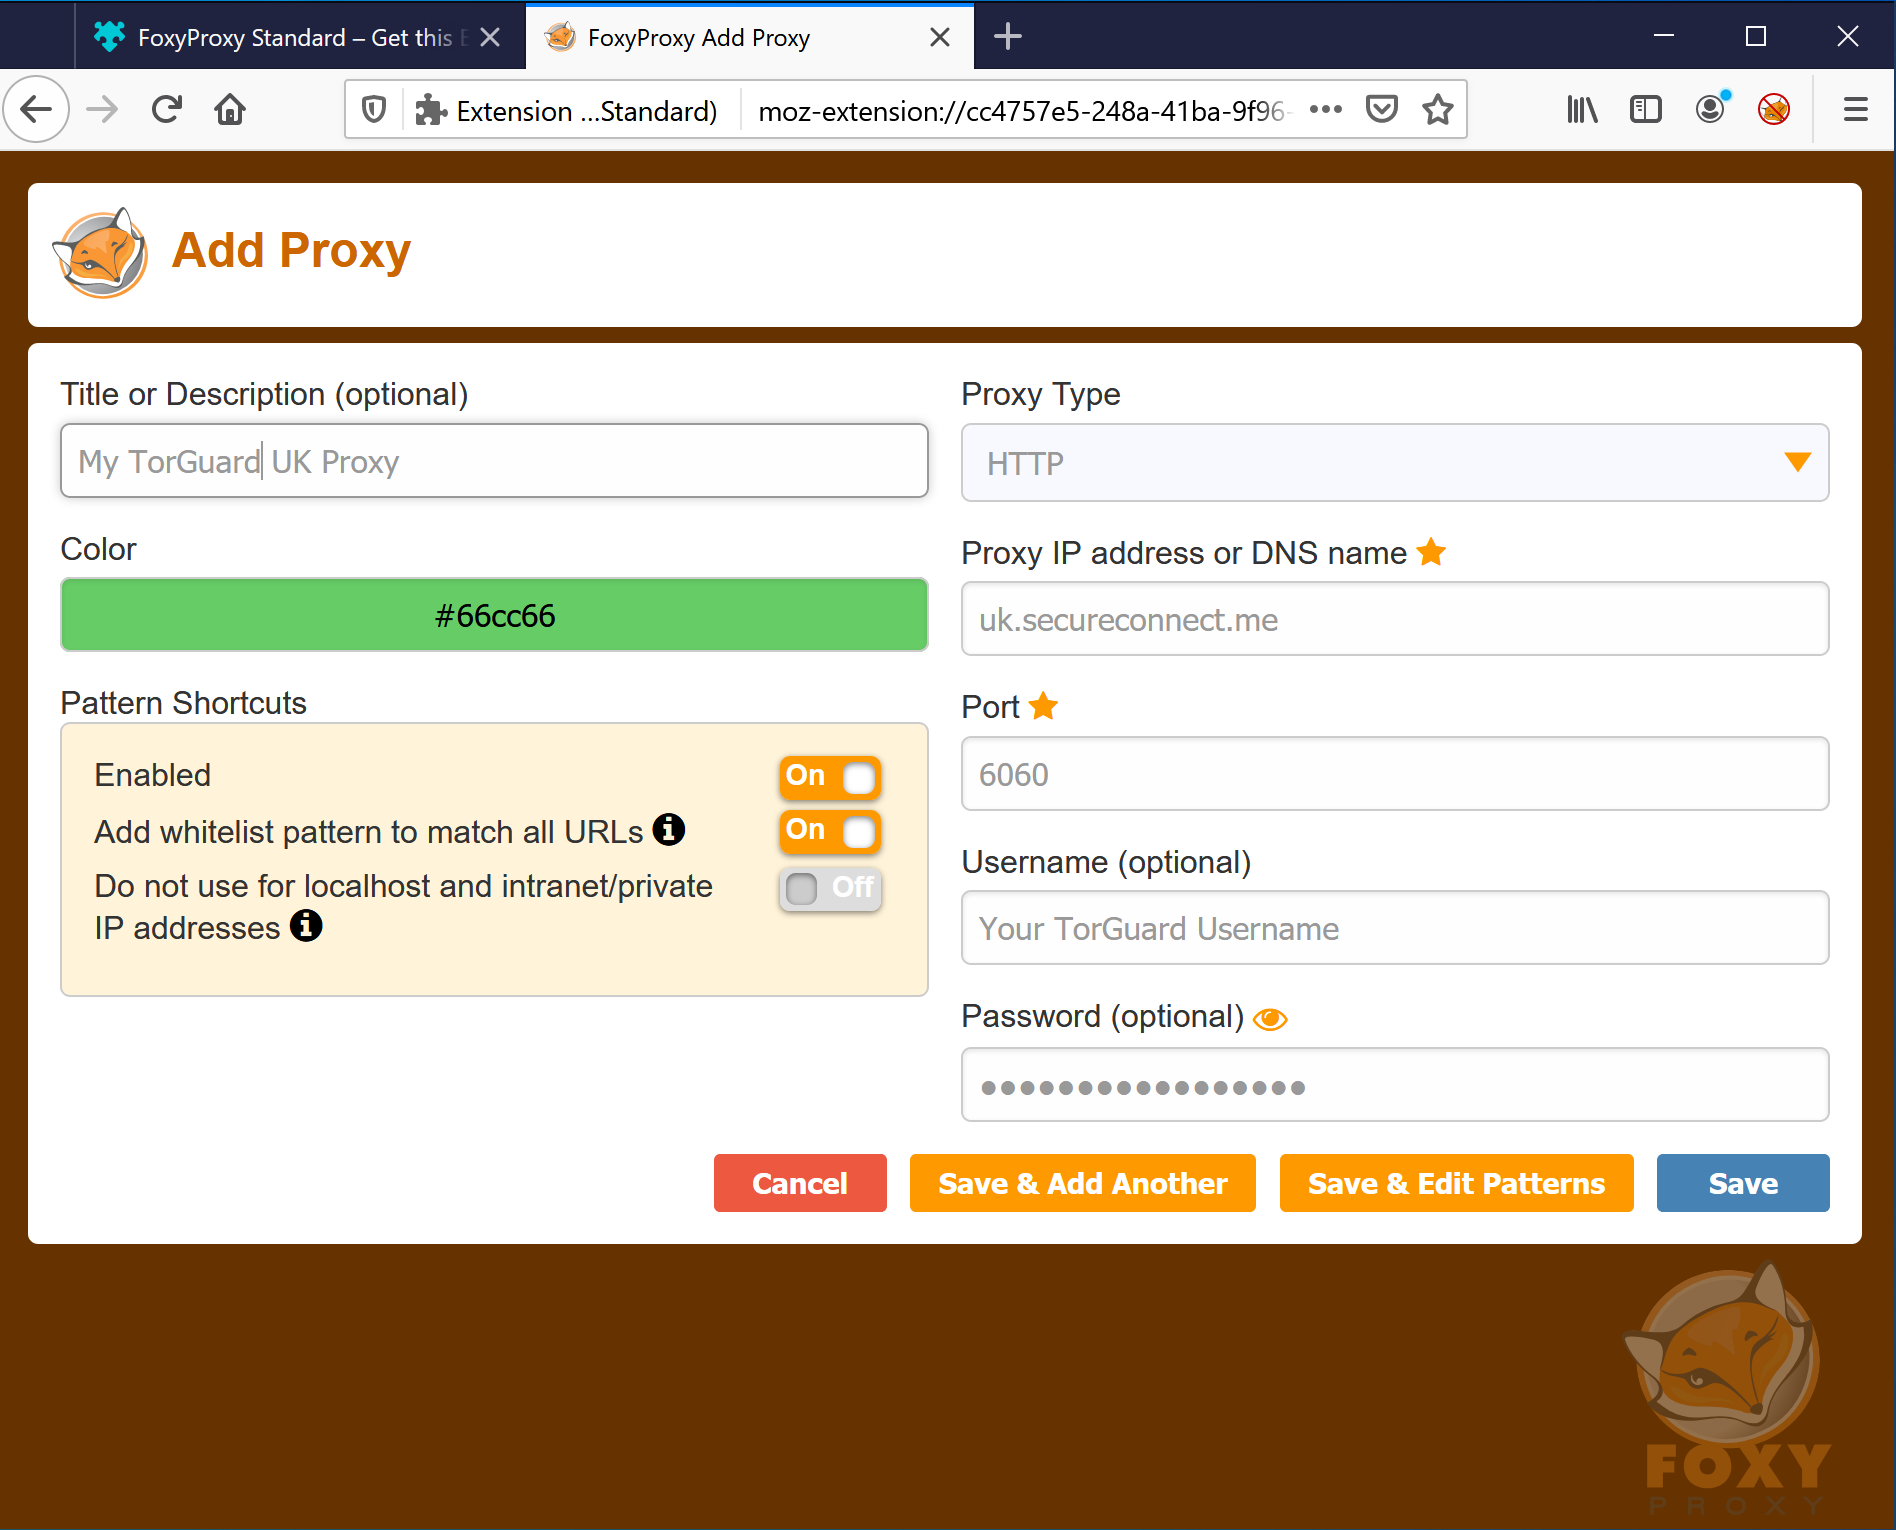
STEP 4) Fill out the HTTP settings to connect to our public HTTP Proxy hostnames:
- For Anonymous VPN service owners: For Host choose one of the server locations on our server page.
- For Anonymous Premium Proxy service owners: For Host choose one of the server locations on our Premium servers page.
- In This example we will use Anonymous VPN service host:
Title: Anything (Optional)
Proxy Type: HTTP
Proxy IP Address or DNS name: uk.secureconnect.me
Username: Your TorGuard Service Username
Password: Your TorGuard Service Password
Then click Save.
STEP 5)
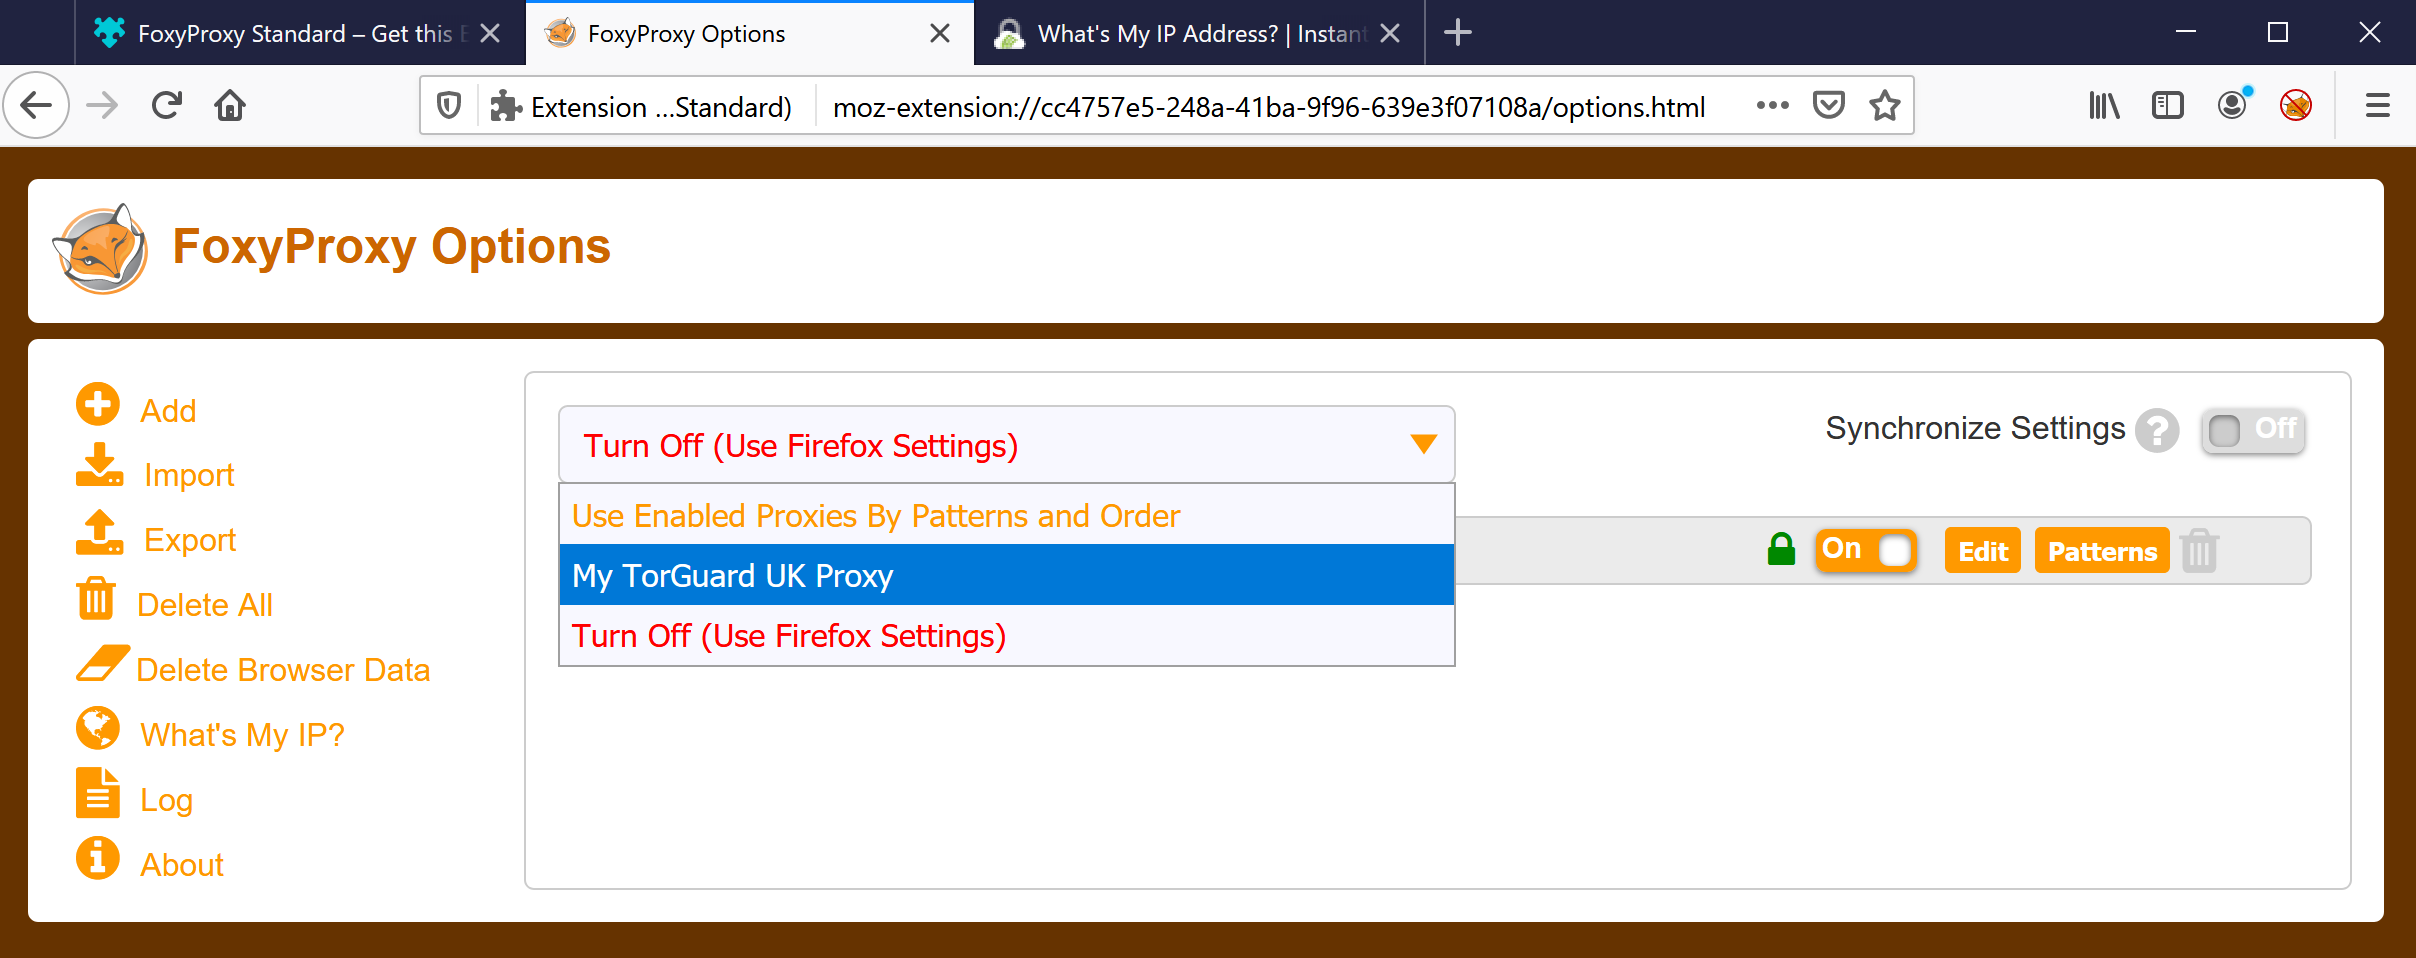
Now under the menu where it says "Turn Off (Use Firefox Settings)" Select your proxy from the list, in this case, "My TorGuard UK Proxy".
STEP 6)
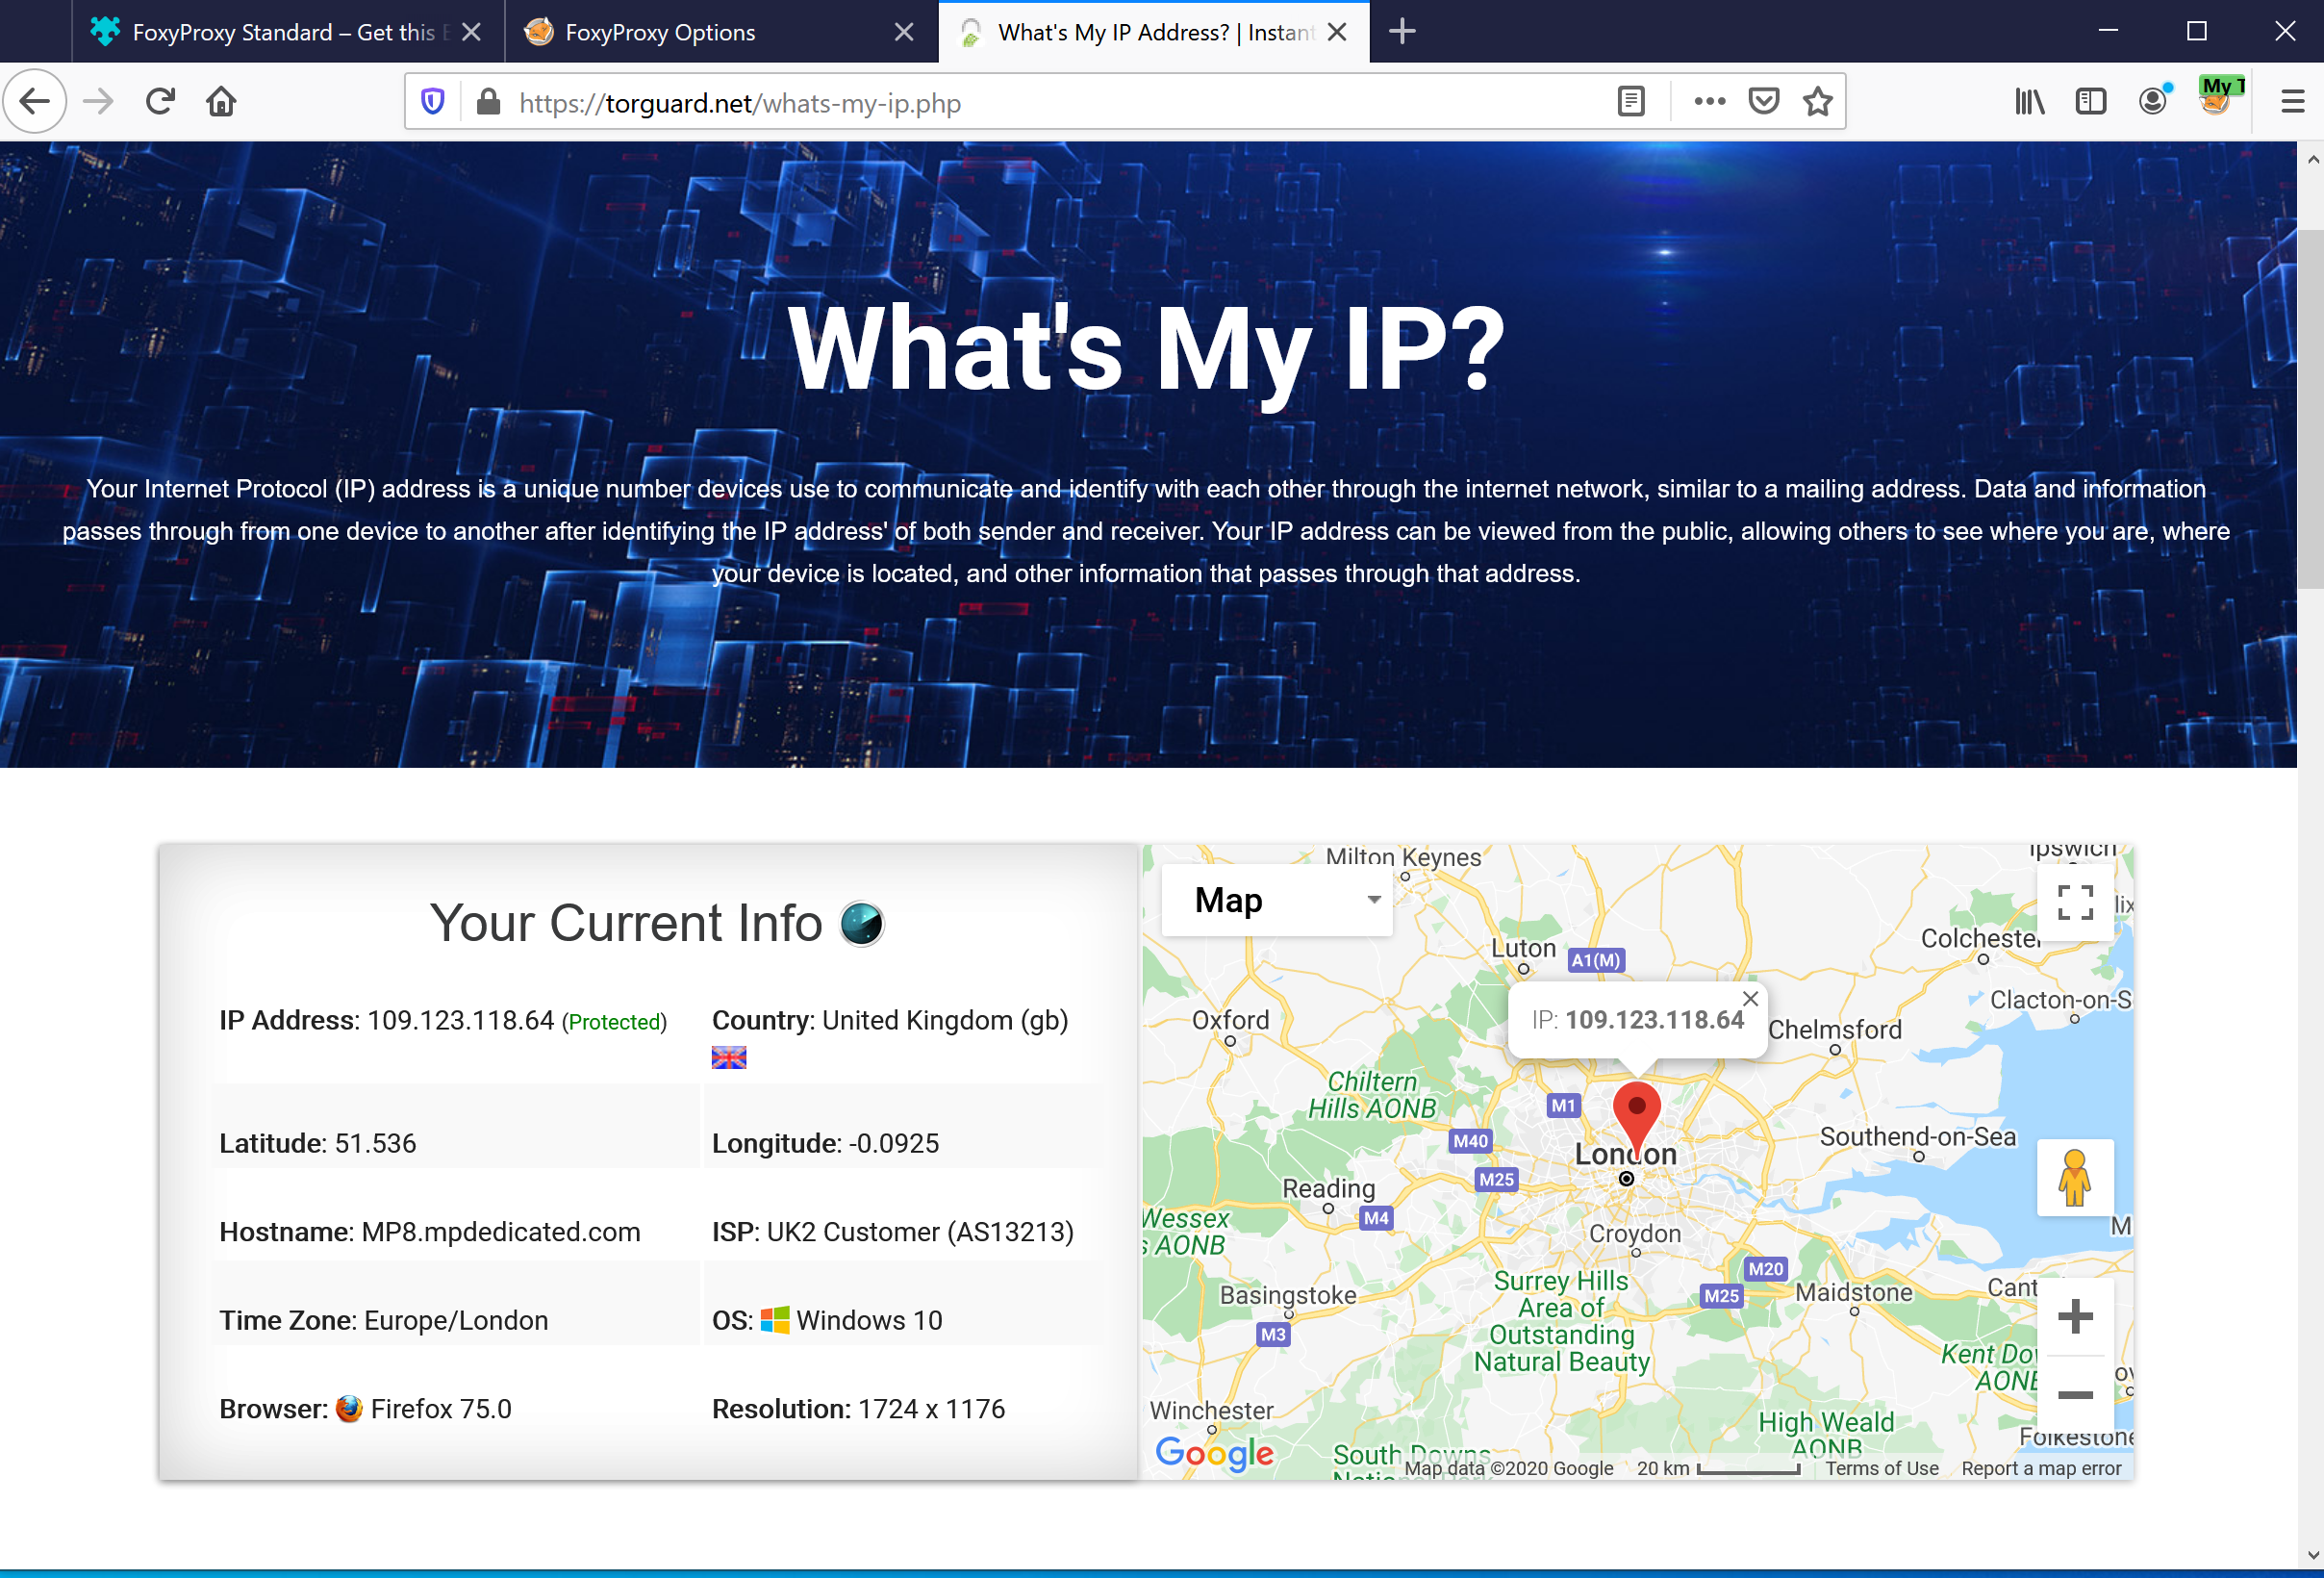
Verify your proxy is indeed connected:
a) Browse to https://torguard.net/whats-my-ip.php
b) Check the IP Address line states a TorGuard IP and states "Protected".