TorGuard's SSL proxy network is available in our Chrome/Firefox addon and you can also tunnel all your traffic through our SSL proxy by using the client software V2RayA. TorGuard's SSL proxies are very fast and can bypass most firewalls and VPN blocks.
1. First, download V2RayA from the github release page. You can download the V2RayA version 1.5 installer from this link.
Right click the installer and select "run as admin". When prompted with Windows protection click "More Info" then select "Run Anyway". 
2. Click next on the installer, approve the install location and wait a moment for the install to complete.
After installing v2rayA through the installer, v2rayA will run as a service that you can access through your web browser. You can open the admin page by running the desktop shortcut or by visiting http://127.0.0.1:2017 directly.
3. Open a browser and visit http://127.0.0.1:2017 to access the V2RayA admin menu. Create a username and password to access this web UI. This information is stored locally on your computer.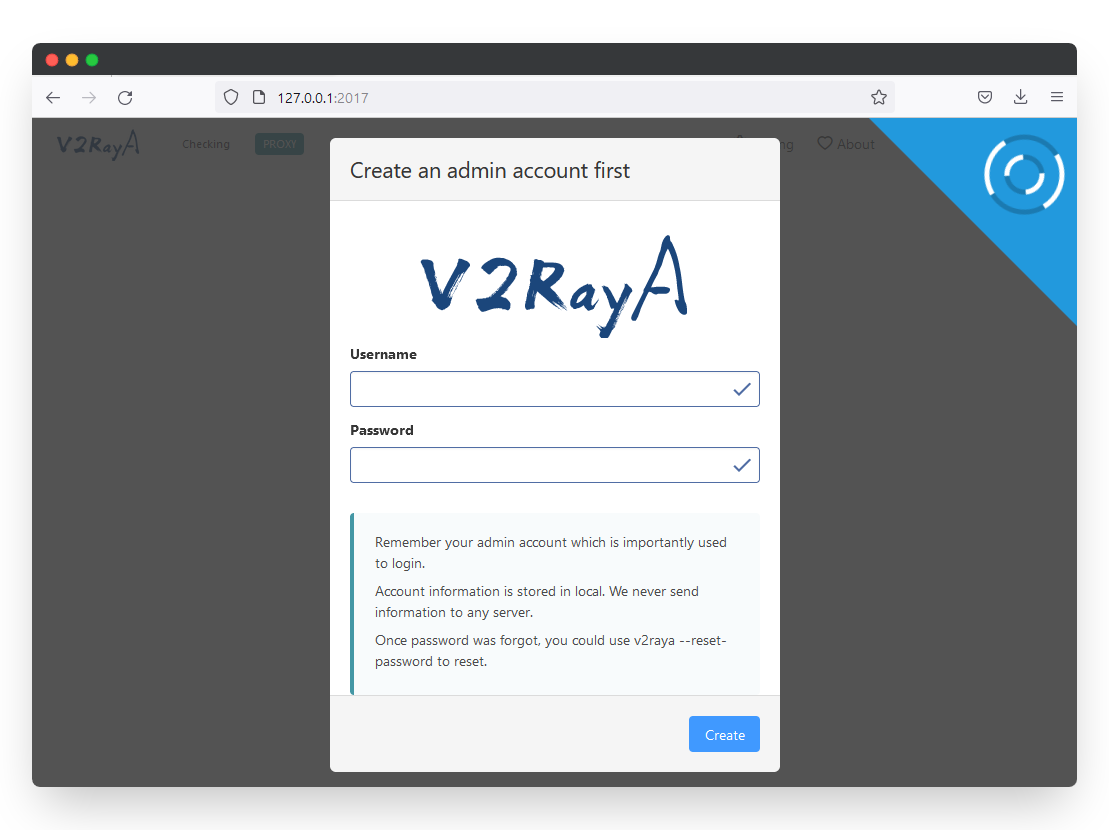
4. To import a TorGuard SSL proxy server click the create button:
5. Next click the HTTP tab and under Protocol choose HTTPS. For Name enter the TorGuard server location you are adding - in this case Canada.
- For Anonymous VPN service owners: For Host choose one of the server locations on our SSL server page. For this tutorial we are connecting to TorGuard's Canada location: ca.secureconnect.me
- For Anonymous Premium Proxy service owners: For Host choose one of the server locations on our Premium SSL servers page. For this tutorial we are connecting to TorGuard's Canada location: ca.stealthtunnel.net
For Port enter 7070 or any port from the server page.
Next to Username and Password enter your TorGuard service username and password.
Click the save and apply button.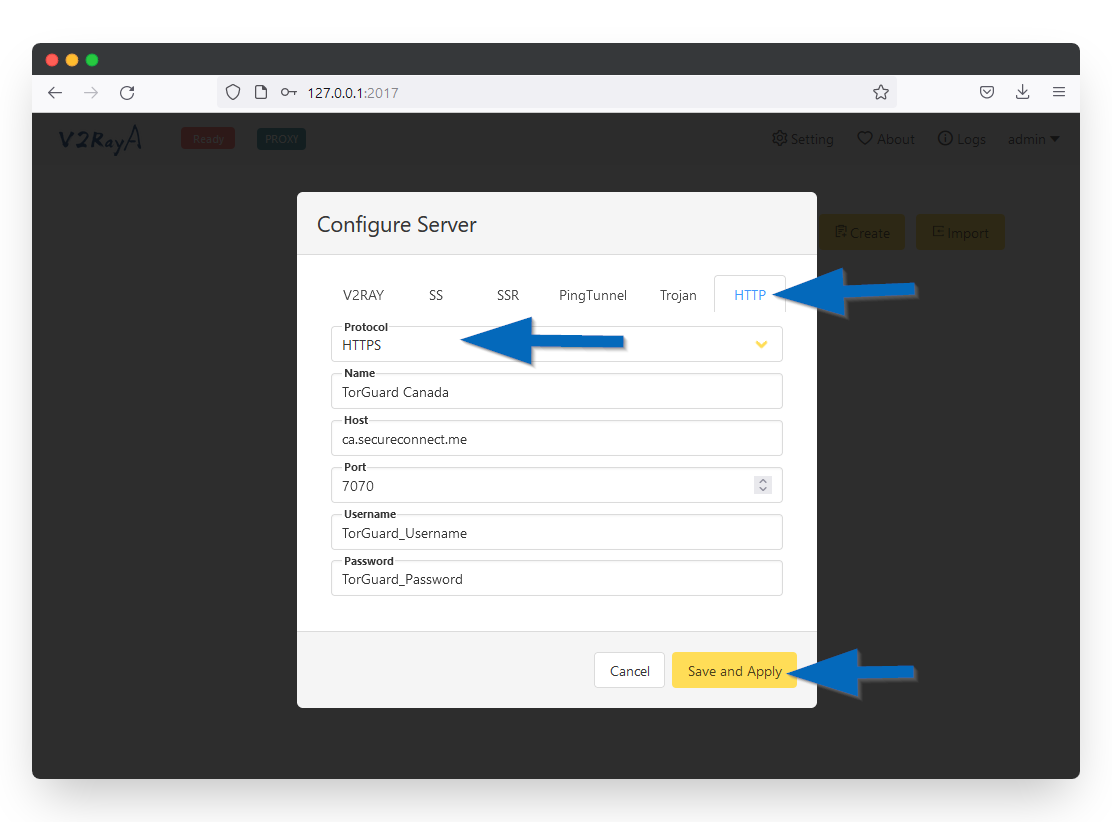
6. Next click the settings button in the top right corner. Under Transparent proxy select Proxy All Traffic. In the Transparent proxy option below select system proxy.
Under prevent DNS spoofing select Forward DNS Requests.
Click the Save and Apply button.
6. Now you are ready to connect. Click the Select button on the newly added SSL proxy server. Then in the top left click the Ready button to connect. When you see the Running message it means your proxy is connected.