If you are new to self hosting this may seems complicated at first, but if you follow these steps the end result will be rewarding. Our support team is available to answer any questions you have.
Step 1.)
First login to the TorGuard member's area, Search for your service, click Manage to open the dropdown and choose Manage VPN Cloud.

Step 2)
You can Add your PrivateRouter device by clicking Add Device button anytime in VPN Configuration table.

Step 3)
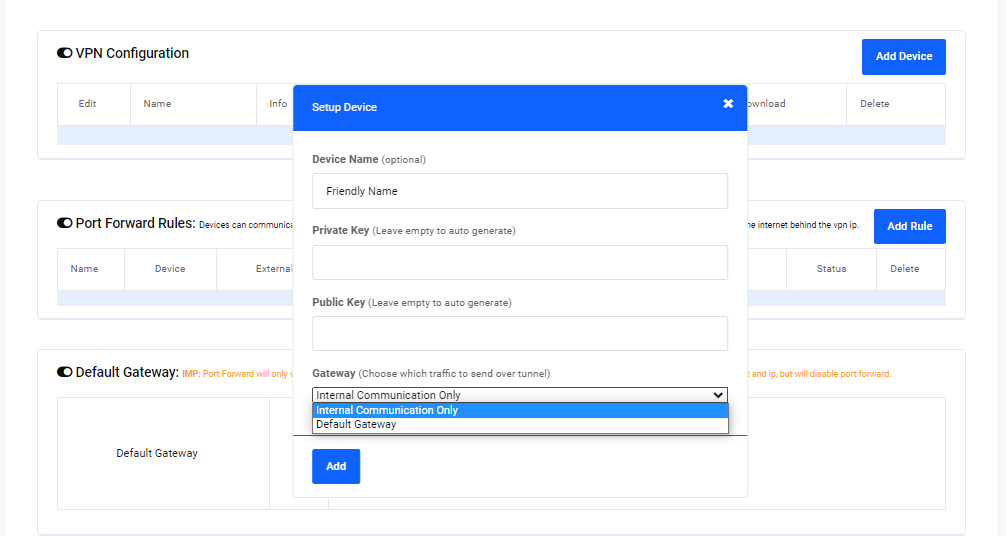
In the Add device window, fill below:
Device Name: Give your device a name that you can easily identify it with in control panel as your OpenWRT PrivateRouter
Private Key: For this example, leave this empty.
Public Key: For this example, leave this empty.
Gateway: Select Default Gateway
Then click "Add" to create your device.
Step 4)
Next we have to download the newly created WireGuard config file and add it to your PrivateRouter OpenWRT router. Click the "Download Config" link and open the file with a text editor like notepad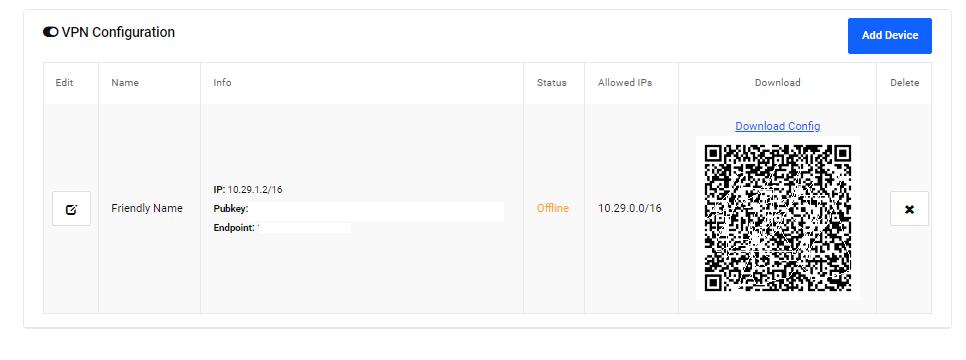
Next we need to connect your PrivateRouter OpenWRT box to your newly created VPN. Access your PrivateRouter OpenWRT device in a web browser at http://192.168.0.1, click the VPN tab then select TorGuard WireGuard. Copy and paste the information values from the wireguard config file and carefully enter them into each text box. Click the save/apply button, then click the Start Wireguard button at the bottom. You should be able to open a new browser window and verify your IP address has changed to your Wireguard server.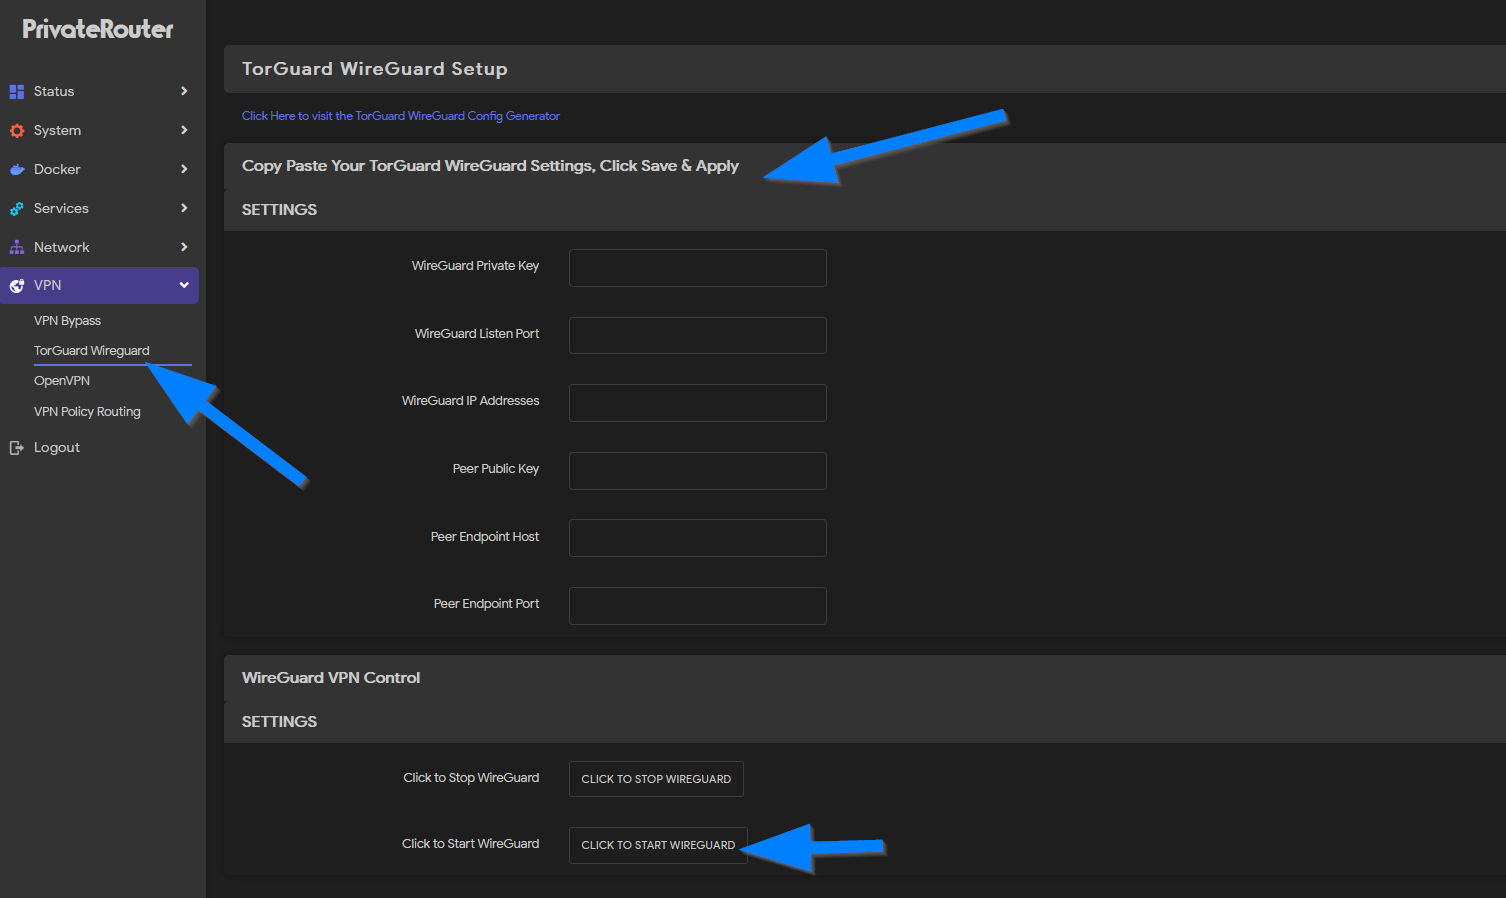
Step 5)
Now that your PrivateRouter OpenWRT box is connected to Wireguard, we need to forward some VPN ports to give your web apps outside access. In this example we will use Nginx Proxy Manager to send traffic from internal ports 8080/4443 to exteral ports 80/443 like seen in the diagram below: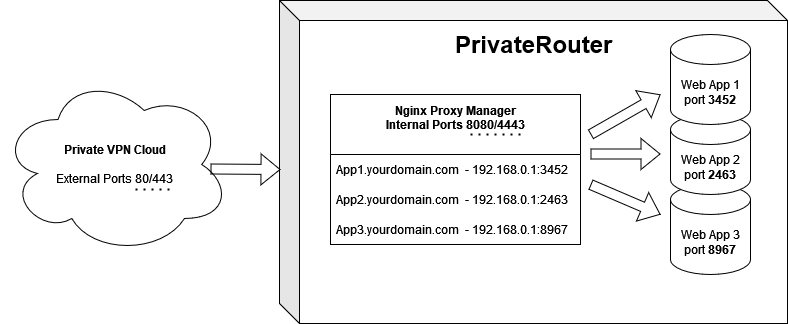
Your port forward rules should look similar to the port forward rules below. Click the Add Rule button to add both of these port forward rules: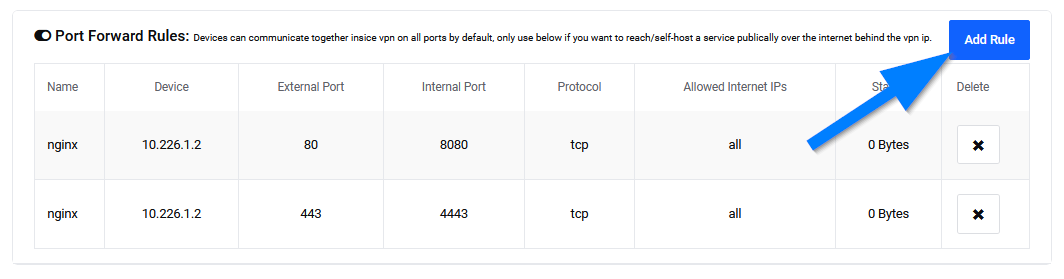
Enter the external port and internal port for 80 / 8080 TCP and 443 / 4443 TCP just like this: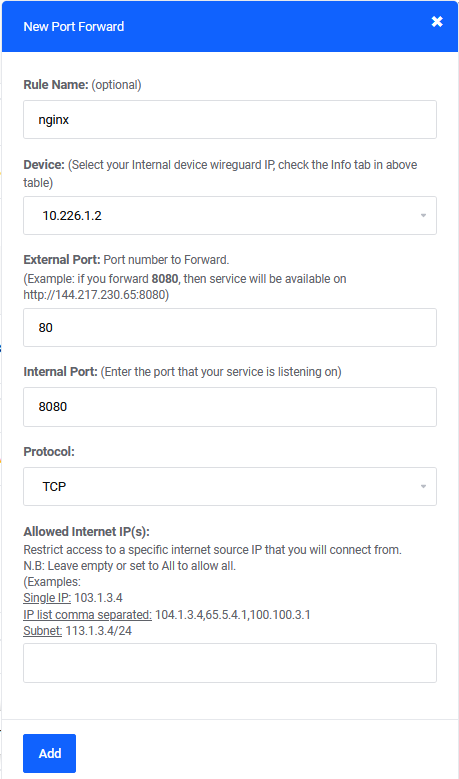
Step 6)
Now that your external ports are forwarded it's time to setup the internal port forwarding with Nginx Proxy Manager. (If you ordered a pre-installed PrivateRouter you can skip this step as Nginx will be setup before shipment).
To install Nginx Proxy Manager click the services tab and select Terminal. Log in with root as the username and the PrivateRouter password you setup on the device initially. 1.) To install Nginx Proxy Manager first login to your PrivateRouter and click the System menu. Select Custom Commands then locate Nginx Proxy Manager and click the RUN button.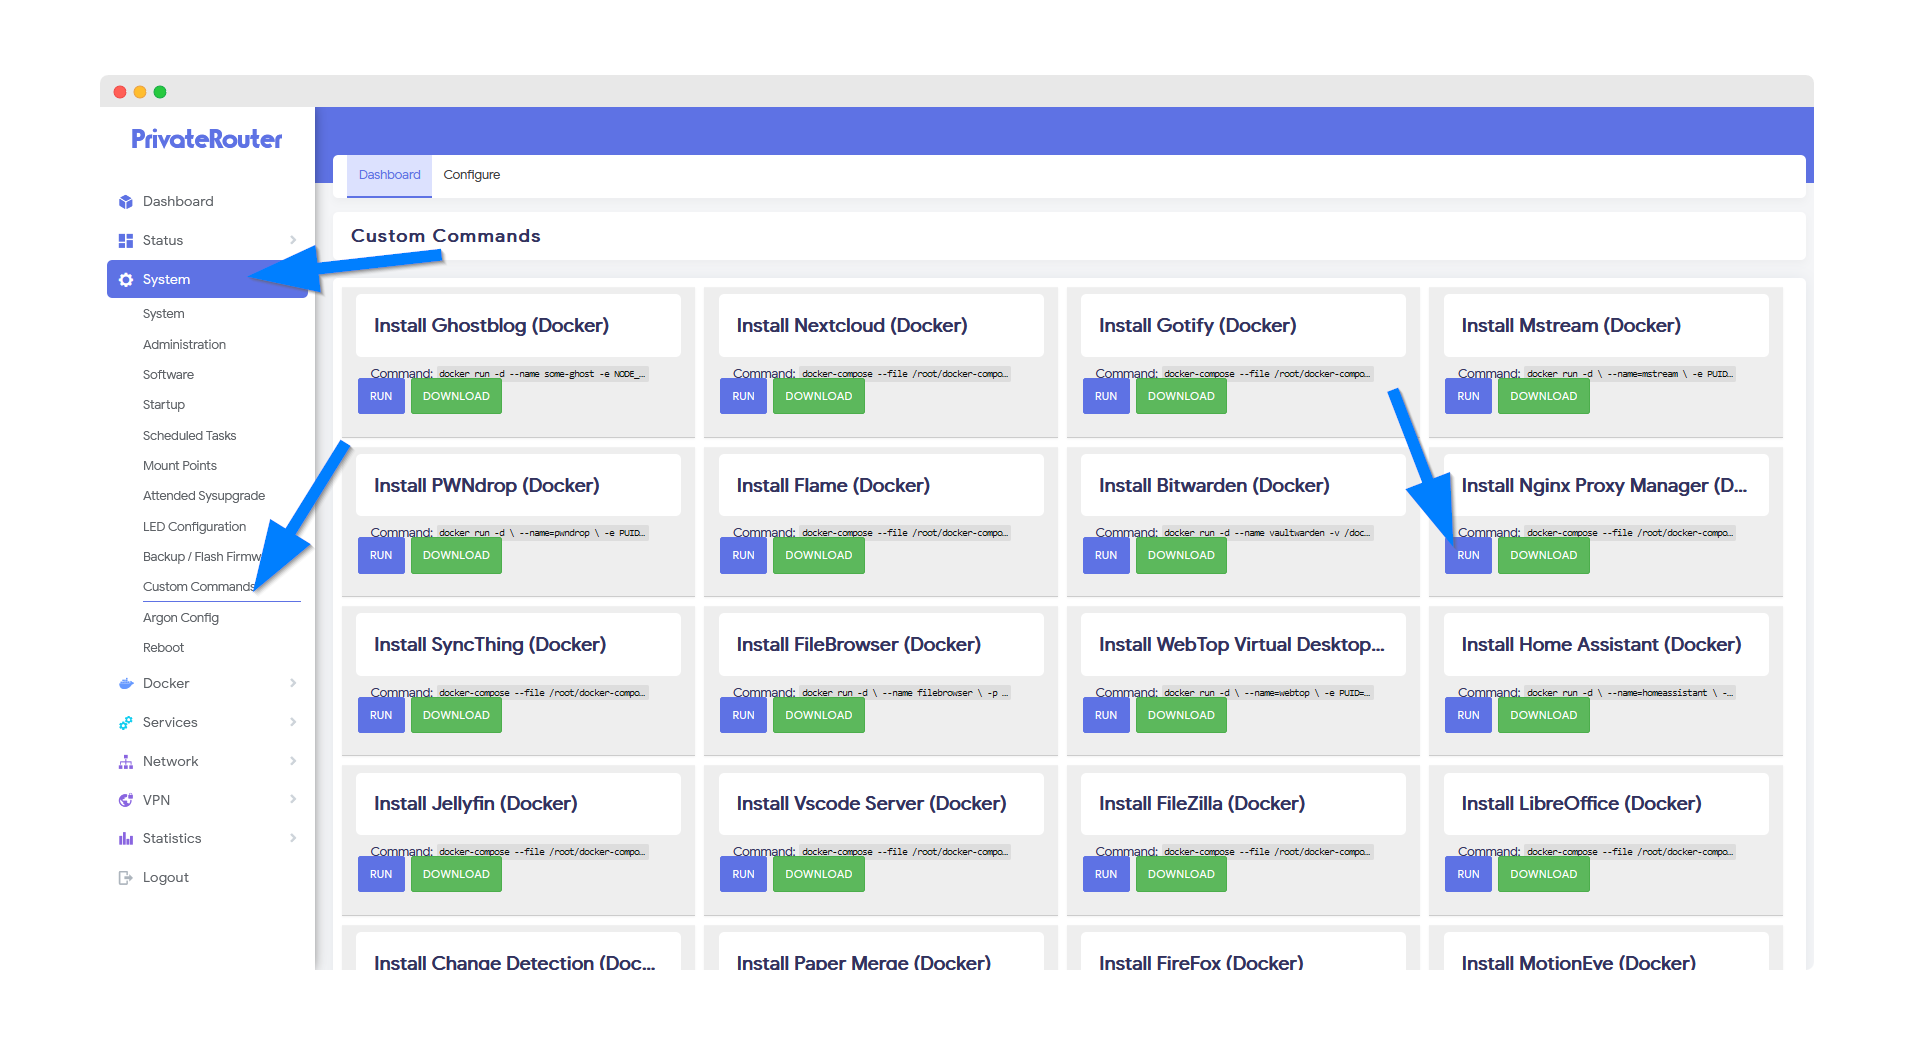
7.) Wait a few minutes for Docker to complete the app install. Scroll to the bottom and you will see output similar to the commands below when the install has been completed. (If you receive an error instead of docker output this can happen if the install takes longer. Nginx Proxy Manager will still be installed so be patient and proceed to the next step.)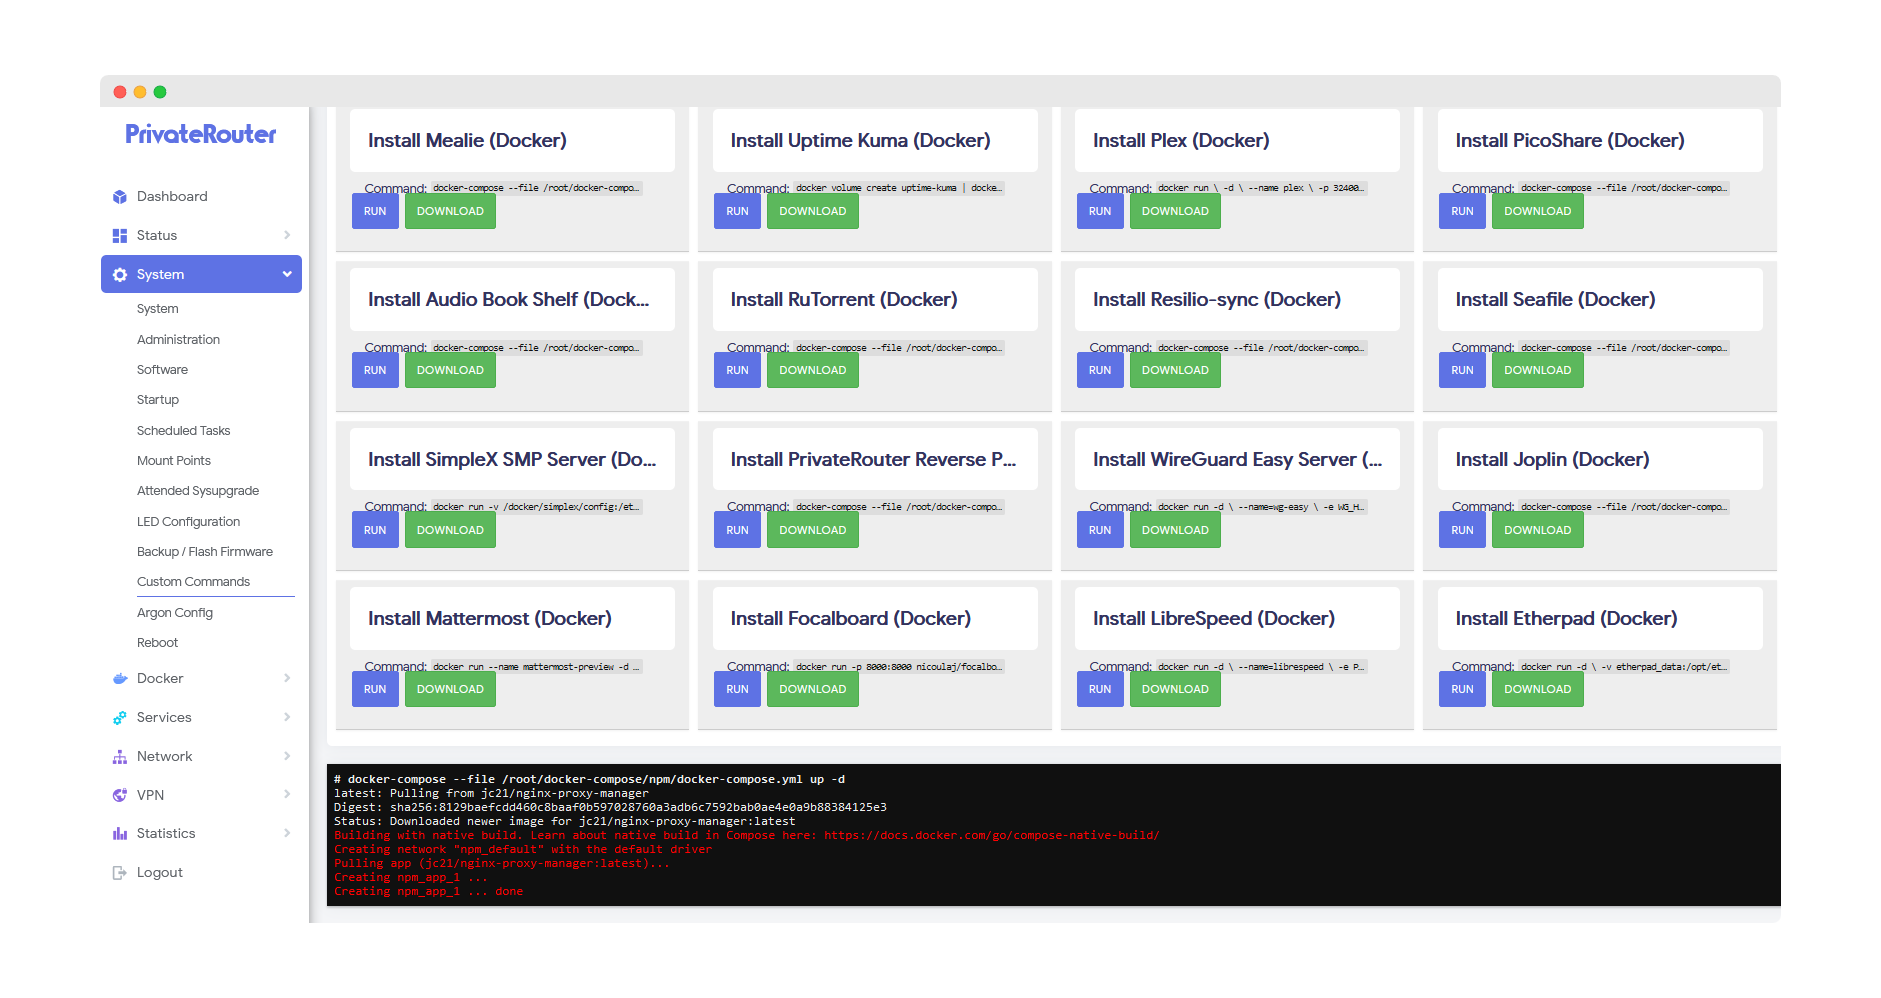
8.) To access Nginx Proxy Manager after it's been installed click the Docker menu then select Containers. You should see the newly created Nginx Proxy Manager (npm) container with a green UP status. This means Nginx Proxy Manager is up and running. Next click the port link to access Nginx Proxy Manager via your local router IP address and port. With default settings this will load at the local URL: http://192.168.0.1:81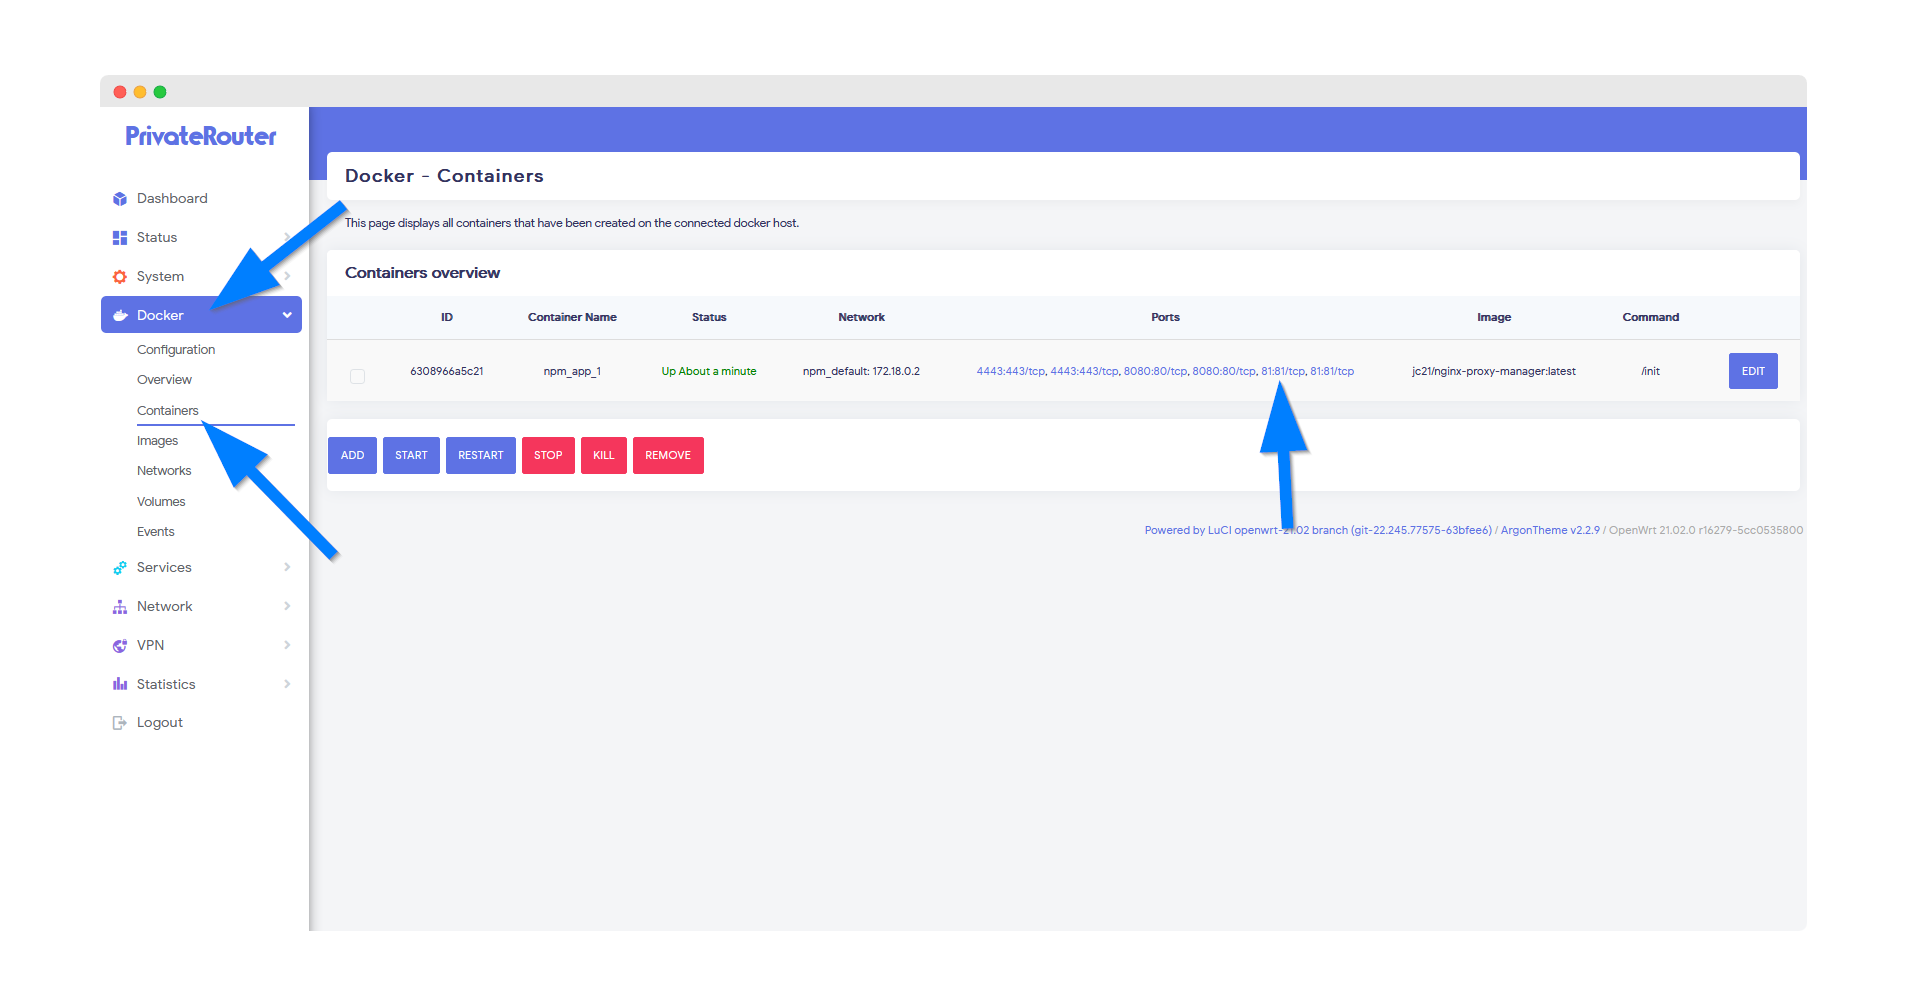
Nginx Proxy Manager will load with the login screen below. The first time you can login with the default username [email protected] and password changeme.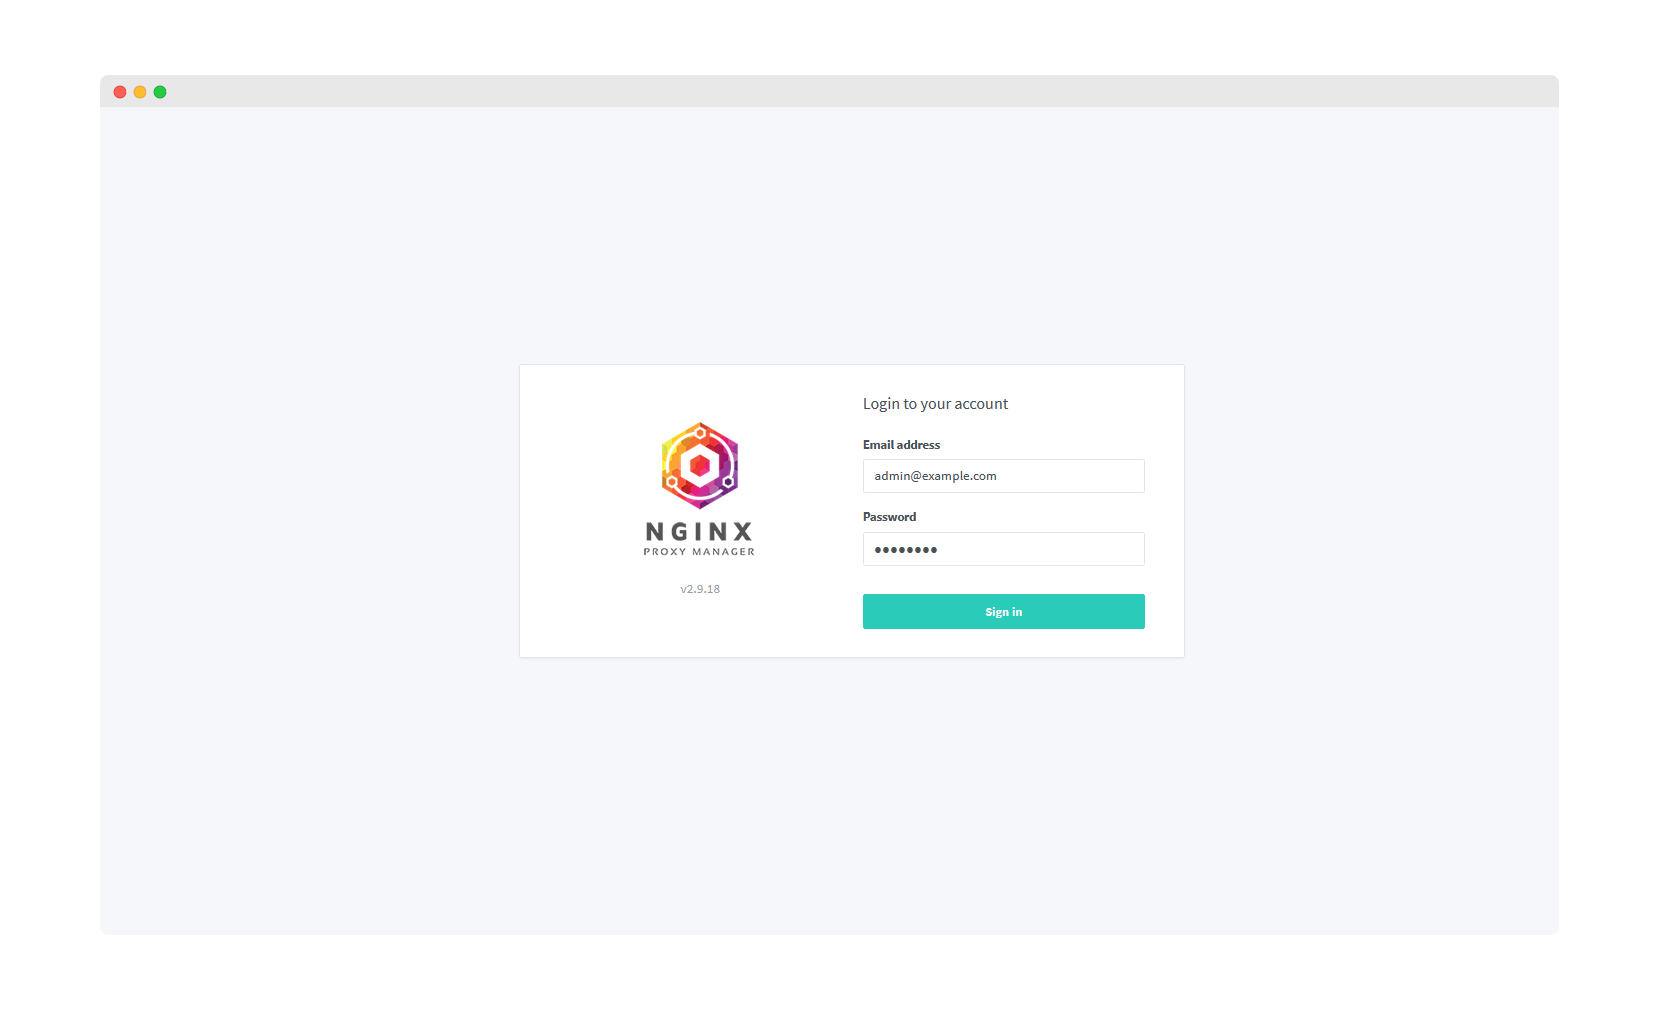
Enter your name and email address so Let's Encrypt can notify you about free SSL cert renewals then proceed to change the default password.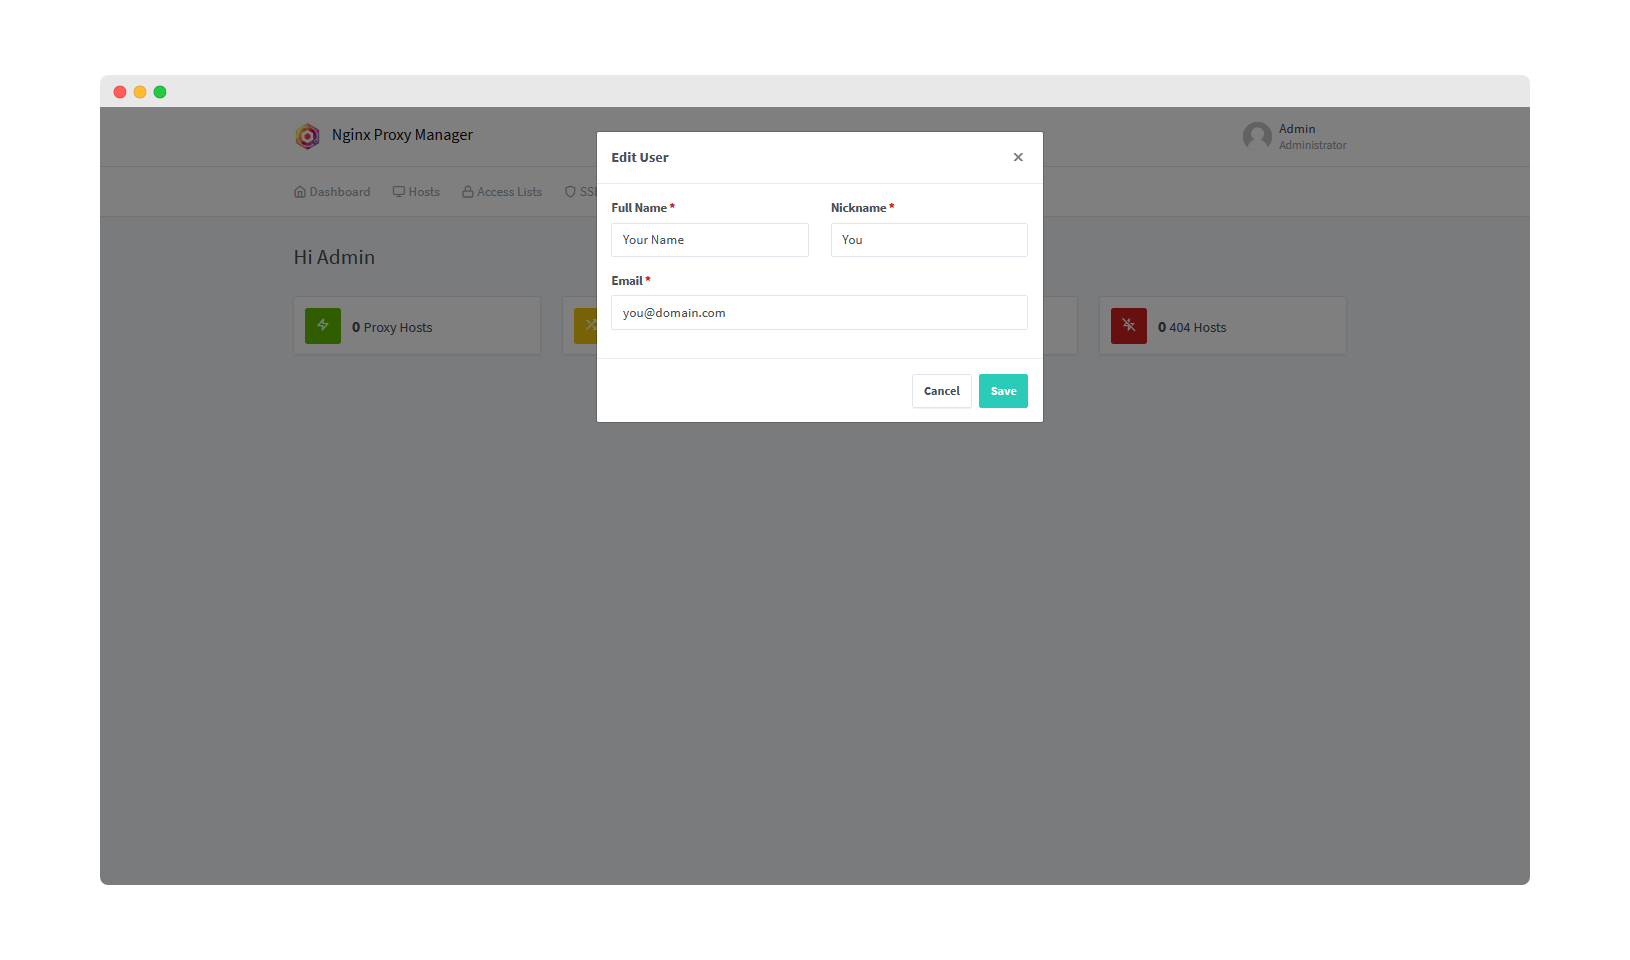
9.) Next we will show how to add a local docker container IP and port address before securing it with Let's Encrypt SSL.
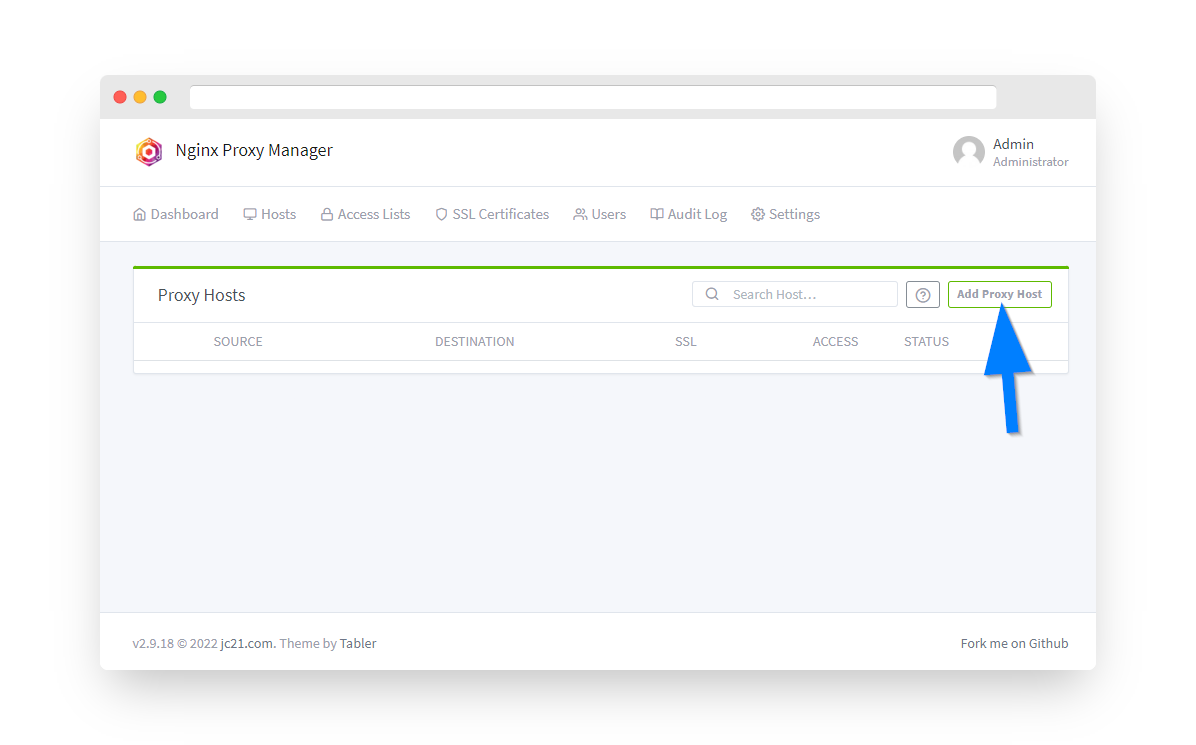
Once you are logged in click the Hosts menu option then select "Proxy Hosts".
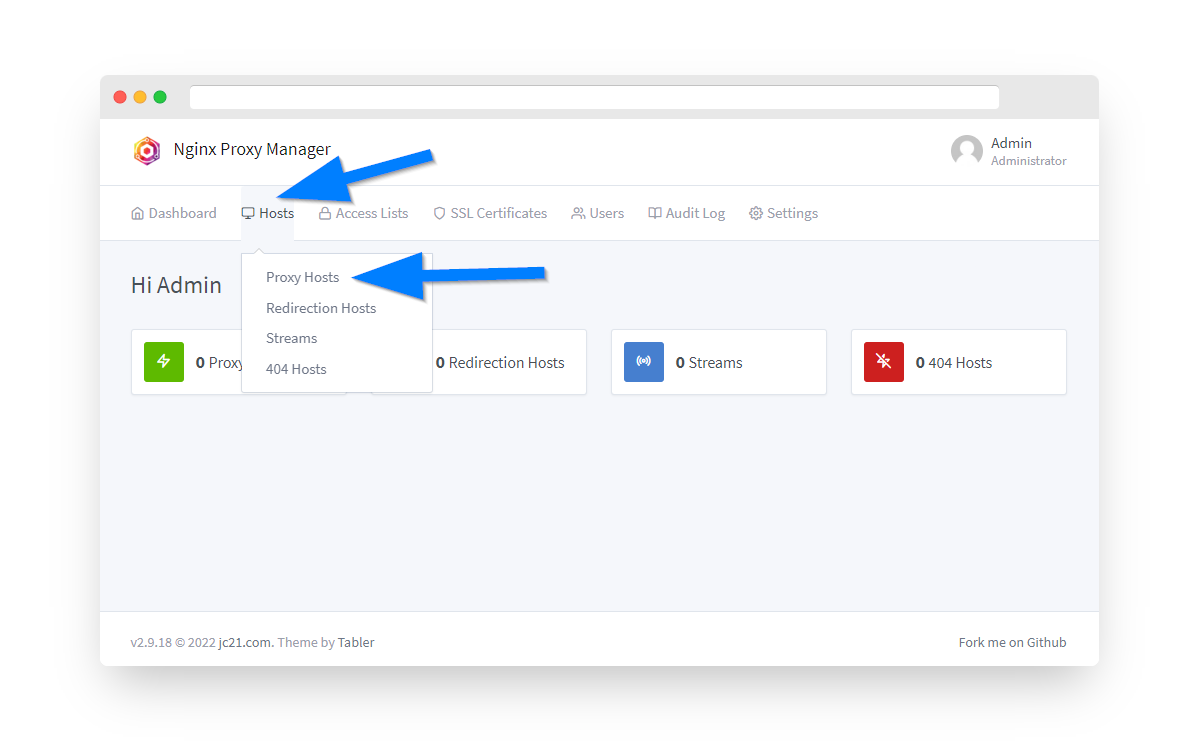
10.) Click the Add Proxy Host button.
11). Before proceeding first make sure you have pointed an A record or A Wildcard record with your domain's registrar at your Private VPN Cloud VPN IP address and setup external/internal port forwarding 80/8080 and 443/4443. Then enter the domain name or subdomain under Domain Names. (example: files.yourdomain.com) Select "https" under Scheme and the enter your Router's IP address (192.168.0.1). For the port enter the web app's port number (for example 8984). Click the SSL tab next.
**For most apps make sure to set the Websockets Support switch to ON**

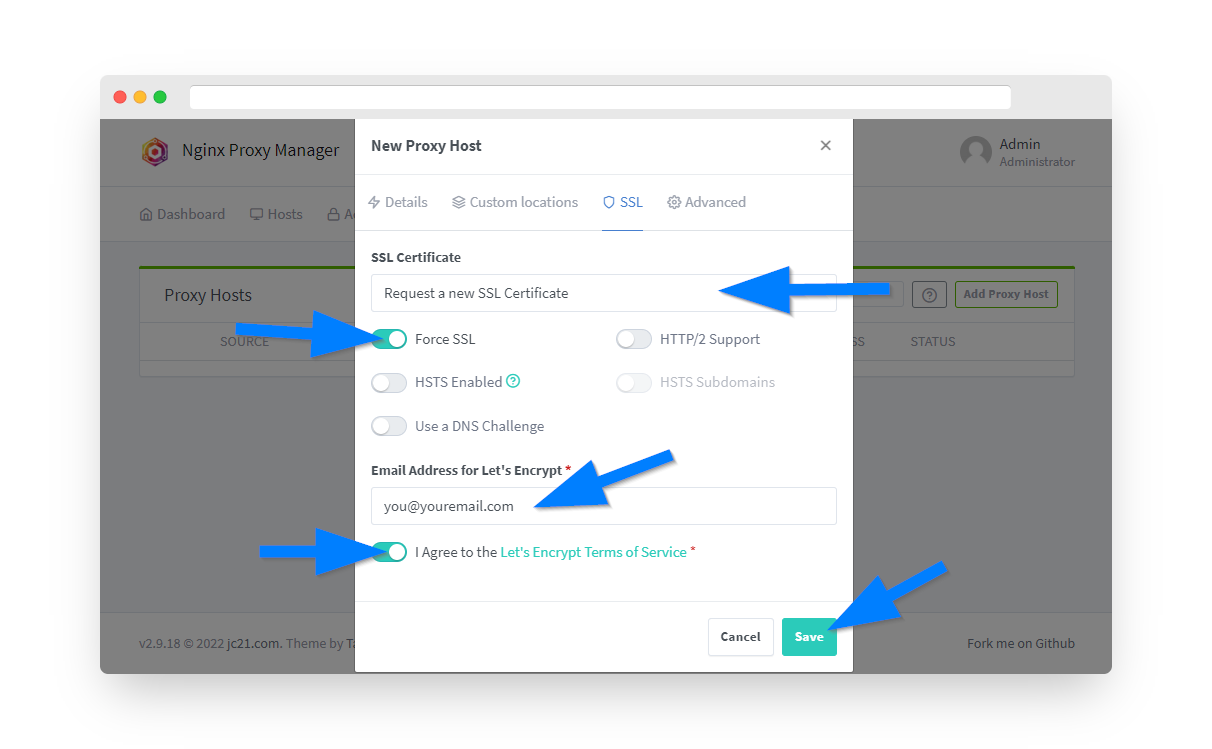
12). Under the SSL tab now proceed with obtaining a free Let's Encrypt SSL certificate. Under the SSL Certificate dropdown select "Request a new SSL Certificate with Let's Encrypt". Click the "Force SSL" option switch and enter an email address to register your SSL cert by with Let's Encrypt. Finally, click the "I Agree" switch on Let's Encrypt Terms and Conditions and click the save button. After a few moments you should see your new proxy host on the Nginx Proxy Manager dashboard with a green "online" status. To verify things are working open a new browser window and enter in your domain name. You should see your web app is now loading through your domain instead of the local IP address.
.