Setup Pihole for Secure Public Access
The first step is to purchase TorGuards Pihole Cloudapp from this link. Cloud apps can be run by themselves or connected to your Private VPN Cloud Wireguard server.
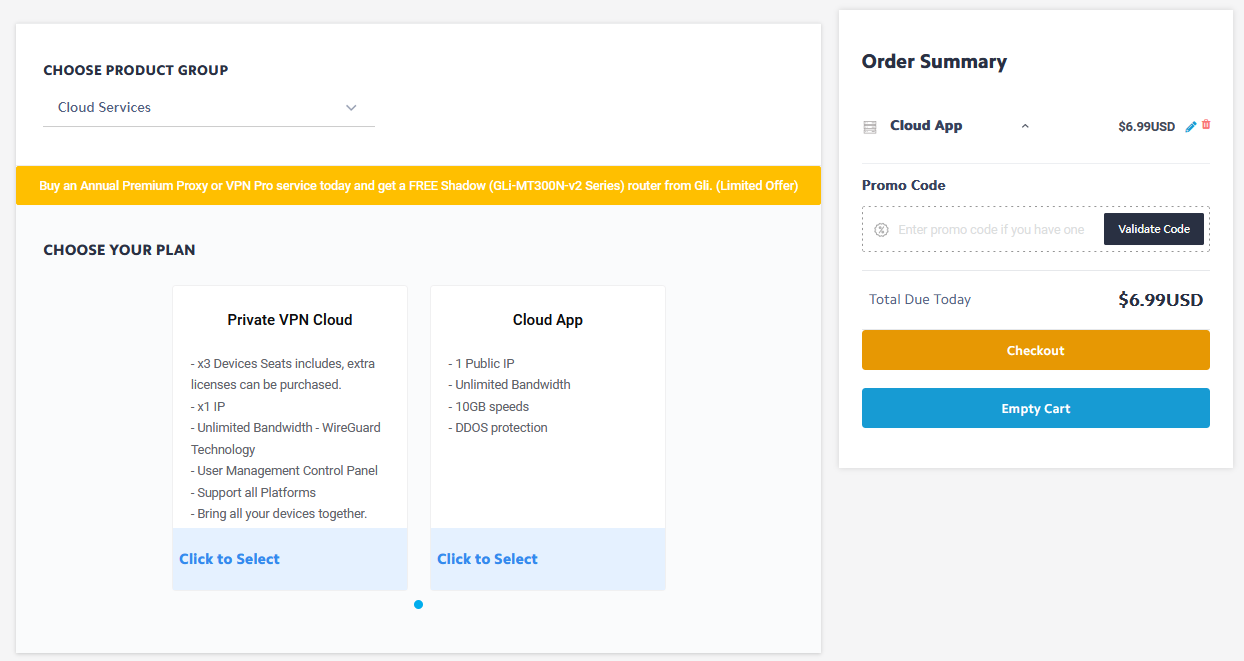
After the purchase is complete, your Pihole server will be ready to use instantly. Visit the My Services area click the manage button next to your Pihole service and select Manage App.

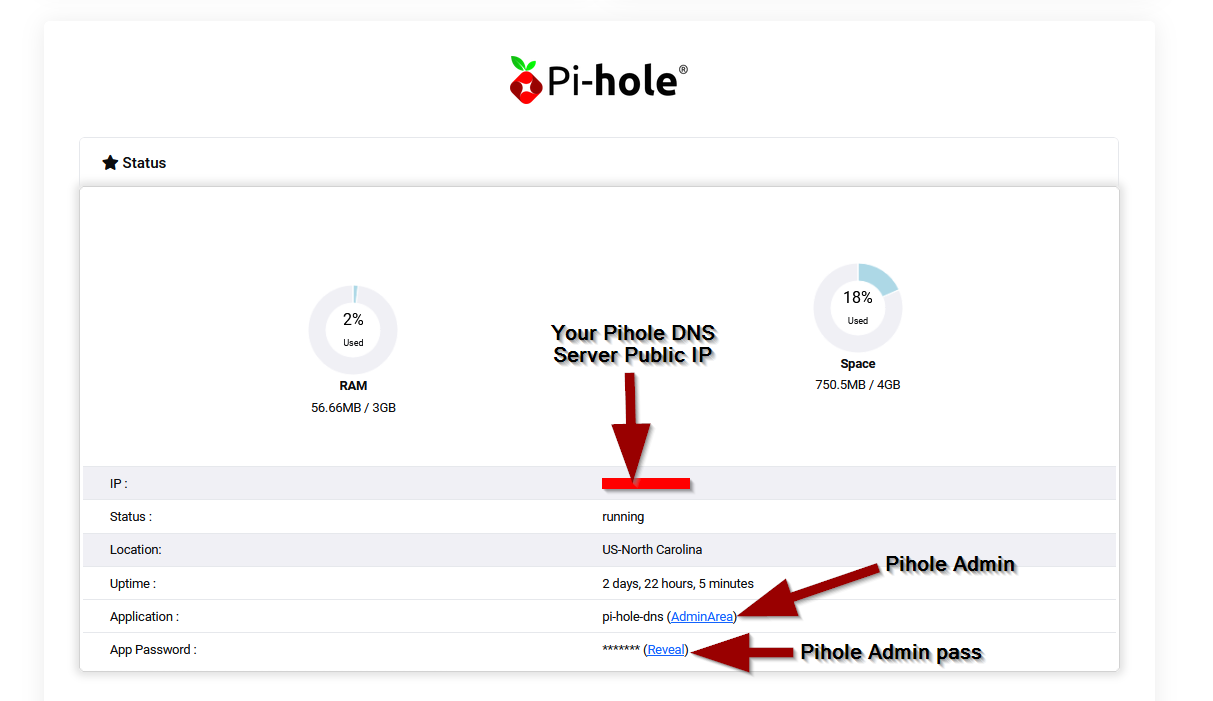
You should now see your Pihole admin screen. Here you can find your public Pihole IP address that can be used as your DNS server IP on any computer, Wifi router, or mobile device. You can also obtain your Pihole admin password and a link to the Pihole admin area.
You Pihole DNS server is ready to use as is, however leaving it public is not ideal. This could allow brute force attacks on your admin area or enable others to use your DNS IP for free. You can block them in the Pihole admin but we suggest locking your Pihole down with the firewall rules in the next section.
Firewall Your Pihole for Secure Web and DNS Access
Next we will add some firewall rules so only you can access your Pihole web admin area and DNS server. You can use your Pihole DNS server on unlimited devices and networks, however you should add each known IP address to the firewall to prevent others from getting free access to your DNS.
In the example below we are blocking ALL outside access to the Pihole Admin area, and Pihole DNS. The only IP that can gain access is the user's private IP address. This private IP address can be your home IP or a dedicated VPN IP address that uses the Pihole DNS
Click the Add Filter button and add each firewall rule as seen below replacing "Pihole IP Address" with your Pihole server IP address. Replace "Your IP Address" with your home IP address or the dedicated VPN IP address you will use along with Pihole. You can add as many IP's to access as needed. 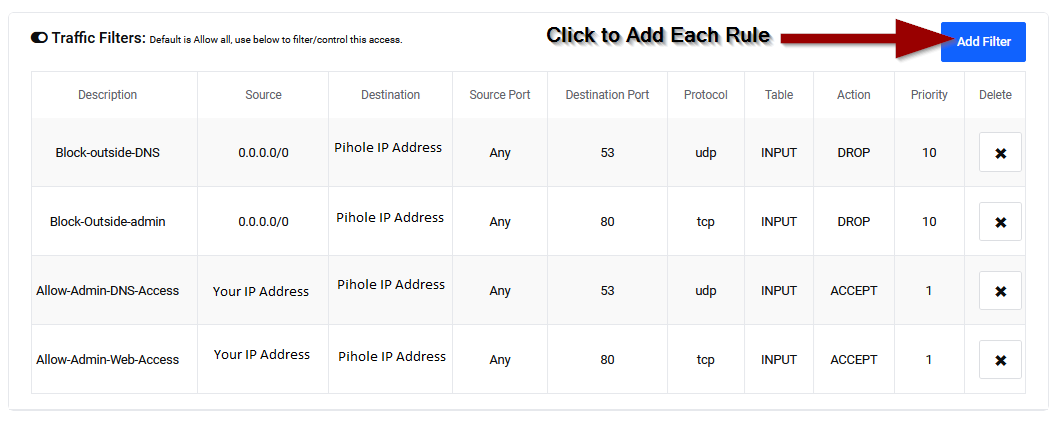
Add Your Pihole DNS server to your Wifi Router
Pihole can now protect your entire network from ads and help monitor unsual DNS requests. The best way to start using Pihole DNS with this method is to update your router's DNS with your Pihole IP Address.
Here are some examples of how to add your Pihole DNS IP to popular WiFi routers.
PrivateRouter OpenWRT:
Click Interfaces then LAN. Click "Edit" on your lan interface then click the Advanced Settings tab. Click the + button under "Use Custom DNS Servers" and enter your Pihole IP Address.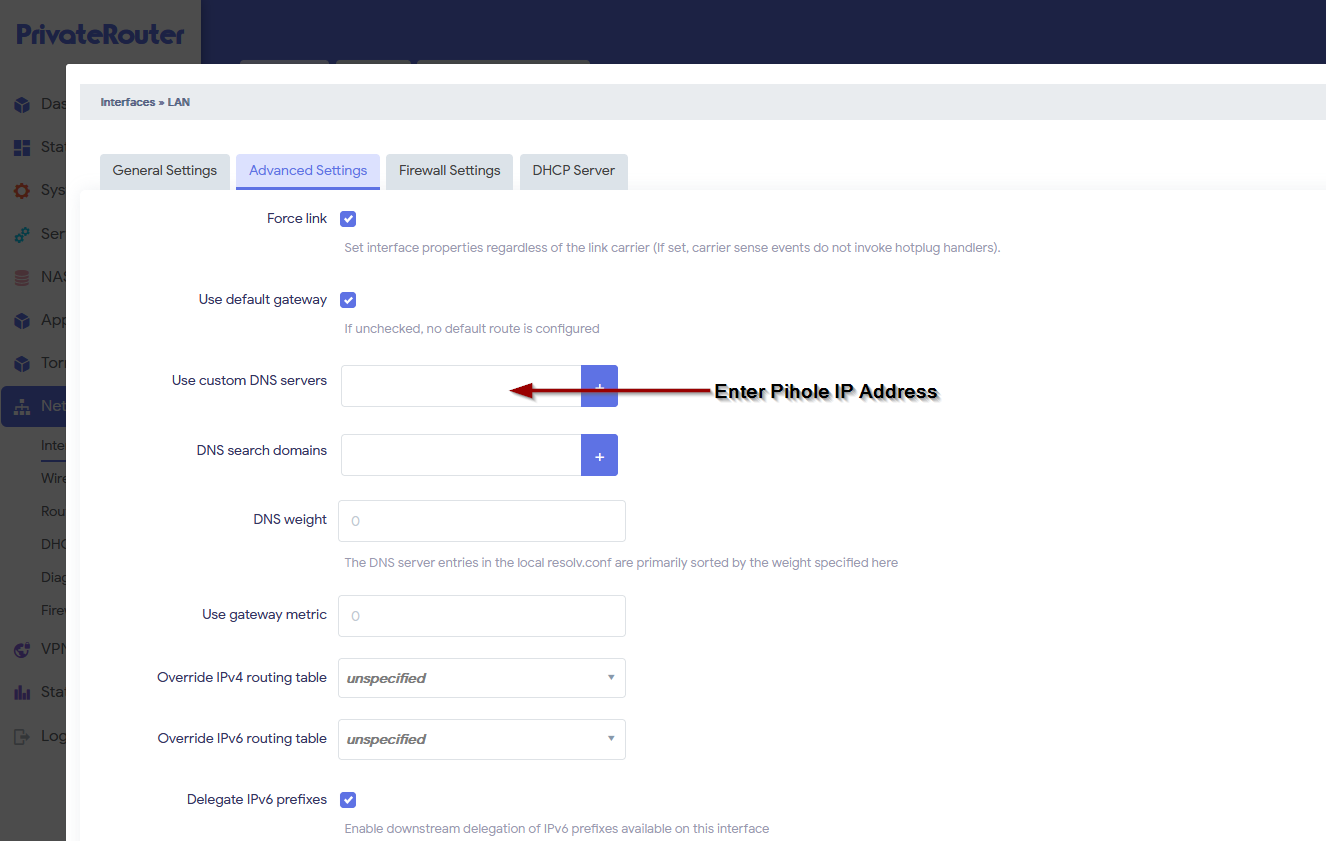
Linksys:
Click on the connectivity tab then select the Local Network tab. Under DHCP server add your Pihole DNS settings to Static DNS 1.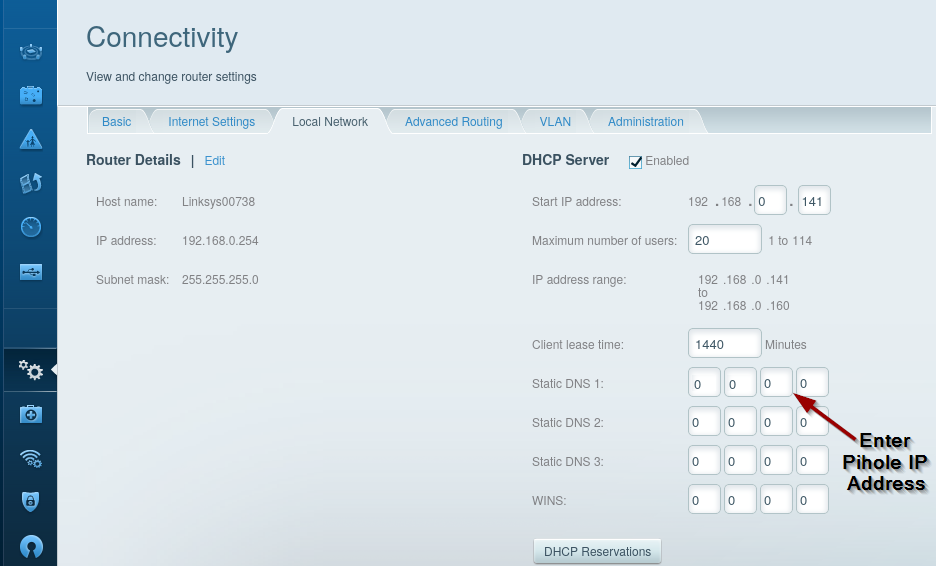
TP-Link:
Click on the Advanced tab then select the Network tab on the left panel. Select DHCP server then under Primary DNS enter your Pihole IP Address.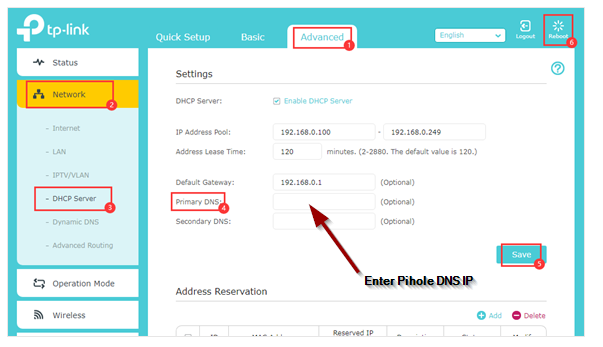
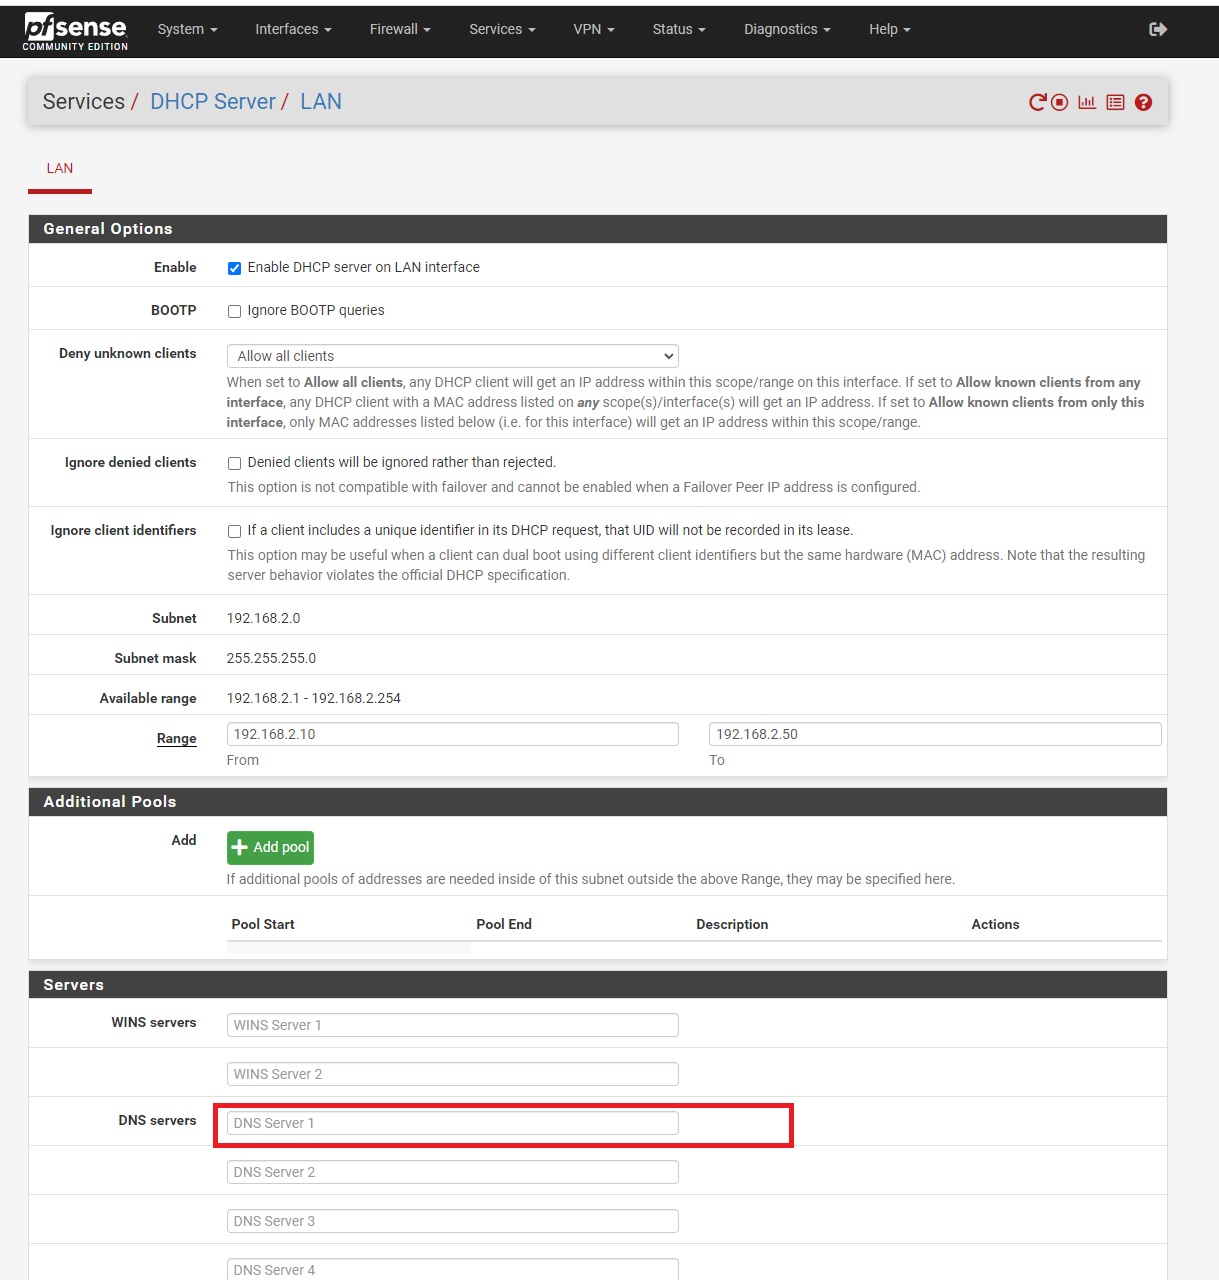
Pfsense:
Under Services Menu > DHCP Server > LAN > Servers section, enter your Pihole IP address in the DNS server 1 text box.
ASUS:
Under Advanced settings on the left tab select LAN. Click the DHCP tap then enter your Pihole IP address in the DNS server text box.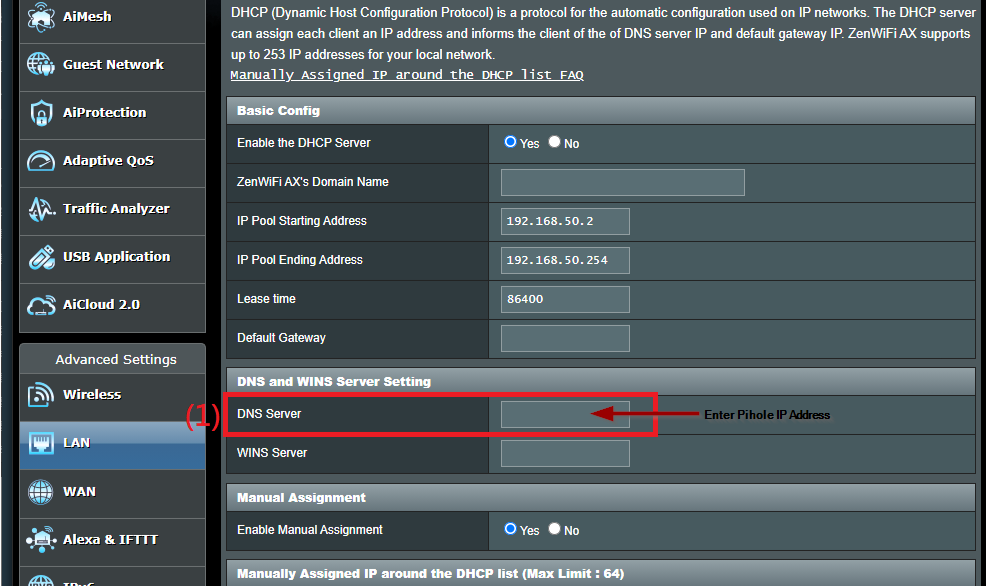
Make sure to click Save/Apply after adding your new Pihole DNS IP address to any Wifi Router.
You can also add your Pihole DNS server as an optional DNS server in the TorGuard VPN app settings, or at the OS level in Windows, MacOS, Android or iOS.
To use in the TorGuard VPN app, click settings, Network then select edit under the DNS menu. Click the add button then enter your Pihole DNS IP. Click OK then select pihole from the DNS dropdown for "when VPN is connected".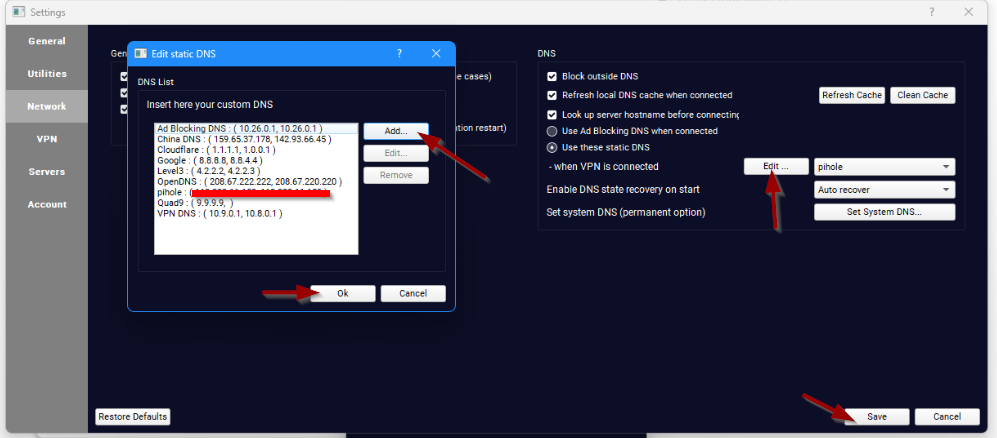
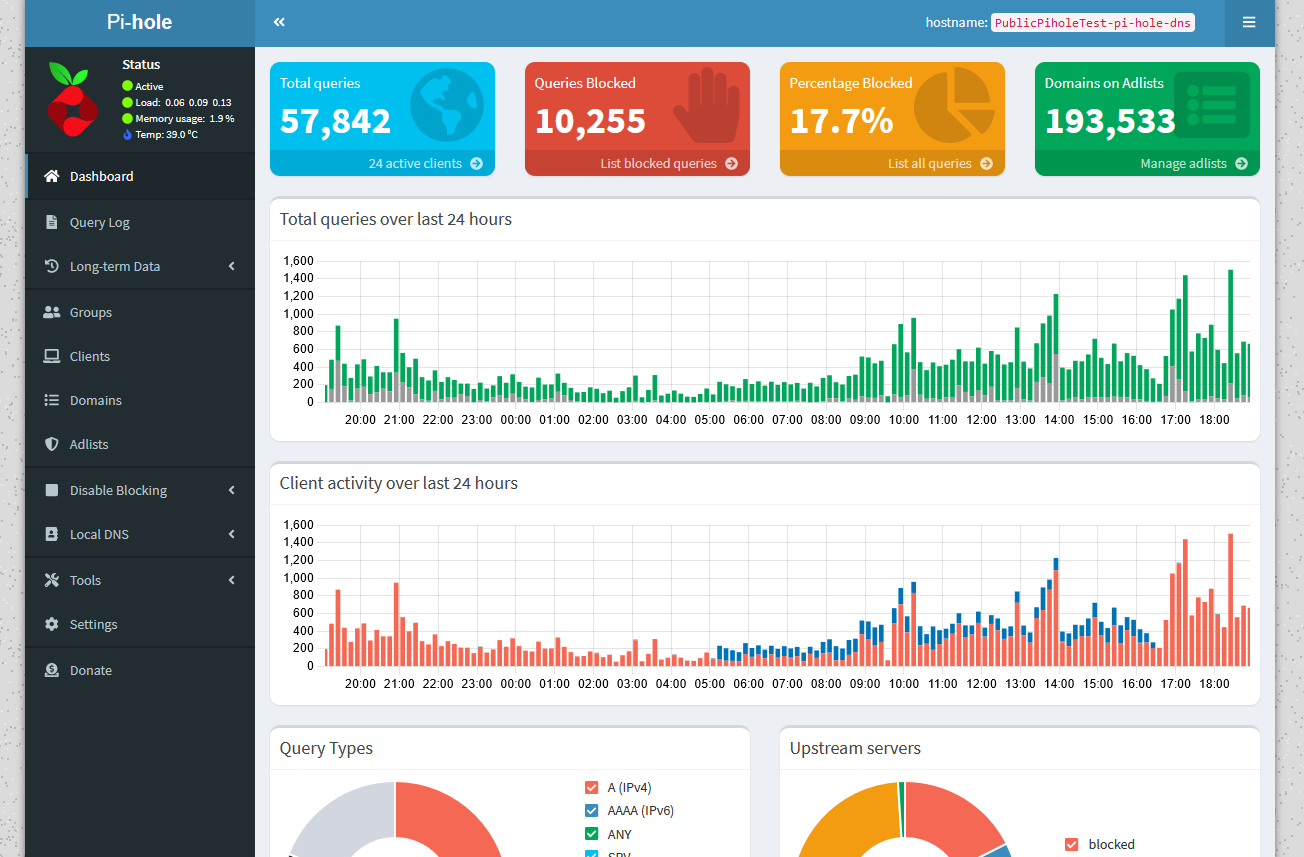
Finally, login to your private Pihole admin area and watch as various requests are blocked: