In this guide, we will be discussing the available methods to connect your pfsense firewall to your Private VPN cloud, you have 3 main options to choose from depending on the purpose of connection:
Option 1) Cloud Access Only: Allow Pfsense and the network (LAN) behind it to access the diff services and devices on the cloud, optionally you can also allow other devices on the Cloud to reach and access your pfsense lan.
Option 2) Internet Access: Use Private vpn cloud as the main and default gateway for internet access on pfsense, pfsense and the network behind it will show your VPN cloud iP, Cloud services and LAN access is also possible in this setup.
Option 3) Share Internet: Allow other devices on the cloud to use and share your pfsense internet showing its IP, LAN access is possbie.
****We will refer to above options as the "Setup options" later on in the guide.****
Step 1)
Log in to your pfSense router.
Step 2)
Check if you see Wireguard under VPN tab, if not then please Head to System>Package Manager>Available Packages and search for wireguard, click Install to install the wireguard package.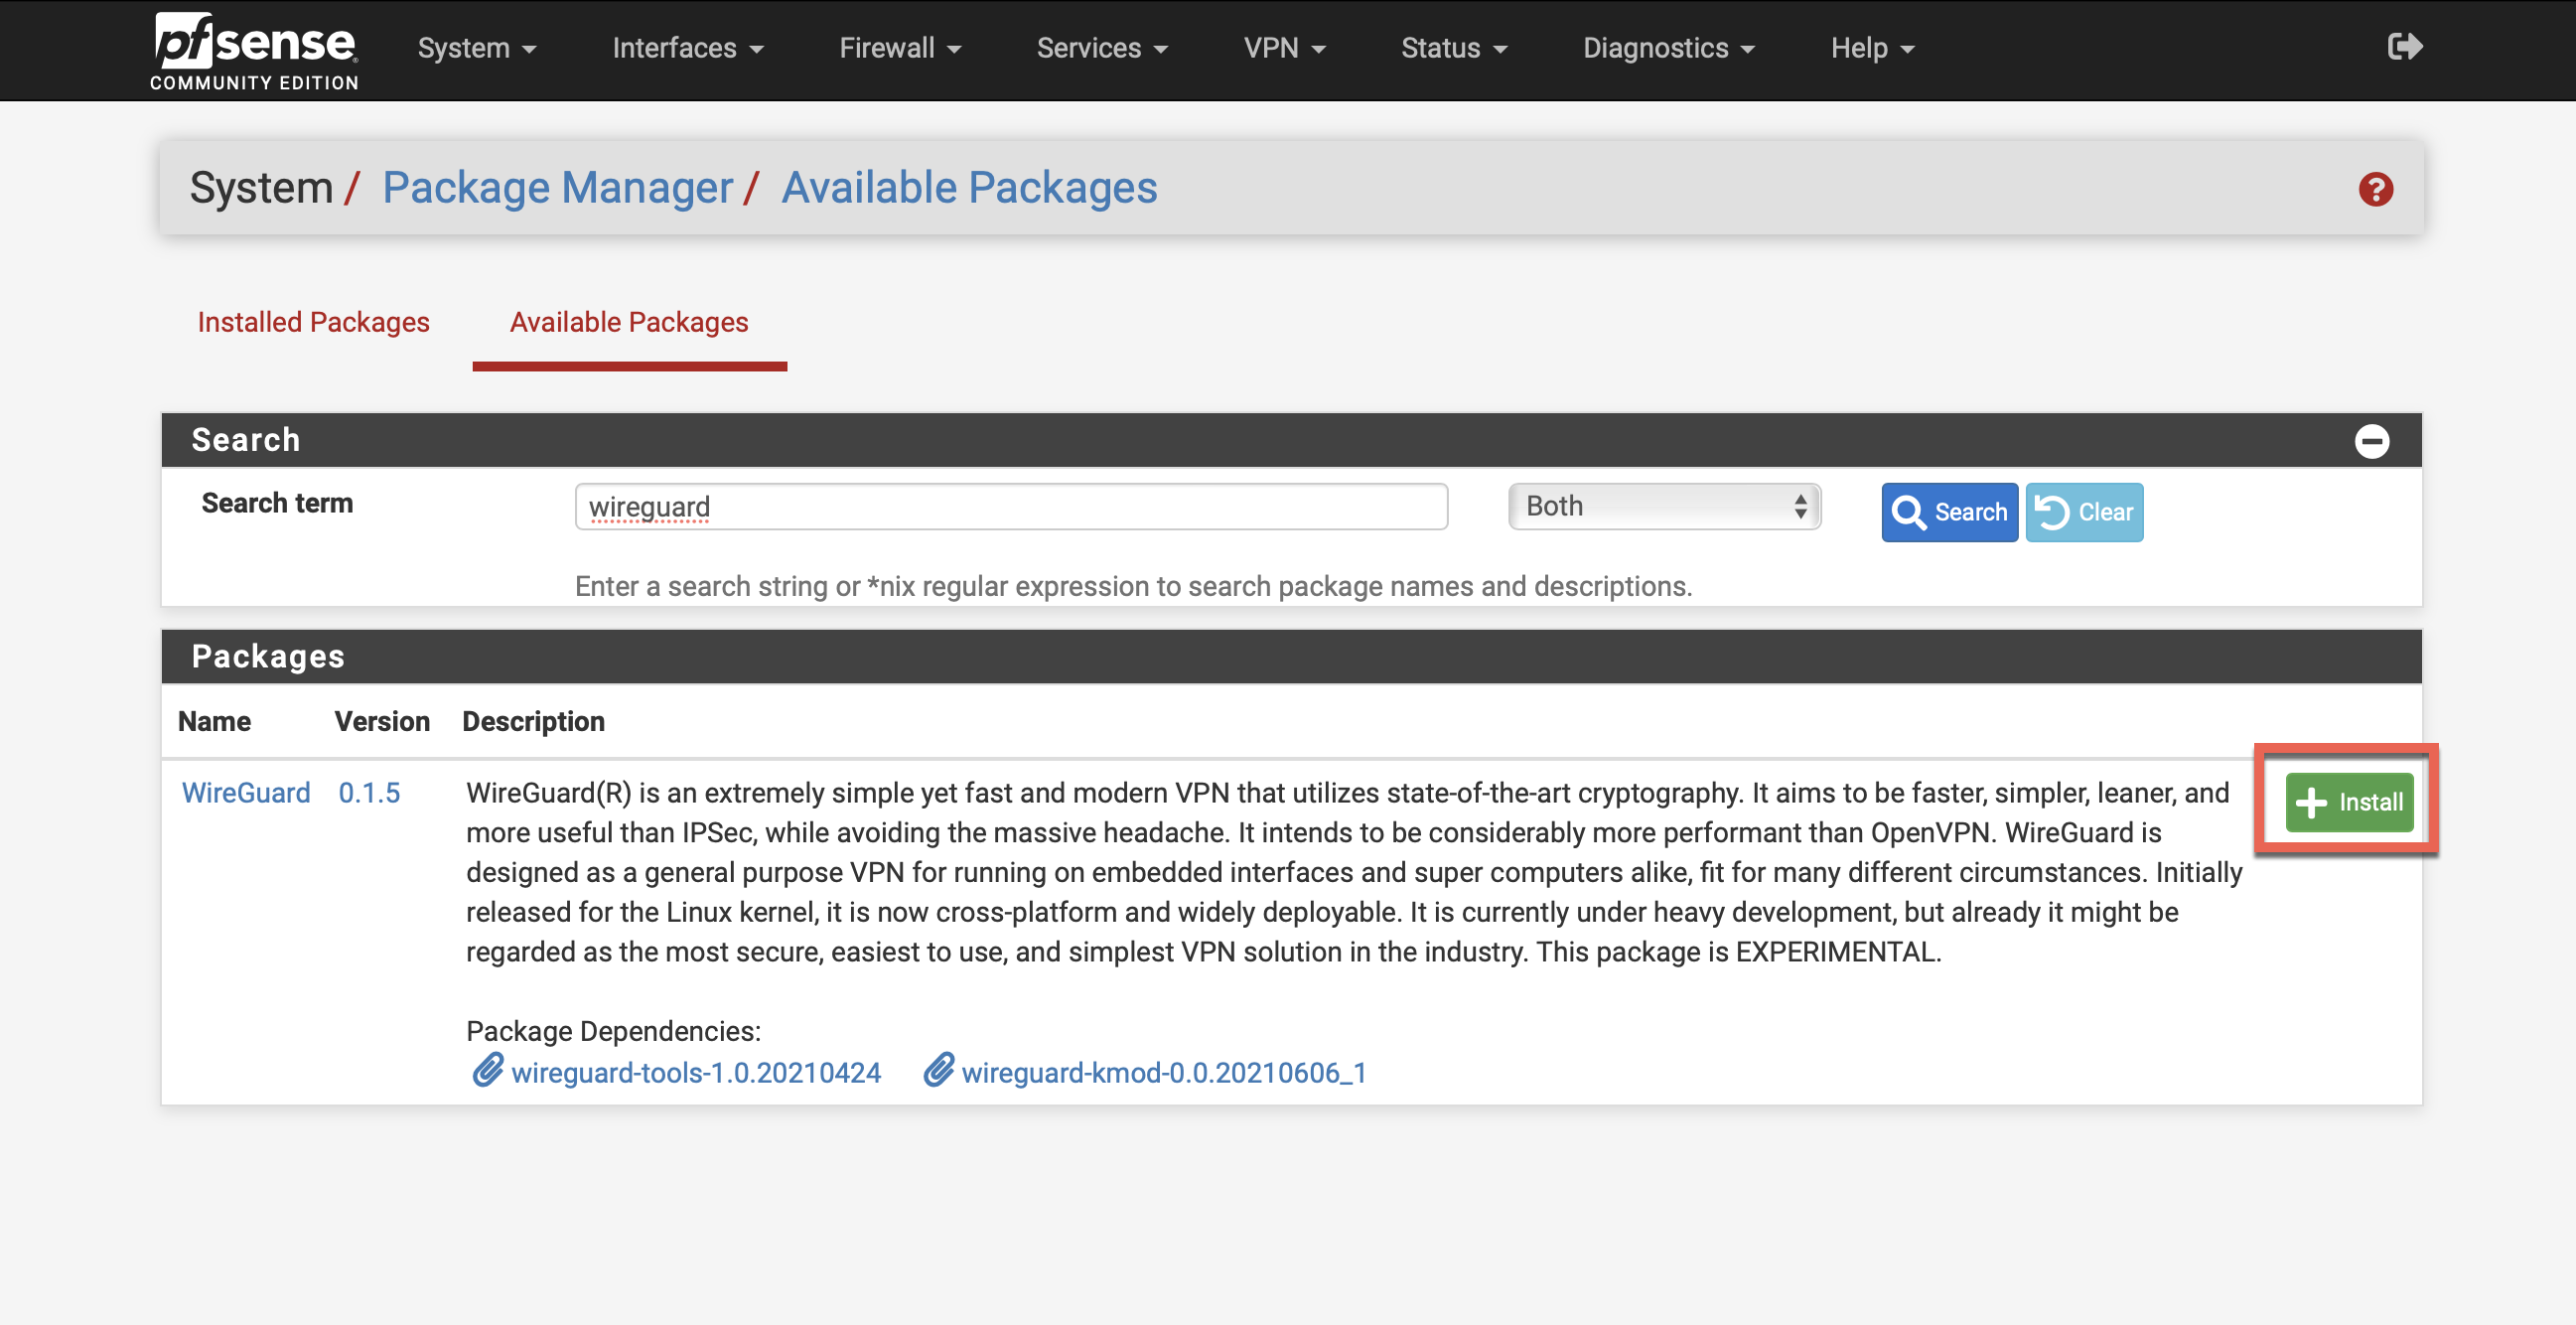
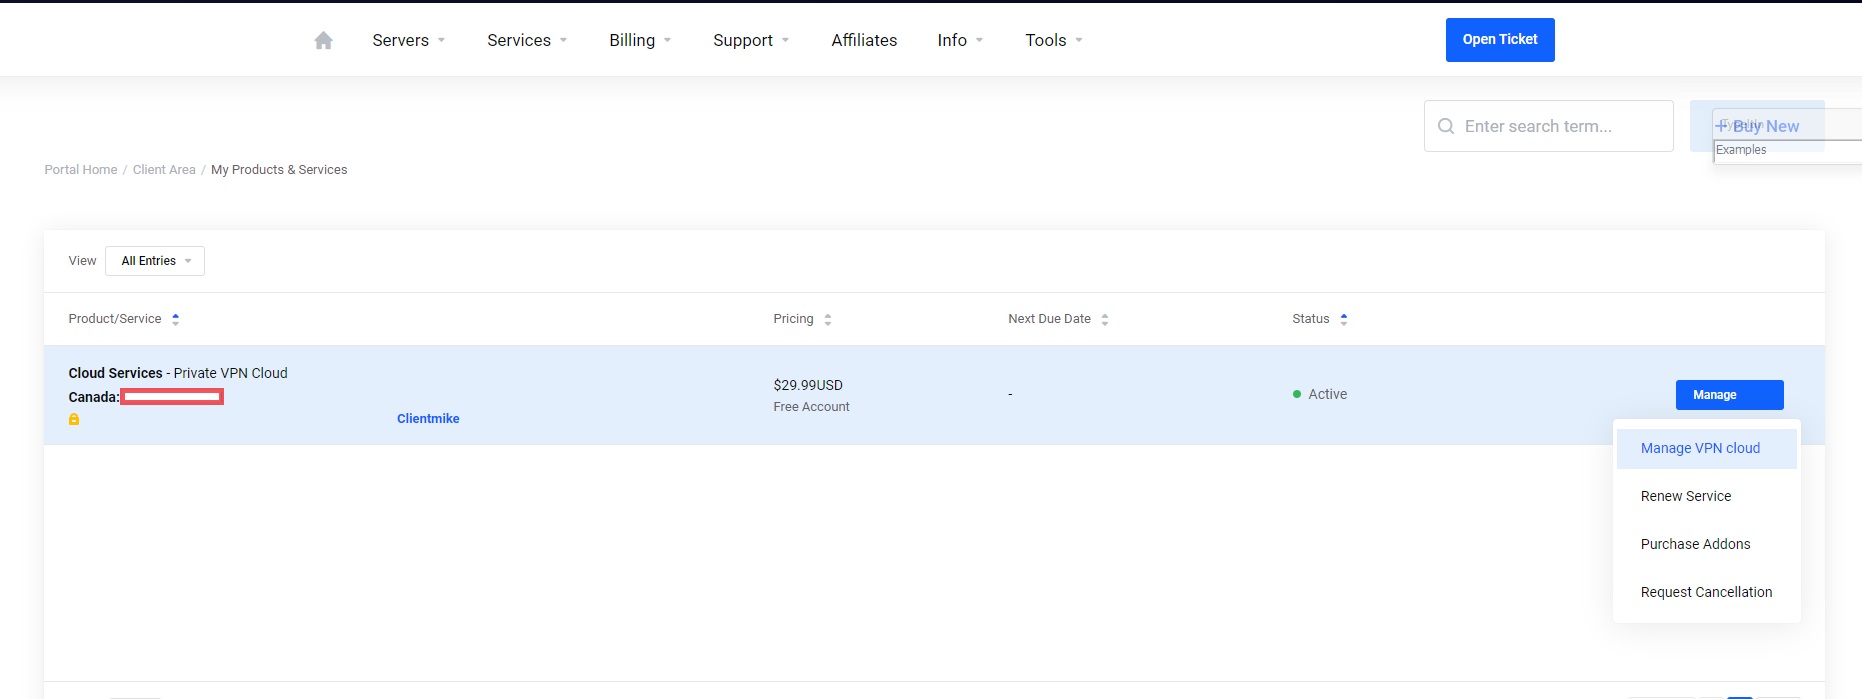
Step 3-1)
Head to Services > My Services > Click Manage VPN cloud beside Your Private VPN cloud service.
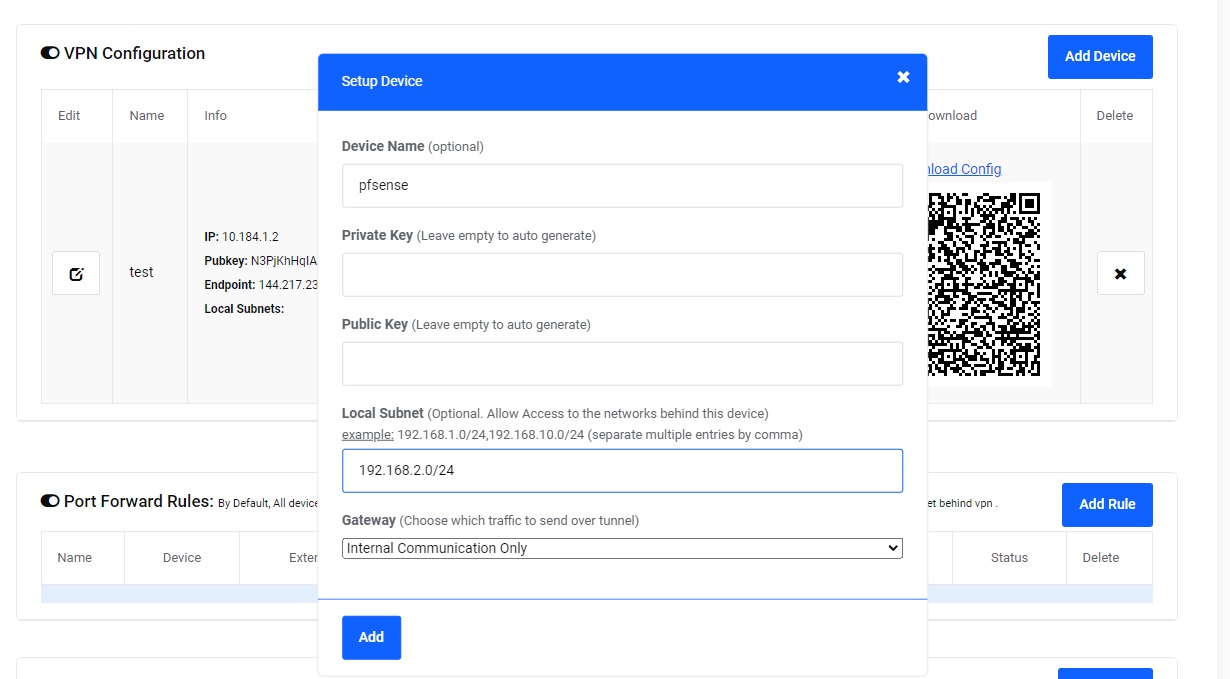
Step 3-2)
Create a new Device for Pfsense:
- fill a name for device like "pfsense".
- if you would like to expose your pfsense LAN to other devices on the cloud, then fill in the Lan Subnet field, for example "192.168.2.0/24", other wise leave this field empty.
- Choose the Gateway based on the setup options we mentioned at the begining of this guide:
a) Choose "Internal communication only" if you want to achieve Setup option 1 or 3
a) Choose "Default Gateway" if you want to achieve Setup option 2
Click Add to generate the config.
Step 3-3)
Click the Download config link beside the new device to download its wireguard config, open the downloaded config using any text editor like notepad or wordpad.

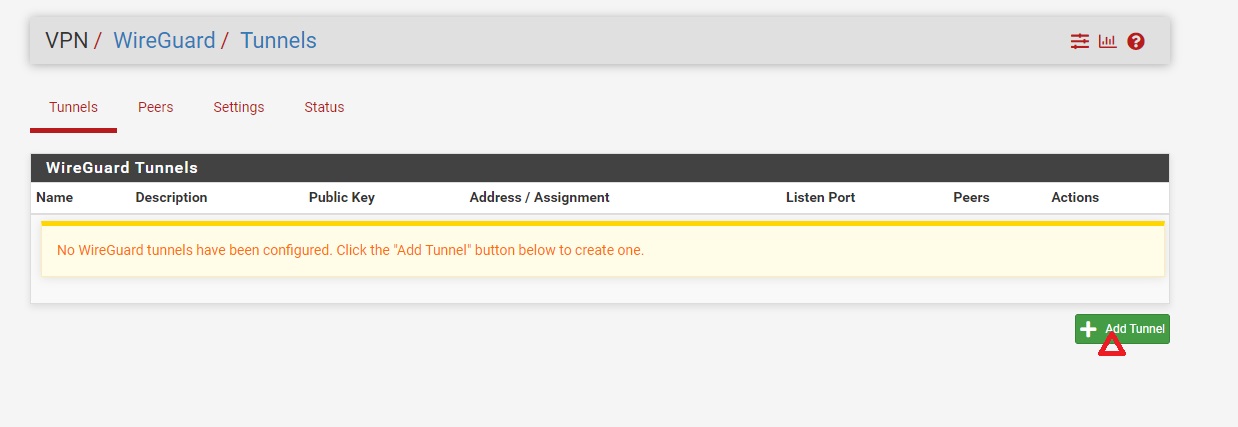
Step 4-1)
You are now ready to configure your Pfsense.
Navigate to VPN>WireGuard and click +Add Tunnel.
Step 4-2)
Fill in the details as shown in the screenshot
Enable: Checked
Description: My Private Cloud
Listen Port: Leave Blank
Interface Keys: Copy the PrivateKey value from text editor into the Private key field.
Interface Address: fill in Address value from text editor.
Then, click Save Tunnel

Step 5-1)
Click Peers and then +Add Peer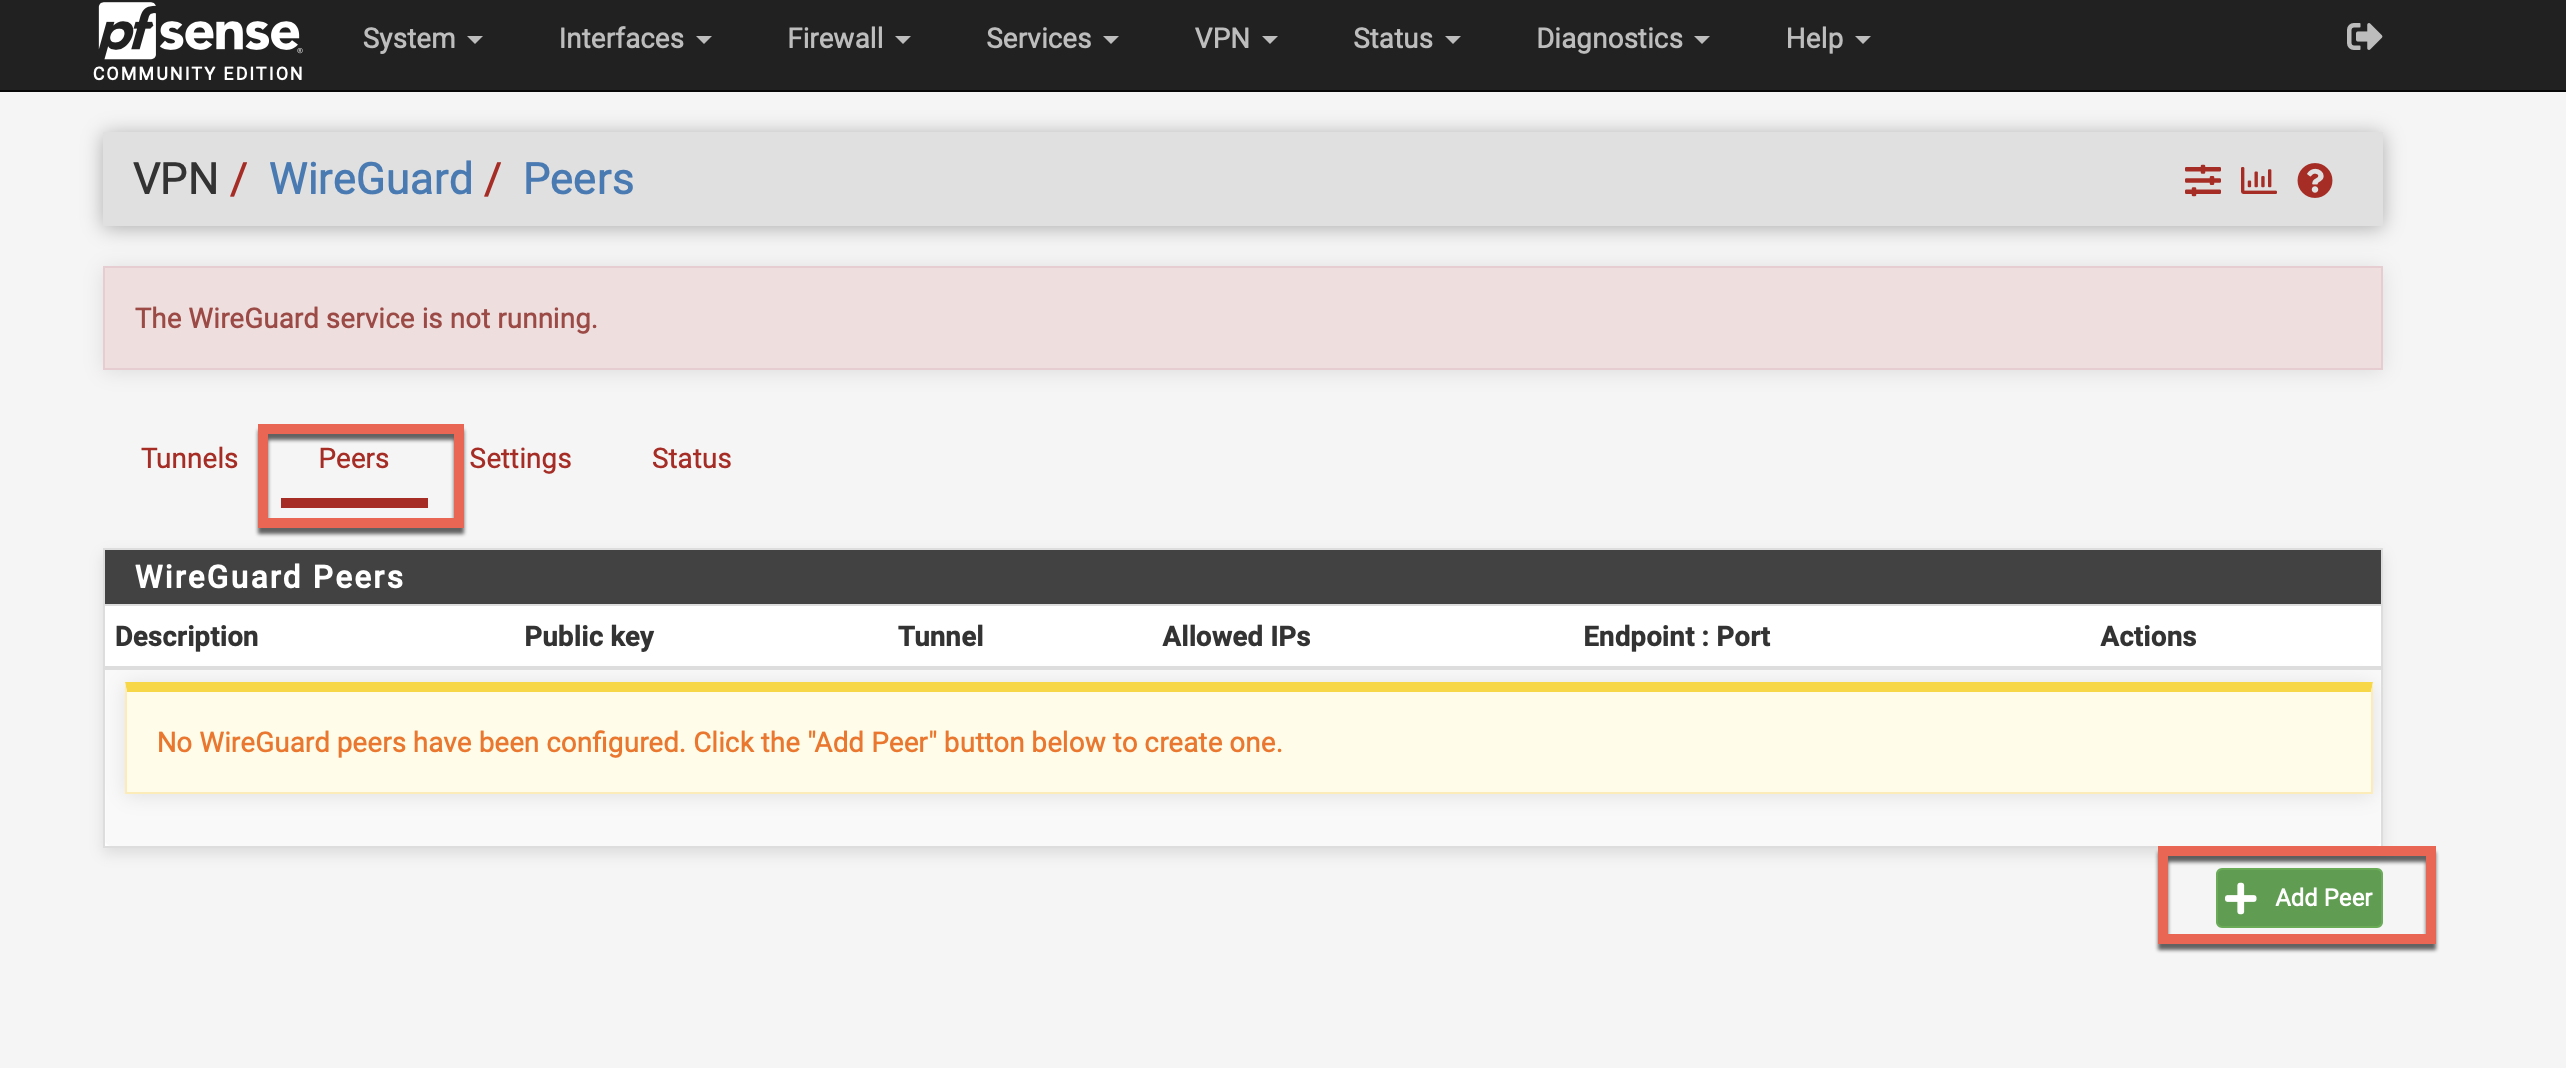
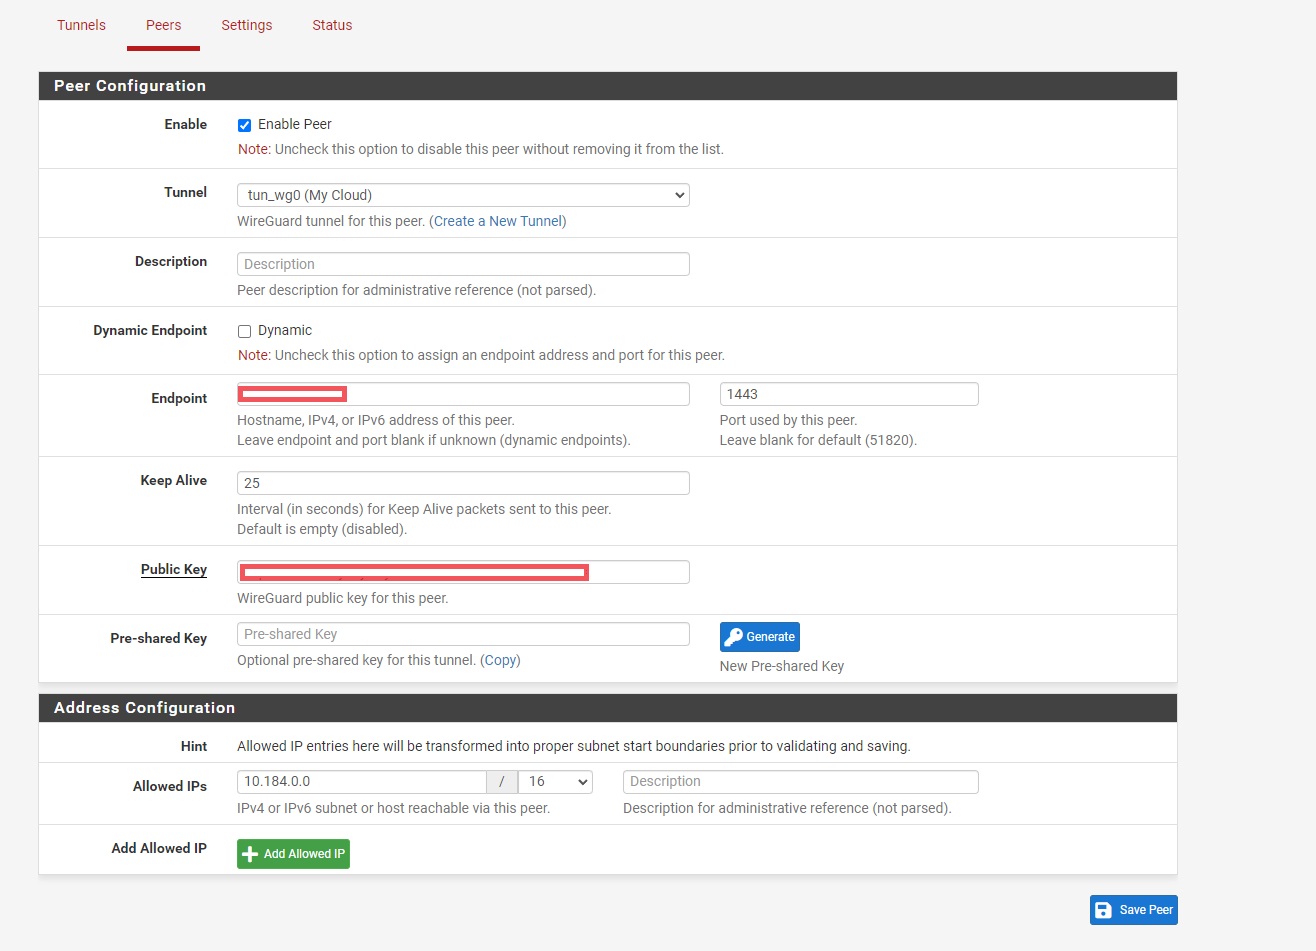
Step 5-2)
Fill in details as shown in the screenshot.
Enabled: Check
Dynamic: Uncheck
Endpoint: Fill in using the value shown in text editor infront of Endpoint field. For example: if the downloaded config shows "Endpoint = 60.60.60.60:1443" then IP will be 60.60.60.60 and port will be 1443, removeing the :
Keepalive: 25
Allowed IPs: Fill in the value of AllowedIPs field in the downloaded config.
Click Save Peer
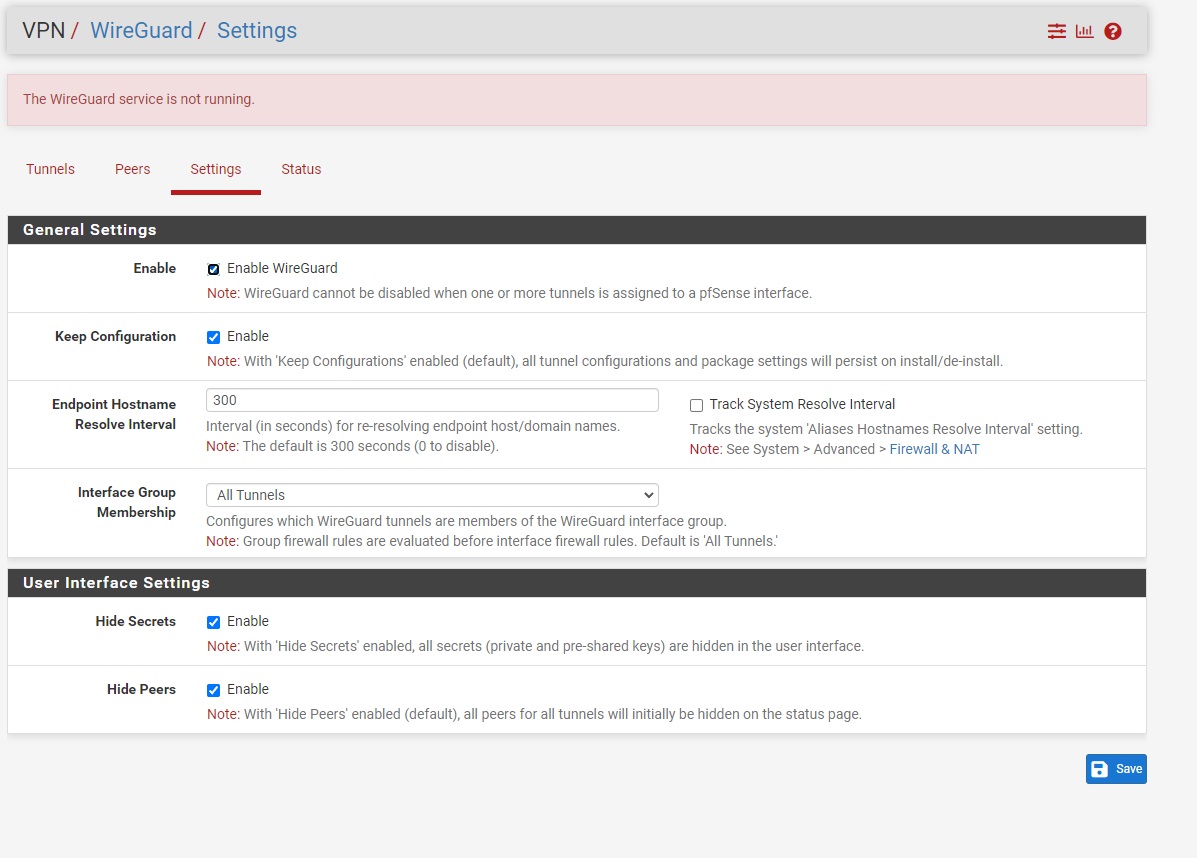
Step 6)
Enable Wireguard under VPN > Wireguard > Settings, and click Save then click apply Configuration.
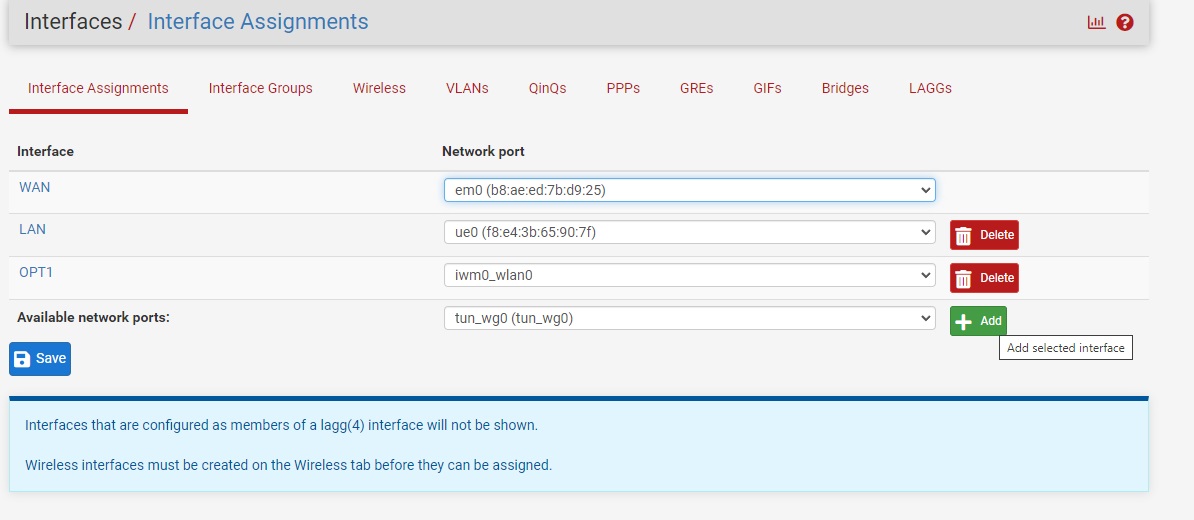
Step 7-1)
Click Add beside The WireGuard interface under Interfaces > Assignments section on pfsense.
Step 7-2)
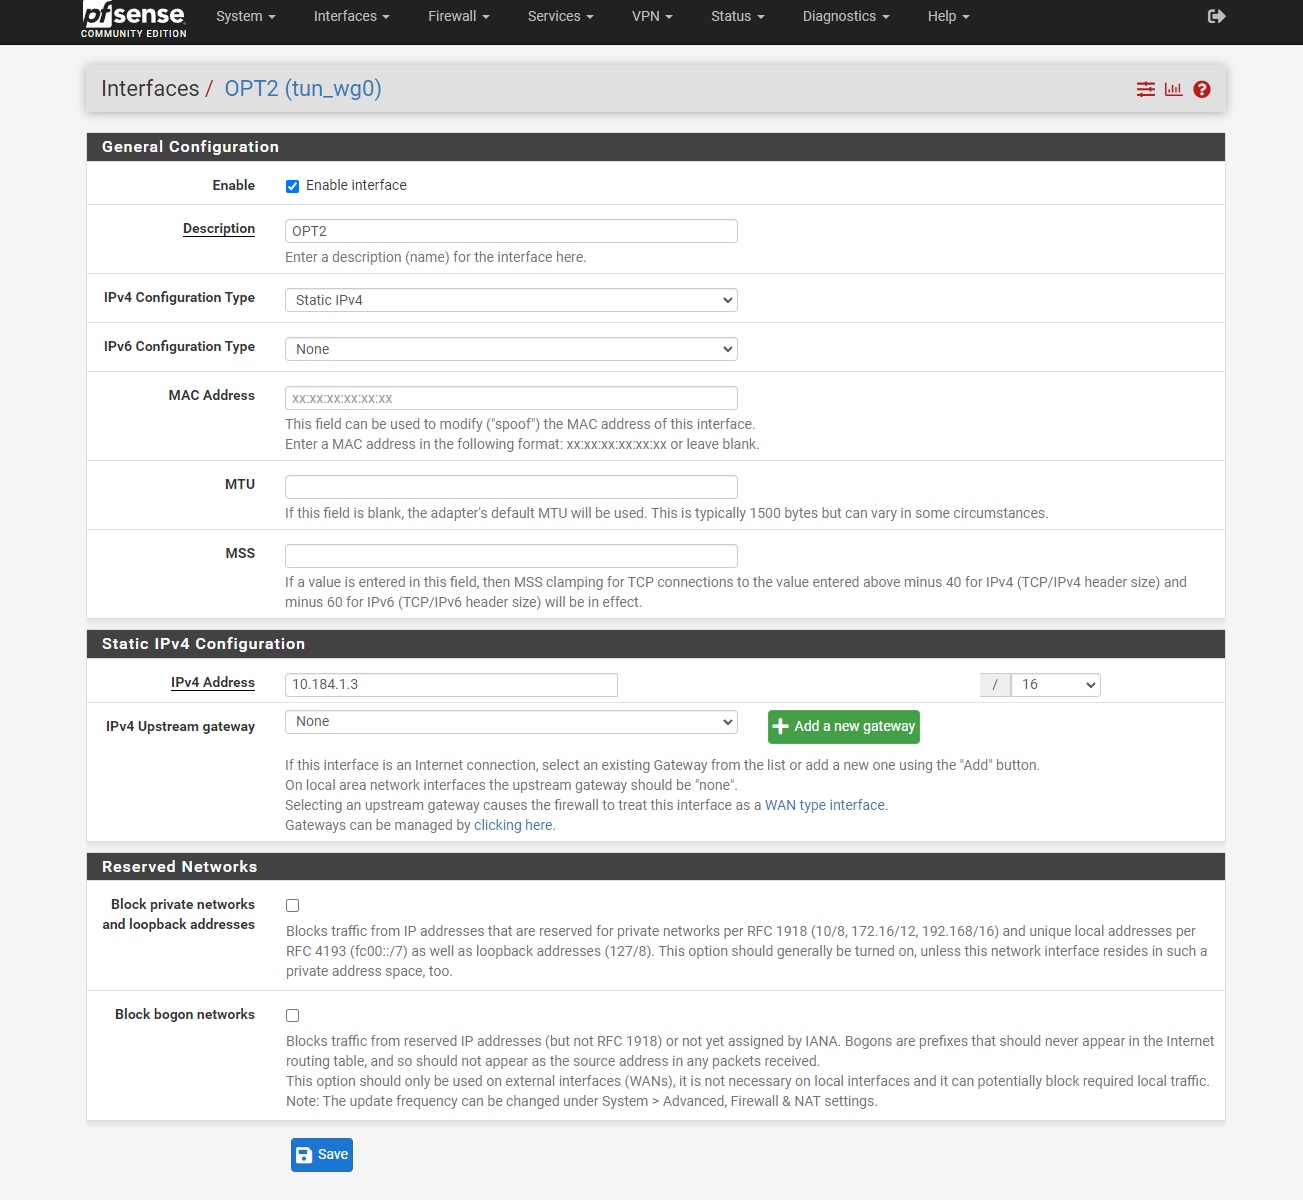
Click Interfaces > and choose the new wireguard interface name, in this guide it is OPT2.
Set your settings to match below:
- Change the description from OPT2 to WG_TG
- In the IPv4 Configuration Type: set this to Static IPv4
- In the Static IPv4 Configuration section: set the IPv4 Address to the same IP address assigned in the wireguard config under the [interface] section..
for example, 10.184.1.3. Yours may be different. The subnet mask is /16.
For Setup Option 2 only: Internet Access
-Besides IPv4 Upstream Gateway, click the + Add a new gateway button.
-Change the Gateway name to WG_TG_GWV4
-Set the Gateway IPv4 to the same IP address assigned in the wireguard config under the [interface] section, for example, 10.184.1.3. Yours may be different. The subnet mask is /32 and then click Add
-Click the Save button and click the Apply Changes button.
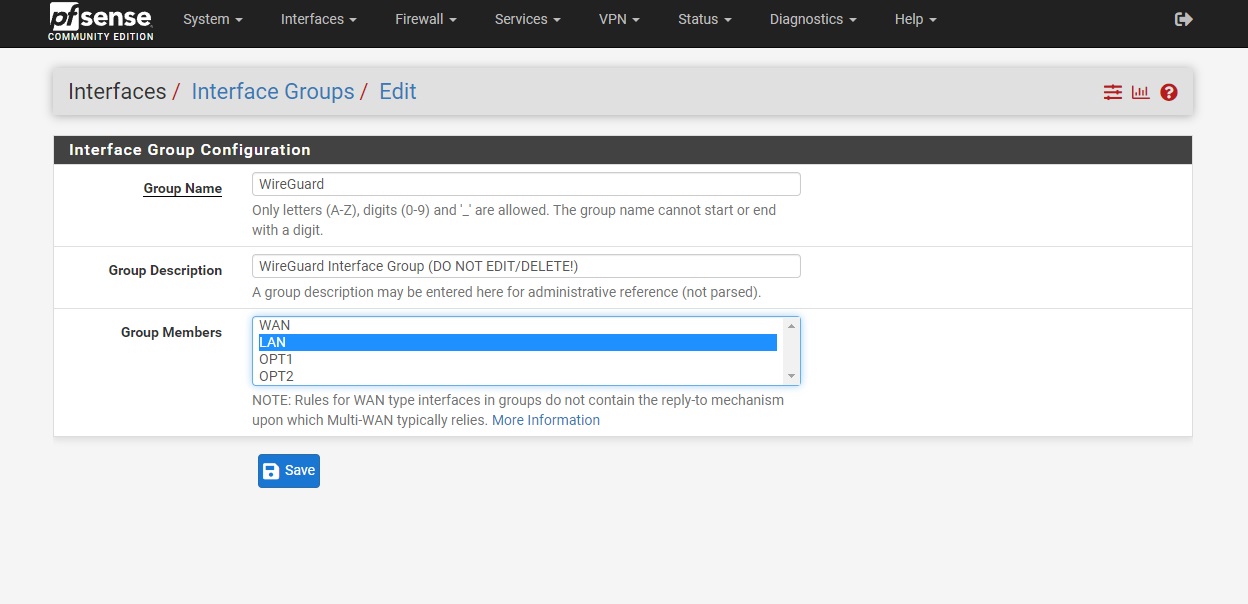
Step 7-3)
Under Interfaces > Interface Groups, edit your Wireguard Interface group, and choose WAN or LAN based on the setup Option
Setup Option 2: Choose WAN
Setup Option 1/3: Choose LAN
Click Save and Apply configuration.
Step 8)
Required for Setup Option 1 and 3, optional for Setup Option 2
Under Network > Firewall > Rules > Wireguard, Click Add
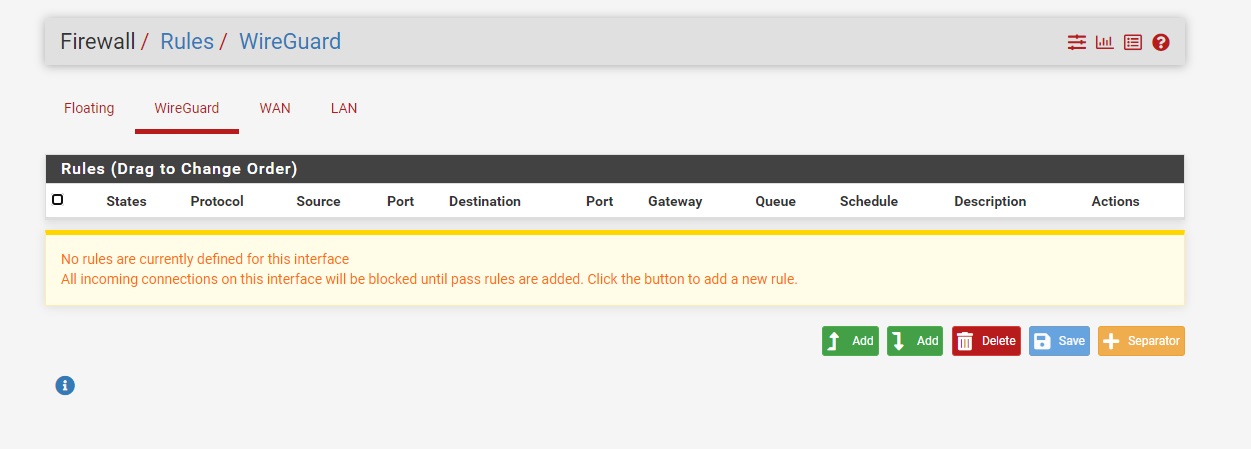
Allow incoming Traffic on wireguard interface by adding below rule
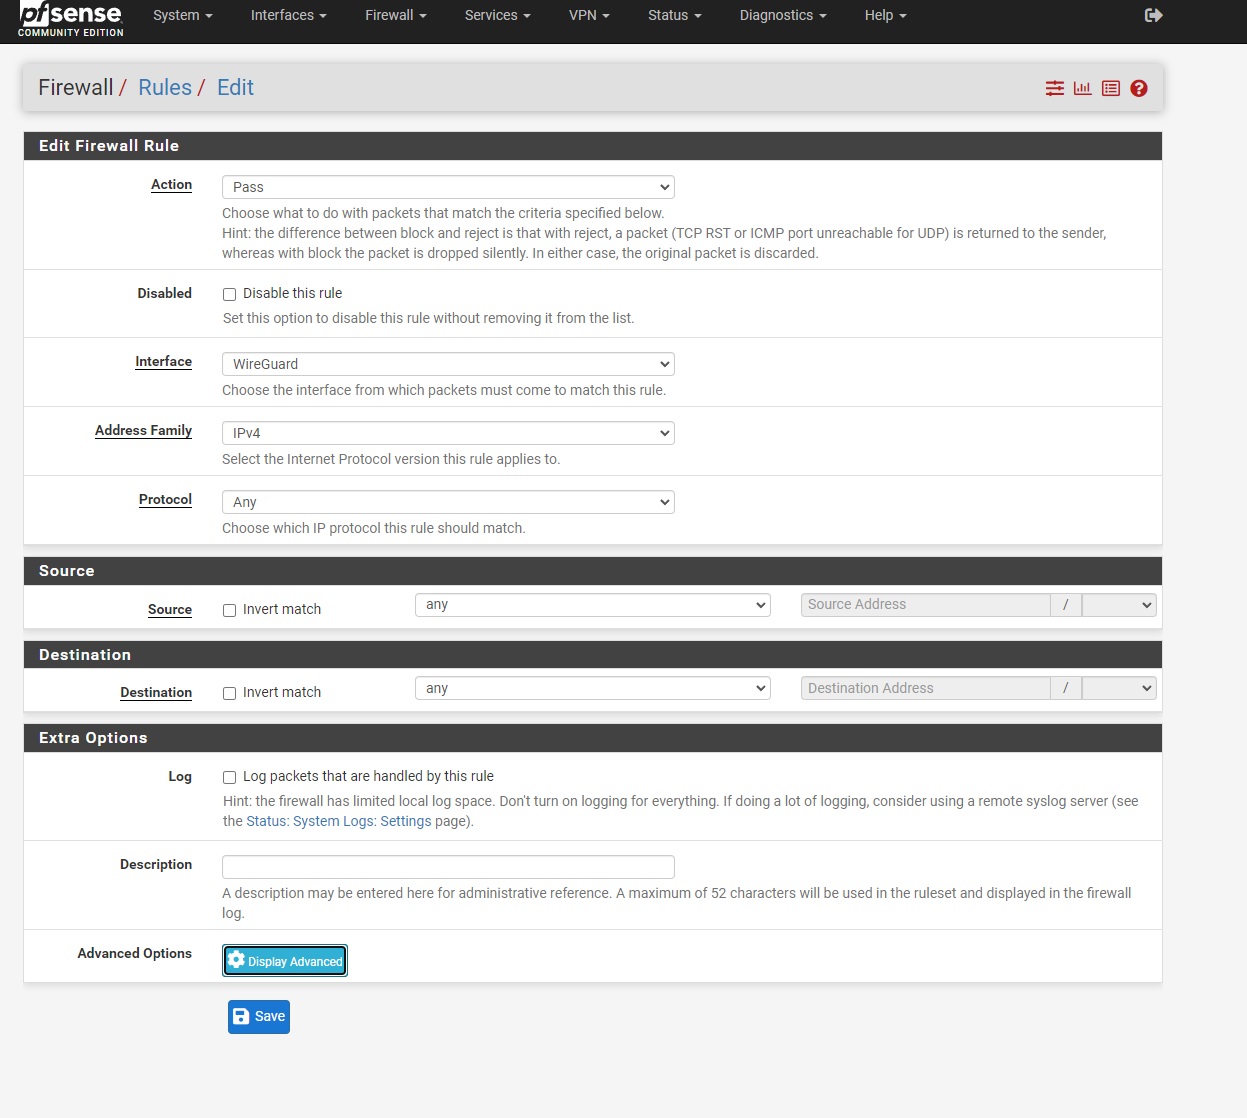
Click Save, and click Apply configuration.
For Setup Option 1 and 3, setup is now complete, only continue with below steps if you are doing Setup option 2
Step 9)
Firewall Configuration:
Navigate to Firewall>NAT >Outbound.
Select so that Manual Outbound NAT rule generation is checked
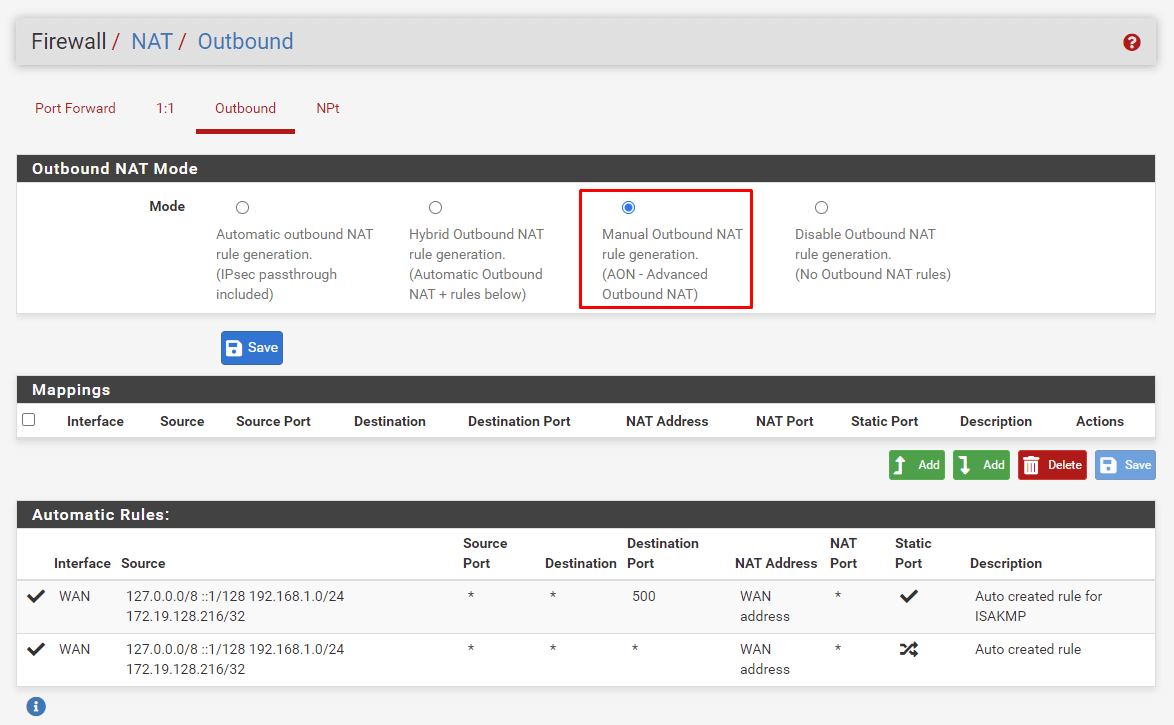
Click on Save.
Click on Apply changes.
A few new rules will be displayed under Mappings. Next to each rule, you will find three buttons under the Action category; Edit, Copy and Delete. Click on Copy next to each one and select tun_wg0 as the Interface.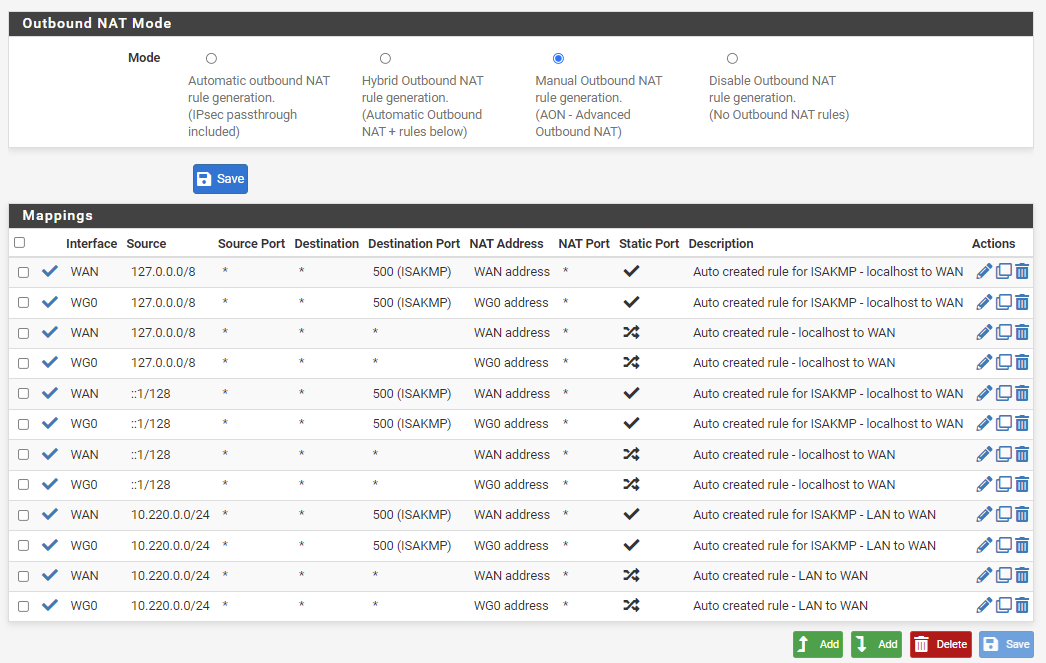
Click on Apply changes.
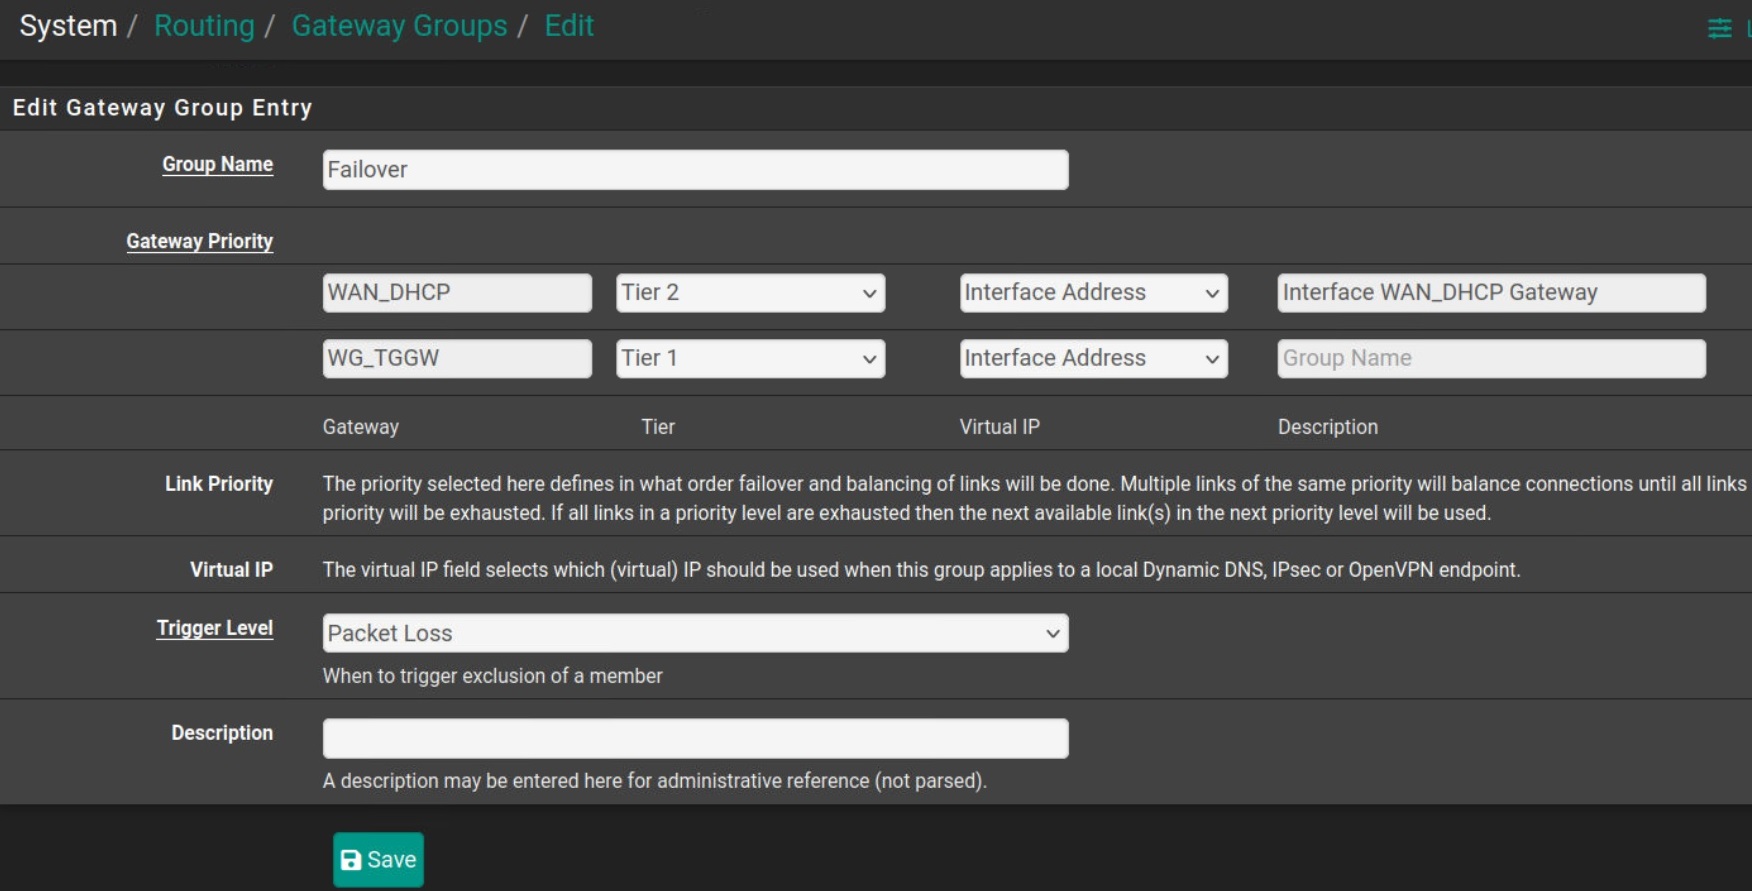
Step 10) In some cases, tunnel might show up and handshake active but still traffic not going over tunnel, this is normally a bug on pfsense not updating routing table in some version, to fix this go to System > Routing > Groups, add a new group having your wan and vpn interface where vpn interface has tier 1 priority and wan is Tier2 and failover over packet loss, and apply then on System > Router > Select this new group from Default ipv6 gateway dropdown and apply
Verify your connection:
Browse to https://torguard.net/whats-my-ip.php and make sure your IP has now changed.