In this guide, we will be discussing the available methods to connect your OpenWRT based routerr to your Private VPN cloud, you have 3 main options to choose from depending on the purpose of connection:
Option 1) Cloud Access Only: Allow OpenWRT and the network (LAN) behind it to access the diff services and devices on the cloud, optionally you can also allow other devices on the Cloud to reach and access your OpenWRT lan.
Option 2) Internet Access: Use Private vpn cloud as the main and default gateway for internet access on OpenWRT, OpenWRT and the network behind it will show your VPN cloud iP, Cloud services and LAN access is also possible in this setup.
Option 3) Share Internet: Allow other devices on the cloud to use and share your OpenWRT internet showing its IP, LAN access is possbie.
****We will refer to above options as the "Setup options" later on in the guide.****
Step 1)
Log in to your OpenWRT router.
Step 2)
If using PrivateRouter Firmware, please check this guide for how to setup wireguard. For standard OpenWRT firmware please Head to Network > Interfaces, add a new Interface and choose Protocol "WireGuard VPN", and give it a name of your liking, for ex: "PrivateCloud"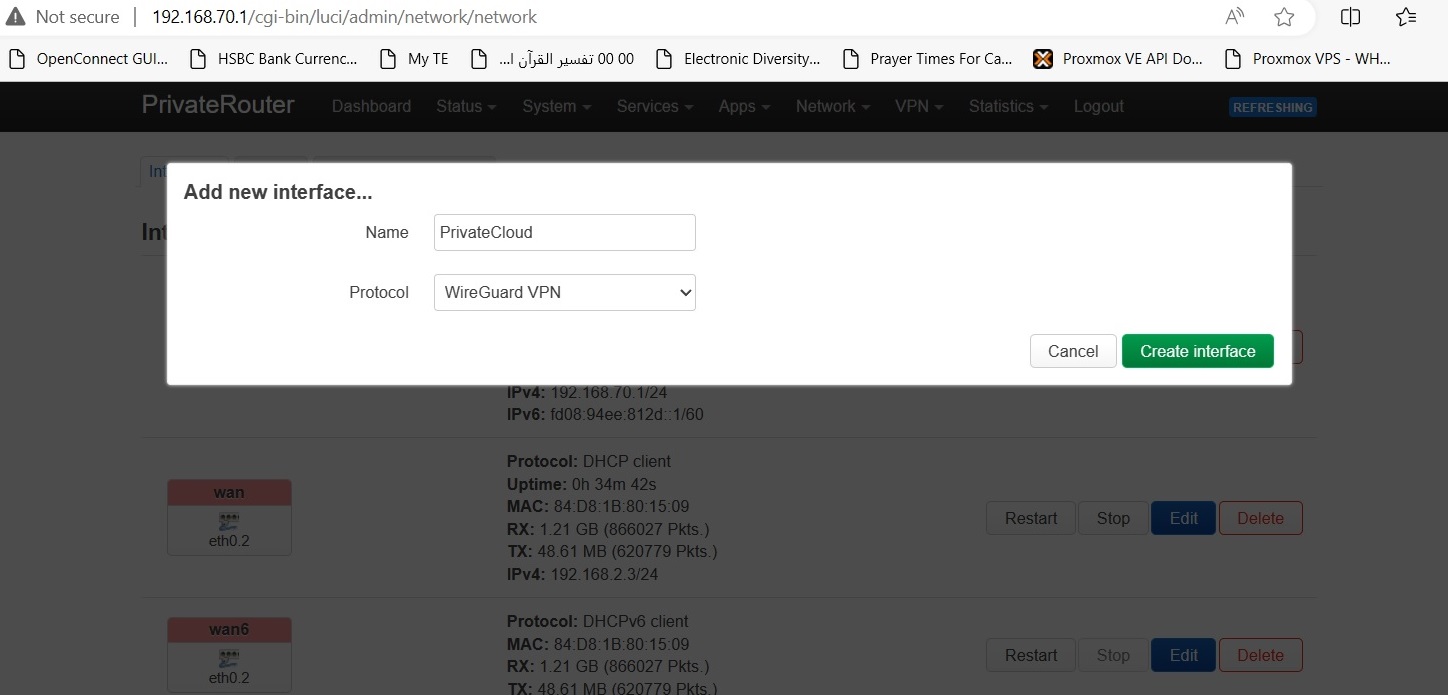
Step 3-1)
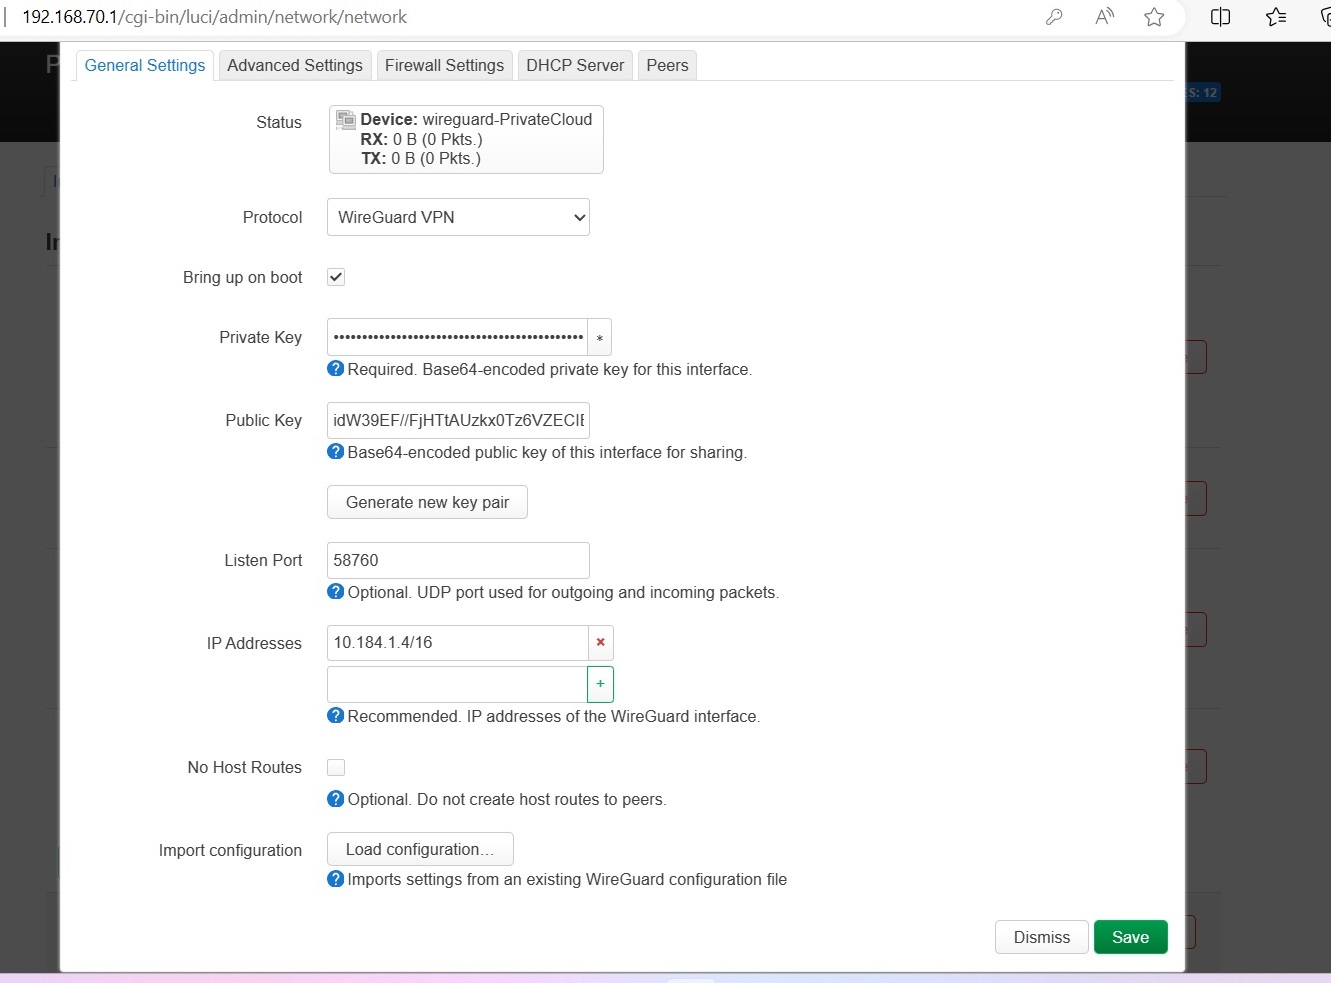
On Next page, click "Generate new Key pair"
Step 3-2)
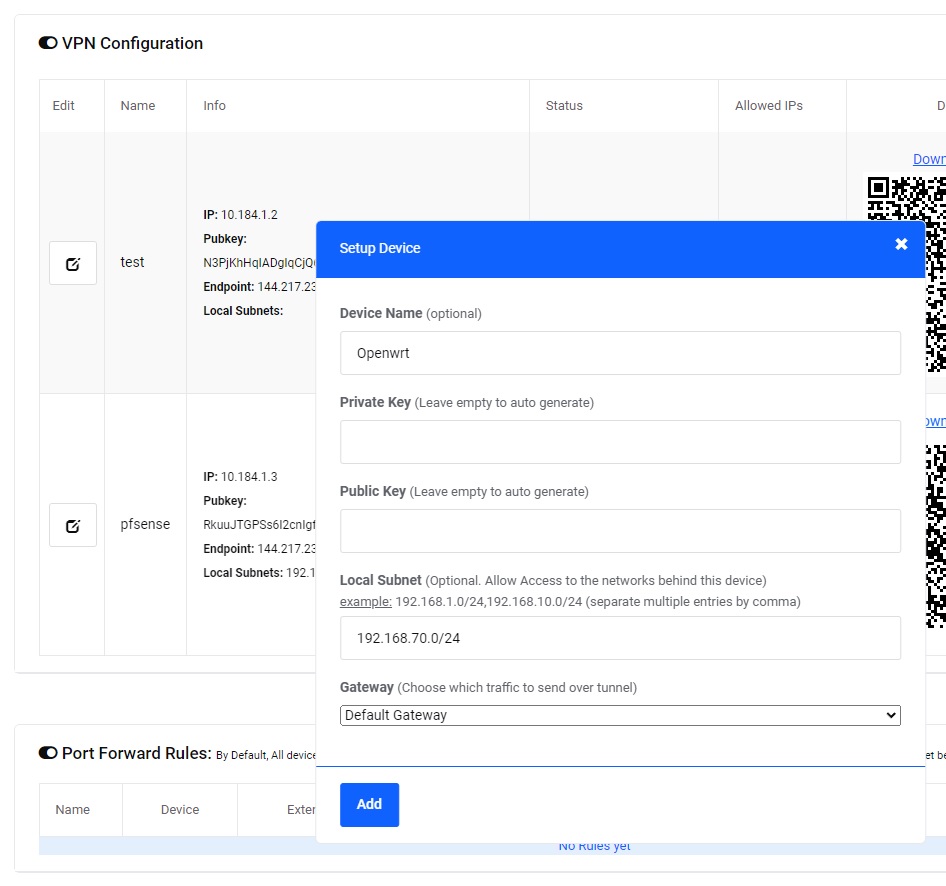
On TorGuard website . Services . My Services . Click Manage VPN cloud beside your Private VPN cloud service, then click Add device button on next page to Create a new Device for OpenWRT:
- fill a name for device like "openwrt".
- fill in the private and public key fields using the keys generated in step 3-1.
- if you would like to expose your OpenWRT LAN to other devices on the cloud, then fill in the Lan Subnet field, for example "192.168.70.0/24", other wise leave this field empty.
- Choose the Gateway based on the setup options we mentioned at the begining of this guide:
a) Choose "Internal communication only" if you want to achieve Setup option 1 or 3
a) Choose "Default Gateway" if you want to achieve Setup option 2
Click Add
Step 3-3)
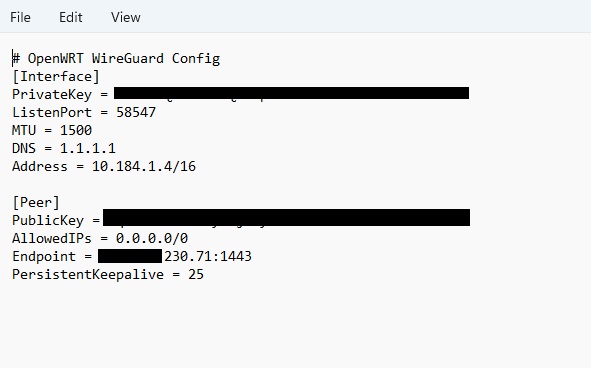
Click the Download config link beside the new device to download its wireguard config, open the downloaded config using any text editor like notepad or wordpad.
Step 4-1)
Go back to openwrt to continue configuring wireguard interface.
On some openwrt builds you can load the config file using "Load Configuration button" and it will auto fill fields for you, if not then you can also manually fill in the fields from file.
General settings: Fill in tje fields using info from the configuration file [Interface] section:
Protocol: WireGuard VPN
Bring up on boot: Check
Listen port: leave empty for dynamic.
IP Address: Fill in the value of the Address field from the downloaded config file.
Step 4-2)
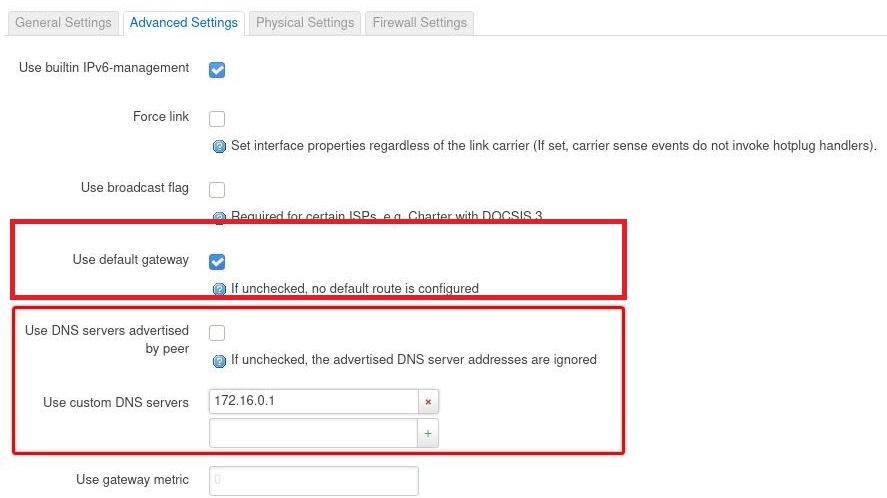
Click Advanced Settingstab:
- Use DNS servers advertised by Peer: Uncheck, and set custom DNS from the downloaded config, for example: 1.1.1.1 (click the + icon if exists, available on some openWRT versions)
- Use Default Gateway: Check for Setup option 2 to use wireguard as the default gateway, otherwise uncheck it.
Step 4-3)
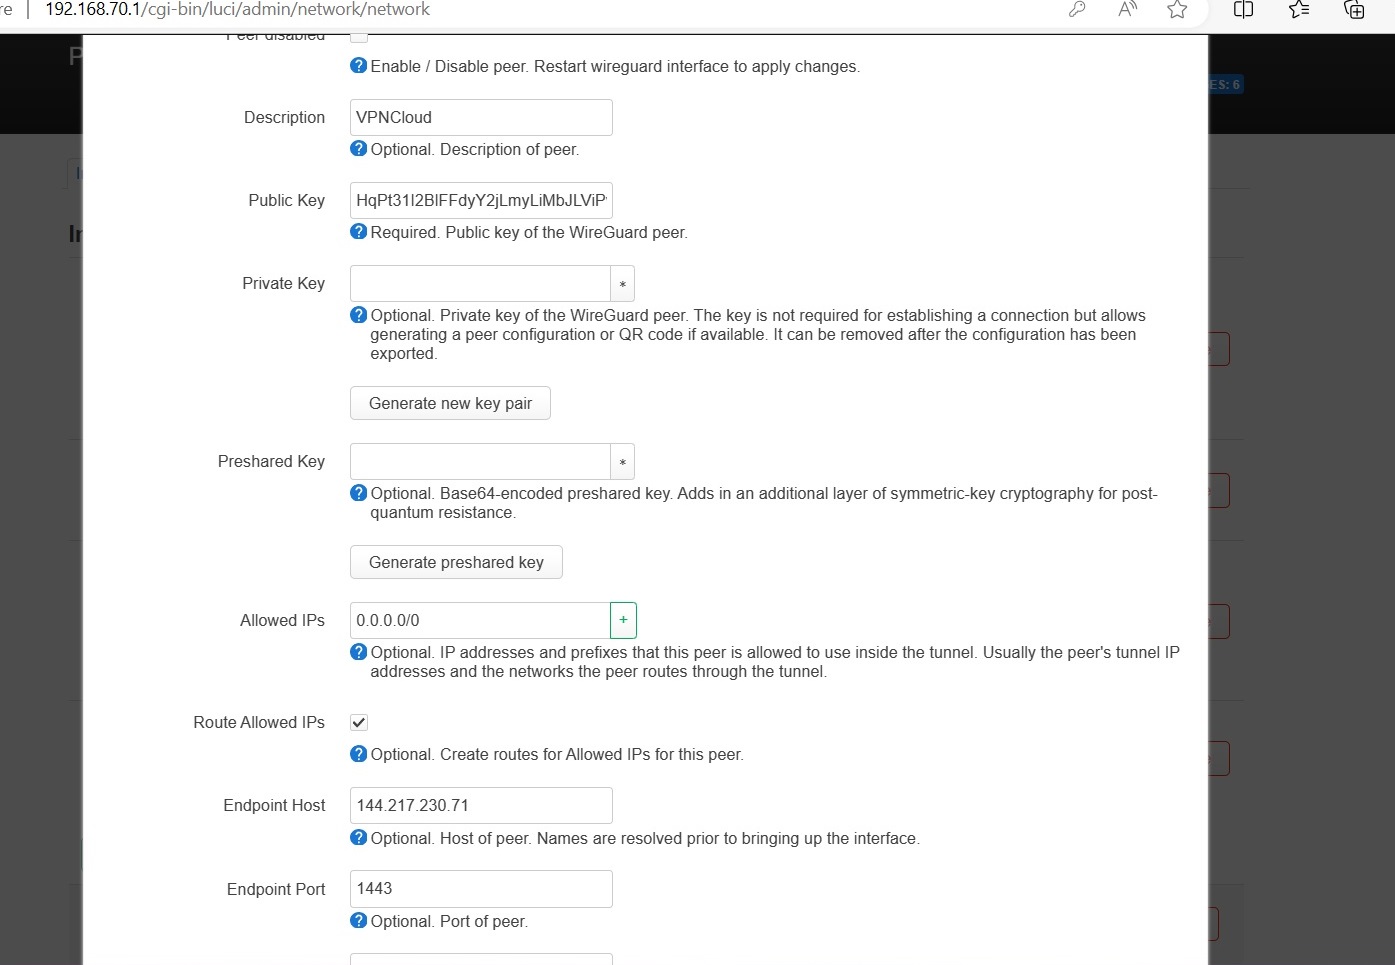
Click Peers tab and fill in settings using the downloaded config file [Peer] Section.
Enable: Checked
Description: VPNCloud
Public Key: Fill in the value of PublicKey from config file.
Allowed IPs: Fill in the value of AllowedIPs field in the downloaded config.
Endpoint: Fill in using the value shown in text editor infront of Endpoint field. For example: if the downloaded config shows "Endpoint = 60.60.60.60:1443" then IP will be 60.60.60.60 and port will be 1443, removeing the :
Route Allowed IPs: Check
Keepalive: 25
Step 4-4)
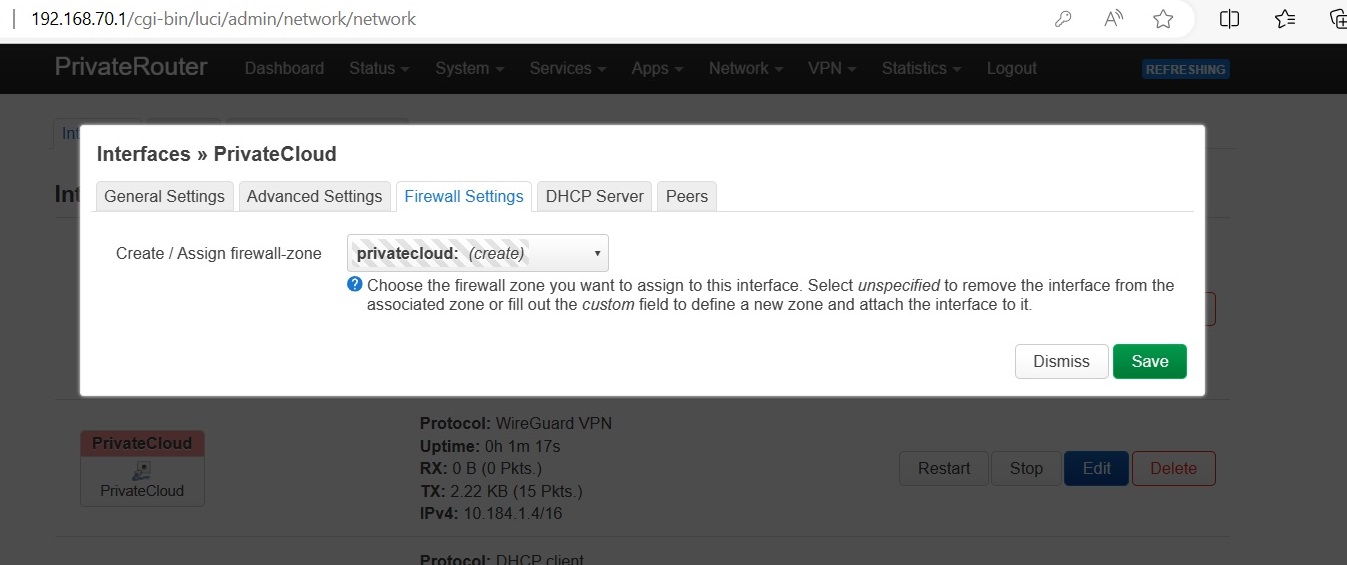
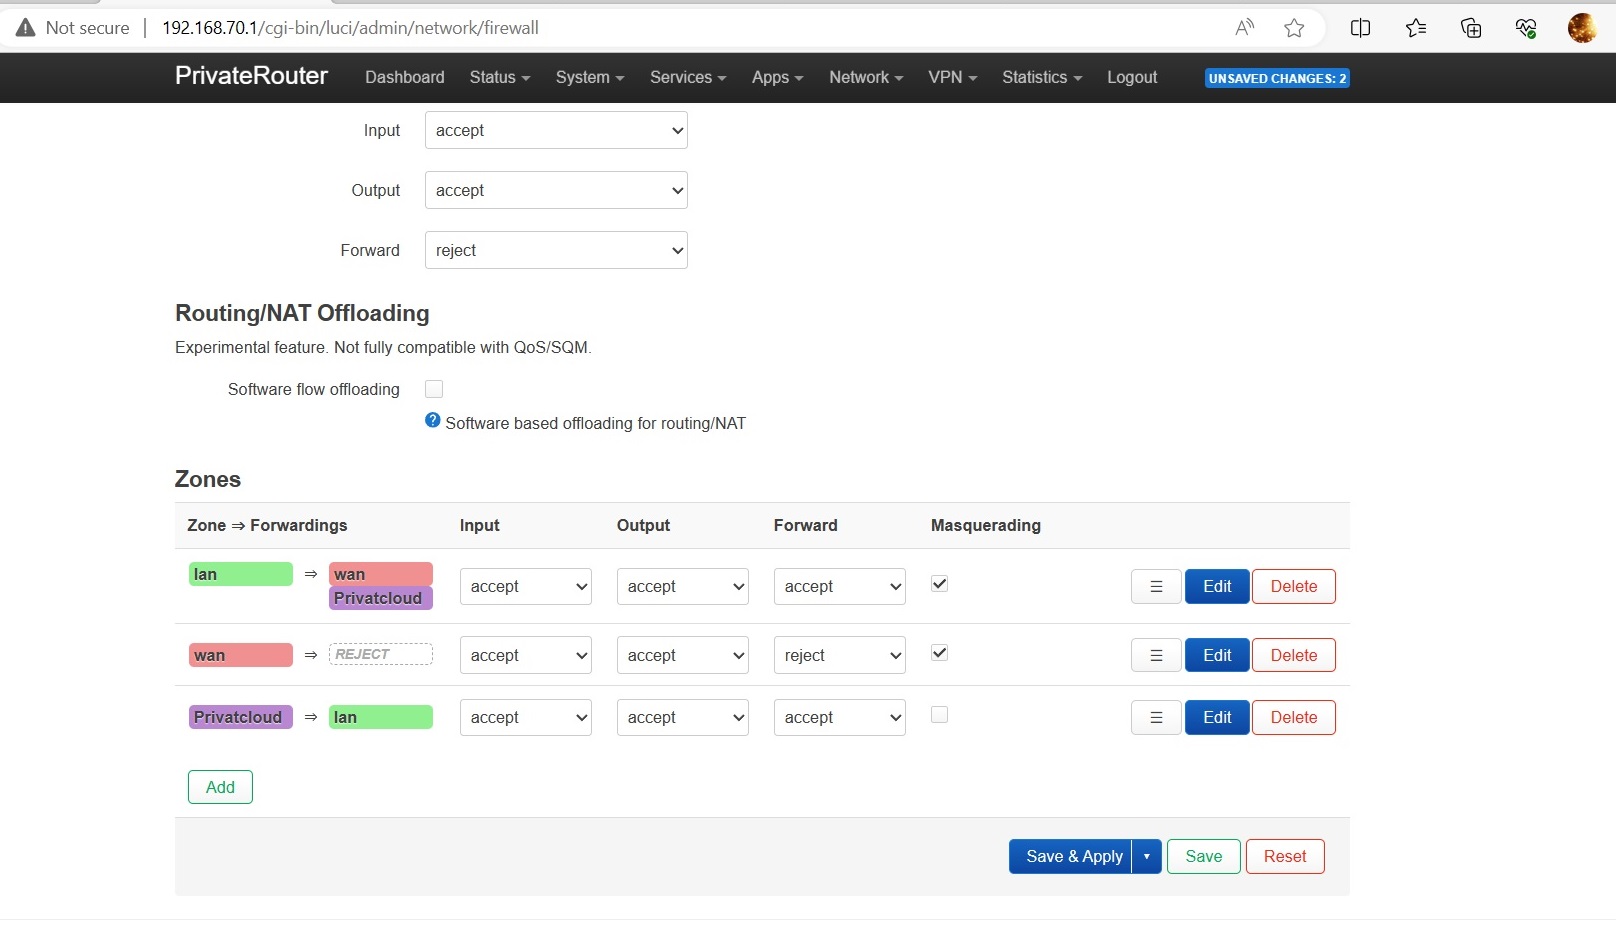
Click Firewall tab:
Choose the value depending on the desired Setup option:
For Setup Option 1 without Lan exposure: choose WAN
For Setup Option 2 without Lan exposure: choose WAN
For Setup Option 1 or 2 with LAN exposure: Click in Custom field and write: PrivateCloud
For Setup Option 3: Choose LAN
Click Save, and apply configuration.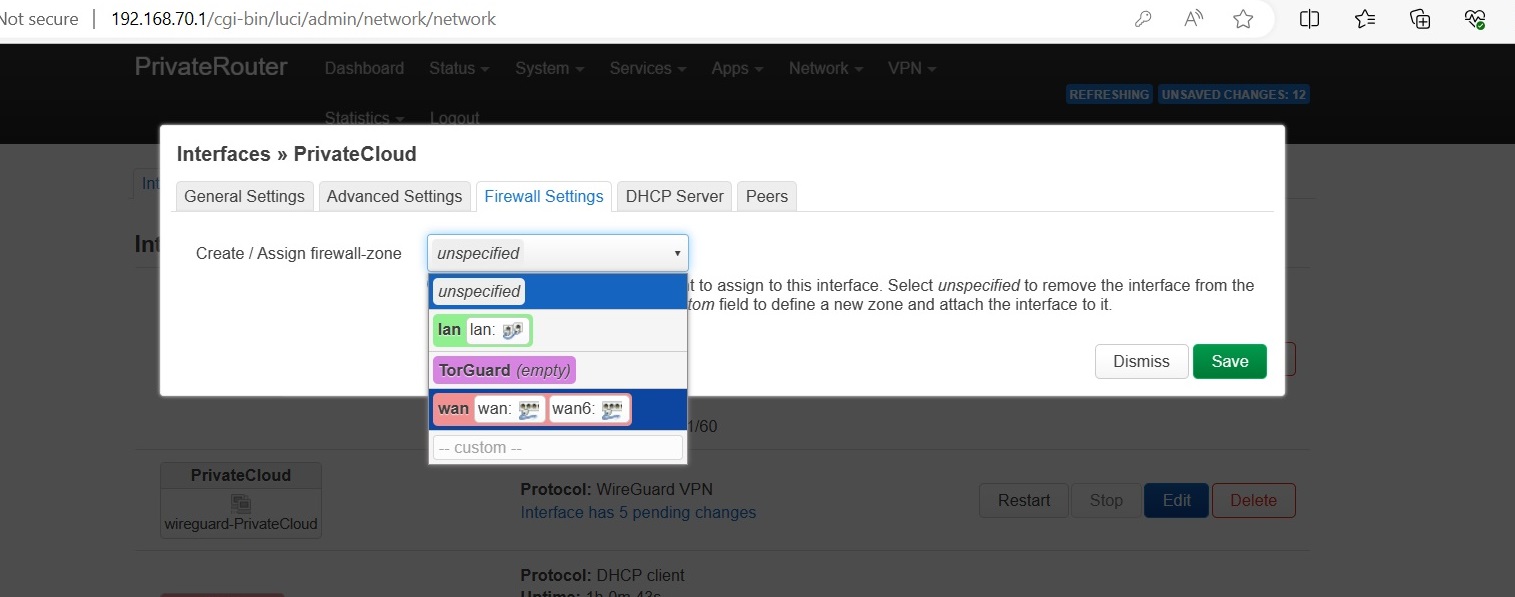
Step 5)
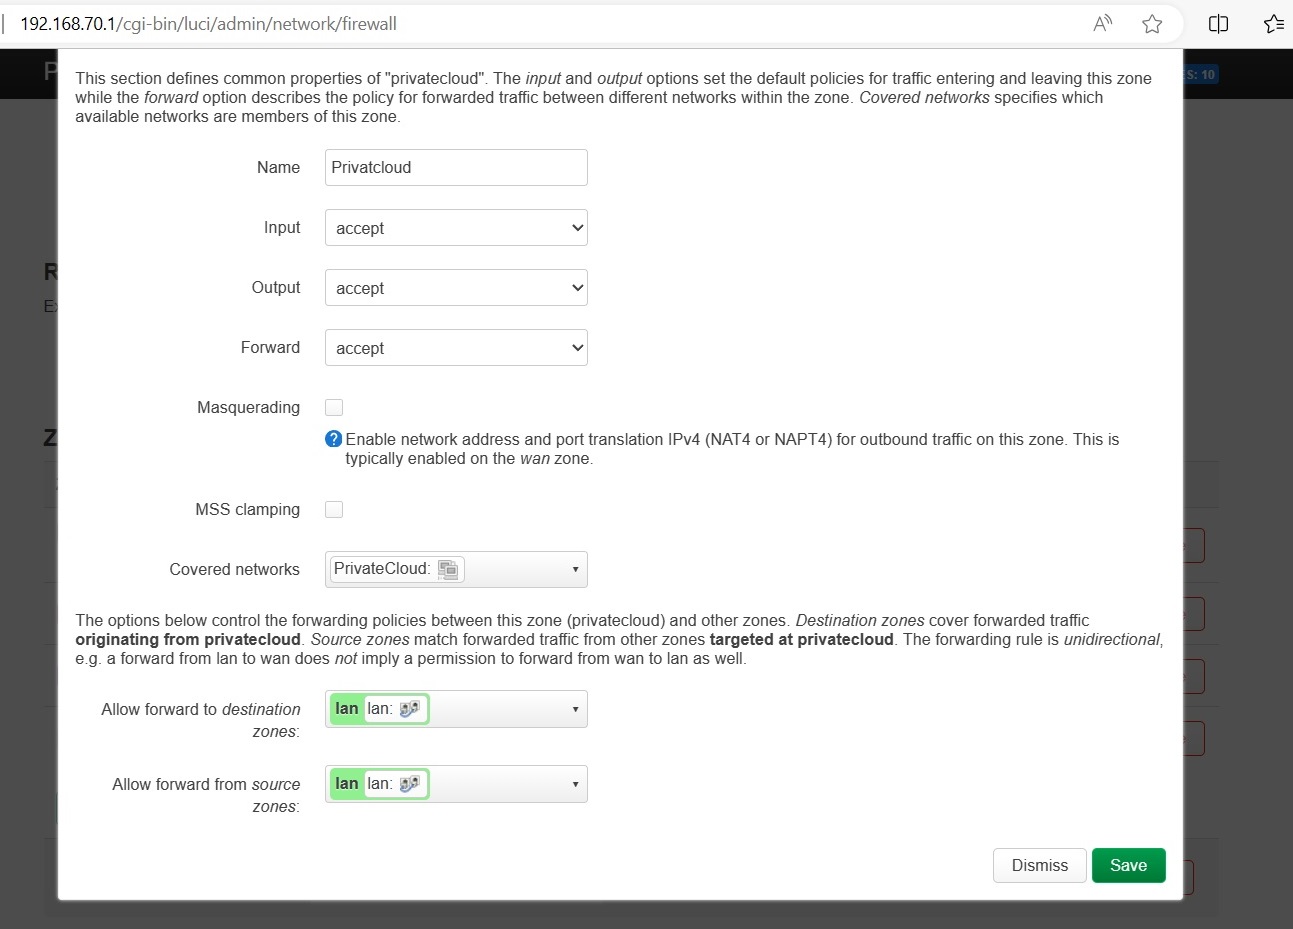
For Setup Option 1 or 2 with LAN exposure
Head to Network > Firewall, Edit the newly created Privatecloud zone.
Input: accept
Output: accept
Forward: accept
Masguerading: Only check if you want to hide real source IPs, for the most you can leave this unchecked.
Allow Forward to Destination Zones: Choose LAN and any other zone that you want to expose.
Allow Forward from Destination Zone: Choose LAN and any other zone that you want to expose.
Click Save
...Setup is now complete!
Verify your connection:
- VPN as default gateway: Browse to https://torguard.net/whats-my-ip.php and make sure that your IP has now changed.
- LAN Exposure: check if you can reach LAN devices over vpn. Security software can block incoming traffic, so the first thing to check is if you have any security software/firewall on those devices, and disable them temporarily if solves the issue, if yes then you will need to add a firewall rule in your security software to allow the incoming traffic from your Private vpn cloud subnet and/or remote lans.